
The trim-flush method in edge banding helps you prevent tear-out and achieve a clean, professional finish. You start by carefully applying adhesive and aligning the edge banding smoothly with the surface. Then, use precise trimming tools to remove overhang without splintering or damaging the edge. Proper technique and the right tools make a big difference in getting seamless, durable results. Keep going to discover how to master this technique step by step.
Key Takeaways
- The trim-flush method ensures a seamless, professional finish by aligning and smoothing the edge band before trimming.
- Proper grain alignment and gentle pressure during trimming minimize tear-out and ensure clean, even edges.
- Using sharp, precise tools like adjustable trimmers and utility knives helps prevent tear-out during edge finishing.
- Applying adhesive evenly and cleaning surfaces thoroughly enhances bond strength and reduces bubbling or gaps.
- Practicing on scrap material improves technique, leading to more consistent, durable, and tear-out-free edge banding results.

NECAMOCU Edge Banding Trimmer – Upgraded Mini Edge Band Trimmer & Cutter, Stainless Steel Blade Veneer Edge Trimmer for Woodworking, Durable Edgebanding Trimming Tool for Wood, Veneer, PVC, ABS
【Precision & Smooth Trimming】 NECAMOCU upgraded edge banding cutter features thicker blade with larger cutting edges and more…
As an affiliate, we earn on qualifying purchases.
As an affiliate, we earn on qualifying purchases.
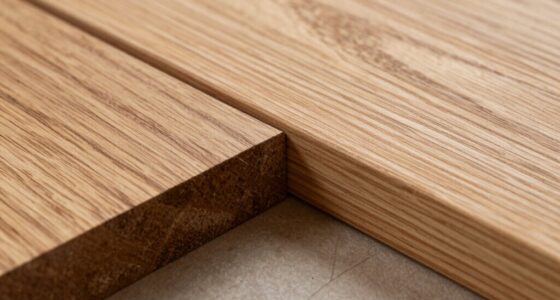
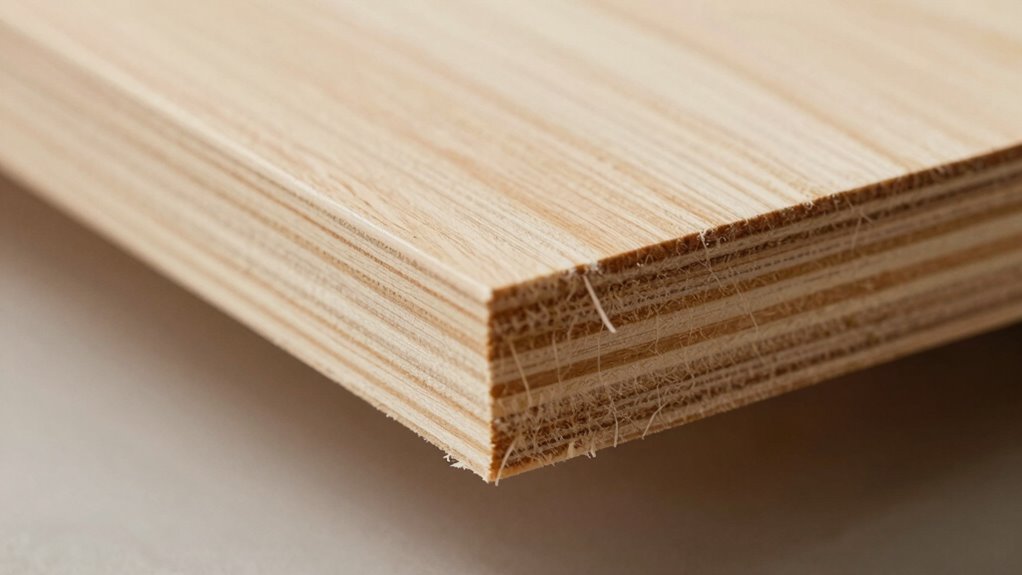
What Is Edge Banding and Why Is It Important for a Professional Finish
Edge banding is a technique used to cover the exposed sides of materials like plywood, MDF, or particleboard, giving finished furniture a clean and polished look. Its applications are widespread in furniture making, cabinetry, and shelving, where neat surface finishing matters. Proper edge banding enhances durability by protecting edges from moisture and damage. It also improves aesthetic appeal, making furniture look professional and refined. You’ll find edge banding especially useful when aiming for seamless joints and smooth surfaces. Using the right edge banding method ensures that the edges stay securely attached and look consistent. Additionally, understanding the types of adhesives used in edge banding can lead to better adhesion and longevity. Overall, it plays a crucial role in achieving a high-quality, professional finish that elevates your craftsmanship and extends the lifespan of your projects.

Festool 499812 EVA Edge Banding Adhesive (Pack of 48)
EVA edge banding adhesive in natural color to match most natural wood edge banding
As an affiliate, we earn on qualifying purchases.
As an affiliate, we earn on qualifying purchases.
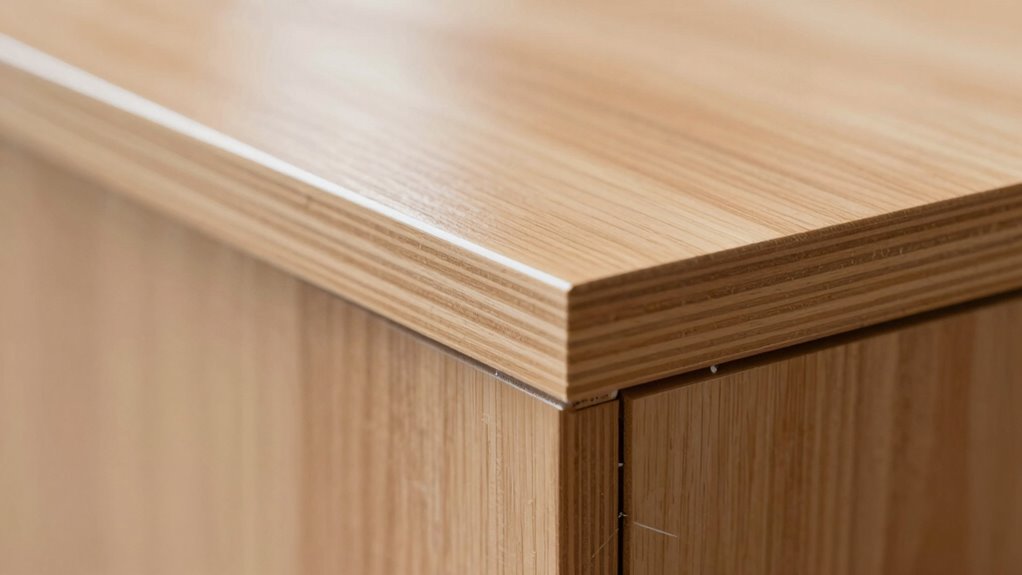
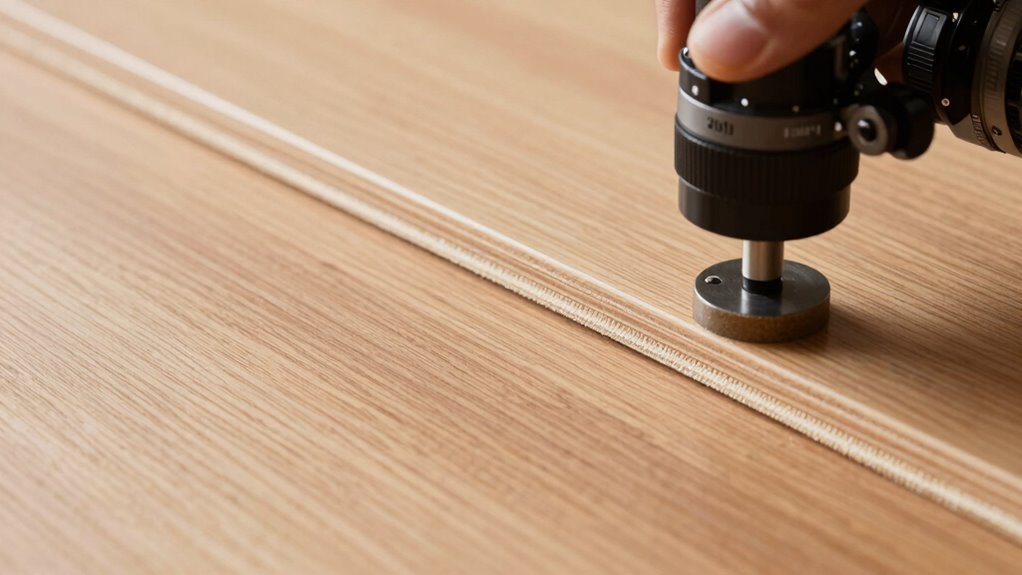
How the Trim-Flush Method Prevents Tear-Out in Edge Banding
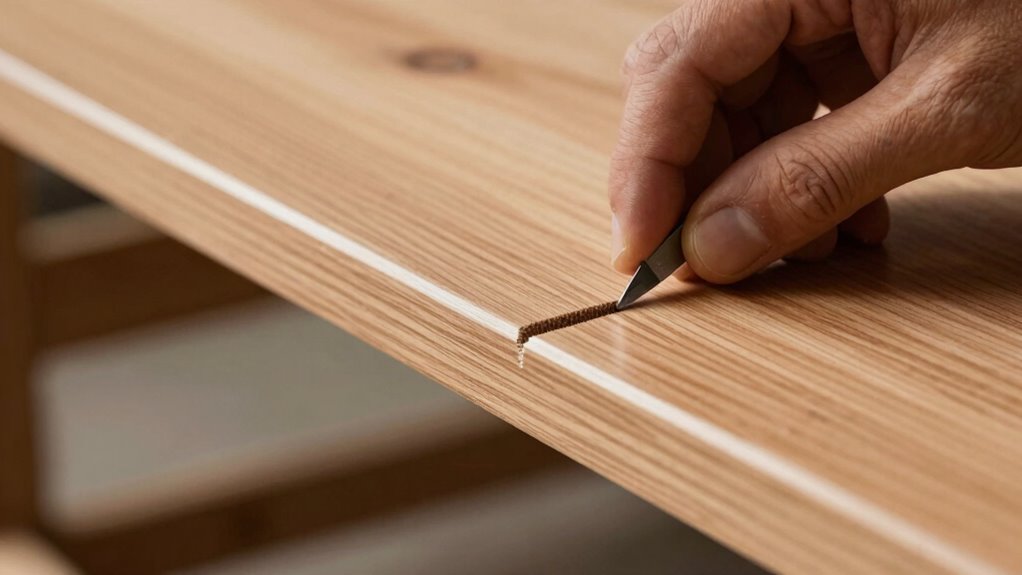
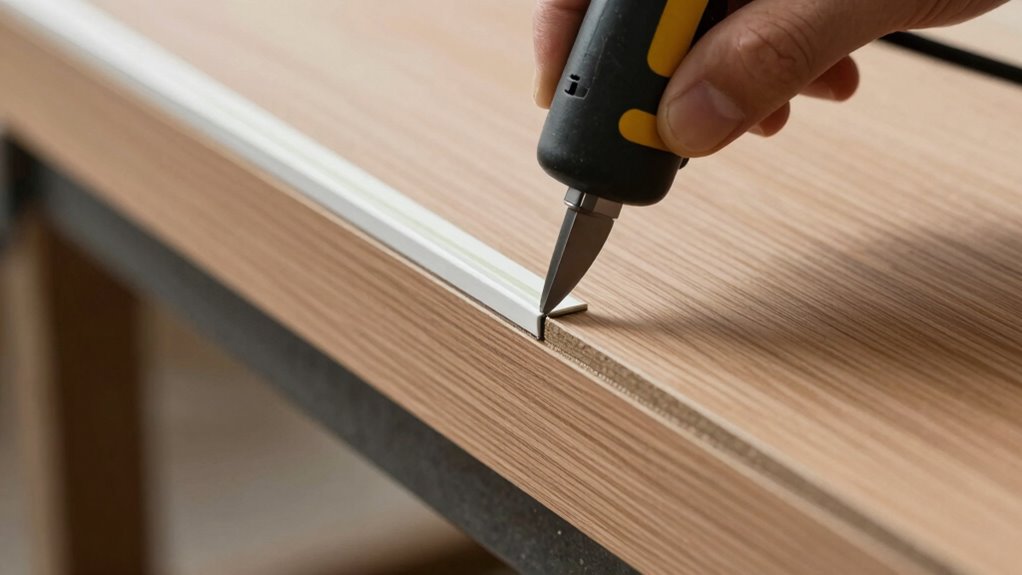
The Trim-Flush method effectively prevents tear-out during edge banding by guaranteeing the edge is perfectly aligned and smooth before trimming. Proper alignment respects the grain direction, reducing stress on the material and preventing splintering. Maintaining cut consistency along the edge helps create a clean, even surface, minimizing the risk of tear-out. When you follow this method, you get a seamless finish that looks professional and lasts longer. Ensuring high-quality materials are used can further improve the durability and appearance of the finished edge.
NECAMOCU Edge Banding Trimmer – Upgraded Mini Edge Band Trimmer & Cutter, Stainless Steel Blade Veneer Edge Trimmer for Woodworking, Durable Edgebanding Trimming Tool for Wood, Veneer, PVC, ABS
【Precision & Smooth Trimming】 NECAMOCU upgraded edge banding cutter features thicker blade with larger cutting edges and more…
As an affiliate, we earn on qualifying purchases.
As an affiliate, we earn on qualifying purchases.
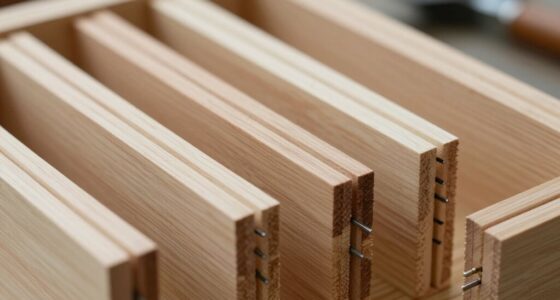
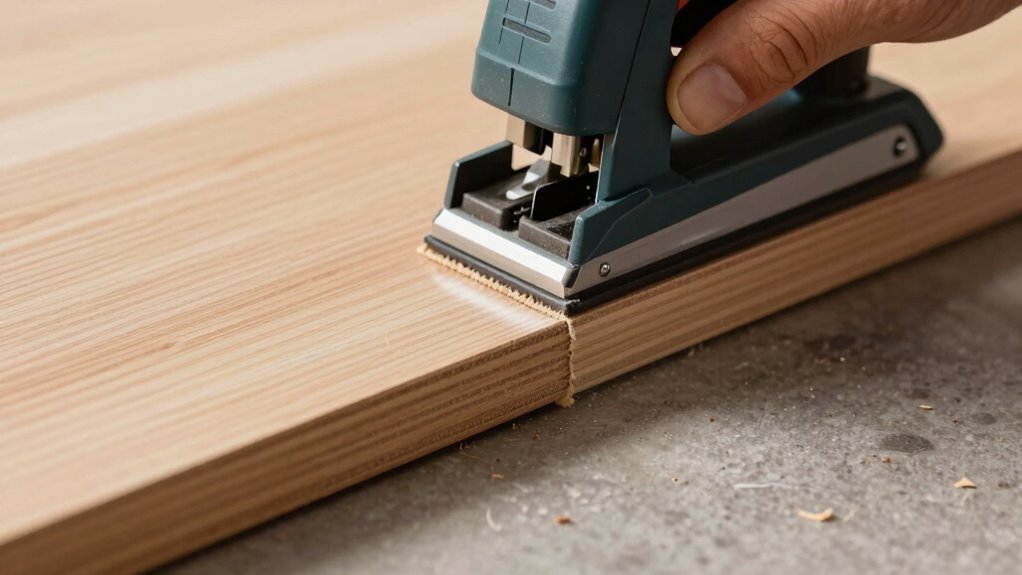
Essential Tools and Materials for Seamless Edge Banding
To achieve seamless edge banding, you’ll need the right tools and materials. Essential power tools, like edge trimmers and routers, make your work more efficient, while quality adhesives and tapes guarantee a strong bond. Precision cutting instruments help you achieve clean, accurate edges that enhance your finished project.
Essential Power Tools
Wondering what tools you’ll need for seamless edge banding? Power tools are crucial to achieve professional results and streamline your finishing techniques. With the right equipment, you can cut, trim, and smooth edges efficiently. Using these power tools not only speeds up the process but also helps you maintain accuracy. They’re indispensable for creating a clean, tear-out-free edge banding finish. Mastering their use improves your craftsmanship and results in a seamless, professional appearance. Additionally, understanding the importance of contrast ratio can help you select the right projector for your home cinema setup, ensuring vibrant images in your viewing space.
Key Adhesives and Tapes
Are you selecting the right adhesives and tapes to guarantee a flawless edge banding finish? Your choice of adhesive types is vital for a secure, durable bond. Hot melt adhesives are popular for their quick setting and strong hold, making them ideal for most edge banding tasks. Contact adhesives offer versatility and a strong, permanent bond but require careful application. Tape selection is equally important; double-sided adhesive tapes simplify the process, especially for smaller or intricate pieces. When choosing tape, consider its thickness, tackiness, and ease of removal if adjustments are needed. Using the right combination ensures a seamless, tear-out-free finish. Proper adhesive and tape choices reduce the need for rework, saving you time and ensuring professional results.
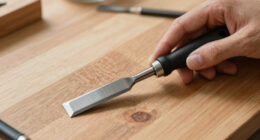
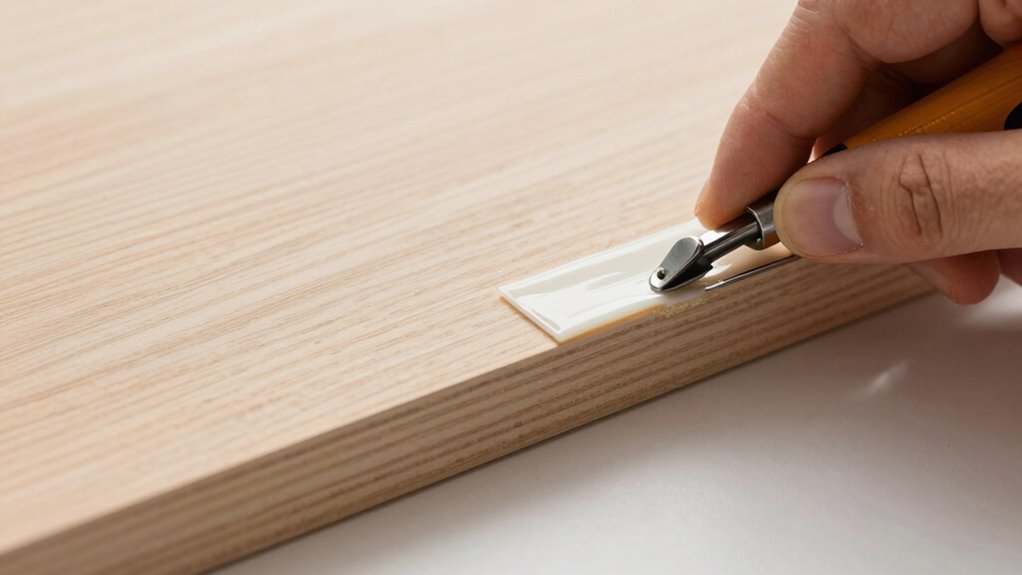
Precision Cutting Instruments
Achieving a seamless edge banding finish relies heavily on using the right precision cutting instruments. The key to flawless results is selecting tools that offer sharp precision blades and excellent cutting accuracy. These tools help you make clean, straight cuts without tearing or chipping the edge banding material. When choosing your instruments, consider the following:
- High-quality utility knives with replaceable blades for precise control
- Adjustable trimmers or routers designed for accurate, smooth cuts
- Specialty scissors or shears for trimming delicate materials with finesse
Using the proper tools guarantees your cuts are clean and consistent, reducing the risk of tear-out and ensuring your edge banding sits flush. Investing in sharp, precise instruments makes the entire process easier and results more professional. Moreover, utilizing innovative European cloud servers can help streamline your workflow and improve project management for your edge banding tasks.

2Pack Woodworking Marking Knife with High Carbon Steel Blade – Dual Bevel Striking Knife for Precise Marking – Premium Quality Woodworking Tool for Woodworkers and Craftsmen
Optimal Woodworking Solution: The marking knife is the ideal tool for creating unique and durable wooden pieces. It…
As an affiliate, we earn on qualifying purchases.
As an affiliate, we earn on qualifying purchases.
Step-by-Step: Applying Edge Banding Using the Trim-Flush Technique
To guarantee a clean, professional finish when applying edge banding, the trim-flush technique is an effective method to master. Begin by applying adhesive evenly to the edge of your panel, ensuring complete coverage without excess. Carefully align the edge banding with the panel’s surface, pressing it firmly to prevent bubbles or gaps. Use a roller or a cloth to smooth out the band, making sure it’s flush with the edge. Trim-flush finishing techniques involve trimming any overhang precisely, avoiding tear-out and ensuring a seamless look. This method minimizes the risk of damaging the veneer or laminate. Additionally, understanding the importance of adhesive application in achieving a durable bond can significantly improve your results. With practice, you’ll develop a consistent approach to adhesive application and trimming, resulting in a flawless, durable edge that enhances the overall appearance of your project.
Common Challenges With Trim-Flush Edge Banding and How to Fix Them
Despite your careful application, you might encounter common challenges with trim-flush edge banding, such as bubbles, gaps, or uneven trimming. These issues often stem from neglecting grain direction or insufficient surface preparation. If the grain isn’t aligned properly, the edge band may lift or crack over time. Poor surface prep can lead to poor adhesion and visible gaps. To fix these problems, consider the following:
Even with careful application, issues like bubbles and gaps can occur without proper surface prep and grain alignment.
- Ensure surface is clean and smooth before applying the edge band.
- Align the grain direction of the edge band with the substrate for better adhesion and appearance.
- Use proper trimming techniques to avoid uneven cuts and tear-out, especially along the edges.
- Paying attention to heat distribution during application can also prevent issues like bubbling or improper adhesion.
Addressing these factors will help you achieve a seamless, professional finish with trim-flush edge banding.
Pro Tips for Flawless, Tear-Out-Free Edge Banding
Getting a flawless, tear-out-free edge banding result requires attention to detail and the right techniques. Start with proper edge finishing by ensuring your surface is clean and smooth; any debris or roughness can cause imperfections. When applying the edge band, use consistent pressure to prevent gaps and wrinkles. To protect your surface, always use a scrap piece or masking tape around the edges to prevent damage from excess adhesive or trimming tools. Consider applying a light protective layer, like painter’s tape, during trimming and sanding to avoid surface scratches. Proper surface protection and careful finishing guarantee a seamless look, while attention to detail minimizes the risk of tear-out. Additionally, understanding your home energy system can help you choose the right tools and techniques for a cleaner finish. Follow these tips to achieve professional-quality results with minimal effort.
Frequently Asked Questions
Can the Trim-Flush Method Be Used on Curved Edges?
Yes, you can use the trim-flush method on curved edges. When working with curved edges, you should explore curved edge techniques and flexible banding options to guarantee a smooth finish. These techniques allow the trim-flush method to adapt to the contours of your project, preventing tear-out and ensuring a clean, professional look. Always select flexible banding options suited for curves to achieve the best results.
What Types of Wood Are Best Suited for Edge Banding?
You should choose hardwoods like oak, maple, or cherry for better wood compatibility and grain matching with edge banding. These woods have stable surfaces that bond well and align with the grain, creating a seamless look. Softer woods like pine may work, but they’re more prone to damage and may not match the grain as smoothly. Always consider the wood’s finish and stability for the best results.
How Long Does the Trim-Flush Edge Banding Process Typically Take?
The trim-flush edge banding process typically takes around 15 to 30 minutes per panel, depending on its size and complexity. Studies show that skilled workers can increase application speed by up to 20%, reducing overall edge banding duration. This method’s efficiency guarantees a smooth, professional finish without tear-out, making it ideal for quick turnaround projects. With practice, you can easily master this technique and improve your workflow.
Is Special Training Necessary to Master the Trim-Flush Technique?
You don’t need special training to master the trim-flush technique, but skill development definitely assists. With some practice and guidance, you can learn to achieve a clean, professional finish. Technique training can speed up your learning curve and ensure you’re using the right tools and methods. Ultimately, consistent practice and attention to detail will make you proficient, even without formal training.
How Do I Remove or Replace Edge Banding Applied With This Method?
Think of removing or replacing edge banding like peeling a stubborn sticker carefully. To start, gently heat the edge with a hot air gun, softening the adhesive. Use a putty knife to lift the edge without damage, then apply edge banding removal techniques like adhesive remover if needed. For replacement, trim the new band flush, sand lightly, and glue it in place, ensuring a seamless finish.
Conclusion
Mastering the trim-flush method isn’t just about aesthetics; it’s a game-changer for professional-looking edges. Some say perfection is unattainable, but evidence shows that with the right technique, tear-out becomes a thing of the past. By refining your skills and understanding the tools, you’ll consistently achieve flawless results. So, embrace this method—your projects will look sharper, more durable, and impressively polished every time.