Sliding dovetails are an excellent woodworking joint that securely locks shelves in place while keeping a seamless, attractive look. By fitting together precisely cut, tapered ends, you create a strong and stable connection that prevents wobbling, even under heavy weight. Their clean appearance enhances your project’s craftsmanship. If you want to master this versatile joint and learn how to cut, fit, and troubleshoot sliding dovetails, keep exploring for all the essential tips.
Key Takeaways
- Sliding dovetails create a strong, secure connection that prevents shelves from wobbling or sagging over time.
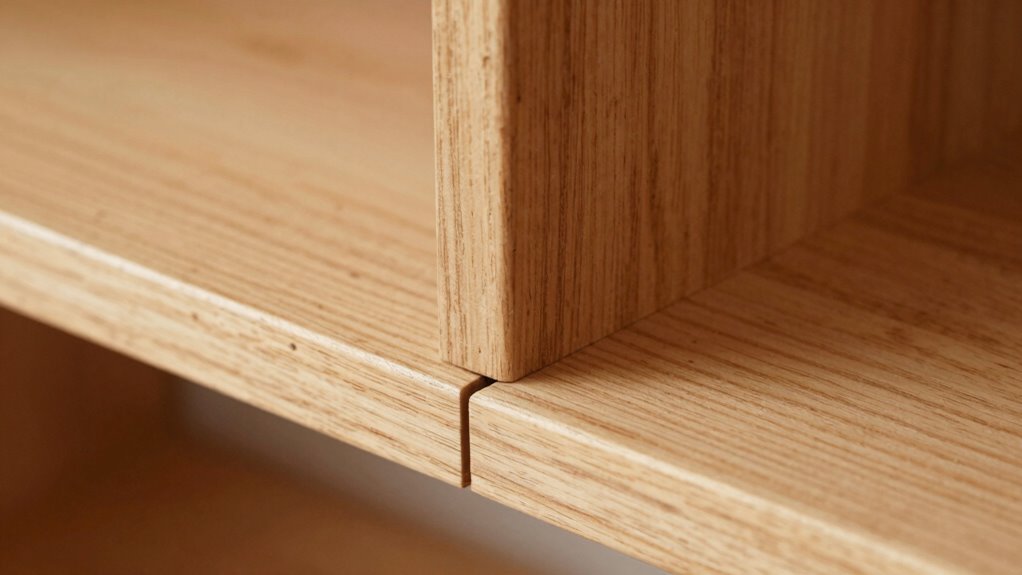
- They offer a seamless, professional appearance by hiding the joint for a clean aesthetic.
- The joint allows for slight movement or adjustment, accommodating wood expansion or seasonal changes.
- Properly cut sliding dovetails ensure a tight fit that locks shelves firmly in place.
- Their durability and stability make sliding dovetails ideal for long-lasting shelving and cabinetry.

SUIZAN Dozuki Dovetail Saw 7" Rip Cross Angle Cut – Professional Japanese Pullsaw Handsaw Woodworking Tools
JAPANESE STYLE PULL SAW: This product is a “Pull Saw.” Most people are used to European saws, called…
As an affiliate, we earn on qualifying purchases.
As an affiliate, we earn on qualifying purchases.
What Is a Sliding Dovetail and Why Use It?
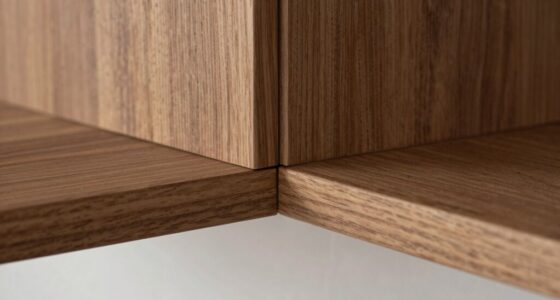
A sliding dovetail is a woodworking joint designed to connect two pieces securely while allowing for some movement or adjustment. It’s prized for its exceptional joint stability, ensuring that shelves or panels stay firmly in place over time. This joint not only provides strength but also enhances woodworking aesthetics, creating a seamless, professional look. When properly executed, the sliding dovetail hides its connection, giving your project a clean finish. It’s especially useful in furniture and cabinetry, where stability and appearance matter. By combining a snug fit with precise craftsmanship, this joint offers both durability and beauty. Understanding the joint’s mechanics helps ensure proper assembly and long-term performance. Whether you’re building a bookshelf or a decorative panel, understanding its purpose helps you leverage its full benefits for a polished, long-lasting result.

Rockler Dovetail Jig – Versatile Dovetail Jig Kit Includes Dove Tailing Router, Template, Dovetail Guide Bushing & More – for Woodworking Accommodates Stock up to 11” Wide
Complete Woodworking Dovetail Jig: Cutting beautiful through and half-blind dovetail is fast and easy with our new and…
As an affiliate, we earn on qualifying purchases.
As an affiliate, we earn on qualifying purchases.
Tools and Materials You’ll Need for Cutting Sliding Dovetails
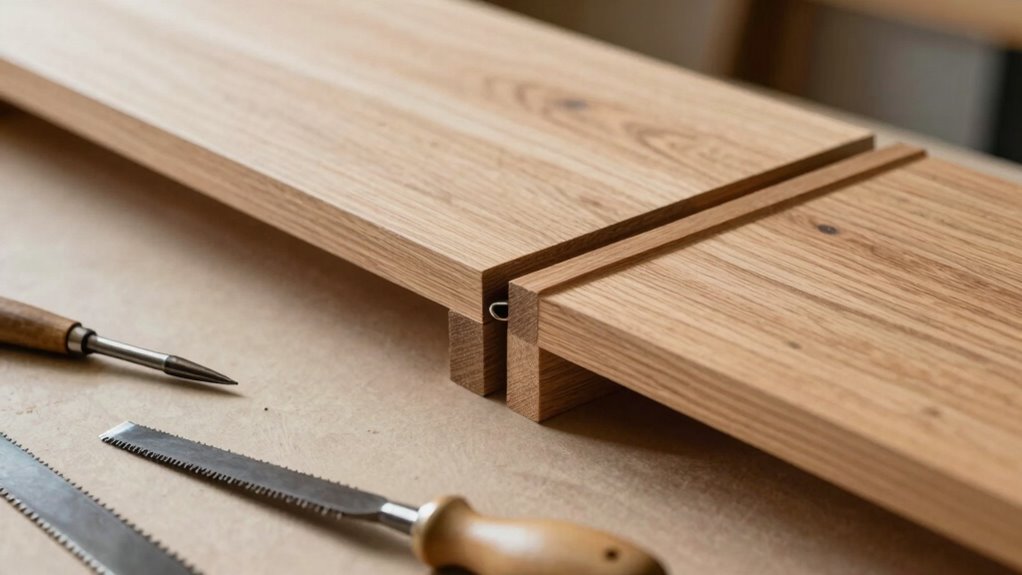
To cut sliding dovetails accurately, you’ll need a set of specialized tools and reliable materials that guarantee precision and a clean fit. A fine-tooth saw or dovetail saw ensures clean, accurate cuts, essential for maximizing joint strength. A sharp chisel helps refine the fit and smooth edges, enhancing aesthetic appeal. A marking gauge or dovetail template ensures consistent, precise markings for tight joints. For stability, a sturdy workbench and clamps are crucial to keep pieces secure during cutting. Use quality hardwoods like oak or maple, which provide durable joints with impressive strength and visual appeal. Proper woodworking techniques and careful planning are also vital to achieving a joint that’s both strong and attractive, ensuring your sliding dovetails lock shelves in place securely.
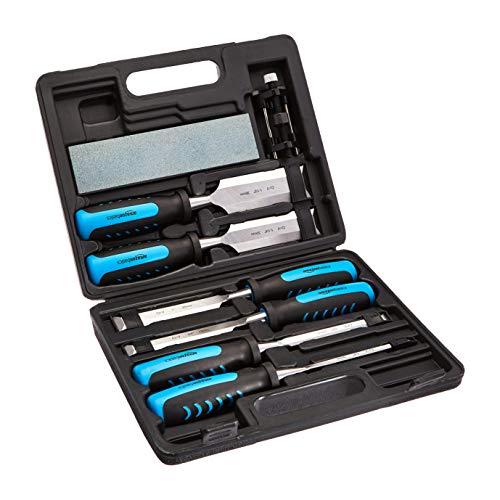
Amazon Basics 8-Piece Wood Chisel Set for Woodworking, with Honing Guide, Sharpening Stone and Storage Case, 1/4" – 1-1/2"
8-piece wood carving chisel set includes 6x chisels 1/4 inch (6mm), 1/2 inch (13mm), 3/4 inch (19mm), 1…
As an affiliate, we earn on qualifying purchases.
As an affiliate, we earn on qualifying purchases.
Step-by-Step Guide to Cutting Sliding Dovetails

To cut sliding dovetails accurately, start by gathering the right tools and materials. Then, use precise marking and layout techniques to guarantee a perfect fit. Finally, follow the cutting and fitting steps carefully to achieve a smooth, secure joint. Proper tool selection is essential for ensuring clean cuts and accurate joinery.
Tools and Materials Needed
Before you begin cutting sliding dovetails, gather the essential tools and materials needed for the job. Using the right tools guarantees good joint strength and enhances the aesthetic appeal of your finished piece. Here’s what you’ll need:
| Tool | Material | Purpose |
|---|---|---|
| Dovetail saw | Hardwood or softwood | Precise cuts for a tight fit |
| Chisels | Wood glue, clamps | Clean out waste and secure joint |
| Marking gauge | Pencil, square | Accurate layout and measurements |
| Router or dovetail jig | Sandpaper | Smooth finish and clean edges |
Having these tools ready helps you achieve a strong, beautiful joint that locks shelves securely in place. Proper planning and the right equipment are essential for ensuring the durability and precision of your sliding dovetail joint, especially when working with European-inspired woodworking techniques.
Marking and Layout Techniques
Accurate marking and layout are essential for ensuring your sliding dovetails fit perfectly and maximize joint strength. Begin by carefully measuring the thickness of your shelves and rails, then transfer these dimensions to your wood. Use a square and marking gauge to establish precise lines, ensuring consistent spacing and depth. Clamping your workpiece securely helps maintain woodworking precision during layout. When marking the dovetail tails and pins, double-check measurements to prevent errors that could weaken the joint. Clear, sharp lines guide your cuts and help achieve a snug fit. Remember, meticulous marking reduces the need for adjustments later and contributes to a stronger, more reliable sliding dovetail joint. Proper layout sets the foundation for a precise, durable connection that locks your shelves securely in place. Additionally, understanding woodworking measurements is crucial for achieving accurate and reliable results.
Cutting and Fitting Process
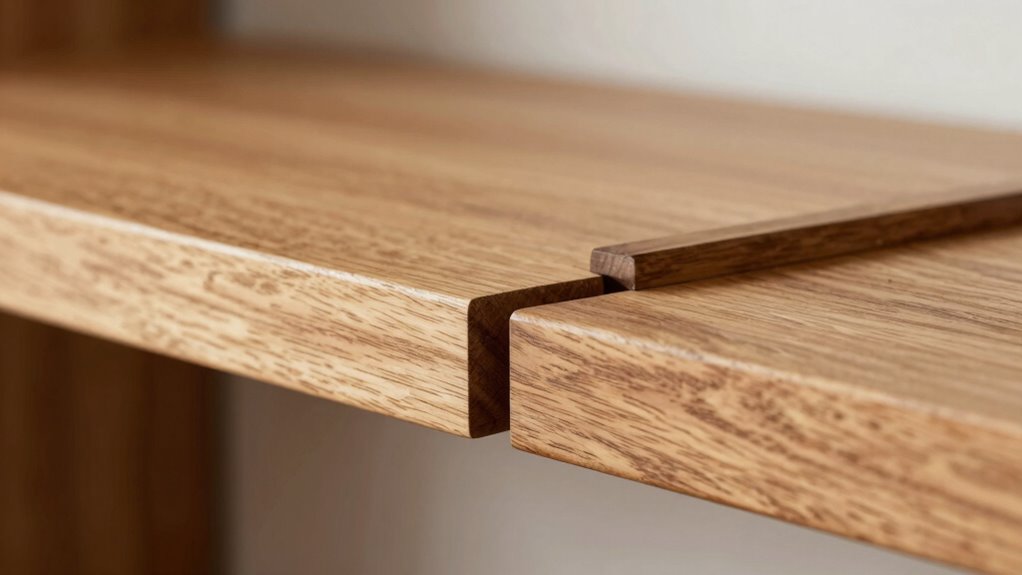
Once you’re ready to cut your sliding dovetails, clamp your workpiece securely to prevent shifting and make certain clean, precise cuts. Proper clamping ensures joint stability and reduces the risk of mistakes that could weaken the joint. Use a fine-tooth saw or a dovetailing saw for accuracy, following your marked lines carefully. Keep your hands clear of the blade to maintain woodworking safety, and cut slowly to avoid chipping or splintering. Check the fit as you go; the sliding dovetail should slide smoothly into its socket without too much force. If it’s too tight, pare down the edges slightly. Remember, careful cutting and fitting are essential for a durable, stable joint that will hold shelves securely over time. Free Floating techniques can help ensure the joint remains balanced and properly aligned during assembly.

Clarke Brothers Wheel Marking Gauge – Woodworking Marking Scriber Kit With 2 Replacement Cutters – Wood Marking Tools With Graduated Inch & MM Scale – Solid Metal Bar Wood Scribe Tool For Carpenter
✅ PATENT PENDING – ROLL STOP FENCE WITH FLAT SPOT – woodworking tasks with a high-end wheel marking…
As an affiliate, we earn on qualifying purchases.
As an affiliate, we earn on qualifying purchases.
Tips for Fitting and Assembling Sliding Dovetails
Getting a perfect fit depends on precise measurement techniques and careful adjustments. Make sure your parts slide smoothly without too much force or looseness. Using proper assembly strategies will help you achieve a strong, accurate joint every time. Additionally, practicing measurement accuracy can significantly improve your results and ensure consistent, high-quality joints.
Precise Measurement Techniques
Have you ever struggled to fit sliding dovetails perfectly? Achieving the right fit depends on measuring accuracy and layout precision. To guarantee a flawless joint, start by carefully marking your cut lines, using sharp tools for clean, precise lines. Double-check measurements before cutting, and consider using a marking gauge for consistent spacing. Keep your workpiece stable to prevent shifting, which can ruin measurement accuracy. Remember, small errors compound, so take your time.
You’ll feel confident when your measurements align perfectly, revealing a tight, smooth sliding fit.
- Eliminate guesswork with careful, deliberate marking
- Use high-quality tools to improve measurement accuracy
- Regularly verify measurements during the process to avoid mistakes
Proper Assembly Strategies
To guarantee a smooth sliding fit, focus on proper assembly strategies that emphasize patience and careful adjustment. Understanding the dovetail history helps you appreciate its strength and precision in woodworking terminology. When fitting sliding dovetails, start by dry-fitting the joint to identify any tight spots or misalignments. Use fine-tuning tools like a chisel or sandpaper to gently refine the fit, avoiding over-removal of material. Remember, the key is gradual adjustments, testing frequently until the joint slides smoothly without excessive force. Proper assembly also involves ensuring the surfaces are clean and free of debris, which can hinder proper fit. Additionally, knowing how blockchain technology drives innovation in secure digital transactions can inspire confidence in modern tools for measuring and precision. Patience during this process results in a joint that locks shelves securely in place, showcasing the timeless effectiveness of this classic woodworking technique.
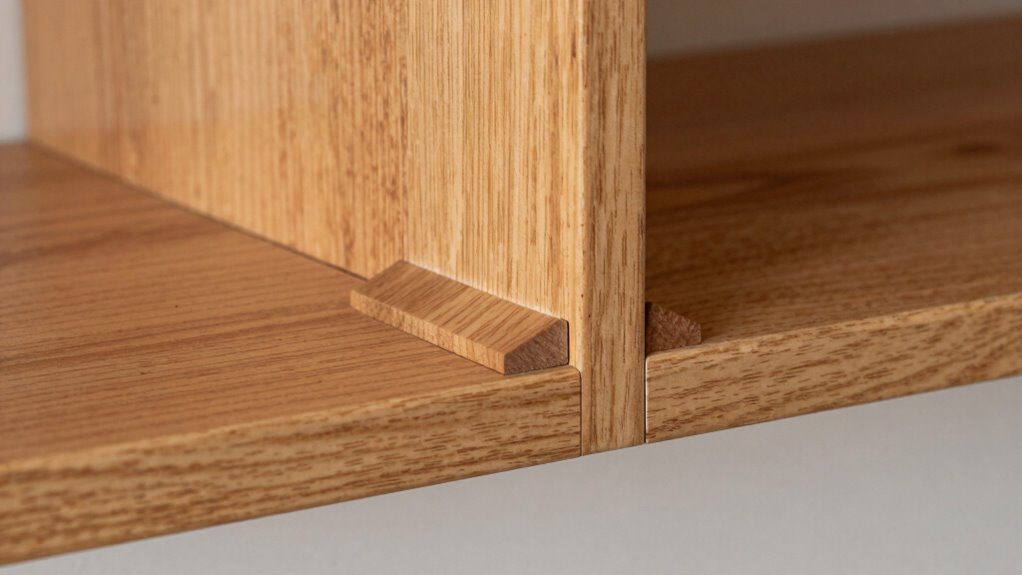
Why Sliding Dovetails Are the Best Joint for Shelves
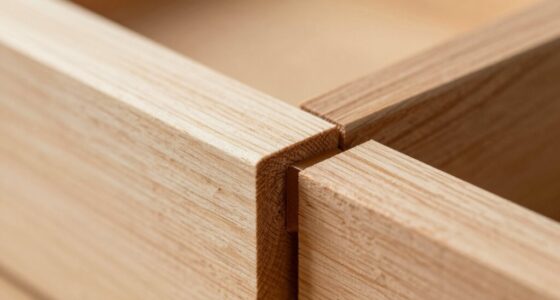
Sliding dovetails stand out as the ideal joint for shelves because they provide exceptional strength and stability. This joint’s design guarantees your shelves stay secure under weight, preventing sagging or wobbling over time. Plus, the seamless fit enhances the aesthetic appeal of your project, giving it a polished, handcrafted look. When you choose sliding dovetails, you’re investing in durability and beauty. Imagine the confidence you’ll feel knowing your shelves won’t fail or loosen, even after years of use. The harmonious blend of joint strength and aesthetic appeal makes this joint unbeatable. You’ll appreciate how it elevates your craftsmanship and provides a reliable, elegant solution for your shelving needs. It’s a perfect choice for both functionality and visual impact. Additionally, mastering proper fitting techniques ensures your sliding dovetails are both strong and visually appealing.
Different Sliding Dovetail Variations for Your Projects

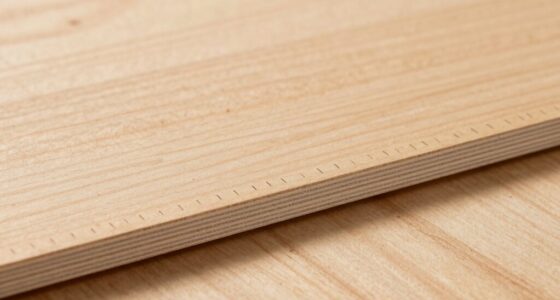
There are several variations of sliding dovetails, each tailored to different project needs and aesthetic preferences. Dovetail variations include full-length, partial, and keyed joints, offering flexibility depending on your design goals. Full-length sliding dovetails run the entire length of the joint, providing maximum strength and stability, ideal for heavy shelves. Partial dovetails cover only a section, saving material and creating a subtle visual effect. Keyed variations incorporate additional elements for decorative or reinforcement purposes. These joint options allow you to customize how your shelves lock into place, balancing strength with appearance. Additionally, considering ventilation considerations can help in ensuring the longevity and safety of your woodworking projects. By choosing the right dovetail variation, you can enhance both the functionality and the style of your woodworking project, ensuring a secure fit that complements your overall design.
Troubleshooting Common Issues With Sliding Dovetails
Have you ever struggled with a sliding dovetail joint that doesn’t quite fit or move smoothly? This can be frustrating, but understanding common issues helps. Poor joint stability often results from mismatched material compatibility, causing looseness or tightness. When materials aren’t compatible, the joint may swell or shrink unevenly, compromising movement. To troubleshoot:
- Check for inconsistencies in your material types that affect stability and fit
- Adjust your cut slightly to improve smooth sliding without sacrificing joint strength
- Use fine sandpaper or a file to refine the joint surfaces for better compatibility
Addressing these issues ensures your sliding dovetail remains stable and moves freely. Correcting material compatibility and fit boosts your confidence and results in a durable, functional joint.
Frequently Asked Questions
Can Sliding Dovetails Be Used With Non-Wood Materials?
Yes, you can use sliding dovetails with alternative materials like plastics or composites. However, keep in mind that their structural integrity may vary compared to wood. You’ll need to guarantee the material can withstand the stress and fit snugly for a strong joint. Properly designing the dovetail and selecting the right material are vital to maintaining the joint’s strength and stability in non-wood applications.
What Are the Safety Precautions When Cutting Sliding Dovetails?
Imagine the sharp blade gliding smoothly through wood, but remember safety first. Always wear safety gear like goggles and gloves to protect your eyes and hands. Handle your tools properly, keeping fingers clear of the cutting path and maintaining a steady grip. Make sure your workspace is clean and well-lit. By following these safety precautions, you’ll cut sliding dovetails confidently while avoiding accidents and ensuring a precise fit.
How Do I Prevent Wood From Splitting During Cut?
To prevent wood from splitting during your cut, pay attention to the wood grain and use a proper cutting technique. Always cut parallel to the grain to minimize stress, and support the wood firmly to avoid pinching the blade. Using sharp blades and applying steady, even pressure also helps. Taking these steps guarantees a clean cut and reduces the risk of splitting, giving you a precise sliding dovetail joint.
Are Sliding Dovetails Suitable for Outdoor Furniture?
Sliding dovetails can work for outdoor furniture if you consider weather resistance and material compatibility. Think of them as a sturdy handshake, locking pieces together securely. To guarantee longevity, choose hardwoods like cedar or teak, which resist moisture and decay. Seal joints with outdoor-grade finishes, and avoid soft woods that swell or warp. With proper treatment, sliding dovetails can stand up to the elements and keep your furniture sturdy.
How Do I Modify the Joint for Adjustable Shelf Heights?
To make your sliding dovetail joint adjustable for shelf heights, you should modify the dovetail depth by adding adjustable shelf supports or track systems. This involves altering the dovetail’s depth to allow easy removal and repositioning of shelves. Use a drill or chisel to carefully adjust the dovetail, then install adjustable supports that lock into place at different heights. This way, you get a flexible, secure fit for your shelves.
Conclusion
Now that you know how to cut and fit sliding dovetails, you can confidently create strong, seamless joints. Practice precision, pay attention to detail, and enjoy the process of crafting durable shelves. Embrace the versatility of sliding dovetails for different projects, experiment with variations, and troubleshoot issues as they come. With patience and skill, you’ll master this timeless joint and enhance your woodworking projects with strength, beauty, and craftsmanship.