
To achieve a glassy finish by de-nibbing between coats, start by carefully preparing your nails—buff to smooth out any imperfections and clean thoroughly. Use fine-grit buffers and gentle strokes to lightly sand the surface, then wipe away dust. Apply each layer smoothly, allowing proper drying time, and re-nib any uneven spots for extra gloss. Finish with a high-quality top coat to lock in the shine. Keep these steps in mind, and you’ll discover how to perfect your glossy look.
Key Takeaways
- Lightly buff nails between coats with a fine-grit buffer to smooth imperfections and enhance gloss.
- Wipe nails with a lint-free cloth to remove dust and debris before applying the next layer.
- Ensure each coat is fully dry before re-nibbing to prevent smudges and maintain a glassy finish.
- Re-nib uneven spots gently and reapply a thin layer of top coat for a flawless, reflective surface.
- Finish with a high-quality top coat and quick-dry spray to seal, boost shine, and achieve a mirror-like look.

Maryton Nail Buffer Blocks, Fine Grit 180/240 Professional Salon Quality 3 Way Blue Buffing Blocks for Natural Nails – Buff Nails Prior to Application of Gel Polish, Acrylic, 5 Count
OPTIMAL NAIL BUFFER – Prepping your nails for acrylic, polish, gel, or dip powder is easy and quick…
As an affiliate, we earn on qualifying purchases.
As an affiliate, we earn on qualifying purchases.
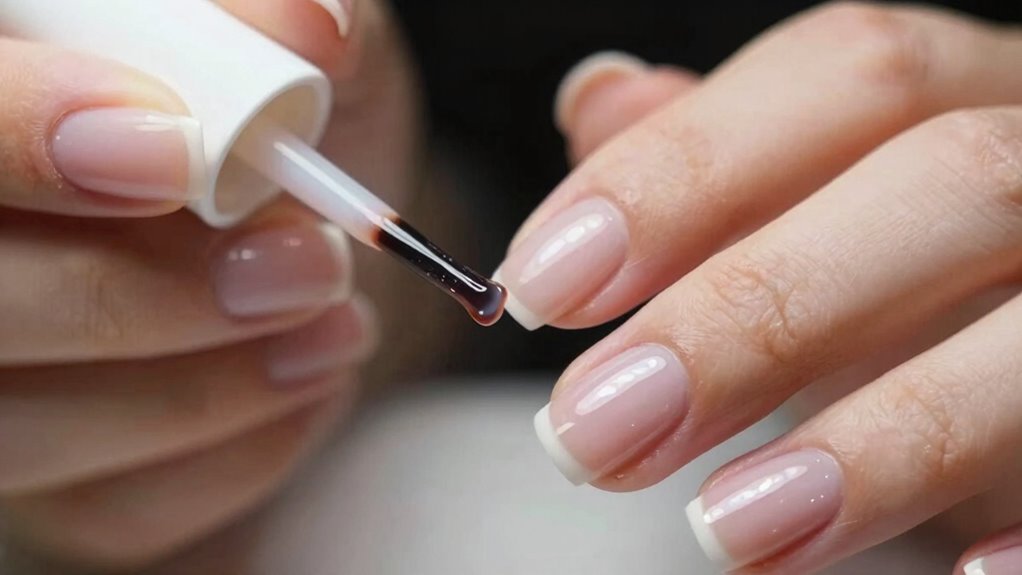
Why De‑Nibbing Between Coats Creates a Flawless, Glassy Finish
De-nibbing between coats is essential because it guarantees a smooth, even surface for the next layer. This step not only improves the appearance but also protects your nail health by preventing uneven buildup that can cause cracking or lifting. When you gently remove ridges and imperfections, you ensure each coat bonds properly, resulting in a flawless, glassy finish. Always follow safety precautions, like wearing gloves and working in a well-ventilated area, to avoid inhaling fumes or damaging your skin. Proper de-nibbing minimizes the risk of nail damage or infection, keeping your nails healthy and strong. Additionally, natural pool design principles can inspire a more harmonious and sustainable approach to your manicure routine. Taking this extra step ensures your manicure looks professional, lasts longer, and maintains the integrity of your natural nails.

4 Way Nail Buffer Block (4 Pcs), Nail Shine Buffers Blocks Files for Natural and Acrylic Nails Smoother Buffing Block Polisher Fingernail File Buffer 120/240/600/3000 Grit for Buffing Shinning
Achieve Glossy Nails Effortlessly: Our nail buffer block has four sides to shape, smooth, buff, and polish nails….
As an affiliate, we earn on qualifying purchases.
As an affiliate, we earn on qualifying purchases.
How to Prepare Your Nails for De‑Nibbing and Polishing

Before you start de-nibbing and polishing, make sure your nails are clean and free of oils or residue. Next, shape your nails to your desired length and buff the surface to create a smooth canvas. Proper preparation guarantees the best results and a flawless finish. Ensuring proper hygiene during nail care helps prevent infections and maintains healthy nails.
Clean Nails Thoroughly
To guarantee your nails are ready for de-nibbing and polishing, start by thoroughly cleaning them. Proper nail hygiene ensures a smooth surface and prevents dirt from interfering with the finish. Here’s what you should do:
- Wash your hands with soap and water, scrubbing around your nails.
- Use a gentle nail brush to remove debris from under the nails.
- Apply cuticle care to soften and push back cuticles gently.
- Wipe your nails with a lint-free cloth or nail polish remover to eliminate oils and residues.
- Ensuring your nails have a high-quality surface promotes better adhesion of polish and a smoother, glassy finish.
This process creates a clean, dry surface, essential for effective de-nibbing and achieving a glassy finish. Proper nail hygiene and cuticle care set the foundation for flawless results.
Shape and Buff Nails
Once your nails are clean and dry, the next step is shaping and buffing them to create a smooth, even surface. Use a nail file to gently shape your nails, smoothing out any rough edges. Proper cuticle care is essential—soften cuticles with cuticle oil and push them back carefully to avoid damaging the nail plate. This step enhances nail hydration, preventing dryness and brittleness. After shaping, use a buffing block or fine-grit buffer to gently polish the surface, removing ridges and creating a glossy finish. Be cautious not to over-buff, as this can thin the nail. Well-shaped, hydrated nails with healthy cuticles provide the perfect canvas for an even de-nibbing and a high-gloss polish.

Glamonade Top Coat Nail Polish Clear: Quick Dry Nail Polish No Chip High Shine Long Lasting Glossy Fast Air Dry Top Coat for Nail Art Manicure Salon Quality
Quick Dry Top Coat: Experience the convenience of our quick dry top coat. Fast drying nail polish efficient…
As an affiliate, we earn on qualifying purchases.
As an affiliate, we earn on qualifying purchases.
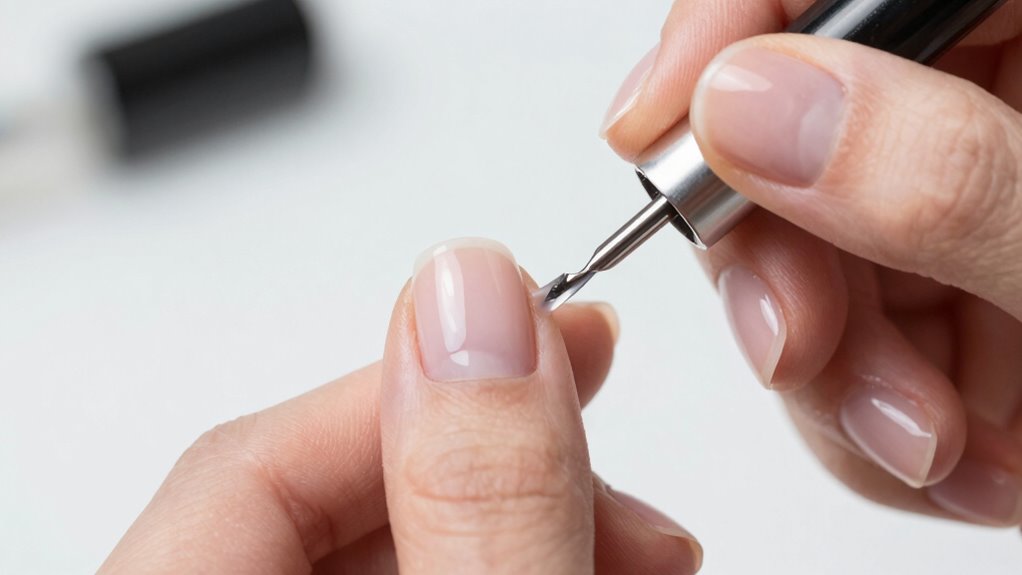
Essential Tools for Perfect De‑Nibbing
Having the right tools is essential for achieving a smooth, professional de-nibbing process. When perfecting your nail art and ensuring proper cuticle care, the right equipment makes all the difference. Here are four must-have tools:
- Fine-grit nail file or buffer – Smooths out imperfections without damaging the nail surface.
- Nail buffer block – Helps create a glossy finish and prepares the nail for the next coat.
- Cuticle pusher or orange stick – Gently pushes back cuticles, ensuring no debris interfere with the de-nibbing.
- Small, soft brush – Cleans away dust and debris, keeping your nails pristine for a flawless finish.
Having an understanding of professional nail care can further enhance your technique and results. With these tools, you’ll achieve a professional-looking, glassy finish, perfect for showing off your nail art and maintaining healthy cuticle care.

Demert Brands Nail Enamel Dryer Manicurist's Finishing Spray – 7.5 fl oz Spray Can – Fast Drying
NAIL POLISH DRYER SPRAY: Nail polish drying spray for a fast-drying manicure
As an affiliate, we earn on qualifying purchases.
As an affiliate, we earn on qualifying purchases.
Step-by-Step: De‑Nib Your Nails for a Smooth, Mirror-Like Shine
Start by gathering your tools, including a gentle nail buffer or sanding block, to make certain a smooth finish. Use light, even strokes to sand your nails, avoiding too much pressure that could damage the nail surface. With the right techniques, you’ll achieve a flawless, mirror-like shine that lasts. Incorporating proper equipment, such as high-quality buffers and polishes, can further enhance your results.
Gather Your Tools
Before you begin de-nibbing, gather the essential tools to guarantee a smooth process. Proper tools ensure your nails stay healthy, promoting nail hydration and ideal cuticle care. First, grab a fine-grit nail buffer to smooth out surface imperfections without damaging the nail. Second, have a gentle, lint-free cloth or buffing pad to wipe away dust and residue. Third, include a cuticle pusher or orange stick to gently push back cuticles if needed, supporting overall nail health. Fourth, keep a small brush or soft cloth nearby to clean nails thoroughly before de-nibbing. Using appropriate tools helps you achieve a flawless, mirror-like finish while maintaining healthy, well-hydrated nails and cuticles. Proper preparation makes the de-nibbing process more efficient and effective.
Gentle Sanding Techniques
To achieve a smooth, mirror-like shine, gentle sanding is essential. Use a fine-grit nail buffer or sanding block, applying light pressure to avoid damaging your nail surface. Be mindful of your nail health—avoid over-sanding, which can weaken nails or irritate cuticle tissue. Focus on areas with ridges or uneven spots, gently smoothing them out without digging into the nail bed. Proper cuticle care is crucial; keep cuticles hydrated and avoid pushing or trimming aggressively before sanding. This prevents unnecessary trauma and promotes healthy nail growth. Always work in gentle, even strokes, and periodically check your progress to ensure you’re not overdoing it. With careful technique, your nails will become smoother, ready for that flawless, glossy finish. Additionally, understanding the air quality in your environment can impact nail health and overall well-being, making proper maintenance even more important.
Common Mistakes During De‑Nibbing and How to Avoid Them
One common mistake during de-nibbing is applying too much pressure, which can damage the nib or cause uneven ink flow. To prevent issues like over sanding or improper pressure, keep these tips in mind:
- Use light, steady pressure to prevent removing too much material.
- Regularly check your progress to avoid over sanding the surface.
- Don’t rush; patience ensures a smoother finish without damaging the nail.
- Use a fine-grit buffer or file designed for de-nibbing, rather than aggressive tools.
- Understanding the importance of tool selection can help you choose the appropriate equipment for a flawless finish.
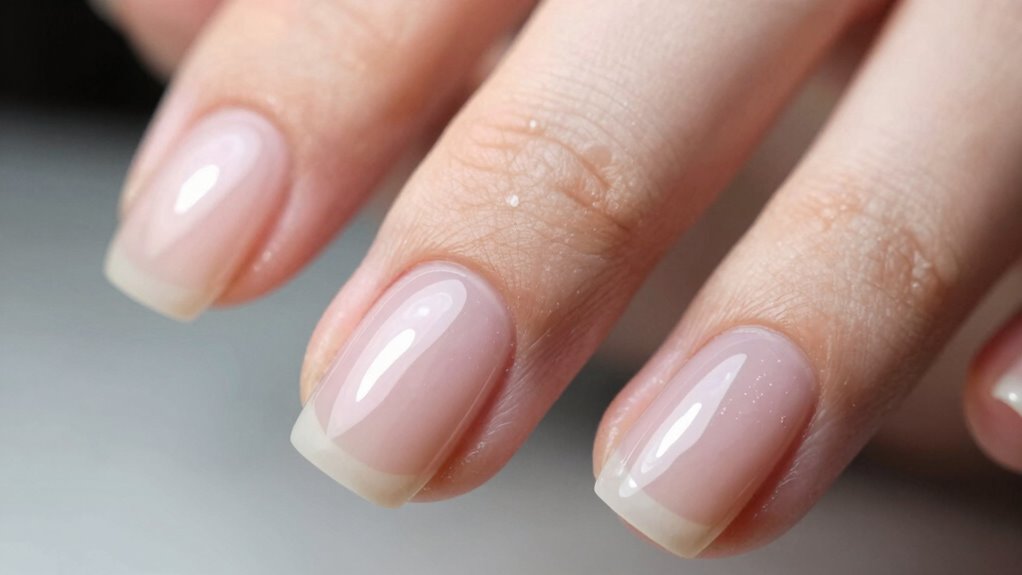
Tips for Achieving a Stunning, Glassy Nail Finish
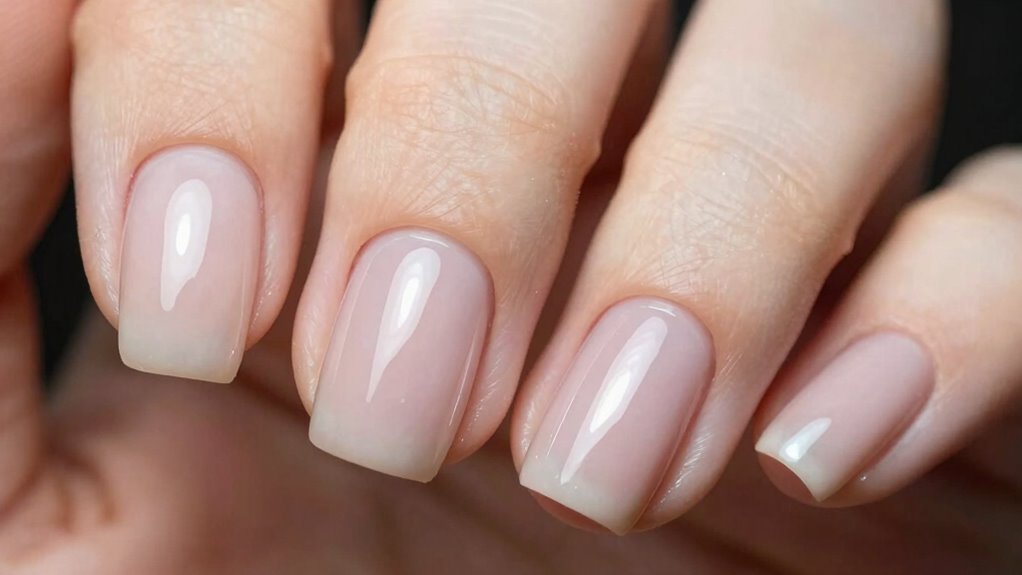
Achieving a stunning, glassy nail finish requires attention to detail and proper technique. To start, verify your nails are healthy and free of damage, as nail health impacts the final look. Before applying polish, clean your nails thoroughly to remove oils and residue that could hinder polish adhesion. Use a base coat to create a smooth surface and improve adhesion, helping the polish stay flawless longer. When applying the top coat, choose a high-gloss formula and apply it evenly in thin layers, avoiding streaks or bubbles. Let each layer dry completely before adding the next. Proper prep and careful application are key to a mirror-like, glassy finish that not only looks stunning but also lasts.
Fixing Problems When De‑Nibbing Doesn’t Go as Planned
Sometimes, despite careful application, de-nibbing doesn’t turn out as planned. If you notice uneven surfaces or rough patches, don’t panic. Focus on restoring cuticle care and nail hydration first. Here are some steps to fix issues:
- Gently buff the affected area to smooth out rough spots. Use gentle buffing techniques to avoid damaging the nail surface.
- Rehydrate your nails with cuticle oil to improve flexibility.
- Apply a thin layer of nail moisturizer to prevent dryness.
- Lightly re-nib any uneven spots using a fine abrasive, then reapply your top coat.
These steps help recover your nails’ smoothness and shine. Proper cuticle care and nail hydration are key to preventing future problems and achieving a flawless, glassy finish.
Final Touches: Top Coats and Techniques for a Flawless Look
To create a truly flawless manicure, applying the right top coat and using proper techniques are essential. A high-quality top coat not only enhances shine but also protects your nail health by sealing in moisture and preventing chipping. For maximum polish durability, choose a top coat suited to your nail type and avoid over-application, which can cause peeling. Use smooth, even strokes to avoid streaks and ensure complete coverage. Allow each layer to dry thoroughly before adding the next to prevent smudges and bubbles. Finishing with a quick-dry spray can boost durability and shine. Proper technique and the right product keep your nails looking flawless longer, while also supporting overall nail health. Achieving a glassy finish depends on these final, deliberate steps. Regular review sessions can help reinforce your technique and improve your overall manicure results.
How Regular De‑Nibbing Elevates Your Nail Art and Finish
Regular de-nibbing is a simple yet powerful step that considerably enhances the overall look of your nail art and finish. It smooths out nail texture, giving your nails a sleek, professional appearance. By removing imperfections between coats, you create a flawless surface that’s perfect for achieving artistic effects. Here’s how it elevates your manicure:
Regular de-nibbing creates a smooth, flawless surface for professional-looking, long-lasting nail art.
- Refines Nail Texture – Eliminates bumps, ensuring a smooth canvas for subsequent layers.
- Enhances Artistic Effects – Sharpens lines and details for cleaner, more precise nail designs.
- Prevents Bubbles and Cracks – Reduces imperfections that can ruin the final glossy look.
- Increases Longevity – Promotes better adhesion, making your nail art last longer.
Incorporating regular de-nibbing transforms your nail art into a polished, mirror-like finish.
Frequently Asked Questions
How Often Should I De-Nib My Nails for Optimal Results?
You should de-nib your nails every 2-3 coats to maintain nail health and achieve a glassy finish. This maintenance schedule prevents excess buildup and keeps your nails smooth and shiny. Regular de-nibbing ensures ideal results by removing uneven surfaces and promoting better adhesion of subsequent coats. Be gentle to avoid damage, and always use a fine-grit buffer for a polished, professional look.
Can De-Nibbing Damage My Natural Nails Over Time?
De-nibbing, if done carefully, shouldn’t damage your natural nails or harm nail health. However, aggressive or frequent exfoliation can weaken nails over time. To keep your nails healthy, use gentle tools and avoid excessive pressure. Always make certain you’re practicing safe exfoliation, and give your nails regular breaks from de-nibbing, so you protect both nail health and maintain a smooth, glassy finish without risking damage.
Is De-Nibbing Suitable for All Nail Types and Shapes?
Ever wondered if de-nibbing suits your nail shape or type? It’s generally appropriate for most nail types, but if you have very fragile or brittle nails, it might cause damage. For different nail shapes, it can help achieve a smoother, glossier finish, but always be gentle. Are you prepared to adjust your technique based on your unique nail condition? Proper care ensures you get the best results without harm.
What Are the Best Products to Use for De-Nibbing?
You should use a buffing block and cuticle oil for de-nibbing. The buffing block gently smooths your nail surface, removing ridges and imperfections, while cuticle oil hydrates and softens your cuticles for a clean look. Make sure to choose a fine-grit buffing block to avoid damage. Applying cuticle oil after buffing keeps your nails healthy and ready for a glossy finish.
How Long Does a Glassy Finish Typically Last After De-Nibbing?
Imagine a mirror reflecting sunlight; that’s how a glassy finish can last. Usually, it stays pristine for several weeks with proper care. To maximize longevity, avoid harsh chemicals and dust it gently. Regular maintenance tips include applying a clear coat or wax every few months and keeping the surface protected from scratches. With consistent upkeep, your glossy surface can maintain its stunning appearance for a long time.
Conclusion
So, now that you’ve mastered de‑nibbing, go ahead—glossy, flawless nails are just a buff away. Who knew that a little extra step could turn your DIY mani into a mirror reflection? Just remember, perfection’s a journey, not a destination—unless you’re aiming for that glassy finish, then it’s a relentless pursuit. Happy buffing, and may your nails shine brighter than your weekend plans!