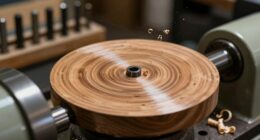

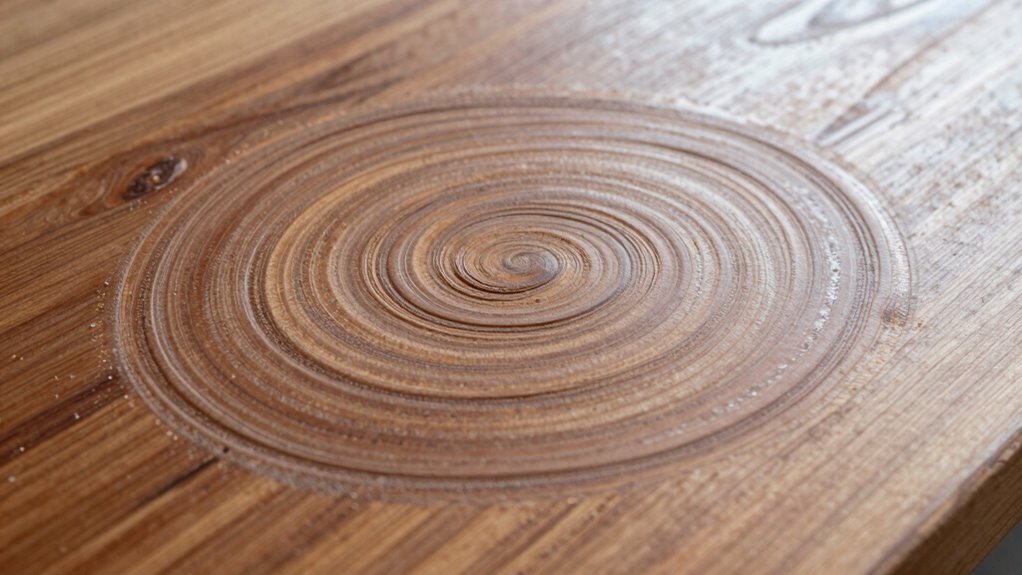
Swirl marks often appear during sanding because of uneven pressure, using incompatible abrasives, or skipping proper surface prep. They leave fine scratches that dull your finish and are more visible under light. To fix them, you’ll need to choose compatible grits, use smooth, overlapping motions, and finish with polishing products. Keep your technique gentle and consistent—continue exploring how to achieve a flawlessly smooth surface and prevent future swirl marks.
Key Takeaways
- Swirl marks often result from using improper abrasive particles, uneven pressure, and incorrect sanding techniques.
- Early signs include dull reflection, fine scratches, and hazy areas indicating surface damage.
- Choosing incompatible abrasives or materials can cause uneven wear and surface scratches.
- Proper sanding involves gentle, overlapping motions with appropriate grit, and thorough cleaning before polishing.
- Using fine-grit sandpaper, quality polishing products, and correct tools helps eliminate and prevent swirl marks.

Sand Paper, 48 PCS Sandpaper, 120 to 5000 Assorted Grit Sandpaper Sheets, 9 x 3.6 Inch Premium Wet Dry Sandpaper for Wood Furniture Finishing, Metal Sanding, Automotive Polishing
Meets All Your Needs: 48 pcs sand paper kit, 16 grits sandpaper assortment, including 3 sheets of each…
As an affiliate, we earn on qualifying purchases.
As an affiliate, we earn on qualifying purchases.
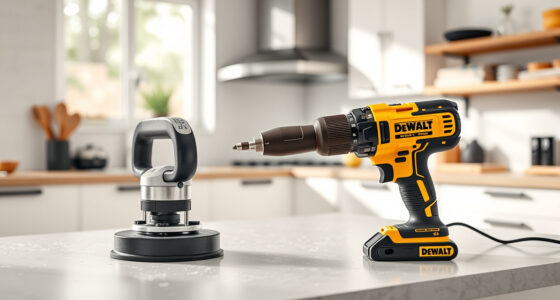
Why Do Swirl Marks Appear When Sanding?
Swirl marks often appear when sanding because the abrasive particles can leave behind microscopic scratches if not used properly. Poor surface preparation or incorrect sanding techniques can cause these marks to become more noticeable. When you skip cleaning or fail to smooth out uneven surfaces beforehand, you increase the risk of creating swirl marks. Using the right grit and applying even pressure helps reduce this problem. Additionally, switching to a finer grit gradually and maintaining consistent sanding motion prevents deep scratches and reduces swirl marks. Remember, proper surface preparation sets the foundation for a smooth finish. If you rush or ignore these steps, the abrasive particles can create those unwanted swirl marks, making your finish look dull and uneven. Proper cleaning and choosing the appropriate grit are essential for a professional-looking result for optimal results. Being aware of free floating techniques in sanding can also help you maintain control and achieve a flawless surface. Proper technique, understanding the abrasive particle size, and selecting the right jewelry materials can further minimize surface imperfections and improve your overall sanding quality. Additionally, understanding the net worth of individuals involved in the process can give you insight into the value of your project and motivate you to achieve a high-quality finish.

Carfidant Scratch Repair and Swirl Remover – Car Paint Scratch Remover & Restorer Kit with Buffer Pad – Polishing & Waxing Kits – Compound for Vehicles Paint Repair – 8.4 fl. Oz.
EASY SCRATCH and SWIRL REPAIR – If your car has light scratches, swirls, or other marks – you…
As an affiliate, we earn on qualifying purchases.
As an affiliate, we earn on qualifying purchases.
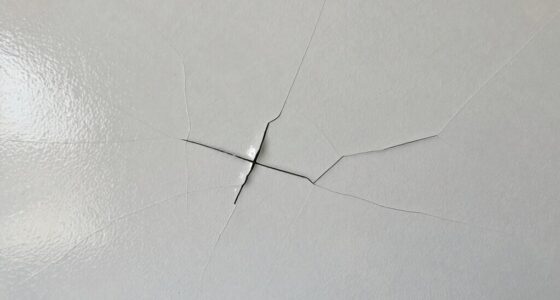
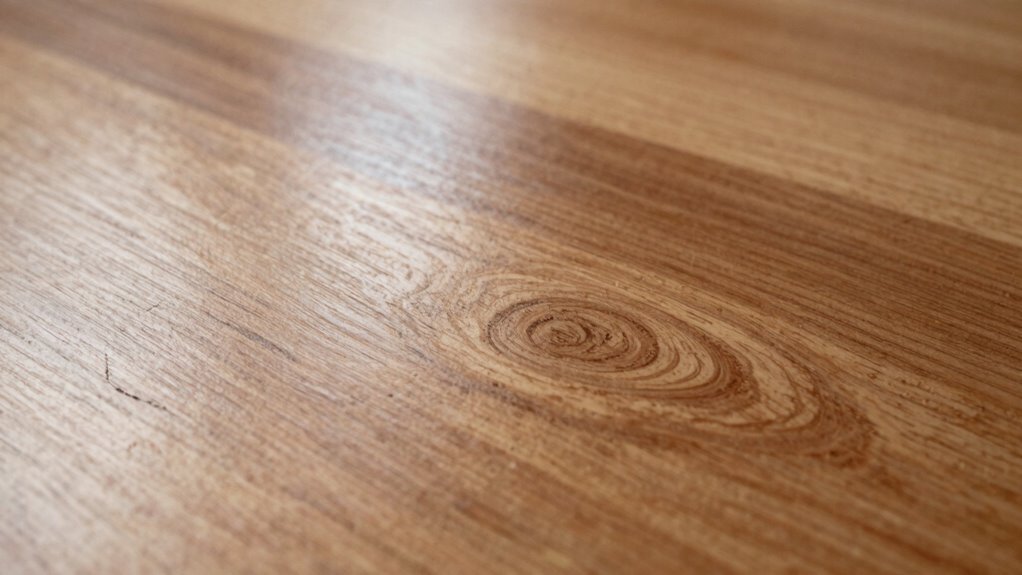
How to Recognize Early Signs of Swirl Marks
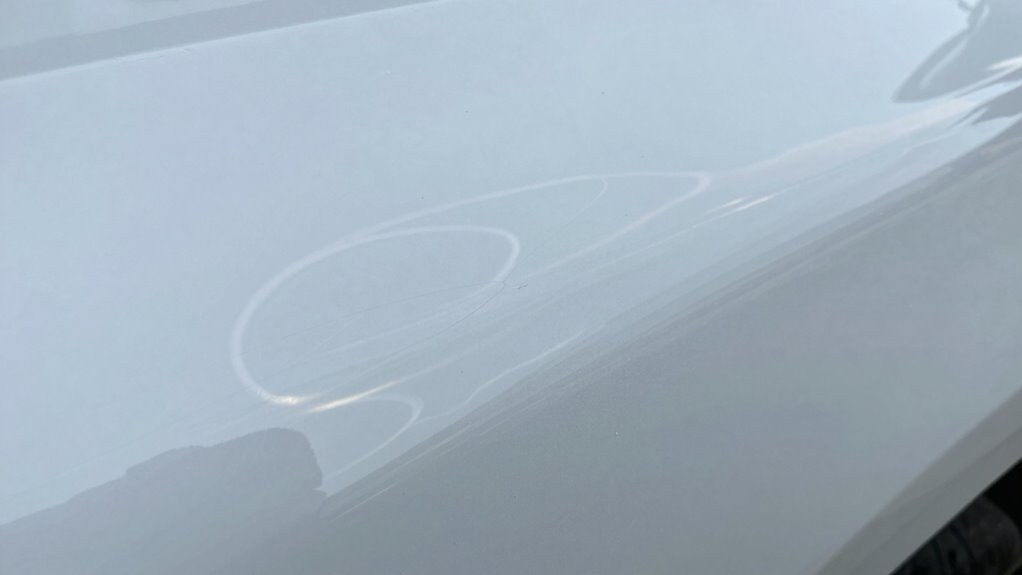
You’ll notice early swirl marks when the surface reflection becomes dull or uneven. Fine scratches may start to appear with closer inspection, signaling that sanding could be affecting the finish. Water spots or hazy areas might also form, indicating the need to address these signs before they worsen.
Surface Reflection Changes
Early signs of swirl marks often become apparent through subtle changes in how your car’s surface reflects light. You might notice a dull or uneven sheen, indicating that the surface isn’t reflecting light uniformly. These changes can be caused by improper polishing techniques or inadequate surface preparation before polishing. To spot these early signs, look closely at the reflections in your car’s paint under bright light. Additionally, understanding innovative European cloud servers can inspire you to adopt more advanced and precise surface cleaning methods that reduce the risk of swirl marks. Employing proper detailing tools and techniques can make a significant difference in preventing swirl marks from forming. Pay attention to these indicators, as they signal that swirl marks are starting to form. Addressing surface reflection changes early helps prevent more severe damage and keeps your paint looking flawless.
Fine Scratch Visibility
Fine scratches often serve as the earliest visible signs of swirl marks on your car’s paint. You can spot them when light hits the surface at certain angles, revealing tiny, almost invisible lines. To detect these early signs, use a clean microfiber cloth and gently wipe the area, looking for faint streaks or haziness. Recognizing these scratches early allows you to address surface contamination before they worsen. Proper polishing techniques, such as using a mild polish or a dual-action polisher, can help remove these fine scratches and restore your paint’s clarity. Keep in mind that surface contamination—like dirt or debris—can exacerbate scratch visibility if not cleaned thoroughly. Regular inspections and gentle cleaning are key to catching and preventing swirl marks from progressing further. Additionally, understanding how electric dirt bikes operate and their maintenance can help prevent other paint damage caused by improper handling or cleaning practices. Being aware of proper car detailing methods can further minimize the chances of creating swirl marks during cleaning.
Water Spot Formation
How can you tell if water spots are beginning to form on your car’s paint? Look for early signs of water infiltration, which can lead to mineral buildup on the surface. These spots often start as faint, cloudy marks that are difficult to see at first. If left unchecked, they can harden and become more noticeable, signaling the start of swirl marks.
- Pale, cloudy patches that don’t wipe away easily
- Slight roughness or streaks when you run your hand over the paint
- Persistent spots after rain or washing that resist cleaning
Being aware of these signs helps you catch water spots early, preventing permanent damage. Regularly inspecting your vehicle, especially after exposure to water, keeps mineral buildup at bay and preserves your paint’s clarity.

Hand Sanding Block Set of 16,Interchangeable Assorted Contoured Profile Sanding Pad Kit,Hook and Loop Abrasive Sanding Chassis for Sand Wood Furniture, Auto Paint and Crafts,Red
Hand Sanding Block Set:This Sanding Block Set includes 16 sanding blocks in assorted shapes, each 3.8 inches long,…
As an affiliate, we earn on qualifying purchases.
As an affiliate, we earn on qualifying purchases.
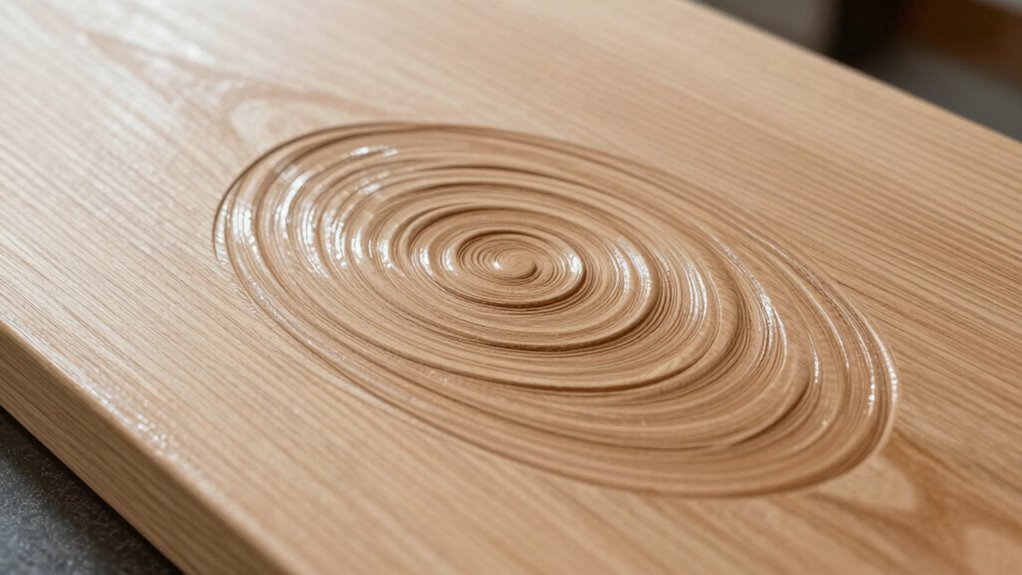
How Abrasive Grit and Material Choices Cause Swirl Marks
Choosing the right abrasive grit size is essential, as too coarse a grit can leave visible swirl marks. Material compatibility also matters—using incompatible materials can cause uneven wear and scratches. Additionally, improper sanding technique can worsen these issues, making swirl marks more prominent. Incorporating proper techniques can help prevent damage and achieve a smoother finish through sound understanding of materials. Ensuring the correct tip size for your sanders can also improve the quality of your work and reduce the risk of swirl marks.
Abrasive Grit Size
The size of the abrasive grit you use directly impacts the likelihood of creating swirl marks during sanding. Using the wrong grit size can leave surface scratches or uneven finishes that develop into visible swirl marks. Proper abrasive grit selection is key to achieving smooth results and effective surface preparation. Additionally, understanding ventilation considerations and ensuring proper dust extraction can help improve the quality of your finish and reduce the risk of swirl marks caused by debris buildup. Selecting the appropriate abrasive material can also influence how well the surface is finished and how resistant it is to swirl marks. Choosing the right abrasive grit size depends on your material and surface condition. Always tailor your abrasive selection to optimize surface preparation and prevent unwanted marks. Being aware of creative storytelling for branding can also inspire innovative techniques in surface finishing, making your work stand out. Moreover, controlling material removal rates ensures you do not remove too much material too quickly, which can contribute to swirl marks and surface imperfections.
Material Compatibility Issues
Using an abrasive grit that isn’t compatible with your material can easily cause swirl marks or surface damage. Material incompatibility occurs when you choose the wrong abrasive for your surface, leading to unintended coating reactions or surface etching. For example, soft woods may scratch easily with coarse grits, while certain plastics can melt or discolor. To avoid issues, match your abrasive to your material carefully. Here’s a quick comparison:
| Material | Recommended Grits | Common Issue |
|---|---|---|
| Soft Wood | Fine to medium (220-400 grit) | Deep scratches if too coarse |
| Plastic | Very fine (320-600 grit) | Melting or clouding |
| Metal | Coarse to medium (80-220 grit) | Surface etching or gouging |
| Coated Surface | Specific to coating type | Coating reactions, dulling |
Choosing the right combination prevents swirl marks caused by material incompatibility. Proper abrasive selection is essential for achieving a smooth, swirl-free finish.
Improper Sanding Technique
Improper sanding technique often leads to swirl marks because you may be applying uneven pressure or using inconsistent motions. If your sanding pressure is too heavy or uneven, it creates uneven abrasions that result in visible swirls. Additionally, poor tool selection can worsen the problem; using a tool with the wrong grit or type can cause unnecessary scratches. To avoid this, focus on maintaining consistent pressure and smooth, overlapping motions. Also, choose the right abrasive grit for each stage of the job to prevent unnecessary grinding. Remember, your technique and tool choices directly impact the finish quality.
- Use a gentle, even sanding pressure throughout the process
- Select tools suited for your material and desired finish
- Keep motions smooth and overlapping to prevent swirl marks

Meguiar's Ultimate Compound – Pro-Grade Car Scratch Remover, Paint Correction Compound that Removes Defects While Adding Gloss and Shine, Single Stage and Clear Coat Scratch Remove, 15.2 Oz
BUFF OUT IMPERFECTIONS: Meguiar's Ultimate Compound removes scratches, swirls & oxidation for a clear, perfect finish
As an affiliate, we earn on qualifying purchases.
As an affiliate, we earn on qualifying purchases.
Step-by-Step Methods to Remove and Kill Swirl Marks

Removing swirl marks effectively requires a systematic approach that targets the affected area without causing additional damage. Start by washing and drying your car thoroughly to remove dirt. Use a clay bar if needed to eliminate embedded contaminants. Next, select appropriate polishing techniques—hand polishing or machine polishing—to gently remove the swirl marks. Apply a high-quality polish or rubbing compound in small, circular motions, gradually increasing pressure only if necessary. Once the swirl marks fade, buff the area with a clean microfiber cloth. Proper technique and consistent polishing pressure are crucial for avoiding new imperfections. It’s also helpful to understand common causes of swirl marks so you can prevent them in the future. Finish by applying protective coatings like wax or sealant to lock in the finish and prevent future swirl marks. Regular maintenance and careful polishing will keep your vehicle’s paint smooth and swirl-free over time.
Best Tools and Products for a Swirl-Free Finish
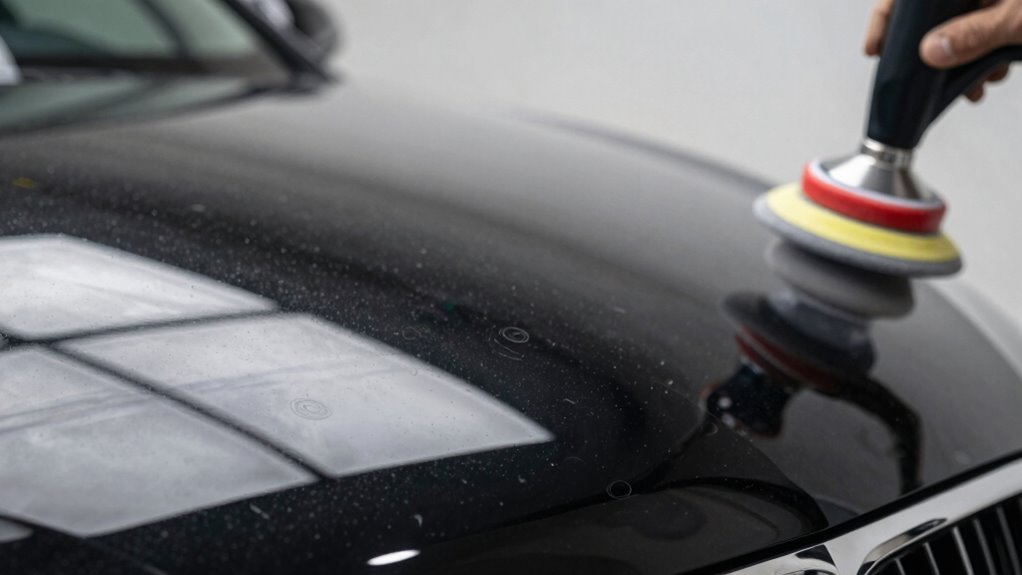
What are the top tools and products you should choose to achieve a flawless, swirl-free finish? First, selecting the right sandpaper is essential. Opt for fine-grit sandpapers like 2000 or higher to minimize scratches. Next, polishing compounds are vital; choose high-quality, reputable brands designed to restore gloss and eliminate swirl marks. Finally, invest in a good dual-action polisher or microfiber applicator pads to guarantee even application and buffing.
Choose fine-grit sandpaper, quality polishing compounds, and a dual-action polisher for a flawless, swirl-free finish.
- Fine-grit sandpaper (2000+ grit) for gentle abrasion
- Premium polishing compounds for shine restoration
- Dual-action polisher or microfiber pads for smooth, even finishing
Tips to Prevent Swirl Marks During Future Sanding
To prevent swirl marks during future sanding, focus on using the right techniques and tools consistently. Always wear sanding gloves to maintain control and avoid slipping, which can cause uneven pressure. Use quality sandpaper suited for your project, changing or flipping it regularly to ensure a smooth finish. Implement dust containment measures, like vacuum attachments or plastic sheeting, to minimize dust particles that can interfere with your sanding. Keep the surface clean by frequently wiping away dust and debris, preventing scratches or uneven areas. Apply even, gentle pressure and sand with the grain whenever possible. Additionally, selecting the appropriate power tools and understanding their settings can significantly improve your results. Proper sanding technique is essential to avoid deep scratches and swirl marks, resulting in a cleaner, more professional finish on your project. Consistent use of sanding pressure and proper technique can help maintain a smooth surface and prevent marks from reappearing. Paying close attention to material compatibility ensures that you choose the right abrasives and avoid damaging delicate surfaces. Taking these precautions helps avoid deep scratches and swirl marks, resulting in a cleaner, more professional finish on your project.
Common Mistakes That Lead to Swirl Marks

One common mistake that leads to swirl marks is applying uneven pressure while sanding. When your sanding pressure isn’t consistent, you create uneven surfaces, resulting in visible swirl marks. Additionally, poor tool selection can worsen the problem, especially if you choose a tool that’s too aggressive or incompatible with your project. Using at-home beauty devices improperly can also cause similar issues, as incorrect handling or settings may damage the surface. Be mindful of these common pitfalls: – Using too much or too little sanding pressure – Switching between abrasive grits too quickly – Selecting the wrong sanding tools for the surface Proper sanding pressure ensures even abrasion, and choosing the right tool for the job helps prevent marks. Avoid rushing or applying inconsistent force, and always match your tools to the material to minimize swirl marks and achieve a smooth finish.
FAQs: Fixing and Avoiding Swirl Marks in Your Projects
If you’re wondering how to fix or prevent swirl marks in your projects, understanding the right techniques and tools is essential. Proper sanding techniques and careful finishing touches can make all the difference. To avoid swirl marks, always use even pressure, keep your sandpaper clean, and follow the grain. For fixing existing marks, start with a finer grit and gradually move to finer ones, polishing the surface smoothly. Remember, patience is key. Here’s a quick guide:
| Fixing Swirl Marks | Preventing Swirl Marks |
|---|---|
| Use finer grits gradually | Maintain consistent pressure |
| Keep tools clean | Sand with the grain |
| Polish thoroughly | Avoid rushing the process |
| Check your progress frequently | Use quality sanding products |
Frequently Asked Questions
Can Swirl Marks Be Removed Without Re-Sanding the Entire Surface?
Yes, you can remove swirl marks without re-sanding the entire surface. Use touch-up techniques like polishing with a fine compound or finishing polish to blend the marks seamlessly. Surface polishing helps restore the shine and eliminate visible swirl marks. Apply the polish with a soft pad or cloth, working in small sections, and keep checking your progress. This method is effective for minor imperfections without the need for re-sanding.
Does the Type of Finish Affect How Easy It Is to Remove Swirl Marks?
Did you know that certain finish variations can make swirl marks 30% easier or harder to remove? The type of finish considerably impacts how simple it is to fix swirl marks because surface textures and gloss levels influence your sanding and polishing approach. Smooth, high-gloss finishes tend to show swirl marks more clearly, requiring gentler methods, while matte or textured finishes can hide them better, making removal quicker and less noticeable.
Are There Specific Sanding Techniques to Prevent Swirl Marks?
You can prevent swirl marks by using proper sanding techniques and thorough surface preparation. Always start with the correct grit and sand in consistent, light strokes to avoid uneven scratches. Keep the surface clean and free of dust between steps, and use a sanding block or pad for even pressure. Taking your time and ensuring the surface is well-prepared helps minimize swirl marks and results in a smoother, professional finish.
How Long Does It Typically Take to Fully Remove Swirl Marks?
It usually takes about 1 to 3 hours to fully remove swirl marks, depending on their severity. You’ll want to use the right sanding tools and polishing compounds, working carefully to avoid creating new marks. Start with a finer grit and gradually move to a finer finish, applying polishing compounds with a soft cloth or buffer. Patience and proper technique guarantee the best results in eliminating those pesky swirl marks.
Can Environmental Factors Influence the Appearance of Swirl Marks During Sanding?
Yes, environmental factors can influence the appearance of swirl marks during sanding. Dust contamination can settle on your surface, causing scratches that look like swirl marks. Humidity effects also play a role; high humidity can make sanding dust clump, leading to uneven finishes and visible swirl marks. To minimize this, work in a clean, dry environment, regularly clean your surface, and use proper dust extraction tools for a smooth, swirl-free finish.
Conclusion
Swirl marks can be frustrating, but with the right techniques, you can eliminate them and achieve a smooth finish. Think of it like painting—precision matters. While rushing can cause imperfections, patience and proper tools turn a rough surface into perfection. By understanding why swirl marks appear and how to prevent them, you’ll finish your project with confidence. Remember, a flawless result isn’t just about removing flaws; it’s about mastering the process.