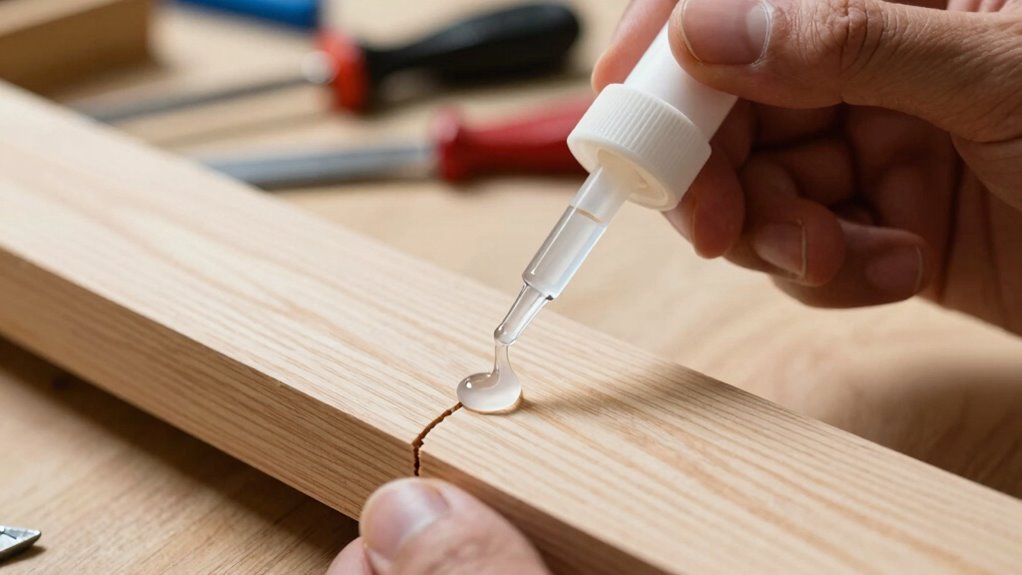
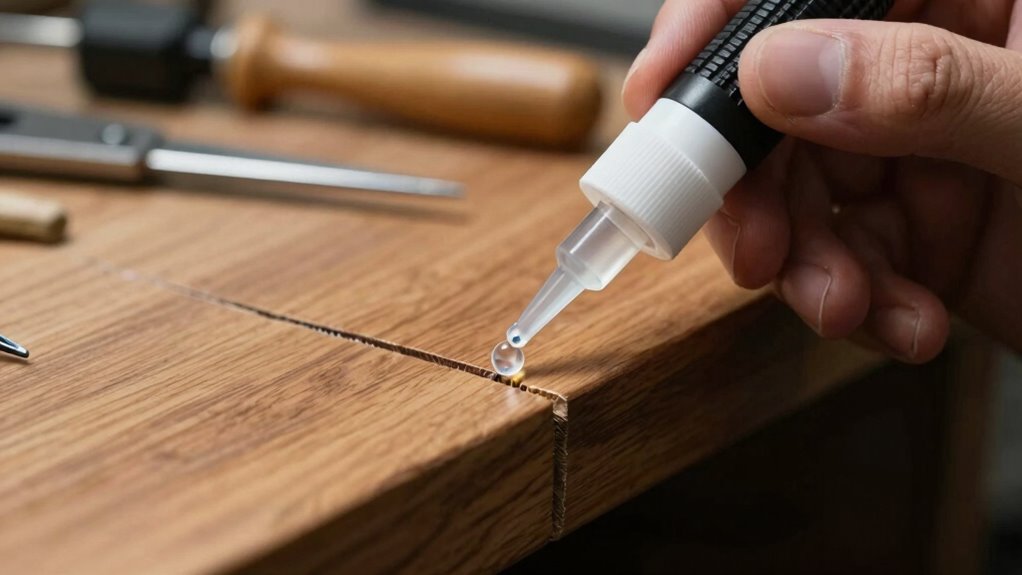
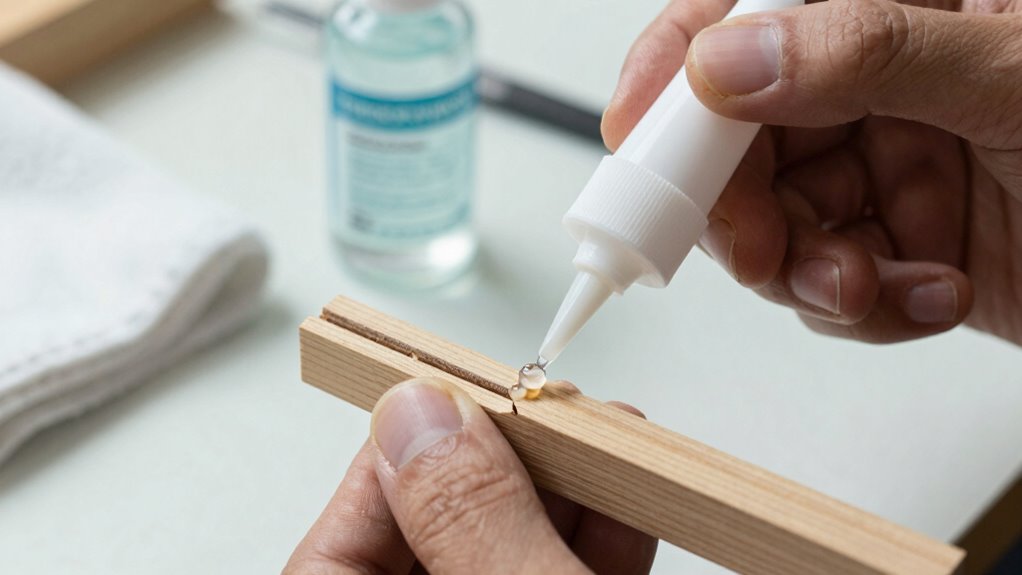
To fix small splits with CA glue without making a mess, prepare your workspace by covering surfaces and using masking tape to contain excess glue. Apply the glue with a fine applicator or toothpick for precision, and use clamps or finger pressure to secure the bond as it dries. Clean up drips quickly with a damp cloth or acetone, applying caution. Master these tips, and you’ll discover even more ways to get perfect, mess-free repairs.
Key Takeaways
- Use masking tape or barriers along edges to contain glue and prevent mess during application.
- Apply CA glue with fine applicators or toothpicks for precise, controlled spots.
- Work in a well-ventilated area and wear gloves to ensure safety and cleanliness.
- Remove excess glue promptly with a damp cloth or gentle scraping before it cures fully.
- Follow proper surface prep and gentle cleanup techniques to avoid damage and ensure clean repairs.

Precision Extender Tips Compatible for CA – 200Pcs Glue Applicator Nozzle Bottle Tips for Hobby, Craft, Model and Small Part
Glue Tips Compatible for CA, for reference, the glue in the picture is 1 oz
As an affiliate, we earn on qualifying purchases.
As an affiliate, we earn on qualifying purchases.
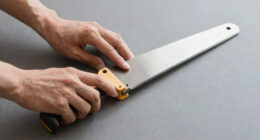
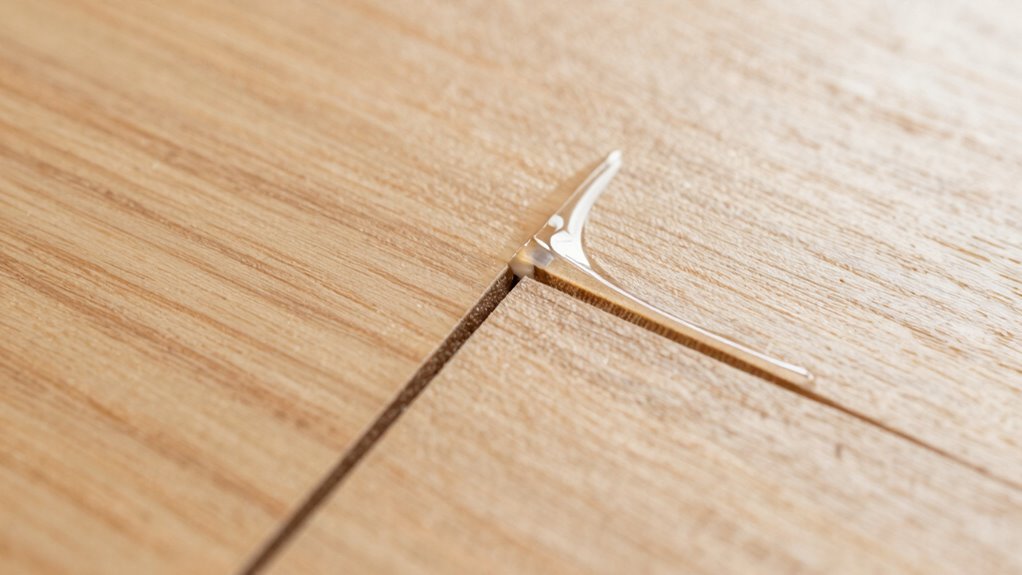
Why CA Glue Is Perfect for Small Cracks and Splits
Ever wonder why CA glue is a go-to choice for repairing small cracks and splits? The main reason is its impressive adhesive strength, which creates a durable bond quickly. When you apply CA glue, you’ll notice that it forms a strong connection almost instantly, making it ideal for tiny repairs. Its fast drying time means you don’t have to wait long before the repair is set and ready for use. This quick turnaround is especially helpful when fixing delicate or time-sensitive projects. Plus, CA glue works well on a variety of materials, from wood to plastic. Its precision application and reliable bonding make it perfect for small cracks and splits, giving you a clean, strong fix without the mess or hassle of other adhesives. Additionally, its adhesive strength is a key factor in achieving long-lasting repairs. Understanding the importance of material compatibility can help you select the right type of CA glue for different repair tasks. Selecting the appropriate application technique ensures a cleaner and more effective repair, reducing excess glue and mess. Using proper surface preparation can further improve the bond quality and durability of your repair.

Scotch Greener Masking Tape, 0.94 in x 60 Yard, 2050, 1 roll
TACKLE INDOORS AND OUTDOORS: Has a strong adhesive that can be used as an indoor or outdoor tape
As an affiliate, we earn on qualifying purchases.
As an affiliate, we earn on qualifying purchases.
How to Prepare Your Workspace for Mess-Free Repairs
To guarantee your CA glue repair stays clean and mess-free, start by organizing your workspace before you begin. Clear away clutter and cover surfaces with newspaper or a disposable cloth to catch drips. Keep your materials within easy reach to avoid unnecessary movement. Use masking tape or painter’s tape to protect surrounding areas from accidental spills. Always follow safety precautions by working in a well-ventilated area and wearing gloves to prevent skin contact. Keep a damp cloth nearby for quick cleanup of excess glue. Proper workspace organization minimizes the risk of accidents and makes your repair process smoother. Additionally, understanding adhesion principles can help you achieve stronger, more durable fixes. Being aware of material compatibility is also crucial for successful repairs. Familiarity with product specifications can guide you in choosing the right adhesive for your specific materials. Learning about surface preparation techniques can further enhance the bond strength and longevity of your repair. Considering environmental factors can also improve the success of your small crack fix. By preparing your environment carefully, you ensure a neat, efficient, and safe small crack fix.
Lucida Surfaces CoreBond Pro-Grade Solvent Free Vinyl Flooring Pressure Sensitive Adhesive | 4 Gallon
Solvent-free adhesive designed for installation of various flooring types, including LVT, Vinyl Plank without attached backing, PVC, carpet…
As an affiliate, we earn on qualifying purchases.
As an affiliate, we earn on qualifying purchases.
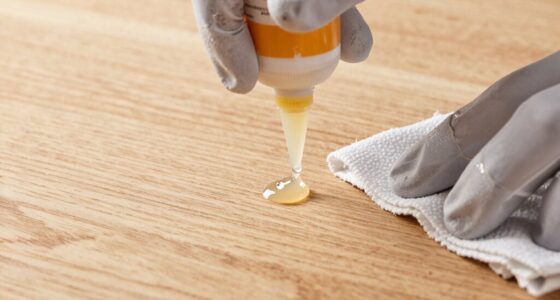
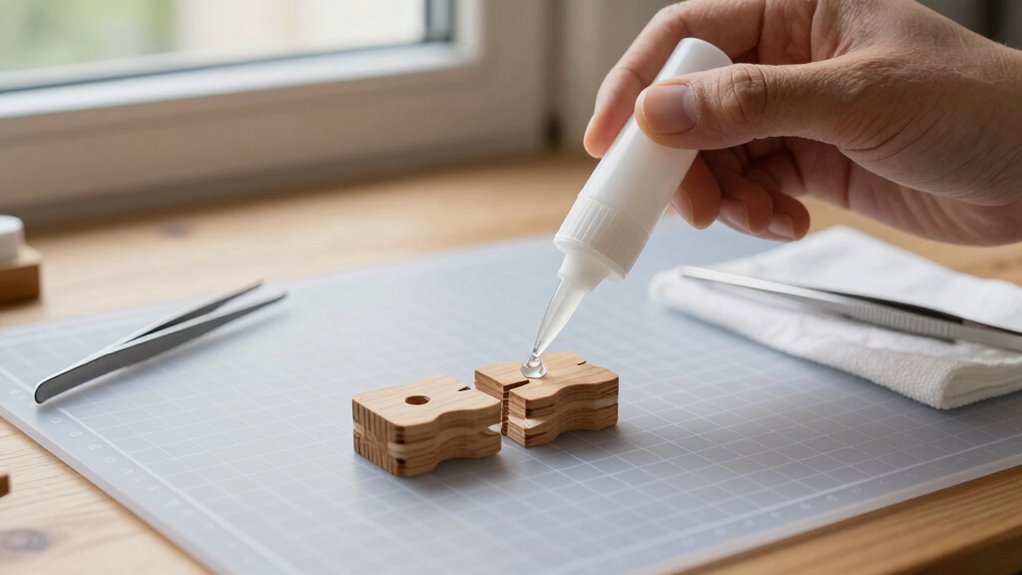
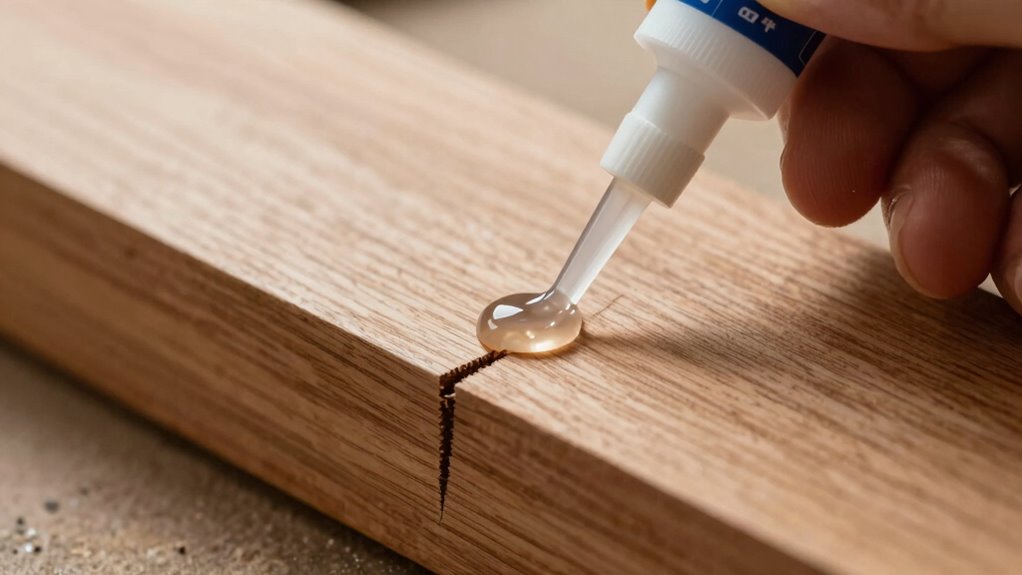
Tips for Applying CA Glue Precisely and Controlably
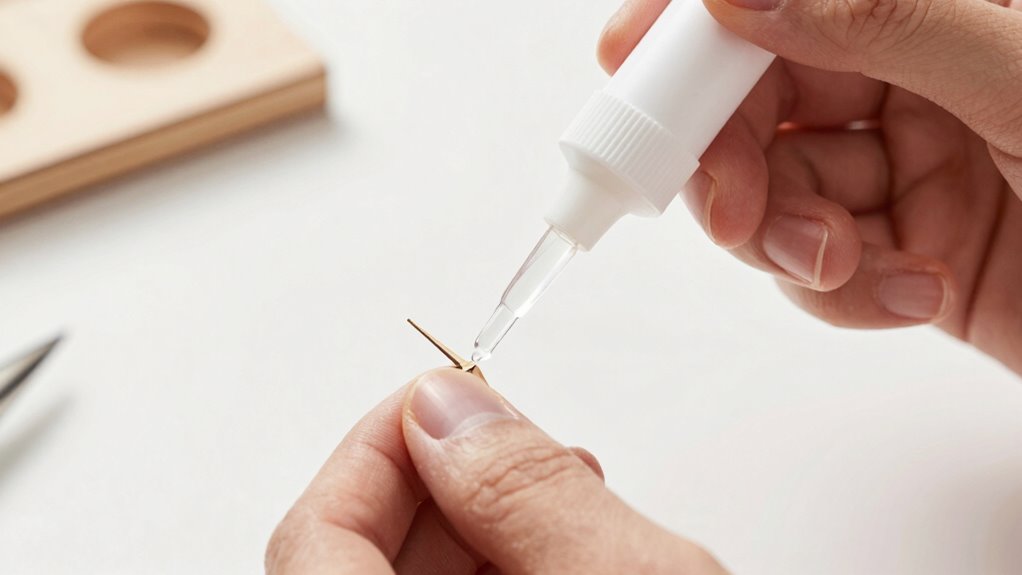
Applying CA glue with precision requires a steady hand and the right technique. To achieve control, use a fine applicator or a toothpick for small, targeted spots. Practice application techniques by applying small amounts at a time; less is more. Keep the glue container upright to prevent excess flow, and consider using a pin or needle to open the nozzle carefully. Steady your hand by resting it on the work surface, and focus on controlled, deliberate motions. For pinpoint accuracy, hold the applicator close to the surface, and avoid squeezing too much glue out. Additionally, understanding the healing process can help you determine the appropriate amount of glue to use for durable repairs. Being aware of safety precautions ensures you handle CA glue responsibly and avoid skin bonds or accidents. Properly managing glue application techniques can significantly improve your repair quality and reduce mess. Incorporating eco-friendly tools like reusable applicators can also make your repair process more sustainable. Developing a steady hand through practice is essential for achieving precision and avoiding excess glue. With patience and proper technique, you’ll master precision control, ensuring your repair is clean and effective without excess glue spreading where it shouldn’t.
Starbond Super Fast Thin CA Glue – Super Glue Pro Kit with Precision Microtips Anti-Clog Cap & Extra Nozzles – Premium Cyanoacrylate Adhesive for Cracks, Joints, Woodturning, Hobby & Repairs, 2 oz
✅ PREMIUM SUPER GLUE, SINCE 1988: For over 35 years, Starbond CA glues have been produced in smaller…
As an affiliate, we earn on qualifying purchases.
As an affiliate, we earn on qualifying purchases.
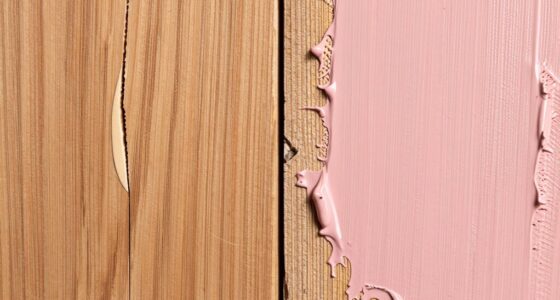
Using Tape and Barriers to Prevent CA Glue Messes
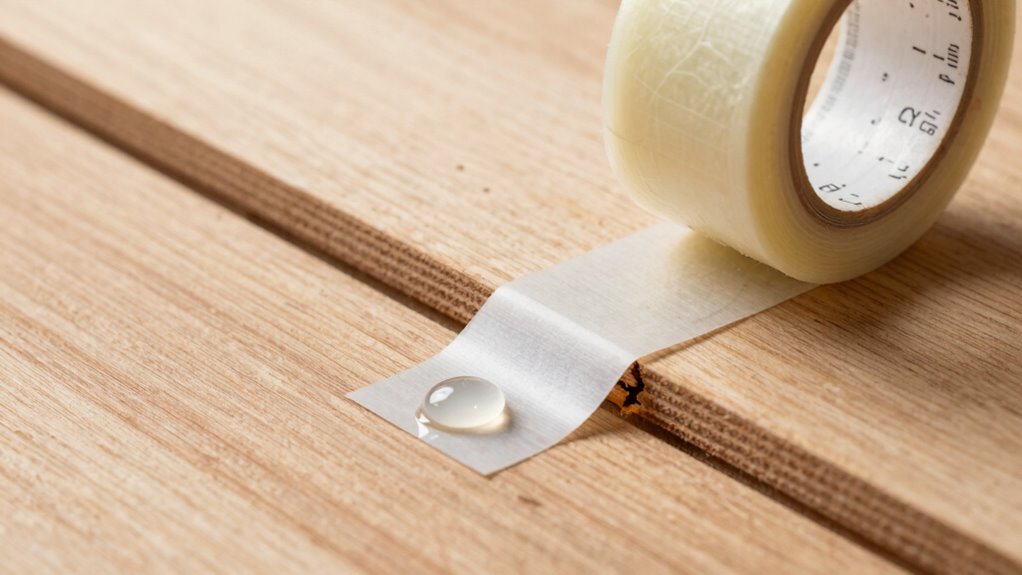
Using tape and barriers is an effective way to keep CA glue from spreading to unwanted areas. You can apply tape barriers or masking strategies to control precisely where the glue goes, preventing messes and saving cleanup time. Carefully place masking tape along edges or around the area you want to protect; this acts as a barrier that keeps the glue contained. When removing tape, do so gently to avoid disturbing the glue or damaging your work. Here’s a visual reminder of how effective tape barriers can be:
| Benefit of Tape Barriers | Why It Matters |
|---|---|
| Precise application | Keeps glue exactly where needed |
| Reduces cleanup effort | Less mess to sand or scrape |
| Protects delicate surfaces | Prevents accidental damage |
| Saves time | Faster project completion |
| Improves control | Less accidental spreading |
Adding a preventive measure like tape barriers can also help minimize the risk of unintended bonding or adhesion issues during application.
Common CA Glue Application Mistakes and How to Avoid Them
Even experienced crafters can make mistakes when applying CA glue, which can compromise the quality of your project. Common application techniques include using too much glue or applying it unevenly, resulting in messy or weak bonds. To avoid this, apply glue sparingly and precisely to prevent excess from spreading. Another mistake is rushing the drying time; impatience can cause weak joints or misaligned pieces. Always check the recommended drying time on the glue’s label and give it enough time to cure fully before handling or stressing the bond. Proper application techniques, such as using a fine applicator or toothpick, help control the amount of glue and improve adhesion. Paying attention to drying time ensures a strong, clean repair without mess or mishaps. Additionally, understanding home and small-shop electrical safety principles can help prevent accidents during your crafting or repair projects. Being aware of safety protocols can further protect you from potential hazards associated with adhesives and tools. Practicing proper safety procedures also reduces the risk of mishaps like burns or injuries from tools used in conjunction with adhesives.
Securing Small Repairs With Clamps and Quick Fixes
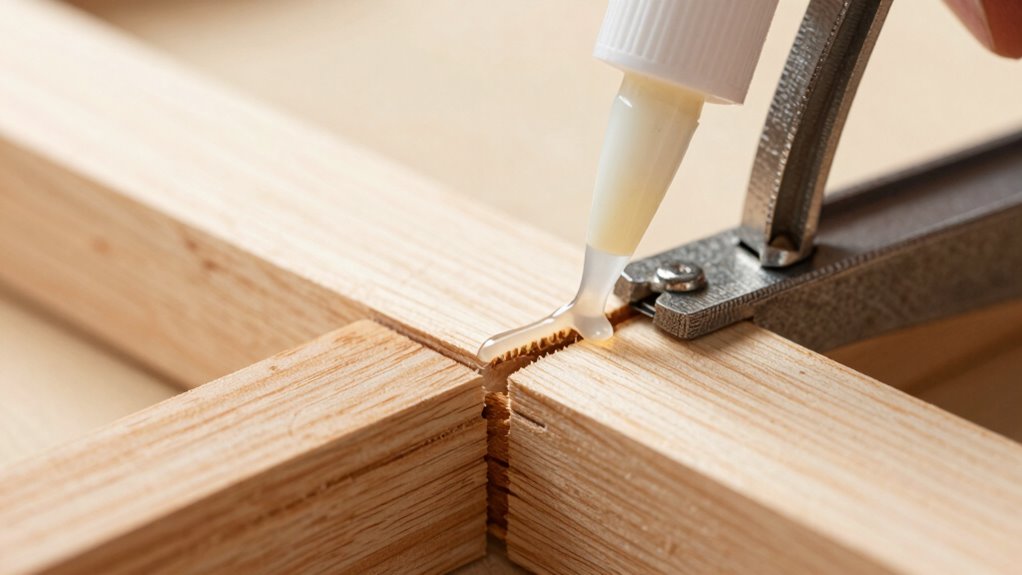
When making small repairs with CA glue, securing the pieces firmly is essential to guarantee a strong bond. Start by choosing the right clamp for your project; a small, spring-loaded clamp often works best for tight spaces. Proper clamp selection ensures even pressure and prevents slipping or shifting during curing. If you need a quick fix, use clamps that allow for fast tightening and releasing, so you can hold the parts securely without delay. Apply gentle pressure to avoid squeezing out excess glue, which can weaken the bond. Keep in mind that CA glue sets rapidly, so positioning your pieces accurately before clamping is critical. Quick setting clamps help you achieve a secure hold quickly, ensuring your small repair stays aligned as the glue cures. Additionally, understanding proper clamp pressure helps prevent damage to delicate surfaces while maintaining a strong bond. Using the correct oil type for your equipment can also prevent issues like clogging or uneven application that might compromise your repair process. Being aware of adhesion techniques can further improve the effectiveness of your small repairs. Incorporating visual cues can also assist in ensuring proper alignment during the quick setting process. To optimize your repair success, consider adjusting clamp pressure based on the material and delicate nature of the parts involved.
How to Clean Up CA Glue Drips and Residue Safely
To clean up CA glue drips safely, start by gently scraping off any excess with a scraper or blade. Then, apply acetone carefully to dissolve the residue, making sure to use it in a well-ventilated area. Finish by washing the area with soap and water, then dry thoroughly to prevent any damage.
Use Acetone Safely
Acetone is a highly effective solvent for removing CA glue drips and residue, but it must be used with caution to avoid damage or injury. Always prioritize acetone safety by working in a well-ventilated area and wearing gloves to protect your skin. Apply a small amount to a cloth or cotton swab and gently dab the glue spot; avoid soaking the material completely. Keep acetone away from plastics or painted surfaces, as it can cause damage. If you’re concerned about using acetone, consider solvent alternatives like isopropyl alcohol or specialized glue removers, though they may be less effective. Remember, patience is key—take your time and test a small area first to ensure safe, effective cleanup without harming your project.
Scrape Gently First
Before reaching for chemicals, always try to remove CA glue drips and residue by gently scraping the surface. Proper surface prep is essential to avoid damage, so use a soft, non-abrasive tool like a plastic scraper or an old credit card. Be sure to wear safety gear, such as gloves and safety glasses, to protect your skin and eyes from accidental splashes. Carefully work around the glue, applying light pressure to lift it without scratching or gouging the material underneath. This gentle approach helps avoid unnecessary mess and preserves the integrity of the surface. Once you’ve loosened the glue, you can assess if further cleaning with chemicals is necessary. Taking your time at this stage ensures a safer and cleaner removal process.
Wash and Dry Properly
Wondering how to safely clean up residual CA glue? Proper washing is key. Use warm, soapy water to gently loosen and remove the glue residue. Avoid harsh chemicals that might damage your surface or cause fumes. Once you’ve washed the area thoroughly, it’s essential to dry it completely. Thorough drying prevents moisture from setting the glue further or causing any damage. Pat the area dry with a clean cloth or paper towel, ensuring no damp spots remain. If residual glue persists, repeat the washing process. Remember, patience is crucial—rushing might spread the glue or make cleanup messier. By properly washing and thoroughly drying, you protect your material while keeping cleanup safe and effective.
Troubleshooting CA Glue Repairs: Fixing Common Issues
Sometimes, CA glue repairs don’t go as planned, and you might face issues like bonding failures or excess residue. Knowing how to identify common problems and apply effective fixes can save your project. Let’s look at practical tips to troubleshoot these common CA glue issues quickly and confidently.
Common CA Glue Problems
Even experienced users can encounter common issues when working with CA glue. One frequent problem is incomplete polymer bonding, which weakens the repair. Another is excessive curing time, leaving you waiting longer than expected. You might also notice the glue oozing or spreading beyond the target area. To visualize, consider this table:
| Issue | Imagery |
|---|---|
| Poor adhesion | A crack that barely holds together |
| Long curing time | Waiting impatiently for the bond to set |
| Excess glue spread | Glue seeping onto unwanted surfaces |
Understanding these issues helps you troubleshoot effectively. Ensuring proper application and patience for curing time can considerably improve your results. Remember, managing polymer bonding and curing time is key to avoiding these common CA glue problems.
Effective Fixes and Tips
When you encounter issues like poor adhesion, long curing times, or excess glue spread, knowing how to troubleshoot can save you time and frustration. For weak bonds, guarantee surfaces are clean and dry, and consider applying a thin layer of wood glue before using CA glue for added strength. If curing takes too long, improve airflow or increase ambient temperature; avoid using epoxy resin in place of CA glue for small splits, as they have different curing properties. Excess glue can be cleaned with acetone or warm water before it hardens. Sometimes, applying a small amount of accelerator can speed up curing, but use it carefully to prevent messes. These tips can help you achieve cleaner, more reliable repairs without hassle.
Frequently Asked Questions
CAn CA Glue Repair Structural Damage or Only Small Cracks?
CA glue primarily repairs small cracks, but it can also help with minor structural damage if the repair scope is limited. For maintaining structural integrity, it’s best to use CA glue on small splits or cracks where it can bond quickly and effectively. However, for larger or load-bearing repairs, consider stronger adhesives or professional repairs, as CA glue might not provide the necessary strength for extensive structural damage.
What Safety Precautions Should I Take When Using CA Glue?
When using CA glue, you should always wear safety gear like gloves and eye protection to prevent skin and eye contact. Make certain proper ventilation in your workspace to avoid inhaling fumes, which can be harmful. Work in a well-ventilated area, and avoid open flames or sparks, as CA glue is highly flammable. Taking these precautions keeps you safe while achieving professional results with your repairs.
How Long Does It Take for CA Glue to Fully Cure?
CA glue cures in a flash, like lightning striking a tree. Typically, it dries within 10 to 30 seconds, but full curing takes about 24 hours. During this curing process, the glue reaches maximum strength, so avoid handling or stressing the bond. For the best results, guarantee proper ventilation and keep the area dry, as moisture accelerates curing, while excess moisture can prolong it.
Is It Possible to Sand or Paint Over CA Glue Repairs?
Yes, you can sand or paint over CA glue repairs once it’s fully cured. To guarantee a smooth finish, use fine-grit sanding techniques to gently level the surface without damaging the repair. When painting over, apply a primer suitable for your material first, then proceed with your paint. This approach helps your repairs blend seamlessly, providing a clean, professional look without messing up your project.
Are There Alternative Adhesives for Repairing Small Splits?
Yes, you can use epoxy alternatives or other woodworking adhesives for small splits. Epoxy provides strong, durable bonds and fills gaps effectively, making it ideal for repairs. Wood glues or PVA adhesives are also good options, especially if you want easier application and clean-up. Choose the right adhesive based on your project needs, ensuring it bonds well and dries clear if aesthetics matter. Always follow the manufacturer’s instructions for best results.
Conclusion
With the right techniques, fixing small splits with CA glue is straightforward and mess-free. By preparing your workspace, applying glue carefully, and using simple barriers, you can get professional results without a headache. Remember, patience is key—don’t rush, or you’ll end up chasing your tail. Keep these tips in mind, and you’ll have your repairs done in a jiffy, turning a small mishap into a quick fix that sticks!