
To prevent glue starvation caused by overly dry joints, make certain your wood’s moisture levels are balanced and surfaces are thoroughly cleaned and sanded before applying glue. Use even, sufficient adhesive coverage and choose the right type for your project. Apply clamping pressure evenly and follow recommended curing times. If your joints are too dry or cracking, reapply glue with better surface preparation. Keep these tips in mind to strengthen your joints—more expert strategies for perfect adhesion await you.
Key Takeaways
- Ensure proper wood moisture levels before gluing to promote optimal glue penetration and joint adhesion.
- Thoroughly clean and sand surfaces to remove dust, dirt, and contaminants that cause dryness and weak bonds.
- Apply glue evenly using appropriate tools to maintain consistent coverage and prevent starved spots.
- Use proper clamping pressure and timing to maintain contact without squeezing out excessive glue or causing dryness.
- Monitor environmental conditions and curing times to prevent premature drying and ensure strong, durable joints.

General Tools MMD4E Digital Moisture Meter, Water Leak Detector, Moisture Tester, Pin Type, Backlit LCD Display With Audible and Visual High-Medium-Low Moisture Content Alerts, Grays
HUMIDITY SENSOR: Our handy meter tool can quickly determine what level of remediation is needed to keep your…
As an affiliate, we earn on qualifying purchases.
As an affiliate, we earn on qualifying purchases.
What Causes Glue Starvation in Woodworking Joints?
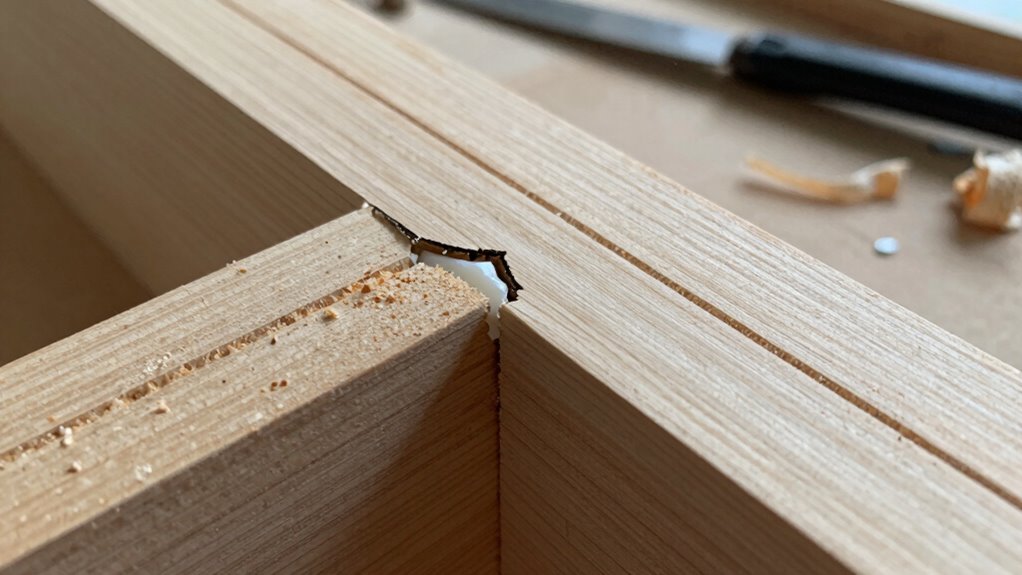
Glue starvation in woodworking joints occurs when insufficient adhesive reaches the contact surfaces, resulting in weak bonds. One common cause is wood moisture; when wood is too dry, it prevents proper glue penetration, creating a barrier that inhibits adhesion. Conversely, overly moist wood can also hinder glue flow by blocking the adhesive’s ability to seep into pores. Properly conditioned wood has the right moisture level, allowing for ideal glue penetration and a strong bond. If the surface is uneven or dusty, the adhesive might not spread evenly, leading to gaps. Additionally, applying glue to surfaces that are too dry or too wet reduces contact and weakens the joint. Ensuring the right moisture content and clean, prepared surfaces is essential to prevent glue starvation. Maintaining proper moisture balance is crucial for optimal adhesion and joint strength. To achieve this, using moisture meters can help monitor and control wood moisture levels effectively. Furthermore, surface preparation including cleaning and sanding, is vital in creating a uniform surface that promotes better glue flow and bonding. Proper surface preparation, including cleaning and sanding, also plays a vital role in preventing glue starvation and ensuring a durable bond.

Rockler 7” Long Silicone Glue Brush – Wood Glue Applicator Ideal for Woodworking & More – Long-Last Silicone to Hold Wet Glue – Easy to Clean Bristles – Waterproof
Adhesive Brush: A wood glue brush that you’ll never have to throw away! Our brush won’t shed bristles…
As an affiliate, we earn on qualifying purchases.
As an affiliate, we earn on qualifying purchases.
Why Moisture Levels Are Key to Strong Wood Joints
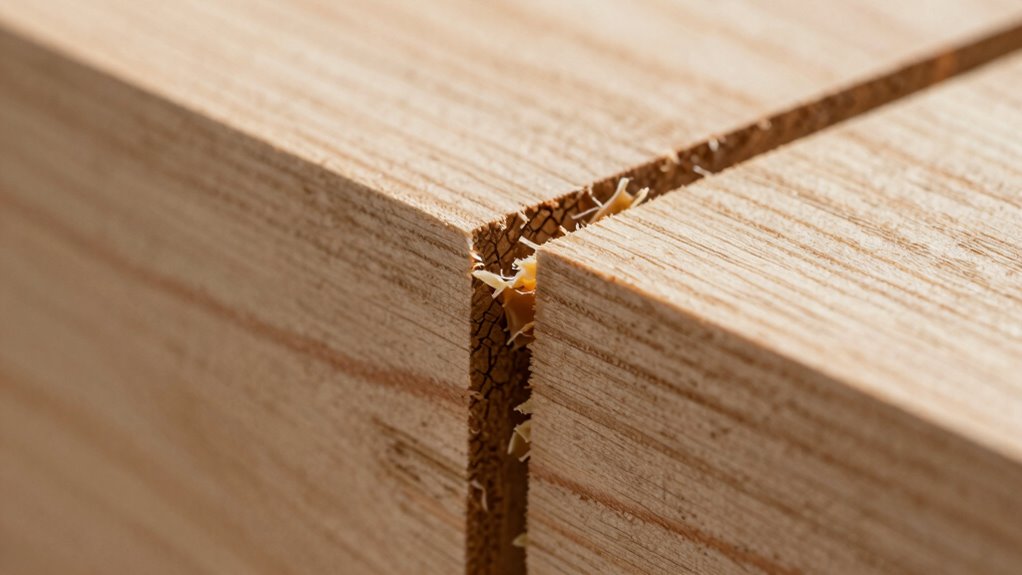
Moisture levels in wood directly influence how well glue can penetrate and form a strong bond. When the moisture content is just right, the wood’s fibers are neither too dry nor too damp, allowing the glue to seep in effectively. If the wood is too dry, it resists swelling, preventing proper glue penetration and leading to weak joints. Conversely, if the wood is overly moist, swelling can create gaps or uneven surfaces that hinder adhesion. Achieving ideal moisture content ensures the wood swells slightly, exposing fresh surfaces for glue to bond tightly. This balance is essential because proper swelling increases contact area and enhances the joint’s strength. Maintaining correct moisture levels helps prevent glue starvation and results in more durable, reliable wood joints. Understanding moisture balance is crucial for achieving optimal gluing results and ensuring long-lasting wood connections. Properly managing moisture content can significantly improve the effectiveness of your woodworking projects, especially when considering factors like air quality considerations that influence moisture levels in your workspace. Additionally, attention to detail during the process ensures that all variables are controlled for the best possible outcome. Ensuring consistent wood moisture levels can also prevent issues caused by fluctuating environmental conditions.

SENCTRL 0-200 Psi Water Pressure Gauge Test with Lazy Hand, Lead-Free, Waterproof, 2.5" Dial Size, 3/4" Female Garden Hose Thread, Stainless Steel Case, for Home Potable Water, House Tube
IP67 Waterproof: The circular dial is enclosed in a 304 stainless steel case for corrosion resistance. The PRV-Tex…
As an affiliate, we earn on qualifying purchases.
As an affiliate, we earn on qualifying purchases.
How to Prepare Surfaces for Better Glue Adhesion
To guarantee your glue bonds effectively, start by cleaning the surfaces thoroughly to remove dust, dirt, and grease that can create barriers to adhesion. Proper surface preparation ensures the adhesive can form a strong bond with the material. Choose an adhesive suited to your project; some adhesives require clean, dry surfaces, while others benefit from slightly textured or roughened areas. Before applying glue, make sure the surfaces are dry and free of contaminants, as moisture or debris can weaken the bond. Using the right adhesive selection for your materials and ensuring clean, well-prepared surfaces will improve adhesion and reduce the risk of glue starvation. Additionally, understanding the importance of creative storytelling in branding can help you craft narratives that reinforce your project’s value and appeal. Emphasizing the significance of surface compatibility can further enhance the effectiveness of your bonding process, reducing the chance of joint failure over time. Taking these steps helps create a solid foundation, leading to stronger, longer-lasting joints, especially when considering material surface prep techniques for optimal results, as proper preparation directly impacts adhesion quality and durability. Incorporating electric dirt bike horsepower considerations can also inform the selection of appropriate adhesives for high-performance applications, ensuring your joints withstand the demands of off-road conditions.

Krud Kutter Gloss-Off Prepaint Surface Preparation Cleaner, 32 oz, No Sanding Liquid Deglosser for Cabinets, Trim, Doors and Furniture, Removes Dirt Grease and Gloss for Paint Adhesion
Prepares Surfaces for Painting Without Sanding Helps remove gloss and dull previously finished surfaces to improve paint adhesion….
As an affiliate, we earn on qualifying purchases.
As an affiliate, we earn on qualifying purchases.
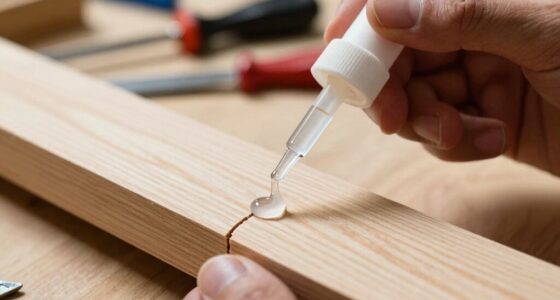
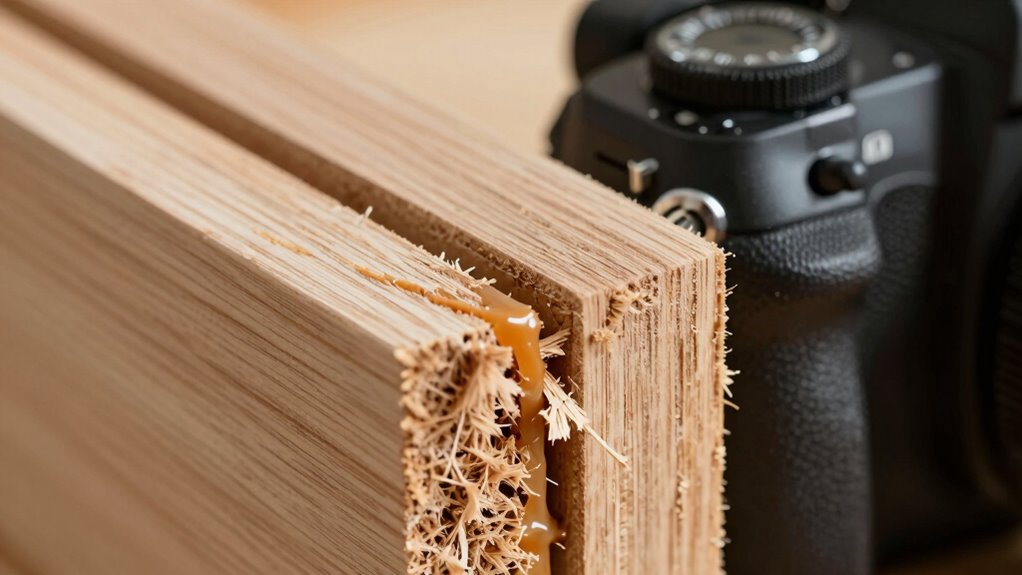
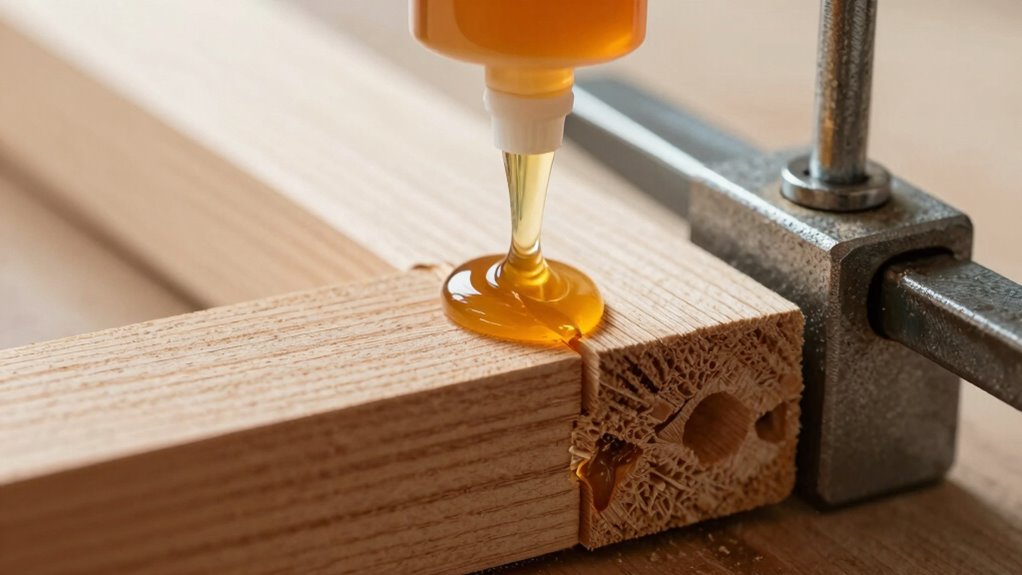
Tips for Applying Glue Properly and Avoiding Starvation
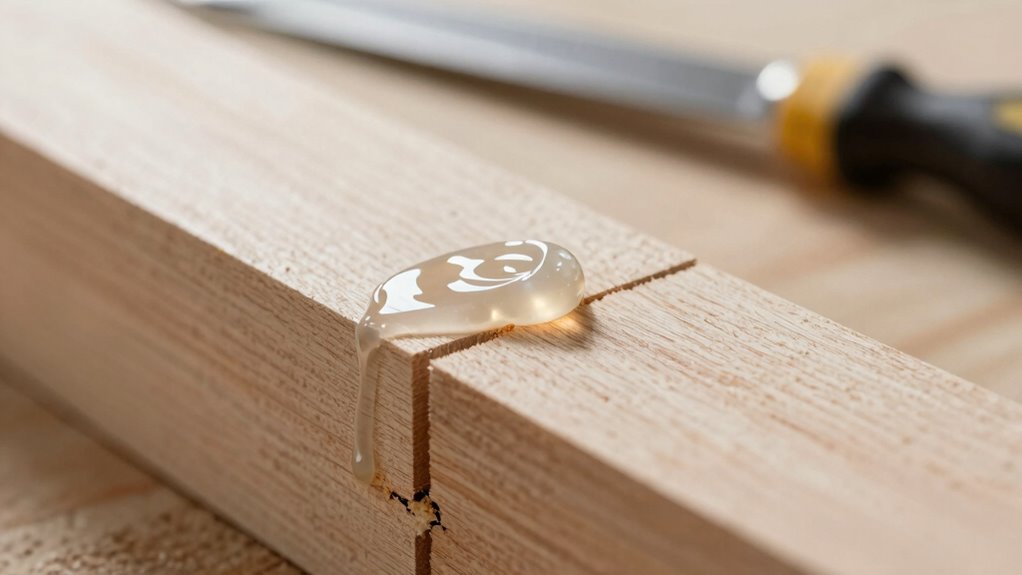
Applying glue evenly and in the right amount is essential to guarantee a strong bond. Proper application ensures ideal adhesive consistency, preventing starved joints. Use a brush, roller, or squeeze bottle to control the amount you spread. Too much glue can delay drying time, while too little risks a weak bond. To help, follow this table:
| Tip | Benefit |
|---|---|
| Use a consistent adhesive thickness | Prevents dry spots and ensures even drying |
| Apply in thin, even layers | Reduces drying time and avoids starved areas |
| Check glue flow and adjust | Maintains suitable adhesive consistency throughout |
Additionally, ensuring the proper adhesive consistency throughout application will help prevent glue starvation and achieve optimal bonding results. Maintaining a application technique that promotes even spread is crucial for consistent bonding quality. Regularly monitoring the adhesive flow rate during application can further help maintain an even layer and avoid starved joints. Consistently assessing the application process helps identify potential issues before they affect the bond.
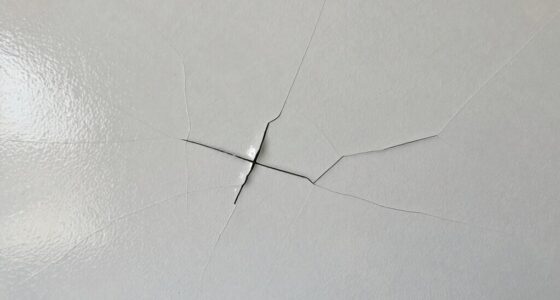
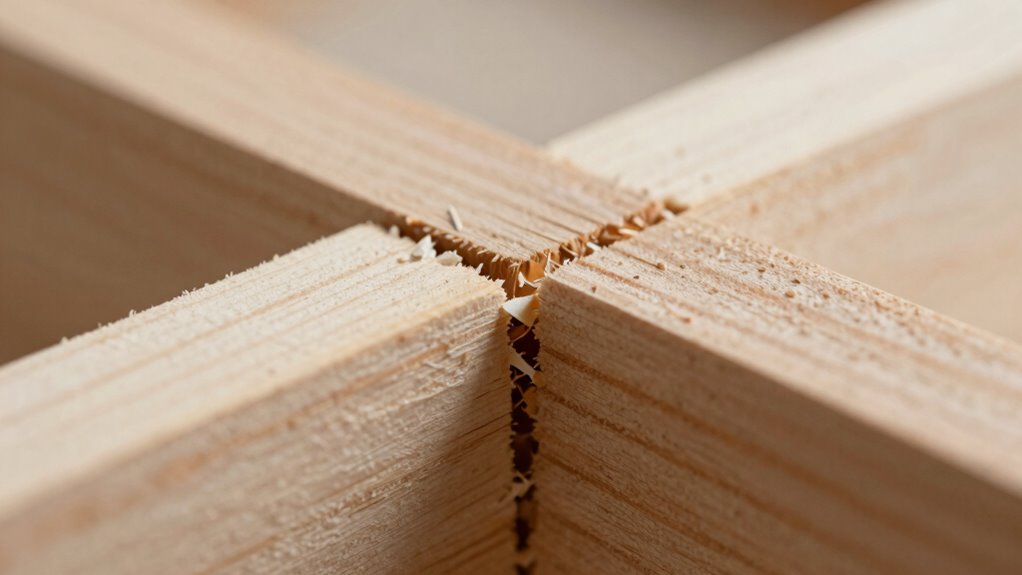
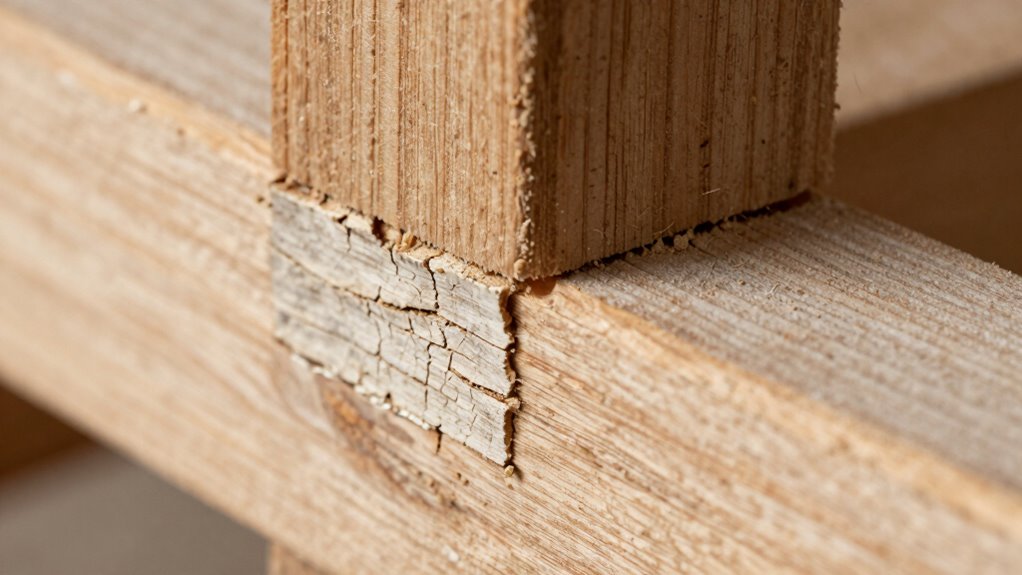
Recognizing the Signs of a “Too Dry” Joint
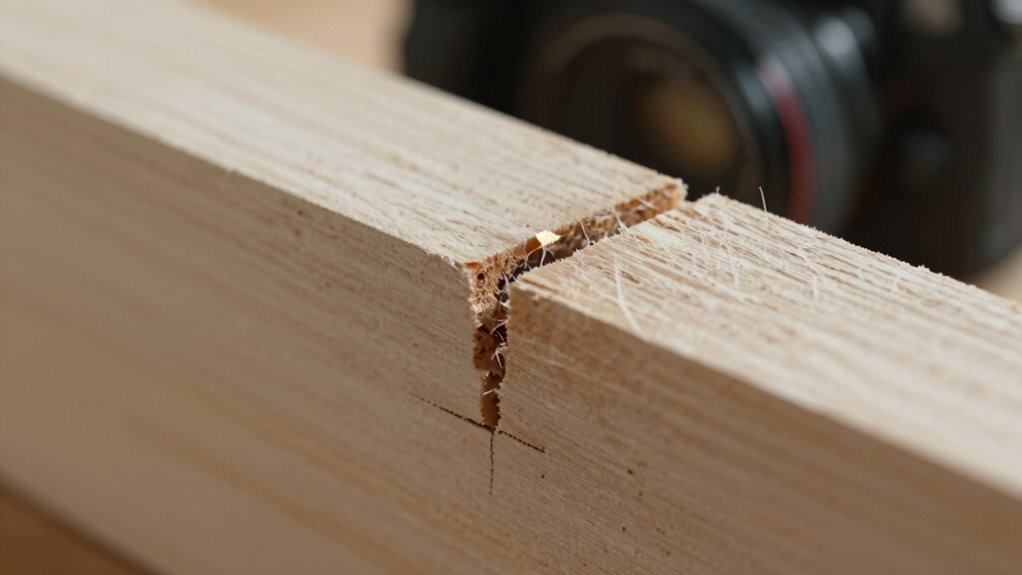
If your joints show visible surface cracks or resist proper clamping, they’re likely too dry. These signs mean the glue hasn’t spread evenly or penetrated fully, risking weak bonds. Recognizing these issues early helps you take corrective action before lasting damage occurs. Proper adhesion techniques can improve the bonding process and ensure a stronger, more durable joint. Additionally, maintaining optimal humidity levels in your workspace can prevent joints from drying out too quickly, enhancing overall adhesion quality. Using appropriate storage methods can also help keep glue from drying out prematurely. Ensuring the correct application method is followed can also significantly reduce the risk of glue starvation and joint failure. Monitoring clamp pressure during assembly can further promote even glue distribution and better adhesion.
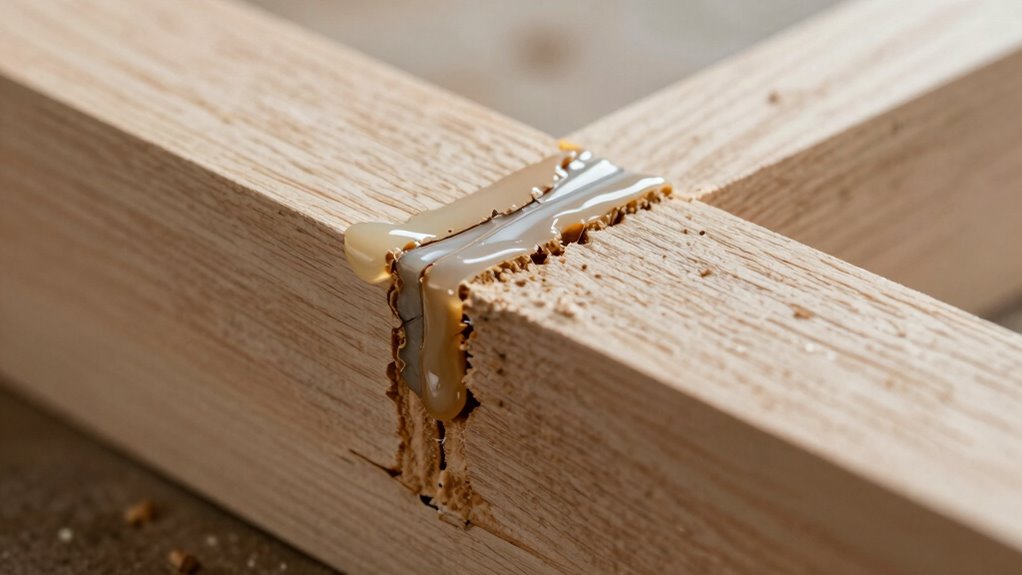
Visible Surface Cracks
Visible surface cracks are a clear sign that your glue joint has become too dry. These cracks can compromise the wood joint aesthetics, making the surface finish look uneven or damaged. When the glue dries too quickly, it shrinks and pulls away from the wood, leaving noticeable lines. Recognizing these cracks early helps you avoid weak bonds or poor appearance later. Below is a quick reference:
| Cracks Indicate | Consequences |
|---|---|
| Excessive dryness | Reduced joint strength, rough surface finish |
| Surface cracks | Detracts from aesthetics, shows poor glue penetration |
| Shrinking glue | Causes visible lines and gaps |
| Poor adhesion | Leads to joint failure over time |
Monitoring for surface cracks ensures a clean, durable, and visually appealing wood joint.
Difficulty Clamping Properly
When a glue joint becomes too dry, you may notice that clamping becomes difficult or inconsistent. Low moisture content causes the glue to lose its tackiness, making it hard to apply even clamp pressure. You might find that the clamps don’t hold the pieces together firmly, or that they slip or loosen easily. This is a clear sign the joint is too dry for effective bonding. Proper clamping requires a certain level of moisture in the glue; if it’s too low, the adhesive won’t flow or penetrate the surfaces properly. To avoid this, monitor the moisture content regularly and adjust clamp pressure accordingly. Recognizing these signs early helps you prevent weak joints caused by glue that’s too dry to set properly.
What Should You Do When You Notice Glue Starvation?
When you spot glue starvation, start by reapplying glue correctly to guarantee proper coverage. Next, adjust your clamping pressure to promote even glue distribution and adhesion. These steps help restore a strong bond and prevent future issues.
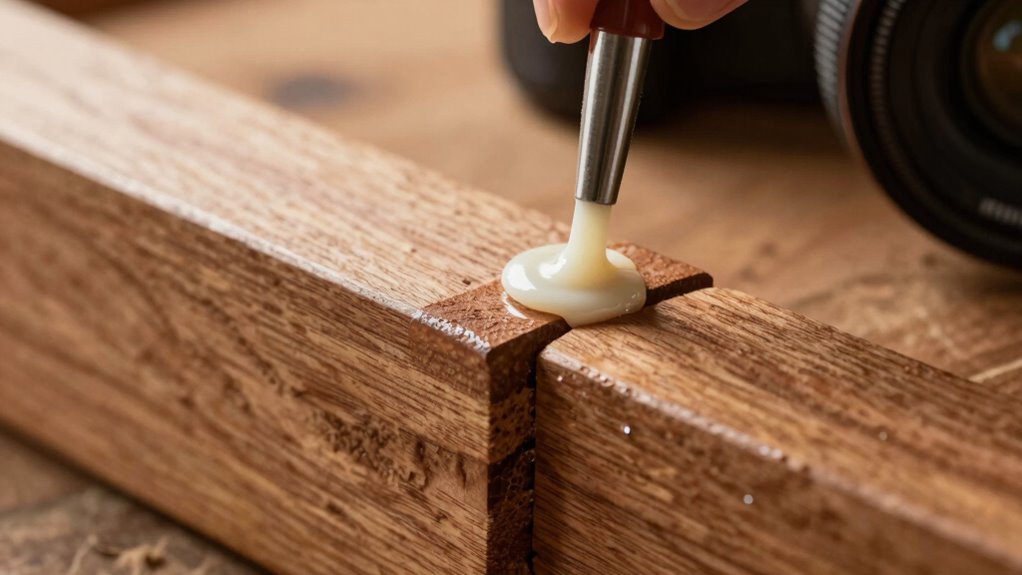
Reapply Glue Properly
If you notice glue starvation during your project, the key is to reapply the glue carefully to guarantee a strong bond. First, check the glue consistency; it should be neither too thick nor too runny. If it’s too dry, it won’t spread evenly, leading to weak adhesion. Reapply a thin, even layer, ensuring good coverage. Keep in mind that drying time varies with glue type and environmental conditions, so allow sufficient time before clamping again. To help visualize, consider this table:
| Glue Consistency | Application Tip | Drying Time Impact |
|---|---|---|
| Too dry | Rehydrate or use fresh glue | Longer, uneven drying |
| Ideal | Apply evenly with a brush | Proper curing time |
| Too wet | Remove excess before clamping | Shorter drying, weak bond |
This approach guarantees proper adhesion and prevents future glue starvation.
Adjust Clamping Pressure
Noticing glue starvation often means the clamping pressure isn’t right; adjusting it promptly can save your project. Too little pressure allows moisture to escape, resulting in a dry joint that lacks adhesion. Increase the clamping pressure gradually to ensure the glue spreads evenly and maintains proper moisture control. Be careful not to overdo it, as excessive force can squeeze out too much glue or damage the wood. Check the joint regularly after tightening to see if the glue appears more vibrant and has filled the joint adequately. Proper clamping pressure maintains the right moisture balance, preventing “too dry” joints. Adjustments should be subtle and deliberate, ensuring the glue remains moist enough to bond effectively without being squeezed out or starved.
Troubleshooting Common Glue Starvation Problems
Troubleshooting common glue starvation problems requires a systematic approach to identify the root causes. First, examine your adhesive chemical’s properties—some glues need specific conditions to flow and bond properly. Next, review your joint design; overly tight or complex joints can restrict adhesive flow, causing dry spots. Third, check application techniques—insufficient coverage or uneven spreading leads to starved areas. Finally, verify clamping pressure and time, as improper pressure can squeeze out too much adhesive, leaving parts dry.
- Inspect adhesive chemical compatibility and viscosity.
- Assess joint design for proper gaps and surface area.
- Ensure even and adequate application coverage.
- Confirm correct clamping pressure and setting time.
Best Glue Types and Tools for Strong Joints
Choosing the right glue and tools is essential for achieving strong, durable joints. Select adhesives with formulations suited for your project—PVA glues work well for woodworking, while epoxy provides superior strength for heavy-duty tasks. Using the proper tools and maintaining them guarantees even application and prevents issues like glue starvation. Keep your brushes, spreaders, and clamps clean and in good condition to avoid contamination or inconsistent adhesion. Here’s a quick comparison:
| Glue Type | Ideal Use |
|---|---|
| PVA | Woodworking, craft projects |
| Epoxy | Heavy-duty, structural bonds |
| Polyurethane | Outdoor or moist environments |
| Cyanoacrylate | Quick fixes, small joints |
| Contact Cement | Laminate surfaces |
Expert Tips for Durable, Starvation-Free Wood Joints
Achieving durable, starvation-free wood joints requires careful technique and attention to detail throughout the assembly process. Proper wood joint design ensures maximum contact and glue coverage, reducing the risk of starved spots. To promote ideal glue curing, always prepare surfaces by sanding and cleaning thoroughly. Here are expert tips to keep your joints strong and reliable:
Ensure strong, durable joints with proper design, surface prep, and controlled clamping.
- Choose joint designs that maximize surface area and contact points.
- Apply glue evenly, ensuring all surfaces are coated without excess or gaps.
- Clamp tightly but avoid over-tightening, which can squeeze out too much glue.
- Allow sufficient curing time in controlled conditions, preventing premature movement or drying issues.
Following these steps helps prevent glue starvation, ensuring your joints are both durable and long-lasting.
Frequently Asked Questions
Can Environmental Conditions Affect Glue Drying Times Significantly?
Environmental conditions can substantially influence glue drying times. Humidity impact plays a key role; high humidity can slow down drying, while low humidity speeds it up. Temperature effects also matter—warmer temperatures typically accelerate curing, whereas colder ones delay it. You should monitor both humidity and temperature to guarantee ideal bonding, especially in environments where conditions fluctuate. Adjusting your workspace or storage can help achieve consistent, strong joints.
How Does Wood Type Influence Glue Absorption and Joint Strength?
Wood type acts like a sponge, soaking up glue differently and shaping your joint’s fate. Hardwoods often absorb less, providing a stronger, more durable bond, while softer woods may swallow more glue, risking weaker joints. You need to take into account wood absorption to guarantee your joint’s strength and longevity. Choosing the right wood for your project directly impacts joint durability, so select wisely to achieve lasting results.
Are There Specific Primers or Treatments to Improve Adhesion on Dry Surfaces?
Yes, you can use surface primers and adhesion treatments to improve bonding on dry surfaces. Apply a suitable primer designed for your material to enhance glue absorption and create a better bond. Adhesion treatments like sanding or applying specialized primers increase surface roughness and chemical compatibility, ensuring your glue adheres firmly. Always follow the manufacturer’s instructions for best results, especially on challenging or dry surfaces.
What Are the Best Practices for Storing Woodworking Glue to Prevent Drying Out?
To prevent your woodworking glue from drying out, store it in a cool, stable environment and keep the lid tightly sealed after each use. Check the glue’s shelf life regularly, as expired glue may lose effectiveness. Maintain a consistent storage temperature, ideally between 50-70°F, to prolong its usability. Proper storage guarantees your glue remains effective, saving you time and money on reapplication or replacements.
How Do I Test if a Joint Is Sufficiently Moist Before Applying Glue?
Think of your joint as a sponge waiting to absorb glue. To test if it’s moist enough, use a moisture meter or perform surface testing by pressing a damp cloth gently against the wood. If the cloth darkens or the meter shows proper moisture levels, your surface is ready. You want just enough dampness to guarantee the glue bonds well without being overly wet, like a lightly damp sponge.
Conclusion
To prevent glue starvation, think of your joints like a sponge—they need the right moisture to absorb and bond properly. By preparing surfaces, applying glue evenly, and choosing the right type, you guarantee your woodworking projects hold strong. Stay attentive to signs of dryness and troubleshoot promptly. With these tips, your joints will be as solid as a rock, giving your craftsmanship the durability and precision it deserves.