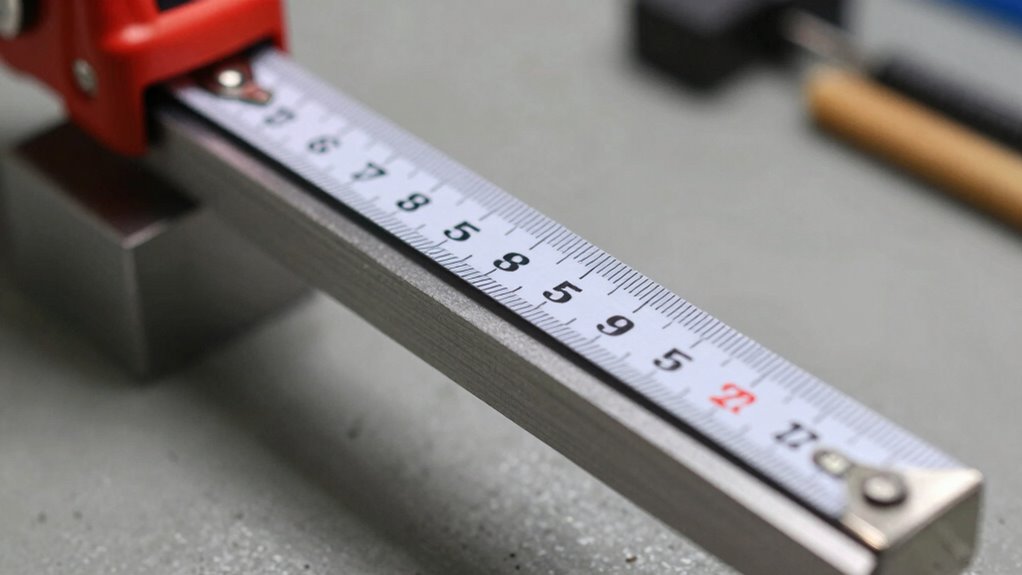
To transfer measurements without errors, use the “reference edge” trick by selecting a stable, well-defined edge as a consistent baseline. Align your tools precisely with this edge, ensuring flush contact and verification of calibration. Properly maintaining the edge and tools helps eliminate inaccuracies caused by surface irregularities or misalignment. If you follow these best practices, you’ll improve measurement accuracy and reliability. Keep exploring to discover detailed steps that make this process even more effective.
Key Takeaways
- Select a stable, well-defined edge that is free from chips or irregularities for accurate measurement transfer.
- Align measuring tools precisely with the reference edge, ensuring flush contact without gaps or tilts.
- Verify calibration of measurement instruments before use to maintain consistent, accurate readings.
- Keep the tools steady during measurement to prevent shifts that could introduce errors.
- Regularly check and maintain the reference edge and tools to ensure ongoing measurement accuracy.
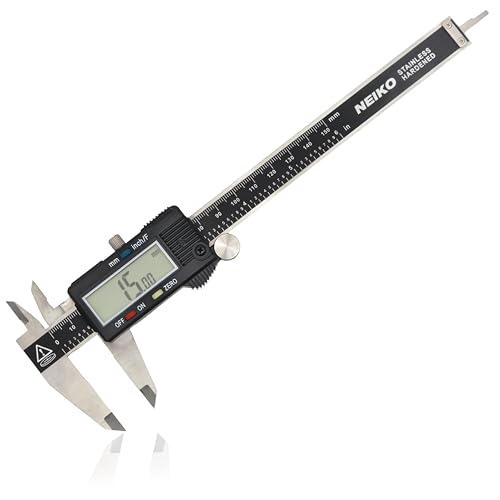
NEIKO 01407A Electronic Digital Caliper Measuring Tool, 0 – 6 Inches Stainless Steel Construction with Large LCD Screen Quick Change Button for Inch Fraction Millimeter Conversions, Digital Caliper Measuring Tool
MULTI-FUNCTION: This measuring tool has a quick-change button that changes between three measuring modes such as inch, fraction,…
As an affiliate, we earn on qualifying purchases.
As an affiliate, we earn on qualifying purchases.
Understanding How the Reference Edge Trick Eliminates Measurement Errors
The reference edge trick works by providing a stable baseline that cancels out common measurement errors. By aligning your tools against this consistent edge, you create a reliable point of reference that minimizes inaccuracies caused by tool imperfections or environmental factors. This approach enhances measurement consistency because you’re effectively standardizing your measurement process. Using calibration techniques, you ensure the reference edge remains precise over time, reducing drift or deviation. The trick relies on selecting a well-defined, stable edge that doesn’t shift during measurements. As a result, you avoid errors caused by tool misalignment or inconsistent measurement points, leading to more accurate transfer measurements. Ensuring high contrast ratios in your setup can also improve the visibility of measurement marks, further increasing accuracy. This method simplifies accuracy without requiring complex adjustments, making it an essential technique for precise work.
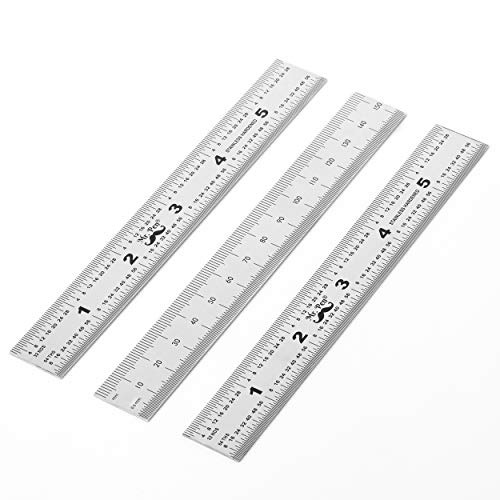
Mr. Pen- Machinist Ruler, 3 Pack, Metric, Precision, Stainless Steel, 6 inch
Mr. Pen machinist rulers come in a set of three, each 6 inches long, designed for precision with…
As an affiliate, we earn on qualifying purchases.
As an affiliate, we earn on qualifying purchases.
Choosing the Best Edge for Accurate Transfer Measurements
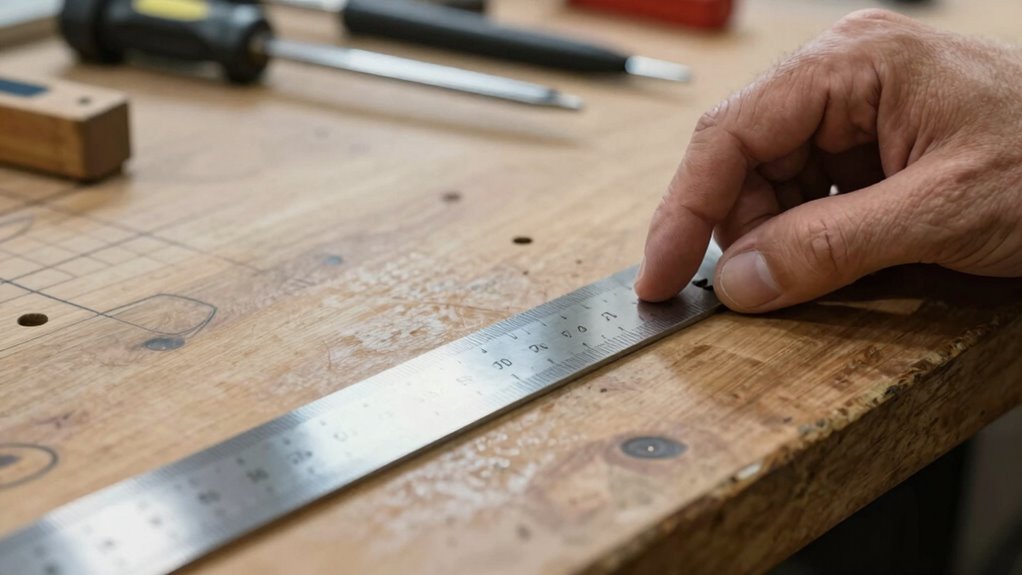
Selecting the right edge is crucial for ensuring transfer measurements are accurate and reliable. Your choice of edge impacts measurement consistency and reduces potential errors. To optimize edge selection, consider these factors:
Choosing the correct edge ensures accurate, consistent measurements and minimizes errors.
- Visibility and Contrast: Choose an edge that’s clearly distinguishable to minimize measurement inaccuracies.
- Stability and Flatness: Select a stable, flat edge to prevent shifting during measurement, ensuring consistency.
- Accessibility: Pick an edge that’s easy to access and align with your measuring tools for precision.
- Understanding Measurement Principles: Familiarity with measurement accuracy helps in choosing an edge that minimizes errors and enhances reliability.

Accurasee Artist 11 Inch Proportional Divider – Upgraded Drawing Supplies & Drafting Tools – Adjustable Caliper & Subject Dividers for Art Drawing Tools (Divider)
NEWLY UPGRADED – Premium design with 30% more proportion choices and durable pointers. Must have artist measurement caliper:…
As an affiliate, we earn on qualifying purchases.
As an affiliate, we earn on qualifying purchases.
Step-by-Step Guide to Applying the Reference Edge Technique
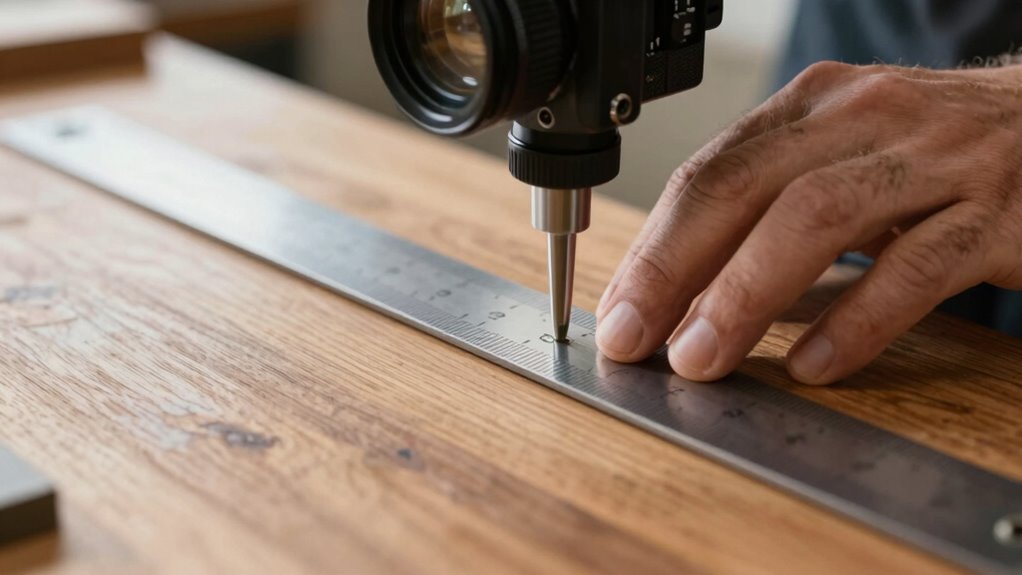
To accurately apply the reference edge technique, start by aligning your measuring tools with the selected edge. Carefully choose an edge that’s straight and clearly visible, as proper edge selection is crucial for accuracy. Position your measuring instrument so that its zero point or reference mark aligns precisely with this edge. Keep the measuring tools steady and make sure they don’t shift during the process. Use your fingers or clamps if necessary to hold the tools in place. Confirm that the tools are flush against the edge and that there’s no gap or tilt. Take your measurement carefully, maintaining contact with the reference edge throughout. This step sets a reliable foundation for error-free transfer measurements, ensuring precision from start to finish. Additionally, understanding the importance of proper calibration can help maintain measurement accuracy over time.

Wound Care Nurse Essentials Cards with Badge Reel – Pressure Injury Staging, Dressing Selection & Braden Scale – Waterproof PVC Reference Guide with Measurement Tools for Home Health, Hospice Nurses
🩸 BETTER THAN A WOUND CARE BOOK Stop flipping through heavy textbooks. This 20-page PVC deck packs critical…
As an affiliate, we earn on qualifying purchases.
As an affiliate, we earn on qualifying purchases.
Common Mistakes to Avoid When Using the Reference Edge
Avoid misplacing the reference edge, as it can skew your measurements from the start. Don’t ignore measurement parity; inconsistent readings lead to errors. Take your time during setup—rushing increases the chance of mistakes that compromise accuracy. Additionally, ensuring your tool calibration is up to date helps maintain measurement precision throughout your project.
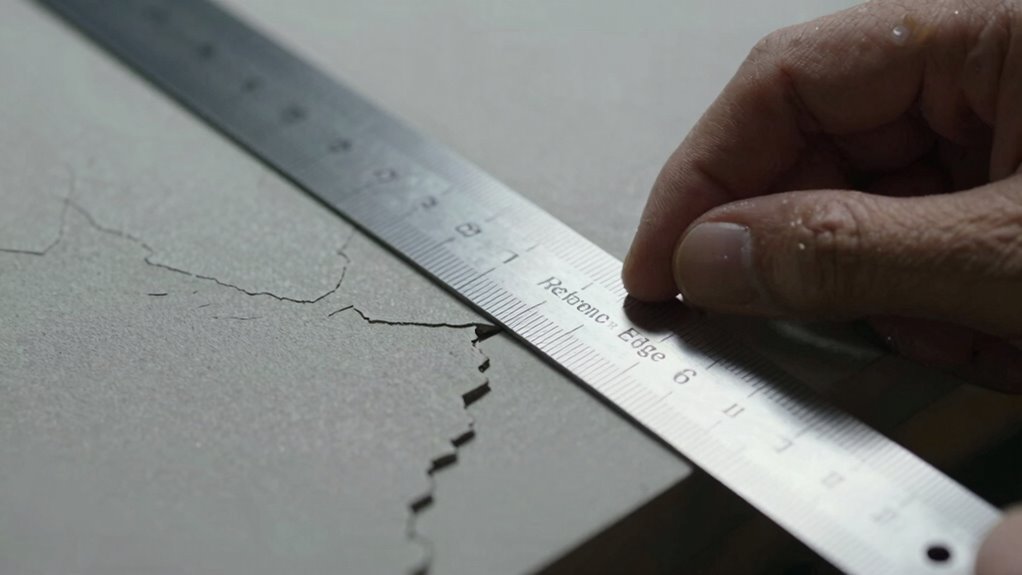
Misplacing the Reference Edge
One of the most common mistakes when using the reference edge is misplacing it, which can lead to inaccurate measurements. Incorrect edge selection or shifting the edge during measurement disrupts measurement consistency. To avoid this, make sure you select a clear, well-defined edge that aligns with your measurement goals. Always double-check that the edge remains in the same position throughout the process. Ensuring proper art care practices can also help maintain the integrity of your measurements over time.
- Confirm the edge’s position before starting any measurement.
- Use a stable, flat surface to prevent shifting.
- Mark or secure the edge if necessary to maintain accuracy.
Ignoring Measurement Parity
Misunderstanding measurement parity can lead to significant errors when using the reference edge. If you overlook the importance of measurement calibration, you risk mismatched readings that throw off your entire transfer process. Always verify your tools are properly calibrated before starting, so the measurements are consistent. Additionally, pay close attention to edge selection; choosing an edge with uneven or irregular features can cause parity issues. When the measurement parity isn’t maintained, your transferred values become inaccurate, defeating the purpose of the reference edge trick. Double-check that your measurement device aligns correctly with the reference edge and that all calibration steps are completed. Avoid rushing through this step, as overlooking measurement parity can introduce errors that compromise the entire process. Moreover, understanding the measurement calibration process ensures your tools provide accurate and reliable data throughout the transfer.
Rushing Setup Procedures
Rushing through setup procedures can lead to mistakes that undermine the accuracy of your measurements. Proper measurement calibration and careful edge selection are critical steps you shouldn’t skip. When in a hurry, you might choose an incorrect reference edge or skip calibration checks, which can cause errors. Confirm you take the time to verify the edge is clean, straight, and properly aligned. Double-check that your measuring tools are calibrated before starting. Avoid the temptation to rush; precision depends on methodical setup. Remember, a small mistake early on can lead to significant errors later. Always allocate enough time to select the ideal edge and perform calibration. Pay attention to measurement accuracy and ensure every step is carefully executed. This attention to detail guarantees your measurements are reliable and reduces the need for rework or correction.
Troubleshooting Difficult or Irregular Edges
Dealing with difficult or irregular edges during transfer measurements can be challenging, but pinpointing the root cause often makes troubleshooting more straightforward. The key is careful edge selection; choose the most consistent, stable edge available. Irregular edges can cause measurement discrepancies, so examine the edge closely for irregularities like chips, curves, or roughness. If your measurements vary considerably, double-check that you’re consistently referencing the same edge and applying the same technique each time. Use a sharp, clean tool or pointer to guarantee precision. When irregularities persist, consider smoothing or trimming the edge with fine abrasive if possible, to improve measurement consistency. Remember, stable and well-defined edges are vital for accurate transfer measurements, so invest time in proper edge assessment and preparation. Additionally, understanding Free Floating principles can help maintain consistent measurements by reducing external influences that may cause edge instability.
Additional Tips to Improve Measurement Accuracy

To improve your measurement accuracy, start by using precise instruments designed for the task. Always double-check your measurements to catch any errors early. These simple steps can markedly enhance the reliability of your results. Additionally, utilizing measurement tools that are properly calibrated ensures consistent and accurate readings.
Use Precise Instruments
Using precise instruments is essential for achieving accurate transfer measurements. Reliable tools minimize errors and guarantee your results are consistent. To maintain accuracy, regularly perform calibration procedures to keep instruments within their specified tolerances. Proper tool maintenance, such as cleaning and storing equipment correctly, prevents damage that can affect measurements. Investing in high-quality instruments also reduces the likelihood of drift over time. Always verify the calibration status before starting, and avoid using worn or damaged tools. Additionally, choosing instruments suited for your specific measurement tasks can significantly improve accuracy instrument selection. Precise instruments help you confidently transfer measurements, reducing the risk of errors that can compromise your project’s quality. Remember, well-maintained and calibrated tools are key to ensuring your measurements are as accurate as possible.
Double-Check Measurements
Double-checking your measurements is a vital step to guarantee accuracy after using precise instruments. To confirm reliability, compare your results against established measurement standards. Employ calibration techniques regularly to verify your tools’ accuracy, especially if you suspect drift over time. Cross-check measurements with different instruments or methods to identify inconsistencies. Document your calibration procedures and results to maintain traceability and confidence in your data. When possible, use certified reference edges or standards to validate measurements, minimizing errors. Double-checking helps catch mistakes early, saving you time and resources later. By integrating calibration techniques and adhering to measurement standards, you reinforce the accuracy of your measurements and reduce the risk of errors propagating through your project.
Benefits of Using a Reference Edge for Reliable Results
A reference edge provides a stable and consistent point of comparison that substantially enhances measurement accuracy. By anchoring your measurements to this reliable feature, you reduce errors caused by surface irregularities or instrument movement. This approach simplifies calibration techniques, ensuring your measurements stay precise across different measurement units. Using a reference edge helps you maintain consistency, especially when transferring measurements between tools or setups. It also minimizes the risk of cumulative errors, giving you confidence in your results. With a solid reference edge, you can focus on fine-tuning your calibration techniques and confidently compare measurements, knowing your data remains reliable. This method streamlines your workflow and improves the overall precision of your measurements.
Frequently Asked Questions
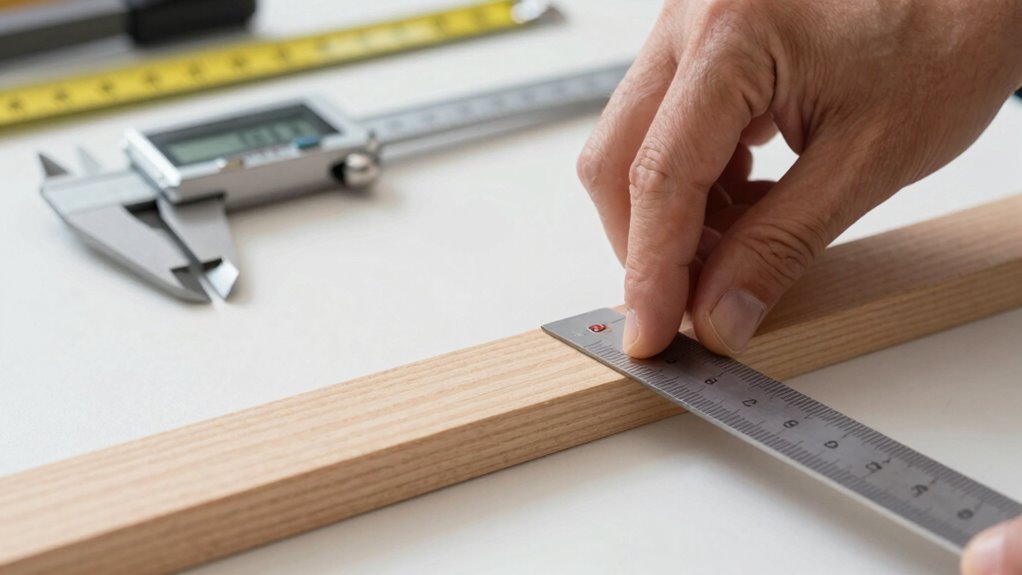
Can the Reference Edge Technique Be Used With Digital Measurement Tools?
Yes, you can use the reference edge technique with digital measurement tools. It improves measurement accuracy by providing a consistent baseline, which digital tools can easily incorporate. Just verify your digital tools are compatible with the measurement method and that you calibrate them correctly. Using this technique with digital tools enhances precision, minimizes errors, and streamlines your workflow, making your measurements more reliable and efficient.
How Does Temperature Variation Affect the Accuracy of the Reference Edge Method?
Temperature variations can throw a wrench into your measurements like unpredictable gusts, causing thermal expansion that shifts the reference edge. This subtle dance makes your readings less reliable, turning calibration challenges into a constant battle. As temperatures rise or fall, your tools expand or contract, making precise transfer tricky. To keep accuracy steady, you need to account for these thermal shifts, ensuring your measurements stay anchored despite the changing environment.
Is This Method Suitable for Measuring Very Small or Very Large Objects?
You can use this method for measuring small objects with high precision, but scaling limitations make it less suitable for very large objects. As objects grow bigger, measurement precision decreases due to potential errors in referencing the edge. For tiny objects, it provides accurate results, but for larger ones, you might need alternative techniques to uphold accuracy. Always consider the scale to ensure reliable measurements.
Can Multiple Reference Edges Be Used Simultaneously for Complex Measurements?
Yes, you can use a multi reference approach for complex measurements, employing multiple reference edges simultaneously. This technique helps improve accuracy by providing additional points of reference, especially when measuring intricate or irregular objects. When implementing this method, guarantee the reference edges are stable and precisely aligned. Using multiple references reduces errors and enhances measurement reliability, making it ideal for complex measurement tasks requiring high precision.
What Types of Materials Are Best Suited for the Reference Edge Measurement Technique?
You might think delicate or highly reflective materials are tricky, but they’re actually perfect for the reference edge method. Soft metals, plastics, and smooth surfaces with good material compatibility and a fine surface finish work best. The technique thrives on surfaces that provide clear, stable edges, making measurements more accurate and less error-prone. So, don’t shy away from these materials—they just might be your best friends in precise measurement tasks!
Conclusion
Think of the reference edge trick as your trusty compass in a foggy sea—guiding you straight to accurate measurements. With this technique, you steer clear of errors and navigate rough edges with confidence. Just like a seasoned sailor relies on landmarks, you’ll trust your reference edge for precise results every time. Master this method, and your measurements will be as steady as the North Star—reliable, clear, and true.