To guarantee your mortise layout never drifts, establish a solid baseline system. Use a sharp marking gauge aligned with a straight reference line, and verify measurements frequently. Keep your work surface stable and well-supported to prevent shifting. Properly calibrate your tools and double-check your marks before cutting. By relying on consistent baselines rather than guesswork, you’ll achieve precise, professional joints every time — and there’s more to mastering this process right ahead.
Key Takeaways
- Establish a precise, straight baseline parallel to the mortise location to serve as a reliable measurement reference.
- Use a sharp marking gauge locked to the correct width and run it along the baseline for consistent scribing.
- Ensure the work surface is stable and well-supported to prevent shifting during marking and layout.
- Double-check measurements and verify layout lines before cutting to avoid drift and inaccuracies.
- Regularly calibrate tools and re-establish the baseline if joint misalignment or surface movement occurs.
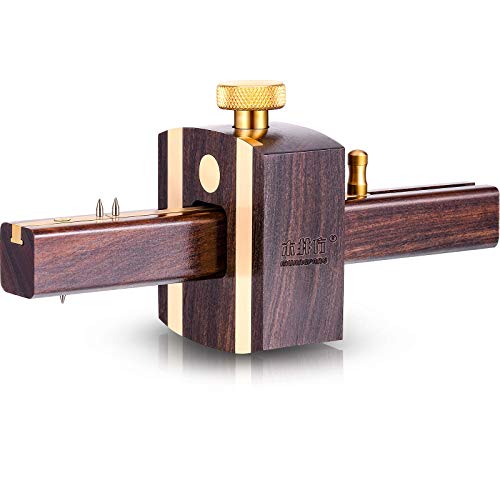
Mortise Gauge Woodworking Marking Gauge Ebony Mortise Square Gauge 6.4 Inches Sliding Mark Scraper Marker Measuring Tool with Brass Screw Type Adjustable Head Meter Carpentry Carpenter Accessories
Multi purpose: this mortise gauge can draw straight lines on wood, with the large adjusting range, suitable for…
As an affiliate, we earn on qualifying purchases.
As an affiliate, we earn on qualifying purchases.
Why Accurate Baselines Prevent Mortise Drift

Accurate baselines are essential because they set a reliable reference point for your entire mortise layout. When your baseline is precise, it ensures mortise accuracy throughout the project. Consistent baselines help you maintain straight, evenly spaced markings, preventing drift as you work. If your baseline shifts or becomes inaccurate, every measurement derived from it will be compromised, leading to misaligned mortises. By establishing a solid, consistent baseline at the start, you minimize the risk of errors that can arise from small inaccuracies. Properly calibrated tools can further enhance the reliability of your measurements. This consistency keeps your measurements true and your mortise layout predictable. Ultimately, reliable baselines form the foundation for precise, professional results, saving you time and frustration while ensuring your mortises fit perfectly every time.
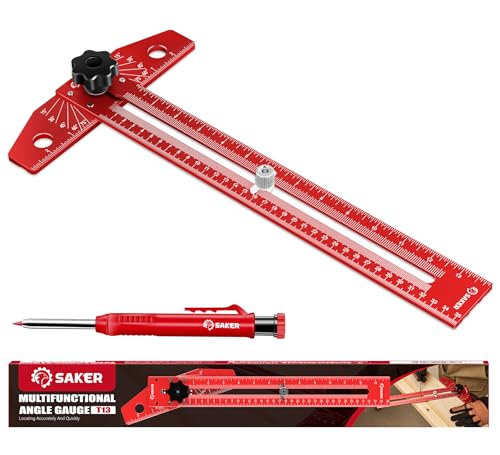
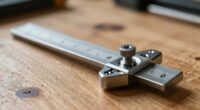
Saker Woodworking Scriber Marking Line Ruler, Adjustable Aluminum Alloy Sliding T-Square Ruler,Precision Line Drawing aid Ruler with Angle Adjustment Scale
【multifunctional T-Square Ruler】The combination of ruler and protractor makes it can measure length and angles easily. The angle…
As an affiliate, we earn on qualifying purchases.
As an affiliate, we earn on qualifying purchases.
What Causes Mortise Marking Errors and How to Avoid Them
Marking errors often happen when you use improper techniques, such as rushing or not double-checking your measurements. If your tools aren’t set up consistently, small mistakes can quickly add up. Additionally, working on an unstable surface makes it hard to keep your markings precise and reliable. Incorporating standardized procedures can help ensure consistency and accuracy in your markings.
Improper Marking Techniques
Improper marking techniques are a common cause of mortise layout errors, often resulting from rushing or using inaccurate tools. When you neglect proper marking methods, your marking precision suffers, leading to misaligned mortises. Inaccurate measurement accuracy can cause your layout to drift, affecting the fit and strength of the joint. To avoid these issues, take your time and double-check measurements before marking. Use sharp, quality tools for clean lines, and ensure your marking devices are properly calibrated. Always work on a stable, flat surface to prevent shifting. Precise marking is the foundation of a perfect mortise; rushing or careless marking compromises that foundation, risking misalignment and weak joints. Focus on accuracy at every step to ensure your mortise layout remains true.
Inconsistent Tool Setup
Inconsistent tool setup can silently cause mortise marking errors, undermining even careful measurements. When your tools aren’t properly calibrated or when operator consistency falters, inaccuracies creep in. Imagine these common pitfalls:
- A marking gauge set unevenly, creating skewed lines.
- A chisel guide slipping due to loose adjustments.
- Calibration drift in marking tools over time.
- Variations in how different operators handle the same tool.
Each of these issues leads to inconsistent results. To avoid them, regularly check your tools’ calibration, maintain tight adjustments, and develop consistent handling techniques. Ensuring your tools are set up correctly every time minimizes errors and keeps your mortise markings precise. Operator consistency and proper tool calibration are key to achieving reliable, drift-free layouts. Additionally, understanding the importance of baseline stability helps maintain accuracy over multiple projects.
Unstable Work Surface
An unstable work surface can cause mortise marking errors by allowing your layout tools to shift or wobble during measurement. When your bench isn’t secure, even slight movements can lead to inaccurate markings, ruining your precise baseline. To avoid this, verify your work surface has solid clamping stability, preventing movement during layout. Also, consider material flexibility—if your surface flexes under pressure, it compromises accuracy. Use quality clamps and support blocks to lock your piece firmly. Here’s how instability affects you:
| Effect | Emotion |
|---|---|
| Wobbly surface causes inaccuracies | Frustration and doubt |
| Flexing surface distorts measurements | Anxiety over precision |
| Poor clamping leads to shifts | Loss of confidence |
| Unstable setup wastes time | Stress and disappointment |
Additionally, ensuring your work surface is properly supported and free from movement is essential for maintaining consistency in your measurements.

Clarke Brothers Wheel Marking Gauge – Woodworking Marking Scriber Kit With 2 Replacement Cutters – Wood Marking Tools With Graduated Inch & MM Scale – Solid Metal Bar Wood Scribe Tool For Carpenter
✅ PATENT PENDING – ROLL STOP FENCE WITH FLAT SPOT – woodworking tasks with a high-end wheel marking…
As an affiliate, we earn on qualifying purchases.
As an affiliate, we earn on qualifying purchases.
How to Set Up a Reliable Baseline System in Your Workshop

To establish a dependable baseline system, start by choosing a consistent reference edge that you always work from. Use accurate measuring tools and double-check your marks regularly to maintain precision. These small steps ensure your layout stays true and prevents drifting over time. Incorporating rigorous measurement techniques can further improve your setup’s accuracy and reliability.
Choose Consistent Reference Edge
Choosing a consistent reference edge is essential for establishing a reliable baseline system in your workshop. To do this effectively, pick an edge that aligns with the grain direction and material consistency. Imagine:
- Marking the smooth face of a board, ensuring it runs parallel to the grain.
- Clamping the board securely so it won’t shift during layout.
- Using a square to verify that your chosen edge is perfectly straight and true.
- Consistently referencing this edge for all measurements, cuts, and layout lines.
Use Accurate Measuring Tools
Using accurate measuring tools is essential for establishing a dependable baseline system in your workshop. Precise measurements depend on consistent measuring accuracy and proper tool calibration. Regularly check and calibrate your tools to prevent errors that could drift your baseline. Invest in quality tools like calipers, squares, and rulers, and verify their accuracy before use. Keep a record of calibration dates to ensure ongoing precision. Use tools with clear graduations and minimal wear to avoid misreading measurements. The table below compares common measuring tools, highlighting calibration needs and typical accuracy:
| Tool | Calibration Frequency | Typical Accuracy |
|---|---|---|
| Steel Ruler | Annually | ±0.2 mm |
| Vernier Calipers | Monthly | ±0.02 mm |
| Combination Square | Quarterly | ±0.1 mm |
| Tape Measure | Annually | ±1 mm |
| Dial Caliper | Monthly | ±0.01 mm |
Additionally, understanding the proper measuring techniques ensures that your baseline remains accurate over time.
Mark and Check Regularly
Regularly marking and checking your baseline points keeps your measurements reliable over time. Consistent marking accuracy ensures your layout remains precise, preventing drift. To do this effectively:
- Double-check your marks after each measurement to catch any errors early.
- Use a sharp, fine-point pencil or scribe for clear, accurate lines.
- Verify your baseline points against a known reference before proceeding.
- Re-mark and re-check periodically as you work to maintain measurement consistency.
This routine helps you catch discrepancies before they compound. By maintaining strict marking accuracy and frequent verification, you create a stable, dependable baseline system that keeps your mortise layout true, no matter how long you work or how many adjustments you make.

Kreg Portable Work Surface – Compact Workbench – Ultra Flat Fiberboard Work Surface – Dog Hole Clamping Versatility – Stable Portable Work Table – DIY Workspace – KWSJAWS
Portable Work Surface: Compact, space-efficient workbench designed to create a stable DIY workspace wherever you need it
As an affiliate, we earn on qualifying purchases.
As an affiliate, we earn on qualifying purchases.
What Tools Help You Establish Precise Mortise Baselines

Establishing precise mortise baselines is essential for accurate joinery, and the right tools make all the difference. Marking gauges are crucial for scribing consistent, straight lines parallel to your mortise location, ensuring your baseline stays true. Use a sharp marking gauge to transfer measurements accurately from your layout to the workpiece. Router bits also play a critical role; a good-quality straight bit allows you to define the mortise’s edges cleanly and precisely, especially when combined with guides or jigs. For even greater accuracy, consider a mortise jig with built-in reference edges. These tools help you establish and maintain a consistent baseline, reducing drift and ensuring your mortise aligns perfectly with your intended layout. Proper tool selection simplifies the process and leads to tight, accurate joints. Incorporating precision tools can further enhance your accuracy and efficiency in establishing reliable mortise baselines.
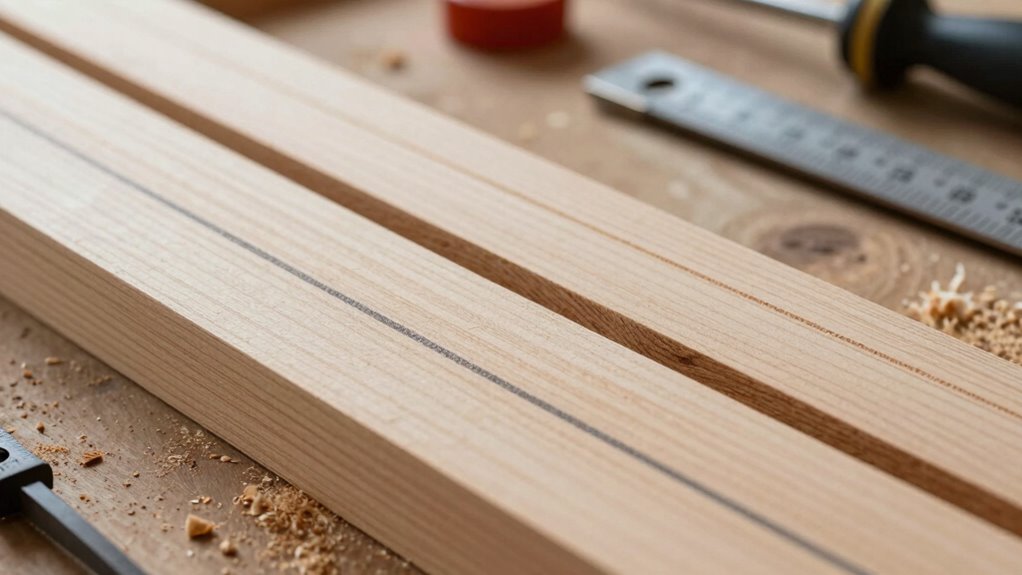
How to Mark a Mortise Using Baselines Step-by-Step

To mark a mortise accurately, start by aligning your marking gauge with your established baseline. Use a mortise template for consistent width, and verify your marking gauge’s pin rests firmly against the template’s edge. Next, follow these steps:
Align your marking gauge with the baseline and use a template for precise mortise width.
- Set your marking gauge to the desired mortise width, locking it in place.
- Secure your workpiece, aligning the baseline precisely with your marking gauge’s fence.
- Run the gauge along the baseline, scribing a clean, straight line across the surface.
- Repeat the process on the opposite side, ensuring parallel lines that define the mortise boundaries.
- Confirm the accuracy of your layout by measuring between the lines before proceeding to cut.
How to Fix and Prevent Mortise Drift Over Time

Mortise drift occurs when the walls of the mortise shift or become uneven over time, compromising the fit and strength of your joint. To fix this, first check the joint alignment by inspecting the mortise and tenon for unevenness or gaps. If drift has occurred, carefully remove the affected wood and re-establish proper joint alignment. Regular tool calibration is essential—ensure your chisels and marking gauges are precise to prevent future drift. Consistent calibration helps maintain accurate measurements and a stable baseline. Additionally, re-mark the mortise using your baseline references before re-cutting. By adjusting your tools and verifying alignment regularly, you prevent drift from recurring, ensuring your mortise stays true and your joints remain strong over time.
Benefits of Using Baselines Instead of Guesswork in Joinery

Using baselines instead of guesswork in joinery guarantees your measurements are accurate and your fits are precise. When you rely on a well-established baseline, you eliminate errors caused by inconsistent measuring accuracy or miscalibrated tools. Imagine:
- Marking a line that’s perfectly aligned along a true reference edge.
- Repeatedly checking your tool calibration to maintain consistency.
- Ensuring every cut follows a reliable, unwavering baseline.
- Achieving tight, seamless joints without the need for rework.
Additionally, understanding media literacy helps you verify the information and techniques you use, ensuring your craftsmanship is based on trustworthy knowledge.
Frequently Asked Questions
How Do Environmental Changes Affect Baseline Accuracy Over Time?
Environmental changes, like climate fluctuations and seasonal expansion, can impact baseline accuracy over time. You might notice baseline shifts as temperature and humidity cause materials to expand or contract. These changes can lead to misalignments if you don’t account for them. To maintain precision, you must regularly monitor and adjust your baselines, ensuring they reflect current conditions and prevent drift caused by environmental variations.
Can Digital Tools Improve Baseline Consistency in Mortise Layout?
Sure, digital tools can improve baseline consistency, making your mortise layout feel like a high-tech masterpiece. With digital calibration, you can precisely align your baseline, avoiding the chaos of guesswork. Tool precision becomes effortless, even in tricky environments. Ironically, while digital may seem like overkill, it actually saves time and frustration, turning what used to be a gamble into a reliable, repeatable process—so your mortise stays perfectly on track every single time.
What Are Common Mistakes Beginners Make When Establishing Baselines?
You often make mistakes with measurement accuracy when establishing baselines, like rushing or misreading measurements. You might skip calibrating your tools, leading to inaccuracies. Always double-check your tools and verify they’re properly calibrated before marking. Relying on guesswork instead of precise measurements causes drift. Take your time, verify measurements, and use consistent reference points to keep your baselines accurate and stable throughout your project.
How Often Should You Check and Recalibrate Your Baseline System?
Think of your baseline system as a compass that needs regular checking. You should calibrate it frequently—ideally daily or whenever environmental conditions change markedly. Environmental monitoring helps you spot drift early. Regular calibration frequency ensures your layout stays accurate, preventing errors from accumulating. Don’t wait for issues to become obvious; consistent checks keep your baseline steady, guiding your work with confidence and precision.
Are There Specific Wood Types That Are More Prone to Baseline Drift?
Yes, certain wood types are more prone to baseline drift due to their characteristics. Softwoods like pine or cedar, with their variable grain patterns and higher moisture content, tend to shift more over time. Hardwoods such as oak or maple are more stable because of their denser structure and consistent grain. You should pay close attention to the wood’s grain patterns and moisture levels to guarantee your baseline remains accurate.
Conclusion
By mastering reliable baselines, you’ll never have to worry about mortise drift again—your joinery will be so precise, it’ll look like magic. Say goodbye to guesswork and hello to perfect fits every time. With these techniques, you’ll craft projects so flawless, they’ll make professional shops jealous. Once you’ve set your baseline system, you’ll wonder how you ever worked without it—your woodworking skills will reach legendary status!