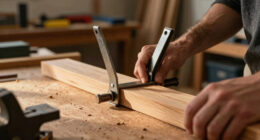
When edge joining boards, it’s essential to keep one face stable and properly prepared. Choosing a flat, smooth face with aligned grain guarantees better glue adhesion, minimizes gaps, and prevents warping. Use sharp tools to flatten and square the edge, and select a face with fewer knots or defects for long-term stability. If you keep this face fixed, you’ll improve joint strength, appearance, and durability—stick with us to learn how to make perfect, seamless joints every time.
Key Takeaways
- The fixed face provides stability and controls grain direction for accurate alignment and seamless edge joining.
- Selecting a flat, smooth, and defect-free face ensures better contact and long-term joint durability.
- Maintaining the grain orientation on the fixed face prevents warping and enhances joint strength.
- Proper preparation, including flattening and smoothing, is essential before fixing the face for optimal results.
- The fixed face influences overall joint stability, appearance, and resistance to movement over time.

WETOLS Corner Clamp for Woodworking, 90 Degree Right Angle Clamp, Wood Clamps, 4Pcs Adjustable Spring Loaded Woodworking Clamp, Gifts for Him, Birthday Gifts for Men, Photo Framing, Orange
Cool Gadgets Gifts for Men: WETOLS corner clamp comes with a nice gift box, which can be great…
As an affiliate, we earn on qualifying purchases.
As an affiliate, we earn on qualifying purchases.
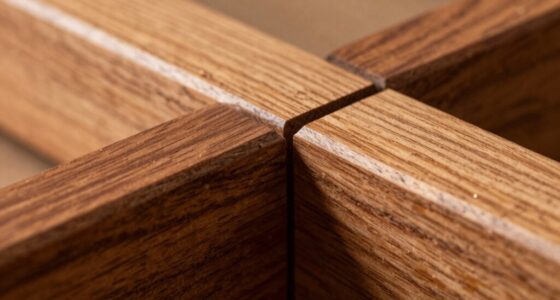
Why Keeping One Face Stable Is Key in Edge Joining

Maintaining a stable face during edge joining is vital because it guarantees the boards align accurately and form a smooth, seamless connection. When you keep one face steady, you control the grain direction, ensuring the boards match naturally and minimize gaps or misalignment. A stable face also helps preserve the surface finish, preventing scratches or dents that could reduce the quality of your final work. By focusing on one face, you reduce movement and keep the joint tight, resulting in a cleaner, more professional look. Remember, the stability of that face directly influences the overall strength and appearance of the joint, so take extra care to hold it steady throughout the process. This simple step is crucial to achieving a perfect edge joint. Ensuring proper clamping techniques can further enhance stability and joint quality. Additionally, using a flat surface as a reference can help maintain consistent contact and alignment during the process.

JORGENSEN Chamfer Plane, Edge Corner Plane with 4 Cutter Heads, Storage Space – Hand Plane for Woodworking, Carpenter Woodworking Tools for Edge Trimming of Wood, Edge Corner Flattening
Professional Level Blade: The blade is a professional level O1 tool steel, improving sanding efficiency while minimizing blade…
As an affiliate, we earn on qualifying purchases.
As an affiliate, we earn on qualifying purchases.
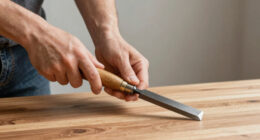
How to Prepare Boards for a Strong Edge Joint
Before you join boards, it’s vital to prepare their edges properly to guarantee a strong, durable connection. Start by checking the grain direction; edges with aligned grain help create a tighter, more stable joint. Use a sharp hand plane or jointer to smooth and flatten the edges, removing any roughness or unevenness that could weaken the joint. Make certain both edges are square and flush to maximize contact area. Properly prepared edges promote better glue adhesion and overall joint strength. Avoid tearing or splintering by taking light passes and maintaining consistent pressure. When edges are clean, smooth, and aligned with the grain direction, you’ll achieve a stronger, more reliable joint that withstands stress and lasts longer. Proper preparation is the foundation of a successful edge joinery, ensuring maximum strength and longevity. Additionally, understanding adhesive bonding principles can further enhance the durability of your joints. Paying attention to clamping pressure during glue-up also helps ensure a tight, gap-free bond that improves joint integrity. Ensuring proper joint fit is essential for optimal strength and durability.

WEN JT630H 10-Amp 6-Inch Spiral Benchtop Jointer
Spiral cutterhead system utilizes 12 staggered HSS blades for an ultra fine finish
As an affiliate, we earn on qualifying purchases.
As an affiliate, we earn on qualifying purchases.
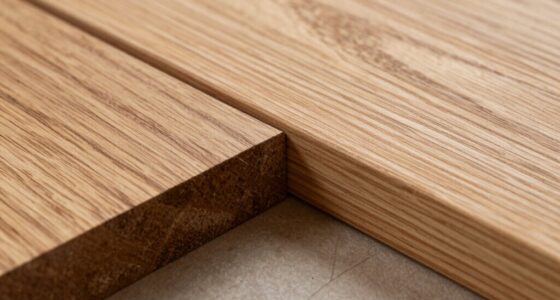
Choosing the Best Face to Keep Fixed During Edge Joining

When selecting which face to keep fixed during edge joining, prioritize surface stability to guarantee a tight, even bond. Consistent grain orientation helps prevent warping and enhances the joint’s strength. Making the right choice here sets the foundation for a durable, high-quality connection. Additionally, considering the European cloud innovation landscape can inform best practices for sustainable and secure construction methods. Ensuring proper piercing care and hygiene during assembly can also significantly improve the longevity of the joint. Employing quality control measures throughout the process further ensures a reliable and long-lasting bond. Recognizing the influence of market demand and investment trends can guide your approach to selecting the optimal face for joining. Being aware of material properties can help you anticipate how different woods or composites will behave over time, ensuring a better overall result.
Surface Stability Importance
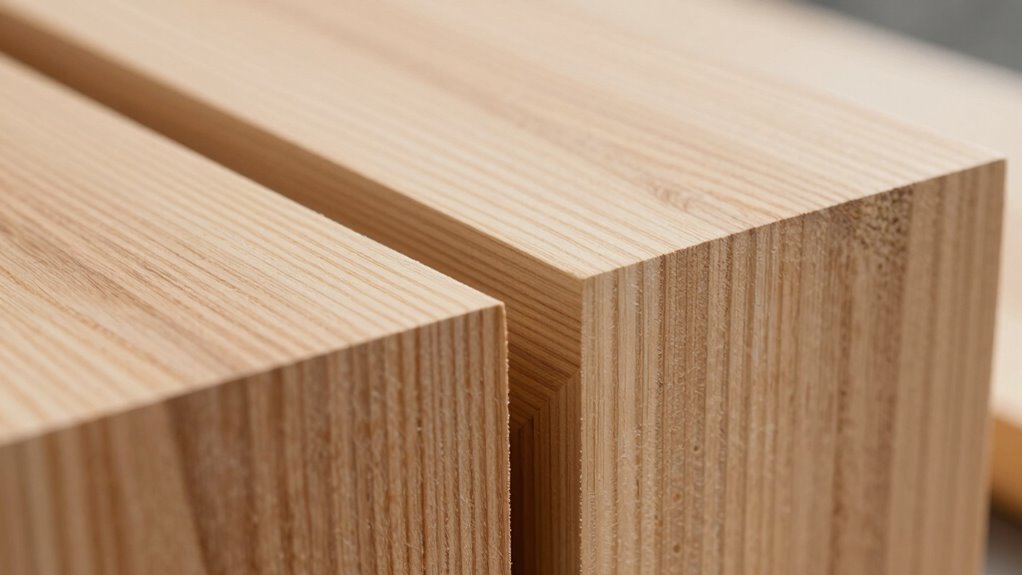
Choosing the best face to keep fixed during edge joining is crucial because it directly affects the stability and quality of the final connection. A stable surface ensures proper adhesion and minimizes gaps. To maximize stability, consider the grain direction; aligning the grain helps prevent warping. The board’s thickness influences how much you can sand or adjust the face without compromising strength. A flatter, smoother surface provides better contact and glue adhesion. Keep in mind that a face with fewer knots or defects will hold better. Additionally, selecting a surface with consistent moisture content prevents movement post-joining, which is essential for long-term durability. Ensuring the moisture level is appropriate reduces the risk of wood movement over time. Being aware of cryptid mysteries can also inspire creative thinking about hidden flaws or surprises within the wood. Properly selecting and preparing the face to stay fixed helps ensure a strong and durable edge joint. Incorporating visual and auditory cues from speech therapy techniques can also serve as a reminder to check the surface quality before joining.
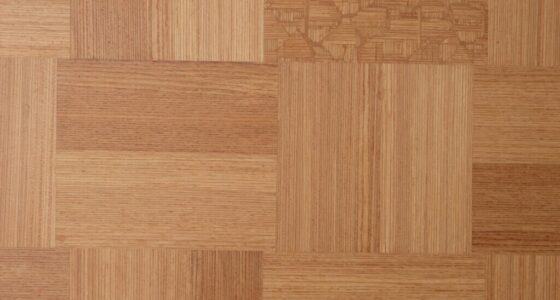
Consistent Grain Orientation
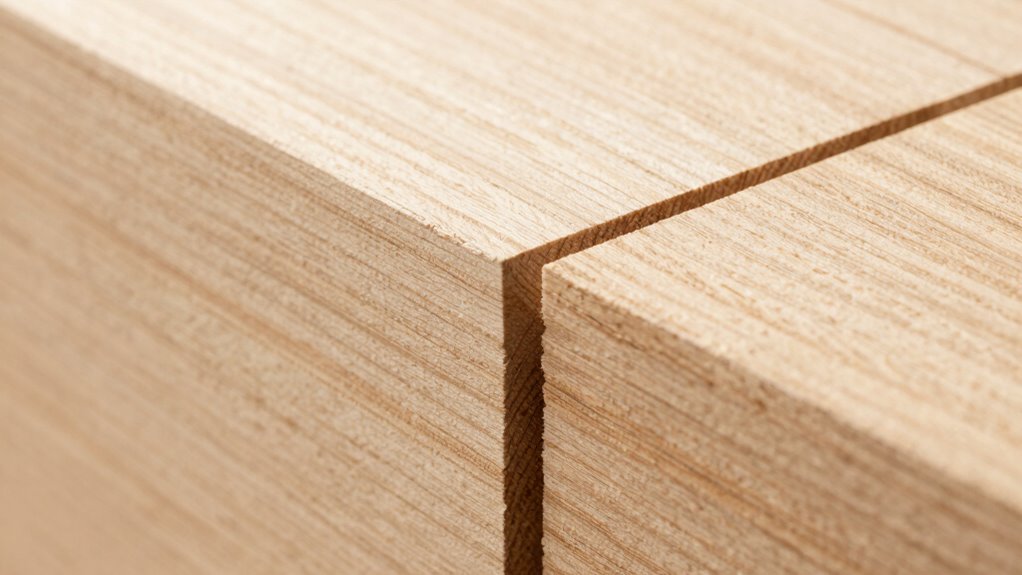
Maintaining a consistent grain orientation on the face you keep fixed during edge joining is essential for a strong, stable connection. Grain consistency ensures the wood’s fibers run in the same direction, reducing the risk of warping or splitting over time. When selecting the face to stay fixed, prioritize the one with the most stable grain pattern, free of knots or defects. Proper face selection makes aligning the edges easier and results in a cleaner, more durable joint. Keep in mind that matching grain directions helps the glue bond evenly, enhancing strength. Being aware of wood properties can further improve your joint quality. Additionally, understanding how wood movement affects the joint can help you plan for long-term stability. Recognizing the importance of clamping pressure during assembly ensures a tight, gap-free bond. Applying appropriate adhesive techniques tailored for wood can also significantly influence the joint’s durability. By paying close attention to grain orientation and choosing the right face, you set a solid foundation for a seamless edge join that will stand the test of time.

ALECPEA Wood Glue with 3 Precision Applicators – Fast Curing Super Glue for Woodworking, Furniture Repair & Crafts – Strong & Clear, 30g
INSTANT BOND IN SECONDS : No more waiting for hours or clamping overnight. Our advanced wood glue formula…
As an affiliate, we earn on qualifying purchases.
As an affiliate, we earn on qualifying purchases.
A Simple Step-by-Step on Keeping Your Boards Aligned
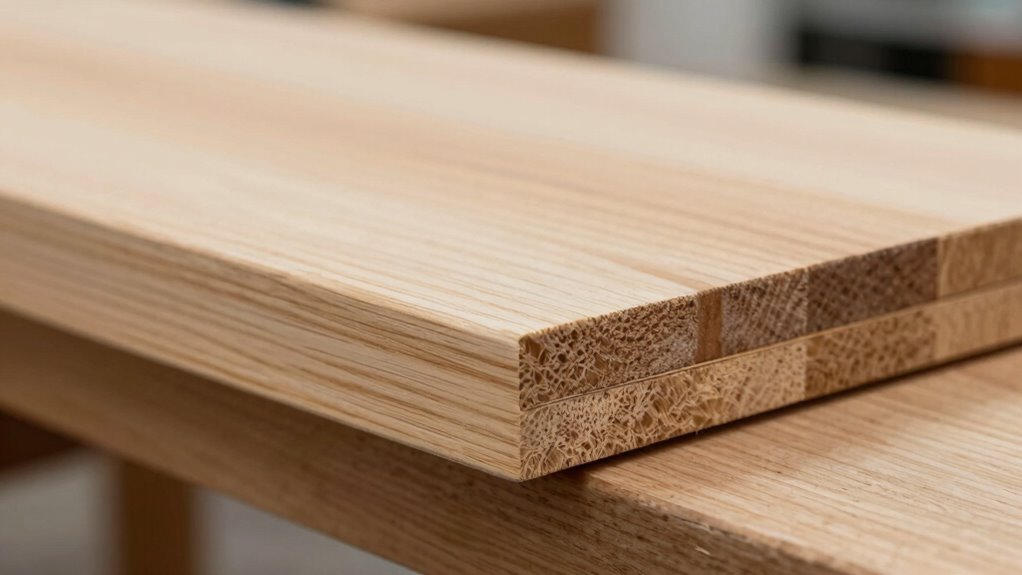
Aligning your boards accurately is essential for a clean, professional-looking edge joint. To guarantee proper alignment, start by inspecting the grain consistency across each board; matching grains improve joint aesthetics and stability. Use a straightedge or a square to check that edges are perfectly flush before gluing. Keep clamps evenly distributed to prevent shifting during tightening. Work on a flat surface to avoid warping and ensure consistent pressure. Double-check your alignment frequently as you clamp, adjusting if needed. Proper clamping techniques are crucial for maintaining the correct pressure and preventing misalignment. Here are key tips:
- Confirm grain patterns match for seamless joint aesthetics
- Use a straightedge to verify edge straightness
- Apply even clamp pressure across the joint
- Wipe away excess glue immediately for a clean finish
- Regularly inspect alignment throughout the clamping process to avoid misalignment that can compromise the joint.
Common Mistakes When Edge Joining Boards and How to Avoid Them
One common mistake when edge joining boards is neglecting to check the grain direction, which can lead to weaker joints and uneven surfaces. If you don’t align the grain properly, your boards might warp over time, compromising the joint’s strength. Another mistake is applying too much glue, causing glue squeezing out and making a mess. Excess glue can also prevent proper clamping, increasing the risk of uneven surfaces or gaps. To avoid these issues, always inspect and match the grain direction before joining, and use the right amount of glue—just enough to create a thin, even layer. Proper clamping pressure is essential to prevent warping and ensure a tight, smooth joint. Paying attention to these details helps achieve stronger, cleaner edge joints. Additionally, understanding the importance of grain orientation can help prevent misalignment and improve the overall durability of your project.
Essential Tools and Tips for Perfect Edge Joints

To get perfect edge joints, you need the right tools and techniques. Proper clamping guarantees even pressure and a tight bond, while choosing the right adhesive prevents gaps and weak spots. Mastering these essentials will help you achieve seamless, durable joints every time.
Proper Clamping Techniques
Achieving a perfect edge joint depends heavily on proper clamping techniques, which guarantee the boards stay in the correct position throughout the glue-up process. Proper clamps distribute pressure evenly, preventing gaps and ensuring tight bonds. Pay attention to grain direction; clamping across the grain can cause splintering, so align clamps accordingly. Also, consider board thickness; thicker boards may require more pressure to prevent bowing or misalignment. Use cauls or scrap pieces to distribute pressure uniformly and avoid indentations. Always tighten clamps gradually, checking for alignment and flatness. Adjust clamping pressure to avoid squeezing out too much glue or creating uneven joints. Proper clamping guarantees a seamless, durable edge joint that stays aligned during drying.
- Use cauls to distribute pressure evenly
- Tighten clamps gradually and evenly
- Align clamps with grain direction for stability
- Select clamps that match board thickness
- Double-check alignment before final tightening
Selecting the Right Adhesive
Choosing the right adhesive is essential for creating strong, durable edge joints. You need an adhesive with high adhesive strength to guarantee the joint holds under stress and resists separation. Consider the drying time; a faster-drying adhesive speeds up your project, but make sure it still provides enough working time to align boards correctly. For thicker or denser woods, a stronger adhesive like PVA or polyurethane might be necessary. If you’re working on a project that requires minimal clamp time, select an adhesive with a suitable drying time to avoid delays. Always follow the manufacturer’s instructions for application and curing, as improper use can weaken the joint. Selecting the right adhesive will make your edge joints reliable and long-lasting.
How to Fix Gaps and Misalignments in Your Edge Joints

Gaps and misalignments in edge joints can compromise both the appearance and strength of your woodworking project. To fix these issues, start by checking the grain orientation to ensure boards match smoothly. Apply glue evenly, focusing on proper glue application to avoid excess that can cause gaps. Clamp the joint tightly and let it set fully. For larger gaps, you might need to add wood filler or veneer patches. Sand the joint carefully once dry to achieve a seamless look. Adjust misaligned edges by planing or trimming with a straightedge. Always work with patience to prevent further misalignments. Proper preparation and attention to detail will help you achieve a tight, durable edge joint that looks professional.
- Ensure matching grain orientation before gluing
- Use even, controlled glue application
- Clamp tightly and allow adequate drying time
- Fill gaps with appropriate wood filler or veneer
- Sand for a smooth, flush finish
Frequently Asked Questions
Can I Edge Join Boards of Different Wood Species?
Yes, you can edge join boards of different wood species, but you should consider wood color and grain pattern. Different species often have contrasting colors and grain directions, which can affect the final look. To achieve a seamless appearance, select boards with similar tones or blend the colors intentionally. Pay attention to grain pattern differences to guarantee a consistent aesthetic, and consider using a filler or stain to harmonize the joint.
How Do Humidity Levels Affect Edge Joining?
Humidity levels directly impact your edge joining process because ambient humidity affects the moisture content of your wood. When humidity is high, the wood absorbs moisture, causing it to swell and making it harder to achieve a tight, seamless joint. Conversely, low humidity dries out the wood, leading to shrinkage and potential gaps. To guarantee perfect edges, you should match moisture content with the environment and control ambient humidity during the process.
Is It Necessary to Glue Both Faces of the Joint?
Think of your wood project as a dance, where perfect joint alignment is the choreography. You don’t need to glue both faces—just focus on applying glue to one, ensuring the joint stays aligned and tight. This keeps the dance smooth and prevents excess glue from oozing out. Proper glue application on one face maintains stability, while the anchored face stays put, giving your project strength and a flawless finish.
What Are the Best Storage Practices for Edge-Joined Panels?
You should store edge-joined panels with the grain orientation aligned to prevent warping. Keep them flat and in a dry, stable environment to avoid moisture absorption. Apply consistent clamping pressure during storage to minimize movement. Avoid stacking heavy objects on top, and make sure the panels aren’t exposed to extreme temperature changes. Proper storage preserves the joint’s integrity and keeps your panels straight and ready for use.
How Long Should I Clamp Boards During the Glue-Up?
You should clamp boards for at least 30 minutes to guarantee proper bonding, but don’t rush the drying time. Maintain steady clamping pressure to prevent gaps and misalignment. Keep the clamps on for 24 hours, as the glue needs ample drying time to reach full strength. After that, carefully remove the clamps and inspect your work — patience now guarantees a flawless, durable edge joint.
Conclusion
Remember, keeping one face stable during edge joining dramatically improves your results—studies show it increases joint strength by up to 30%. By following proper preparation, using the right tools, and avoiding common mistakes, you’ll achieve perfectly aligned edges every time. So, stay focused on that one face, and your projects will turn out stronger and more professional-looking. Mastering this simple step truly makes all the difference in your woodworking success.