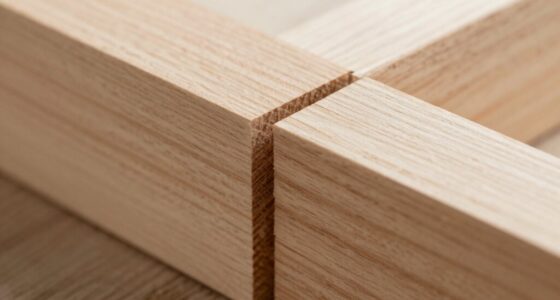
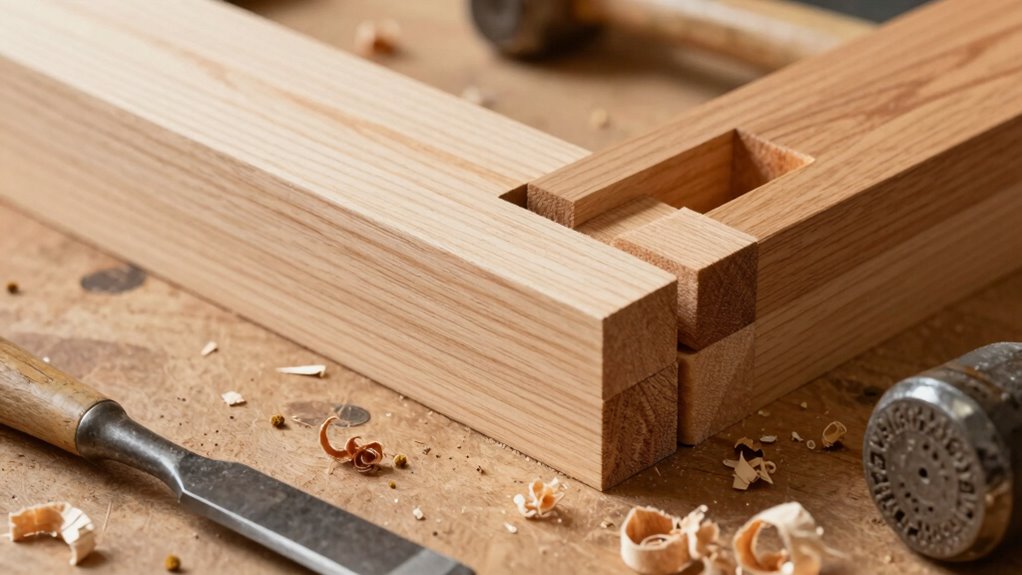
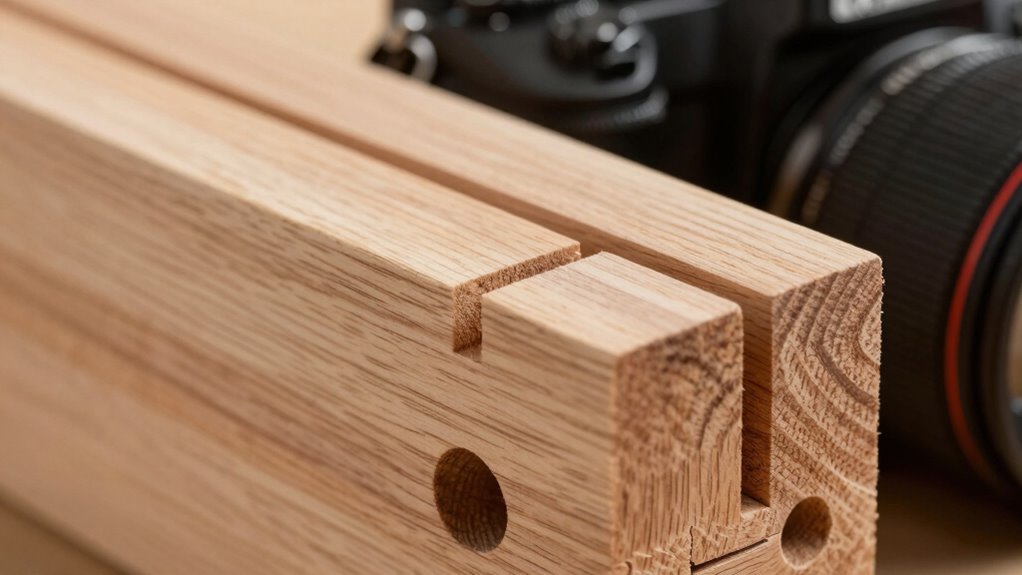
A mortise and tenon joint is a classic woodworking technique where a protruding tenon fits snugly into a mortise hole, creating a super strong, durable connection. Its strength comes from evenly distributing stress and providing excellent load transfer. Perfect for furniture or structural projects, there are different types suited for various needs. Keep exploring to discover how to cut, fit, and reinforce this joint for long-lasting results.
Key Takeaways
- Mortise and tenon joints are among the strongest woodworking joints due to their interlocking design.
- They effectively distribute stress, making them ideal for load-bearing furniture and structural applications.
- Different types, like through and wedged tenons, enhance stability and suit various project needs.
- Proper measurement, precise cutting, and tight fitting are essential for maximum joint strength.
- Reinforcing with glue and careful assembly increases durability and long-term stability.

YUEWO Mortising Attachment for Drill Press, Bench Drill Locator Set for Mortising Chisels Drilling Machine, Square Hole Hollow Chisel Mortiser Drill Bit for Woodworking, Mortise and Tenon Joint Tools
Dimension – This mortising attachment fits bench drill quill diameters of 2.09", 2.17", 2.28", 2.36", 2.56". Complete with…
As an affiliate, we earn on qualifying purchases.
As an affiliate, we earn on qualifying purchases.
What Is a Mortise and Tenon Joint and Why Is It Strong?
A mortise and tenon joint is a classic woodworking technique where a protruding tenon fits snugly into a corresponding mortise hole. This method has deep historical significance, dating back thousands of years across different cultures, showcasing its durability and versatility. Its strength comes from the interlocking design, which distributes stress evenly and resists pulling apart. The joint’s interlocking design not only provides structural integrity but also adds to its aesthetic appeal, making it a popular choice for furniture that requires both strength and beauty. Additionally, the design allows for efficient load transfer, enabling the joint to handle heavier stresses without failure. Properly executed, this joint can withstand significant forces, making it ideal for structural applications in furniture and construction. Beyond its functionality, this joint also offers aesthetic appeal, adding a seamless, handcrafted look to furniture and structures. When properly executed, it creates a clean, timeless appearance that highlights craftsmanship. Because it’s been trusted for centuries, you can rely on it for both strength and beauty, making it a fundamental technique in woodworking that balances tradition, function, and visual appeal. Additionally, understanding wood movement is essential to ensure the joint remains durable over time despite environmental changes.

HURRICANE 4 Piece Wood Chisel Set for Woodworking. CR-V Steel Beveled Edge Blades with Safety Caps. Durable PVC High Impact Handle, for Precision Carving & DIY Projects (1/4", 1/2", 3/4", 1")
Premium Blades: Drop forged CR-V steel with heat-treated edges ensures sharp precision and long-lasting durability, can be used…
As an affiliate, we earn on qualifying purchases.
As an affiliate, we earn on qualifying purchases.
Tools and Materials Needed for Mortise and Tenon Joints
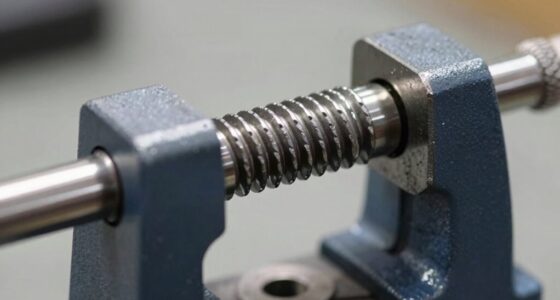
To create a strong mortise and tenon joint, you’ll need specific tools and materials. Ensuring woodworking safety should always be your priority, so check your tools before use and wear appropriate gear. Proper tool maintenance keeps your equipment in top condition, making cuts cleaner and safer. Essential tools include a chisel set for cleanup, a saw (such as a tenon saw or a backsaw) for precise cuts, and a mallet or hammer to drive the tenon. You’ll also need measuring tools like a square and marking gauge for accuracy. Using sharp, well-maintained tools reduces the risk of accidents and guarantees tight joints. Remember, safe and diligent tool maintenance contributes to precision and safety throughout your woodworking projects. Additionally, understanding power tool safety ensures you operate your equipment effectively while minimizing hazards. Incorporating attention to detail during every step helps achieve optimal fit and durability in your joints. For consistent results, practicing proper marking and measuring techniques is crucial to avoid inaccuracies that can compromise joint strength.

Spear & Jackson Saw Tenon 12 inch x 15 ppi
Universal teeth for general use, cuts along and across the grain
As an affiliate, we earn on qualifying purchases.
As an affiliate, we earn on qualifying purchases.
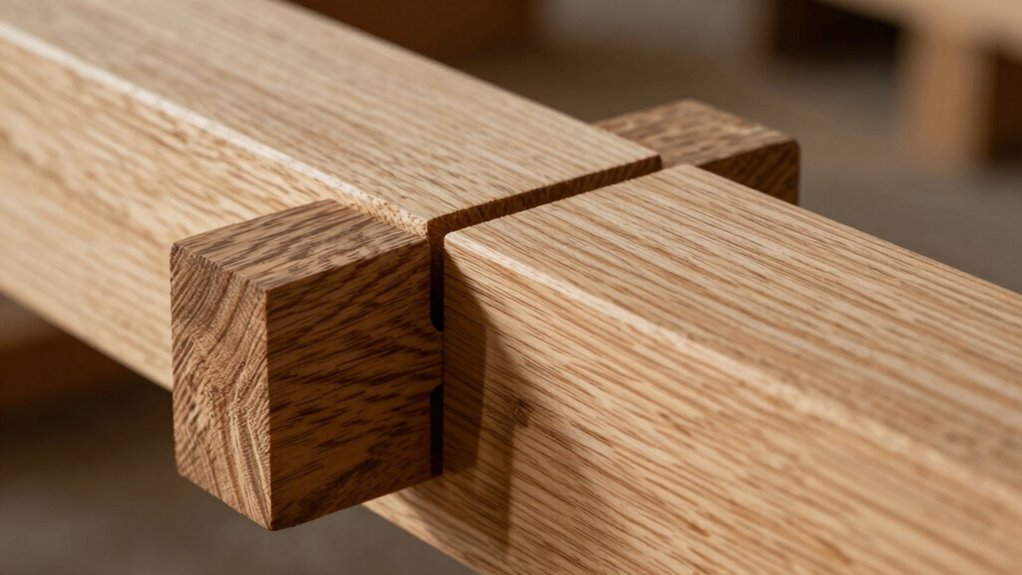
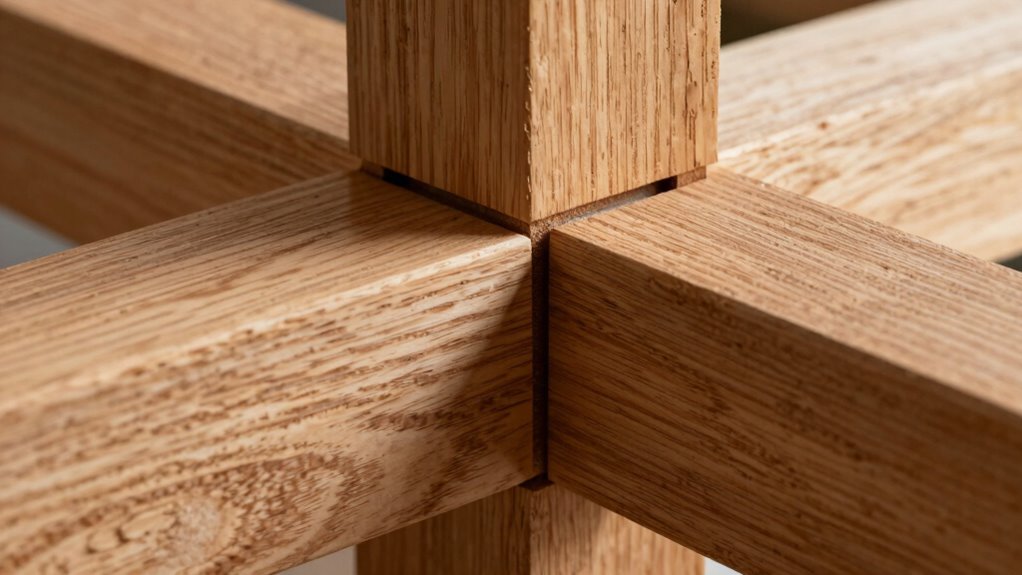
How to Cut a Perfect Mortise and Tenon
Wondering how to achieve perfectly fitting mortise and tenon joints? The key is precision. Start by aligning the grain orientation; cut the mortise and tenon parallel to the wood’s grain for strength and finish compatibility. Use sharp tools and mark your cuts carefully to ensure accuracy. Test fit frequently, removing small amounts of material until the joint fits snugly. Remember, consistent measurement techniques are essential for a professional result. Additionally, paying attention to the grain direction helps maintain the joint’s integrity and reduces the risk of splitting or weakness. Employing proper clamping methods during assembly can also significantly improve the joint’s strength and stability.

Mortising Machine, Tenon Tools Mortising Attachment for Drill Press and Woodworking Mortise, Bench Drill Locator Set for Mortiser Circles/Square Hole Chisel Drilling Machine Mortise Machine.
Mortising Attachment for Drill Press Set include:locator,press block,side positioning rod,fixed seat and other accessories,also comes with 4 kinds…
As an affiliate, we earn on qualifying purchases.
As an affiliate, we earn on qualifying purchases.
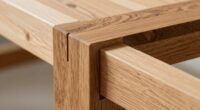
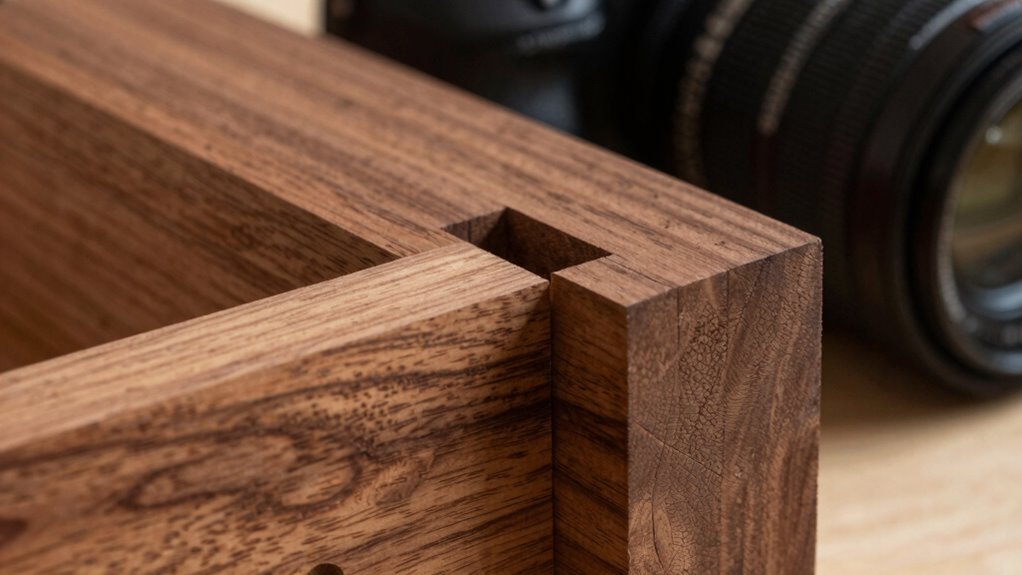
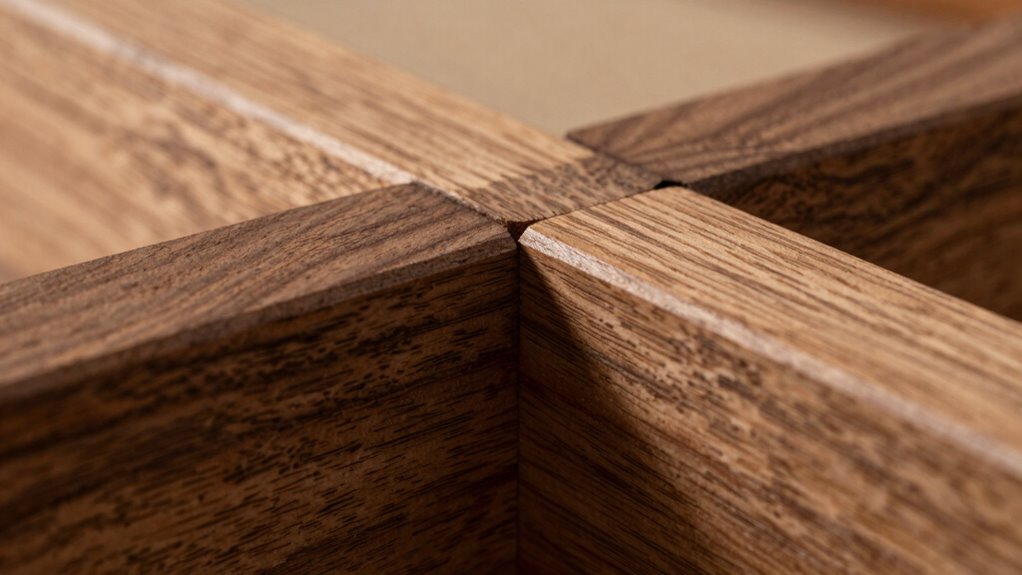
Types of Mortise and Tenon Joints and When to Use Them
Different types of mortise and tenon joints serve specific purposes based on the strength requirements and the direction of stress in your project. For example, a through tenon offers maximum strength, ideal for load-bearing furniture or structural frames, while a stub tenon is better suited for decorative styles or where a subtle joint is desired. Additionally, understanding how to properly prepare the joint ensures optimal fit and durability. Mastering these variations can significantly impact the joint’s structural integrity and overall performance.
- Haunched tenons provide resistance against twisting, perfect for heavy doors or frames with significant lateral force.
- Wedged tenons enhance stability and are often used in traditional or historical applications, adding both strength and decorative appeal.
- Half-blind tenons hide the joint from one side, ideal for aesthetic projects like cabinet doors.
Choose the right type based on your project’s function and visual style to guarantee durability and beauty.
How to Ensure a Tight, Durable Fit
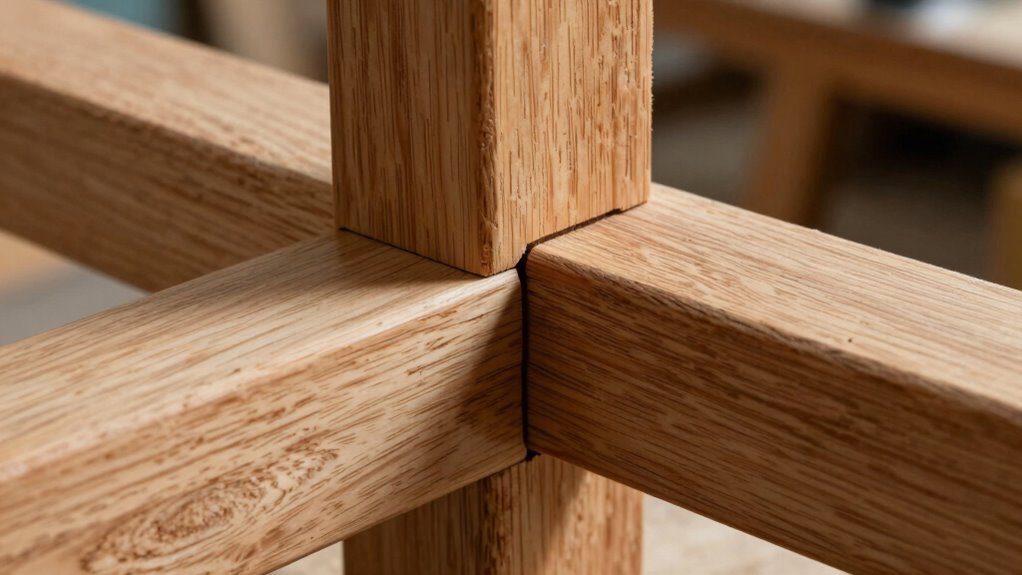
Achieving a tight, durable fit in mortise and tenon joints requires careful attention to detail during both cutting and fitting. Pay close attention to the wood grain; aligning it properly helps prevent splitting and ensures stability. When cutting the mortise and tenon, aim for precise dimensions to eliminate gaps and looseness. Test fit often, making small adjustments as needed for a snug fit without forcing the joint. Maintaining sharp tools is crucial for precision and clean cuts, which directly affects the fit quality. Proper tool maintenance ensures consistent sharpness and prolongs tool life. Additionally, understanding the properties of different wood species can influence how you approach fitting and gluing to optimize joint durability. Selecting the right adhesive type based on your wood’s characteristics can significantly enhance the joint’s strength and longevity. Apply glue sparingly but evenly to both surfaces, avoiding excess that could interfere with the fit. A well-fitted joint combined with proper glue enhances strength and longevity, ensuring your mortise and tenon joint withstands time and use. To achieve consistent results, understanding the cutting process and maintaining sharp tools is essential for precision.
Troubleshooting Common Mortise and Tenon Problems
You might encounter fit issues where the mortise and tenon don’t align properly or feel loose. These problems can compromise the strength and stability of your joint. Fortunately, you can fix loose joints by adjusting the fit or reinforcing them with appropriate techniques. Incorporating timeless outdoor wisdom can also help you recognize early signs of joint wear and prevent larger issues during your woodworking projects.
Common Fit Issues
Why do mortise and tenon joints sometimes fit poorly? Often, it’s due to issues like grain direction or finish compatibility. If the grain isn’t aligned properly, the joint can swell or shrink unevenly, causing a tight or loose fit. Finish compatibility also matters—using different finishes on each piece can lead to movement or sticking issues over time. Additionally, improper measurement or tool calibration can create mismatched joint sizes. To troubleshoot:
- Check the grain direction of both pieces, ensuring they run parallel to avoid uneven swelling.
- Verify that the finish applied is compatible with both parts to prevent movement or sticking.
- Confirm that your tools are accurate, and the tenon and mortise are cut to matched dimensions for a snug fit.
Fixing Loose Joints
Loose mortise and tenon joints can compromise the stability and strength of your project, but they’re often easy to fix with the right approach. First, assess the joint to see if it needs re-gluing or tightening. If the fit is loose, apply fresh glue to the mortise or tenon, then clamp the joint tightly until it sets. For minor looseness, joint oiling can help improve fit and reduce friction during assembly. If the joint is still unstable, consider removing the old glue, cleaning the surfaces thoroughly, and reapplying new glue for a stronger bond. Always guarantee you’re using the right amount of glue to avoid excess squeeze-out. Proper glue application combined with joint oiling helps create a tight, durable fit that lasts. Additionally, understanding the types of wood involved can help you select the best repair method for your specific project. Using the correct adhesive types can significantly enhance the strength and longevity of your mortise and tenon joints, ensuring a durable repair.
Incorporating Mortise and Tenon Joints Into Your Projects
When incorporating mortise and tenon joints into your projects, choosing the right type for your application is essential. Use precise measurement techniques to guarantee tight fits that improve stability. This approach not only enhances the strength of your joints but also boosts the overall durability of your finished piece. Additionally, understanding safe installation practices ensures that your joints remain secure and reliable over time. Proper woodworking tools and techniques further contribute to achieving accurate cuts and fitting joints seamlessly.
Selecting Appropriate Joints
Choosing the right joint is essential for ensuring your project’s strength and durability. When selecting joints, consider how they will handle the load and stresses your project faces. Proper joint selection depends on understanding material considerations, such as wood type, grain, and moisture content, which influence how the joint will hold up over time. Additionally, understanding decoding slang and informal language can help in communicating your project ideas more effectively with others. Consulting material properties and how different woods respond to various joints can further improve your project’s longevity and performance. Key factors to keep in mind include: – The type of load your project will bear – The material’s properties and compatibility – The complexity of the joint relative to your skill level
Precise Measurement Techniques
Have you ever struggled to fit a mortise and tenon joint precisely? Achieving perfect joint alignment starts with accurate measurements. Use sharp marking tools like a marking gauge and a square to guarantee precise layout lines. Double-check your measurements before cutting—small errors can lead to loose or tight fits. When marking the mortise, measure carefully from multiple reference points to confirm consistency. When fitting the tenon, test its size frequently against the mortise, adjusting as needed for a snug fit without forcing. Maintaining measuring accuracy throughout the process is essential. Take your time and verify each step to prevent mistakes. Clear, accurate measurements set the foundation for strong, well-fitting joints that improve your project’s overall quality.
Enhancing Project Durability
Incorporating mortise and tenon joints into your projects substantially boosts their durability and lifespan. These joints improve joint stability, ensuring the structure withstands stress over time. To maximize durability, focus on material compatibility—pairing woods with similar expansion rates prevents gaps or cracking. Properly fitting joints also contribute to long-term strength, reducing the need for repairs. Additionally, strengthening techniques like gluing and reinforcement can enhance joint resilience.
- Match wood types carefully to prevent movement issues
- Ensure tight, precise fits for maximum stability
- Use appropriate adhesives for added strength
Frequently Asked Questions
Can Mortise and Tenon Joints Be Used Outdoors?
Yes, you can use mortise and tenon joints outdoors. They offer excellent weather resistance when made with durable materials like hardwoods or treated wood. Proper sealing and finishing enhance their durability, preventing moisture from causing damage. Make sure you select weather-resistant wood and maintain the joints regularly. This approach guarantees your outdoor furniture or structures stay strong and long-lasting, even exposed to the elements.
What Wood Types Are Best Suited for Mortise and Tenon Joints?
Ironically, you might think any wood will do, but for mortise and tenon joints, you’ll want hardwoods like oak, maple, or hickory. These options excel in durability considerations, resisting wear and environmental damage. Softwoods like pine or cedar aren’t ideal because they may weaken over time. Selecting the right wood for your project guarantees your joint stays strong and lasts, even under outdoor or heavy-use conditions.
How Long Does It Take to Master Cutting Mortise and Tenon Joints?
Mastering techniques for cutting mortise and tenon joints typically takes several months of consistent practice, but it varies based on your woodworking experience. You might see noticeable improvement within 20-40 hours of dedicated practice. The key is patience and focusing on precision. With regular practice, you’ll develop the skills needed for clean, strong joints, gradually reducing your practice duration as your technique mastery increases.
Are There Alternative Joints That Offer Similar Strength?
You can consider dovetail alternatives like box joints, which offer strong, interlocking connections ideal for drawers and boxes. Box joint options are easier to cut with a saw and jig, making them accessible if you’re seeking strength similar to mortise and tenon joints. While they may not match the versatility of mortise and tenon, these options provide excellent durability, especially when you want a clean, decorative look.
How Do I Modify Mortise and Tenon Joints for Curved Applications?
Imagine fitting a puzzle piece perfectly, and that’s what curved joint techniques achieve. To modify mortise and tenon joints for curves, you’ll need to carefully modify tenon angles, ensuring they follow the curve’s contour. Use a saw or chisel to create a tapered, angled tenon, then adjust the mortise to match. This approach keeps the joint strong while accommodating the natural flow of curved designs.
Conclusion
Mastering the mortise and tenon joint is like wielding a medieval sword in furniture making—it’s powerful and reliable. With the right tools, patience, and practice, you’ll craft joints that stand the test of time, much like a well-forged Excalibur. Don’t forget, even in this digital age, a good old-fashioned joint remains your best weapon for strength and durability. Keep honing your skills, and your projects will become legendary.