
To avoid tear-out when working with veneer sheet goods, it’s essential to identify the natural grain direction accurately. Look for subtle lines or flow patterns that run parallel to the sheet’s length, and feel for smoother surfaces that align with the grain. Always cut with the grain to minimize splintering and chipping. Proper grain matching and sharp tools make a big difference. Keep exploring, and you’ll discover more tips for achieving flawless veneer results.
Key Takeaways
- Identifying grain direction is crucial; cutting with the grain reduces tear-out and surface damage.
- Grain patterns can be deceptive, requiring careful inspection and visualization before cutting.
- Proper grain orientation aligns with the cut line, minimizing splintering and chipping.
- Using sharp blades and scoring techniques enhances cut cleanliness and prevents tear-out.
- Matching grain flow across sheets ensures consistent tear resistance and seamless veneer joints.

NECAMOCU Edge Banding Trimmer – 2025 Upgraded Mini Edge Band Trimmer & Cutter, Stainless Steel Blade Veneer Edge Trimmer for Woodworking, Durable Edgebanding Trimming Tool for Wood, Veneer, PVC, ABS
【Precision & Smooth Trimming】 NECAMOCU upgraded edge banding cutter features thicker blade with larger cutting edges and more…
As an affiliate, we earn on qualifying purchases.
As an affiliate, we earn on qualifying purchases.
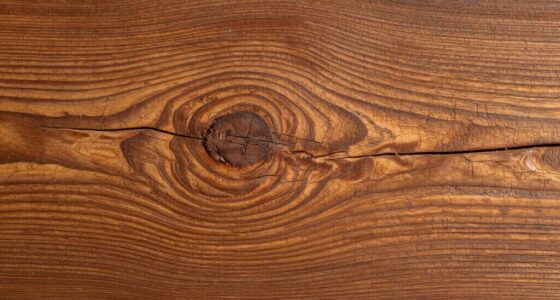
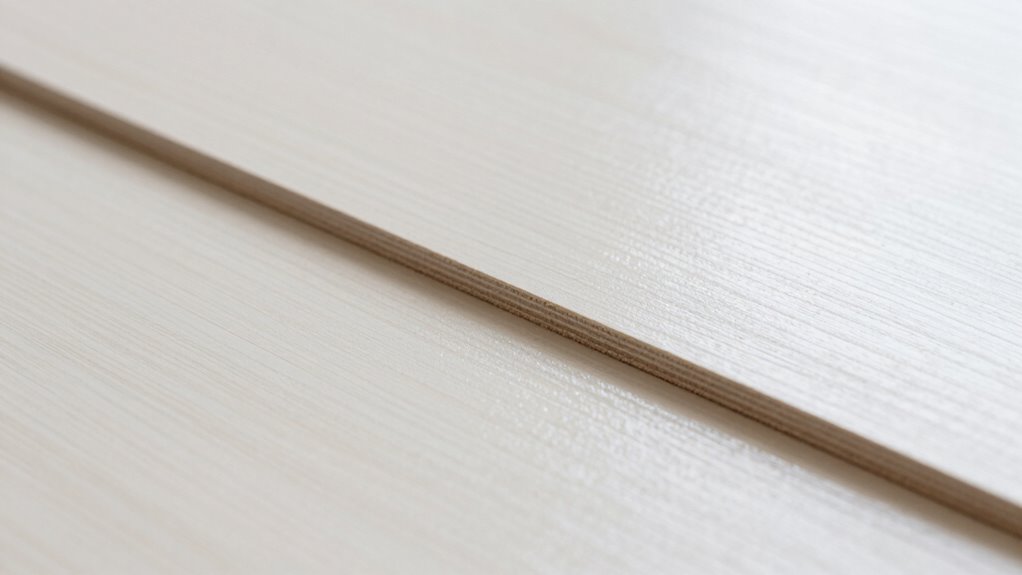
How to Identify the Grain Direction in Veneer Sheets
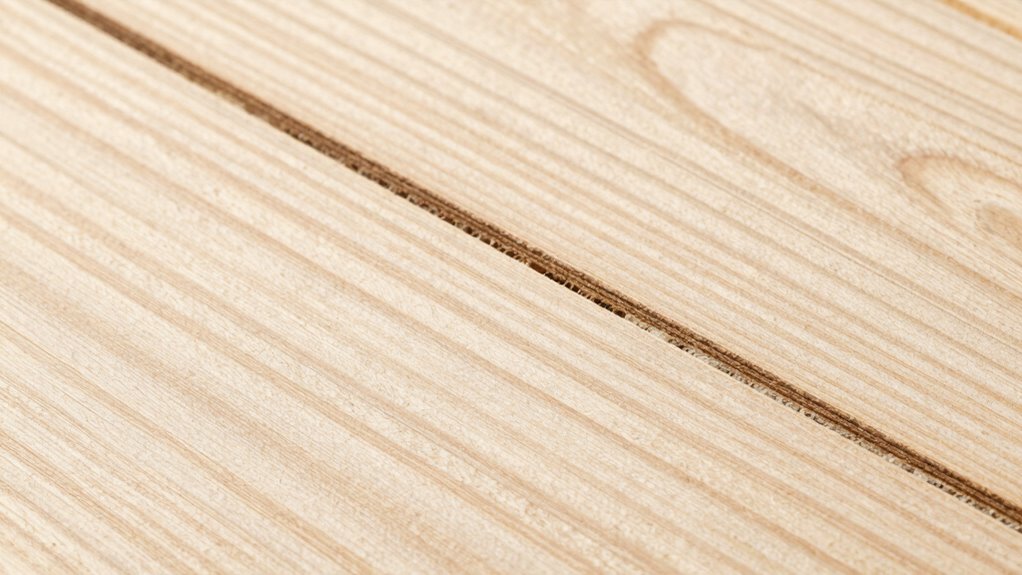
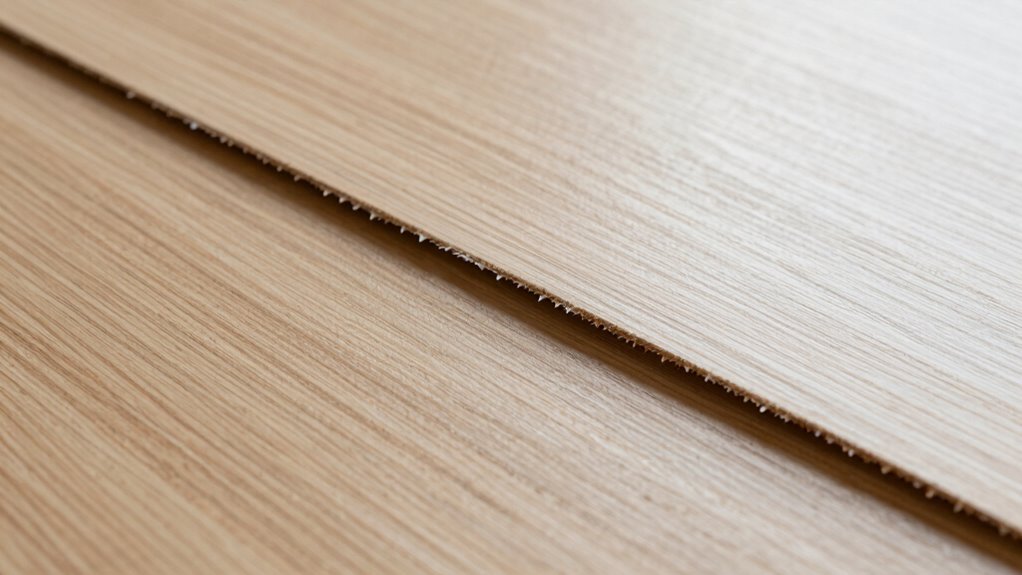
Understanding the grain direction in veneer sheets is essential for achieving a smooth, professional finish. To identify the grain pattern, look closely at the veneer’s surface for subtle lines or flow that follow a natural direction. Usually, the grain runs parallel to the length of the sheet, but variations can occur. Feel the surface gently; the grain often feels smoother in one direction. Check for veneer consistency by inspecting how the pattern aligns across the sheet. Consistent grain flow indicates the correct orientation, helping you avoid tear-out during cutting or shaping. Remember, misjudging the grain direction can lead to uneven cuts and damaged veneer. Taking the time to analyze the grain pattern ensures you work efficiently and produce a polished, high-quality result.

24PCS Jigsaw Blades Set High Carbon Steel Assorted Saw Blades with U-Shank Sharp Fast Cut Down Jigsaw Blade Woodworking Tool for Wood Metal Plastic Cutting Includes 6t 8t 10t 14t 18t 24t 32t
Quality Materials: These jigsaw blades are made of high-quality high carbon steel, with high hardness and wear resistance,…
As an affiliate, we earn on qualifying purchases.
As an affiliate, we earn on qualifying purchases.
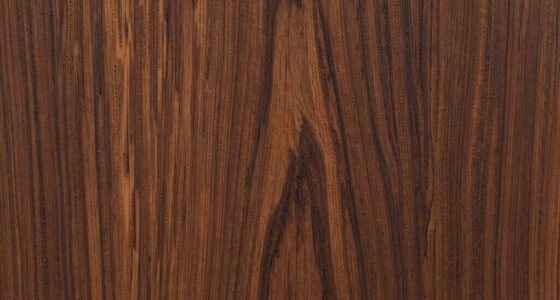
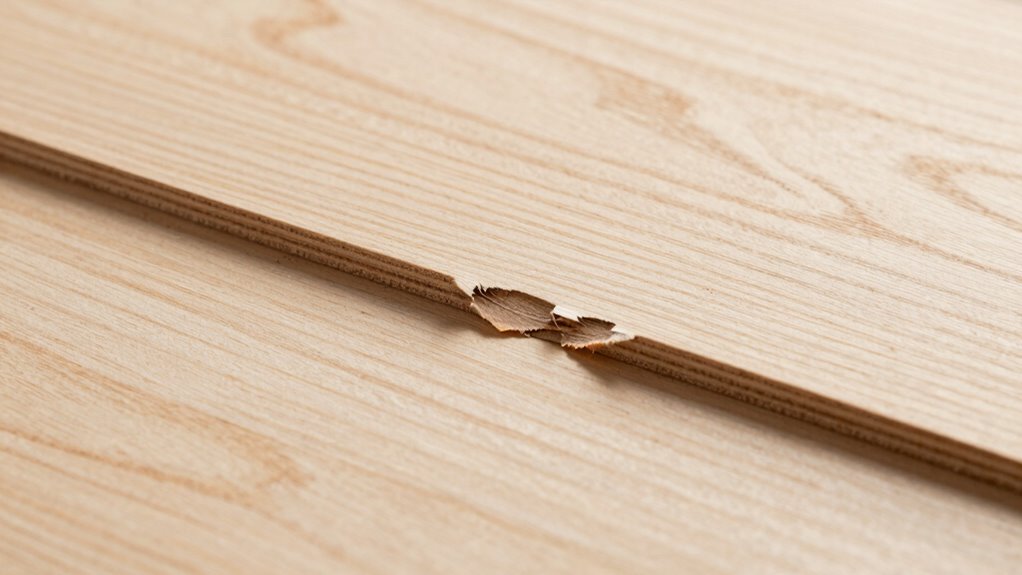
Why Grain Orientation Affects Veneer Tear-Out
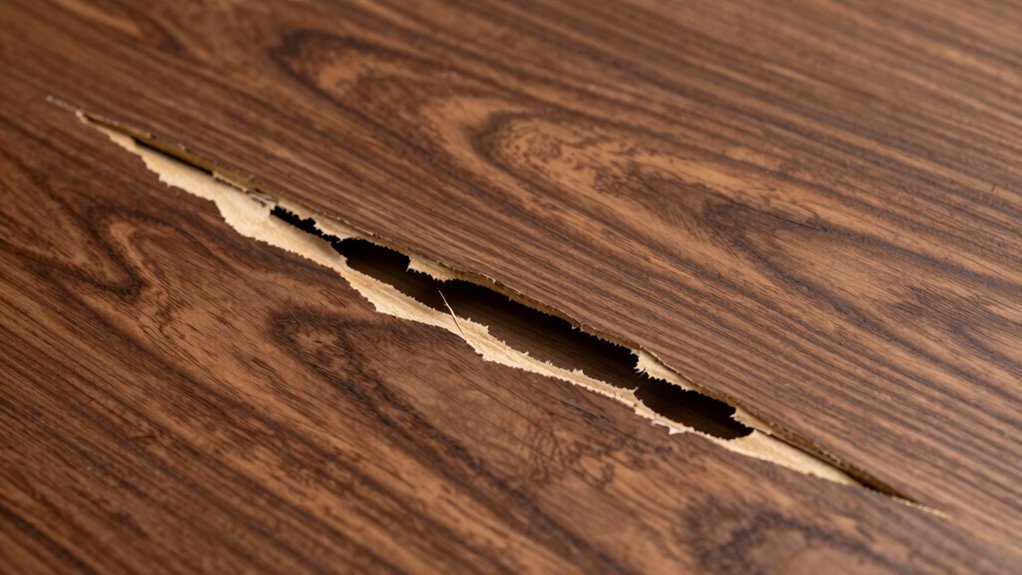
Grain orientation plays a crucial role in how veneer responds to cutting and shaping, directly impacting the likelihood of tear-out. When you cut with the grain, the veneer tends to tear out less, resulting in cleaner edges. Conversely, cutting against the grain can cause the veneer to splinter or chip, leading to tear-out. Proper veneer orientation ensures that the grain runs in the direction you plan to cut, reducing stress on the veneer fibers. Grain matching becomes essential here, as aligning the grain direction across sheets maintains consistent tear resistance. Misaligned grain orientation increases the risk of tear-out, especially when working with sheet goods. Understanding and controlling veneer orientation allows you to achieve smoother cuts and higher-quality finishes, avoiding costly mistakes caused by tear-out. Additionally, utilizing innovative manufacturing techniques can enhance veneer stability and reduce tear-out risks during processing.

Pumtus 24 Pcs Butt Welding Clamps, Sheet Metal Welding Clips, Auto Body Panel Clamps for Edge to Edge Welding, Small Welding Clamps Tack, Welding Door Alignment Tool for Patch Repairs
Value Pack: The package includes 24 packs of butt welding clamps, enough quantity to meet your daily needs…
As an affiliate, we earn on qualifying purchases.
As an affiliate, we earn on qualifying purchases.
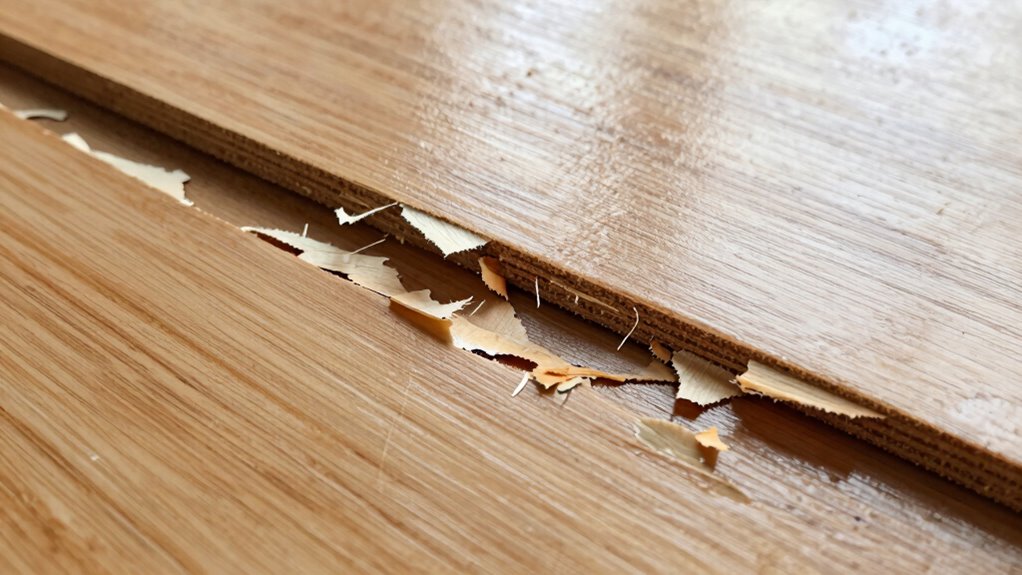
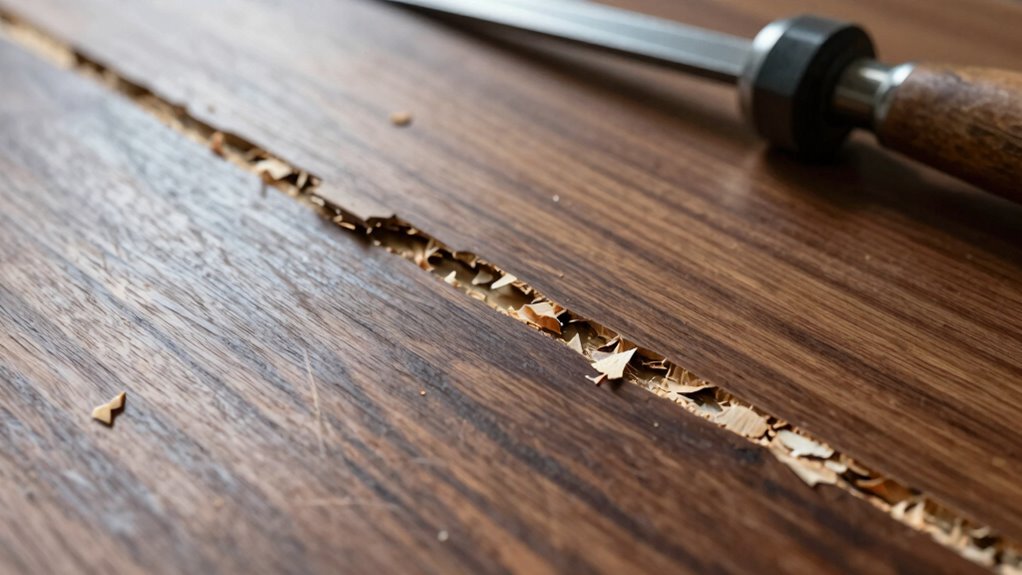
Common Causes of Veneer Tear-Out and Grain Failures

Understanding the common causes of veneer tear-out helps you prevent failures. Mistakes in grain direction, improper tool use, and uneven veneer adhesion all contribute to problems during woodworking. Recognizing these issues allows you to make better choices to guarantee a smooth, durable finish. Additionally, paying attention to grain orientation can significantly reduce the risk of tear-out and improve the overall quality of your project.
Grain Direction Mistakes
One of the most common causes of veneer tear-out is misjudging the grain direction. If you don’t pay close attention to grain orientation, you risk tearing out the veneer during cutting or shaping. Veneer patterns can be deceptive, especially with book-matched or mismatched sheets, making it tricky to identify the true grain flow. Cutting against the grain or at the wrong angle weakens the veneer’s structure, increasing tear-out chances. Always examine the veneer patterns carefully, noting the natural flow of the grain, and cut parallel to it whenever possible. Properly understanding the grain orientation helps you make cleaner cuts and reduces the risk of damaging the veneer. Avoid rushing; a careful assessment of grain direction is key to preventing tear-out failures.
Improper Tool Use
Using the wrong tools or improper technique can quickly lead to veneer tear-out and grain failures. When selecting tools, ensure blades are sharp and suited for veneer work. Misaligned blades or dull tools can cause the cut to deviate from the grain orientation, resulting in tear-out. Proper veneer alignment is vital—failing to match grain direction with tool motion increases risk. To avoid issues:
- Use a fine-toothed saw or knife, maintaining sharpness to reduce stress on the veneer.
- Cut with the grain, not against it, to prevent tear-out and guarantee clean edges.
- Adjust tool settings to match veneer thickness and grain direction, avoiding excessive force that can damage the grain or cause splintering.
- Consistent, precise tool use respects the veneer’s grain orientation, minimizing tear-out risks and supporting free floating stability during the process.
Inconsistent Veneer Adhesion
Have you ever noticed veneer peel or crack after installation? Inconsistent veneer adhesion often causes this issue. One common mistake is poor grain matching; if the veneer’s grain orientation isn’t aligned correctly, it can lead to weak adhesion points. Additionally, improper veneer orientation during application can prevent the adhesive from bonding evenly, making the surface prone to lifting or cracking. To avoid this, verify the grain direction of the veneer matches the substrate’s grain and follows the natural flow of the design. Properly prepared surfaces and correct veneer orientation promote better adhesion, reducing the risk of tear-out. When adhesion is inconsistent, the veneer becomes vulnerable to stresses, especially in high-traffic areas or with changes in humidity. Correct grain matching and orientation are key to achieving a durable, seamless finish. Grain orientation plays a crucial role in ensuring the longevity and stability of veneer applications.

Brunton Grain Size Card – Field Reference for Geology & Sediment Classification (10 Grain-Size Classes with Phi Scale, Grain-Shape Guide, mm Ruler, Waterproof/Transparent)
Waterproof, durable, lightweight card can handle exposure to any type of weather.
As an affiliate, we earn on qualifying purchases.
As an affiliate, we earn on qualifying purchases.
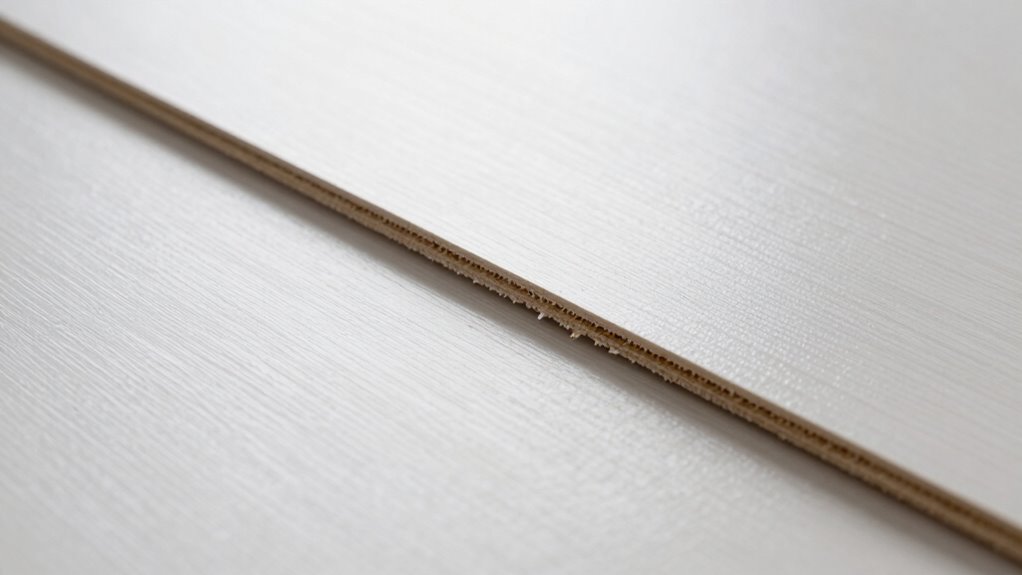
Easy Tips to Cut Veneer Without Tear-Out
Cutting veneer without tear-out requires careful technique and preparation. To master veneer craftsmanship, focus on understanding grain pattern recognition and modify your approach accordingly. Here are three easy tips to prevent tear-out:
- Use a sharp blade to ensure clean cuts and reduce tearing.
- Score along your cut line before slicing to stabilize the veneer and minimize chipping.
- Support the veneer with a sacrificial backing or clamp it securely to prevent movement and uneven tears.
- Pay attention to grain direction when making your cuts, as cutting against the grain increases the risk of tear-out.
Tools and Techniques for Working With Veneer Grain
Mastering veneer grain requires selecting the right tools and applying techniques that respect the natural flow of the wood. To achieve proper veneer alignment, you must pay close attention to grain orientation. Use a sharp utility knife or veneer saw to cut along the grain, minimizing tear-out. Clamping the veneer securely helps maintain consistent grain direction during gluing and pressing. When working with curved or irregular surfaces, use flexible tools to follow the grain flow accurately. Proper grain orientation ensures aesthetic harmony and reduces tear-out risk. Additionally, understanding the importance of grain direction can help prevent costly mistakes and improve overall finish quality.
How to Fix Tear-Out and Prevent It Next Time
To fix tear-out and prevent it in the future, start by ensuring your veneer grain is properly aligned with your cut. Adjust your blade settings for cleaner cuts, and use protective techniques like scoring or masking tape. These steps will help you achieve smooth results and avoid tear-out again.
Use Proper Grain Alignment
Proper grain alignment is essential for preventing tear-out during woodworking. When working with sheet goods, ensure correct veneer orientation to match the grain direction with your cut line. This alignment minimizes stresses that can lead to tear-out caused by grain tear or grain mismatch. To improve your results:
- Always check the veneer orientation before cutting, ensuring the grain runs in the same direction as your saw blade movement.
- Match the grain direction on adjoining sheets for seamless joins and consistent appearance.
- Use a straightedge or guide to align your cut, maintaining proper grain matching throughout the cut. Additionally, understanding how wood movement can affect your project helps in planning cuts to reduce future issues.
Select Suitable Blade Settings
Choosing the right blade settings is essential for preventing tear-out during woodworking. Start by ensuring your blade is properly calibrated for the thickness and type of sheet goods you’re working with. Adjust the blade height so it just clears the material’s surface, reducing stress on the veneer. Pay close attention to grain orientation; cutting with the grain minimizes tear-out and produces cleaner edges. Use a fine-toothed blade designed for veneer or sheet goods to achieve smoother cuts. Make sure the blade is sharp—dull blades increase resistance and tear-out. Test your settings on scrap material first. Proper blade calibration combined with a keen understanding of grain orientation will considerably reduce tear-out and give you cleaner, more professional results.
Implement Protective Cutting Techniques
Implementing protective cutting techniques is essential for both fixing existing tear-out and preventing it on future cuts. Proper grain matching and veneer stacking help minimize tear-out risks. To do this effectively:
- Use a blade with a fine tooth count to reduce tear-out and ensure cleaner cuts.
- Always match the grain direction across your veneer stack, aligning grains for uniform support.
- Apply a sacrificial strip or tape along the cut line to support the veneer and prevent tear-out during the cut.
These steps protect the veneer surface and improve cut quality. By focusing on grain matching and carefully stacking veneers, you reduce the likelihood of tear-out, ensuring a smooth finish and professional results. Protective techniques are key to mastering veneer work.
Expert Tricks for Smooth, Clean Veneer Cuts
Achieving smooth, clean veneer cuts often hinges on using the right techniques and tools. To enhance veneer stability, secure the sheet firmly before cutting. Use a sharp, fine-tooth blade to minimize tear-out and ensure precise cuts. Consistently visualize the grain direction to prevent tear-out and achieve a polished look. Additionally, understanding the importance of grain orientation can help you make more informed decisions during the cutting process.
Quick Guide to Working With Grain for Perfect Veneer Results
Working with the grain is essential for achieving flawless veneer results, and understanding how to follow its natural direction can make a significant difference in your cuts. By paying attention to the grain pattern, you reduce the risk of tear-out and ensure a smooth finish. Proper grain alignment also helps maintain consistent veneer coloring, enhancing the overall aesthetic. Additionally, embracing artistic expression can help you develop a more intuitive sense of grain flow and improve your craftsmanship.
To master this, keep these tips in mind:
- Always examine the grain pattern before cutting, ensuring your cuts follow the natural flow.
- Use sharp tools to minimize resistance and prevent tear-out across grain lines.
- When working with sheet goods, test cut on scrap to observe how the grain responds and adjust your approach accordingly.
Following these steps guarantees cleaner cuts and a more professional veneer appearance.
Frequently Asked Questions
How Does Lighting Affect the Appearance of Veneer Tear-Out?
Lighting considerably impacts how veneer tear-out appears by highlighting grain patterns and emphasizing imperfections. When you change lighting angles, shadows can either conceal or accentuate tear-out flaws, making them more noticeable. Bright, direct light reveals fine details, while softer, angled lighting softens the appearance. Pay attention to how different lighting setups interact with the grain patterns to achieve the most seamless, professional finish on your veneer surface.
Can Veneer Tear-Out Occur With Artificial or Synthetic Veneers?
Yes, veneer tear-out can occur with synthetic veneers if the grain orientation isn’t properly considered. Even though synthetic veneers are more uniform, cutting against the grain or in the wrong direction can cause tear-out or chipping. Always pay attention to the grain orientation, regardless of whether you’re working with natural or synthetic veneer, to prevent tear-out and achieve a smooth, professional finish.
What Are the Best Storage Conditions to Prevent Veneer Grain Damage?
You should store veneer in a cool, dry place where moisture control and temperature stability are maintained. Sudden temperature changes and excess humidity cause grain damage and tear-out. Keep veneers sealed in airtight containers or wrapped tightly in plastic to prevent moisture absorption. By maintaining consistent conditions, you safeguard the grain integrity and ensure a smooth cut, reducing the risk of tear-out during your woodworking projects.
How Do Different Wood Species Influence Tear-Out Susceptibility?
Different wood species influence tear-out susceptibility based on their wood density and grain pattern. You’ll find that dense woods like oak resist tear-out better due to their tight grain, while softer species like pine are more prone to damage. Grain pattern also matters; straight, uniform grain reduces tear-out risk, whereas irregular or wavy grain can cause tear-out during cutting. Understanding these factors helps you choose the right wood for precise, clean cuts.
Are There Specific Finishes That Hide or Accentuate Tear-Out Imperfections?
You can easily hide or highlight tear-out imperfections with the right finishing techniques. Glossy finishes tend to accentuate flaws, making them glaringly obvious, while matte or satin finishes offer superior visual concealment, disguising imperfections like a magician’s trick. To emphasize tear-out, use high-gloss or clear coats, but for hiding them, opt for matte or hand-rubbed finishes. Your choice of finish dramatically impacts how noticeable those imperfections become.
Conclusion
By paying close attention to grain direction and using the right tools and techniques, you can avoid veneer tear-out and achieve professional-looking results. Always respect the grain flow and take your time with cuts—cutting corners can lead to trouble down the line. Remember, a stitch in time saves nine, so invest a little effort now to prevent costly mistakes later. With patience and the right approach, you’ll master smooth, clean veneer work every time.