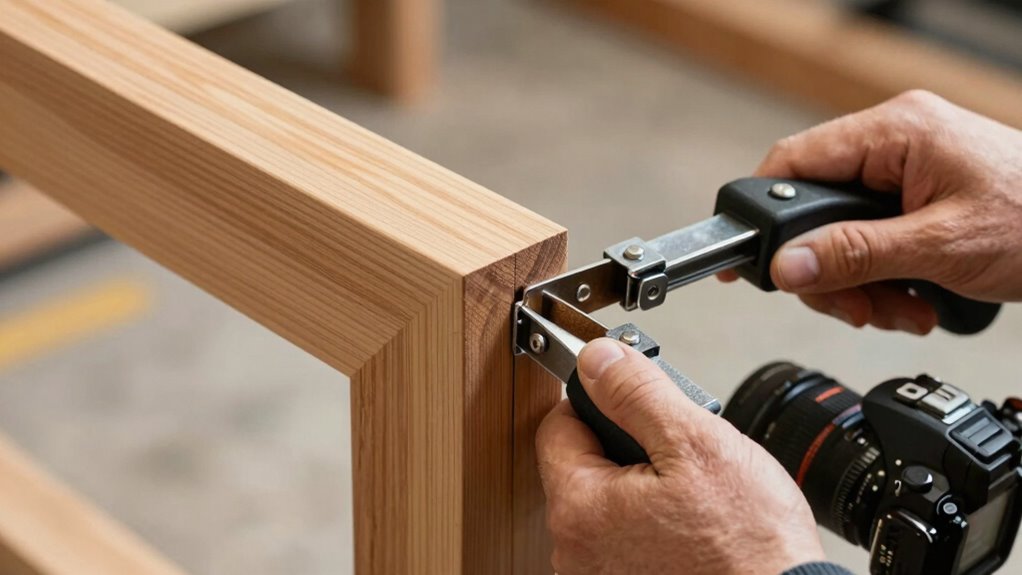
To keep miters at 90°, carefully select clamps that apply even pressure without damaging surfaces, like corner clamps or spring clamps. Use tape along the edges to hold joints temporarily, then add corner blocks or cauls inside the corners to maintain the angle. make certain your clamps are positioned evenly and apply steady, consistent pressure until the joint cures fully. For more tips on achieving perfect miters, continue exploring these effective clamping tricks.
Key Takeaways
- Use corner clamps or spring clamps designed to hold miters at a perfect 90°, ensuring even pressure.
- Incorporate corner blocks or cauls inside joints to maintain accurate 90° angles during clamping.
- Wrap painter’s tape along edges before clamping to prevent surface damage and hold miters in place.
- Apply clamps gradually and evenly, verifying alignment frequently to prevent shifting or misalignment.
- Design custom jigs with adjustable fixtures to hold pieces securely at precise 90° angles during assembly.

DIYLOG Corner Clamp for Woodworking, 90 Degree Corner Clamp, 4 Pack 5.5"x 5.5" Aluminum Alloy Right Angle Woodworking Tools, Positioning Squares for Picture Frame, Box, Cabinets, Drawers
【90 Degree Wood Working Tools and Equipment Precision Angle Clamp】Made of high quality aluminum alloy to ensure 90…
As an affiliate, we earn on qualifying purchases.
As an affiliate, we earn on qualifying purchases.
Why Accurate Miter Angles Make Your Corners Look Professional
Achieving precise miter angles is essential because even small deviations can make corners look uneven or sloppy. Using a reliable miter gauge helps you set accurate angles quickly, ensuring each cut aligns perfectly. Corner jigs are also valuable tools; they hold your pieces securely at the correct angle, reducing the risk of mistakes. When your miter cuts are accurate, your corners will fit together seamlessly, giving your project a professional appearance. Poorly aligned angles can cause gaps or misaligned seams that stand out. Investing in a quality miter gauge and a sturdy corner jig simplifies the process and boosts your confidence. Proper air purifier maintenance ensures your workspace remains clean and free of dust, which can interfere with your tools and project quality. In the end, precise miter angles make a noticeable difference, elevating the overall quality of your woodworking projects.
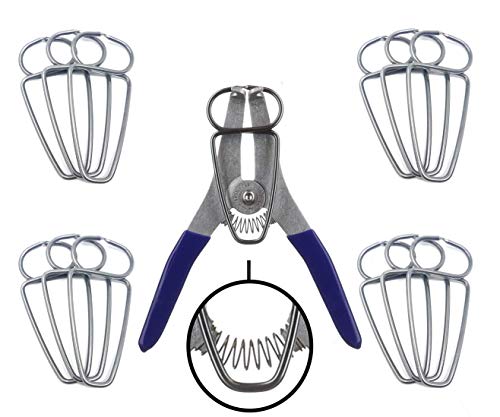
Collins Spring Loaded Pliers and 13 Miter Clamps – Proudly Made in the USA
New Spring Loaded Pliers and 13 spring miter clamps included – LIFETIME GUARANTEE
As an affiliate, we earn on qualifying purchases.
As an affiliate, we earn on qualifying purchases.
How to Choose the Right Clamps and Tools for Perfect Miters

Selecting the right clamps and tools guarantees your miter joints come together perfectly. Start by choosing clamps suited for holding mitered corners securely without slipping or damaging the material. Look for corner clamps or spring clamps that apply even pressure and are easy to adjust. When selecting tools, prioritize a high-quality miter saw with good miter saw safety features to ensure precise cuts and user protection. Clamp material selection is vital; use sturdy, non-marring clamps that won’t scratch or dent your workpiece. Proper clamps help maintain alignment during assembly, reducing gaps and ensuring tight joints. Remember, the right combination of clamps and tools minimizes movement, enhances accuracy, and results in professional-looking corners. Carefully selecting your equipment sets the foundation for perfect miters every time. Additionally, choosing clamps that are compatible with European cloud innovation can ensure durability and consistent performance over time.

AltitudeCraft Crown Stops for Miter Saw – Simplifies Compound Angle Cutting, Heavy Duty Crown Molding Jig Fits DEWALT DWS780 DW718 DW716 & More
Simplify Complex Cutting: Streamlines crown cutting by allowing for precise 45° miter cuts (nested method) without needing the…
As an affiliate, we earn on qualifying purchases.
As an affiliate, we earn on qualifying purchases.
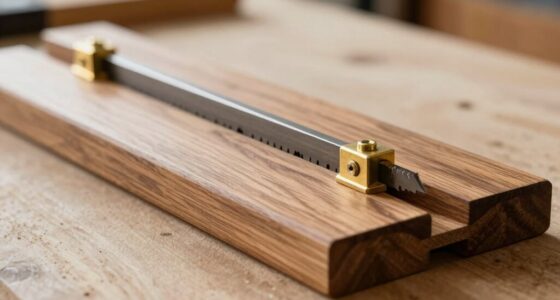
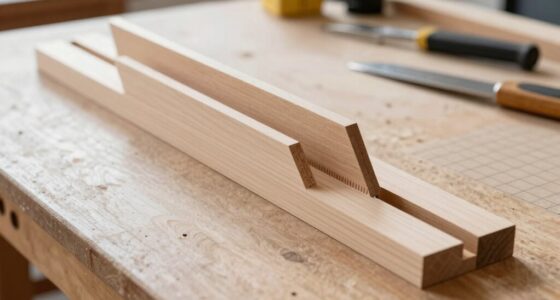
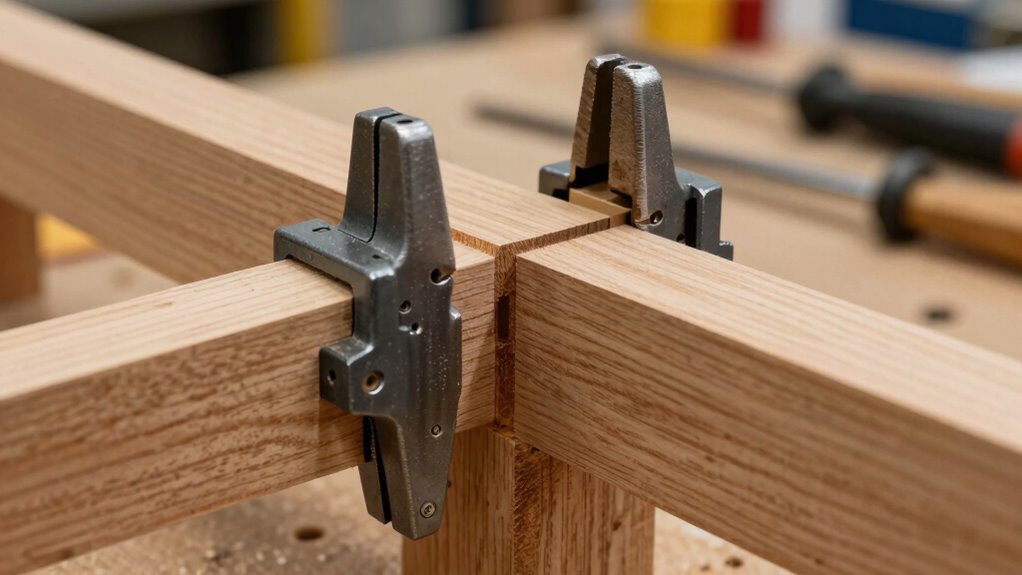
Using Custom Jigs and Fixtures to Align Your Miters Correctly
Using custom jigs and fixtures can substantially improve your miter alignment. Focus on designing jigs that match your project’s specific angles and choosing materials that provide stability without warping. Fine-tune your setup with precise alignment and adjustment techniques to guarantee perfect corner joints every time. Additionally, ensuring your tools are well-calibrated can further improve accuracy and consistency in your cuts. Color accuracy plays a vital role in achieving seamless miter joints, as consistent color and finish can accentuate the precision of your work.
Custom Jig Design Tips
To guarantee your miter joints come out perfectly aligned, designing custom jigs that securely hold your workpieces is essential. Focus on effective jig design by ensuring it provides stable support and precise positioning. Use durable materials like hardwood or aluminum for your jig to withstand pressure and maintain accuracy over time. Consider incorporating adjustable features, such as clamps or sliding stops, to accommodate different angles and sizes. Prioritize simplicity in your design to reduce setup time and minimize errors. Avoid overly complex mechanisms that can complicate the process or introduce instability. Remember, a well-thought-out jig not only improves accuracy but also boosts efficiency, saving you time and frustration during assembly. Proper material selection and thoughtful design are key to creating reliable, reusable jigs. Incorporating insights from the Gold IRA markets can also inspire innovative approaches to jig design, emphasizing reliability and trustworthiness.
Material Selection Strategies
Choosing the right materials for your custom jigs and fixtures is essential to achieving accurate miters. You want materials that resist wear and maintain shape over time, ensuring consistent results. Select woods with tight, straight grain to prevent warping, which can affect alignment. Durable materials like hardwoods or high-quality plywood offer the strength needed for repeated use. Avoid soft or porous woods that may dent or absorb moisture, impacting accuracy. Consider how the wood grain runs; aligning it properly helps prevent movement during clamping. Durability is key for long-term reliability, so invest in materials that withstand pressure without deforming. Material stability plays a crucial role in maintaining precise angles during woodworking projects. Here’s a quick comparison:
| Material | Wood Grain | Material Durability | Best Use |
|---|---|---|---|
| Hardwood | Tight, straight | Very durable | Heavy-duty fixtures |
| Plywood | Consistent layers | High durability | Precise, stable jigs |
| Softwood | Varies | Less durable | Temporary or light-duty tasks |
Alignment and Adjustment Techniques
Achieving perfect miters hinges on precise alignment, and custom jigs and fixtures are essential tools for this task. To guarantee your miter angle is accurate, set up a jig that holds your pieces at exactly 90°, preventing any misalignment. Use adjustable fixtures to fine-tune the angle until it matches your desired corner finish. These tools help eliminate guesswork, giving you consistent, clean cuts every time. When aligning, double-check the fit before final assembly, making tiny adjustments as needed. Proper alignment ensures that your miters meet seamlessly, producing a professional-looking corner. Investing in custom jigs and fixtures streamlines your process, saves time, and assures your corners stay perfectly at 90°, resulting in a flawless corner finish that’s both strong and visually appealing. Understanding tool setup is crucial for achieving accurate and reliable miters.

HORUSDY 6-Piece 6" inch Spring Clamp, Heavy Duty Spring Metal Spring Clamps, 2.5"-inch Jaw opening (6-Piece)
Heavy-duty 6-inch long clamp has an actual maximum opening of 2.5 inches.
As an affiliate, we earn on qualifying purchases.
As an affiliate, we earn on qualifying purchases.
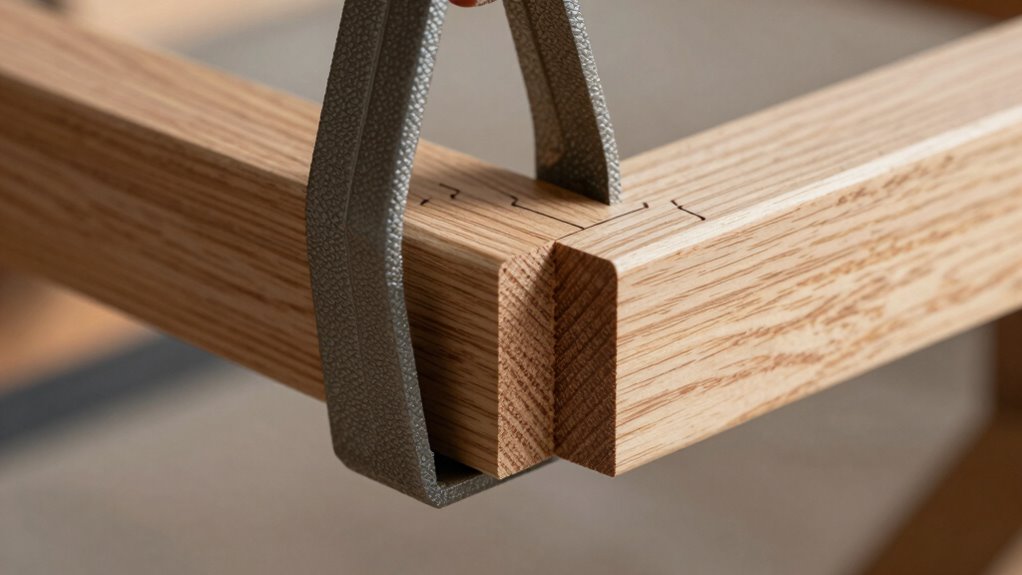
Applying Tape and Clamps for Precise Corner Assembly

Using tape and clamps is essential for securing corners accurately during assembly. Tape helps hold the mitered edges in place without damaging the wood grain or finish, ensuring a clean look. Wrap painter’s or masking tape along the joint, pressing firmly to keep everything aligned. Then, position your clamps over the taped joint, tightening gradually to apply even pressure. This method prevents shifting, maintains the correct 90° angle, and reduces squeeze-out that could mar the surface. Proper clamping guarantees the joint cures evenly, enhancing the finish quality. Take your time to adjust the clamps for consistent pressure. Once set, leave the clamps in place until the adhesive fully cures. Consistent pressure during clamping is crucial for achieving tight, precise corners with a smooth, professional finish.
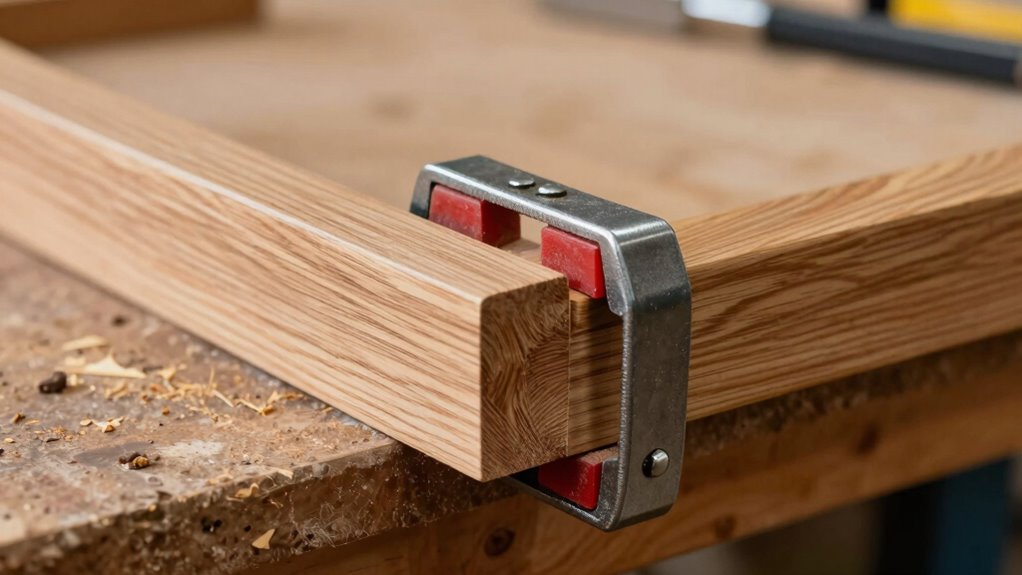
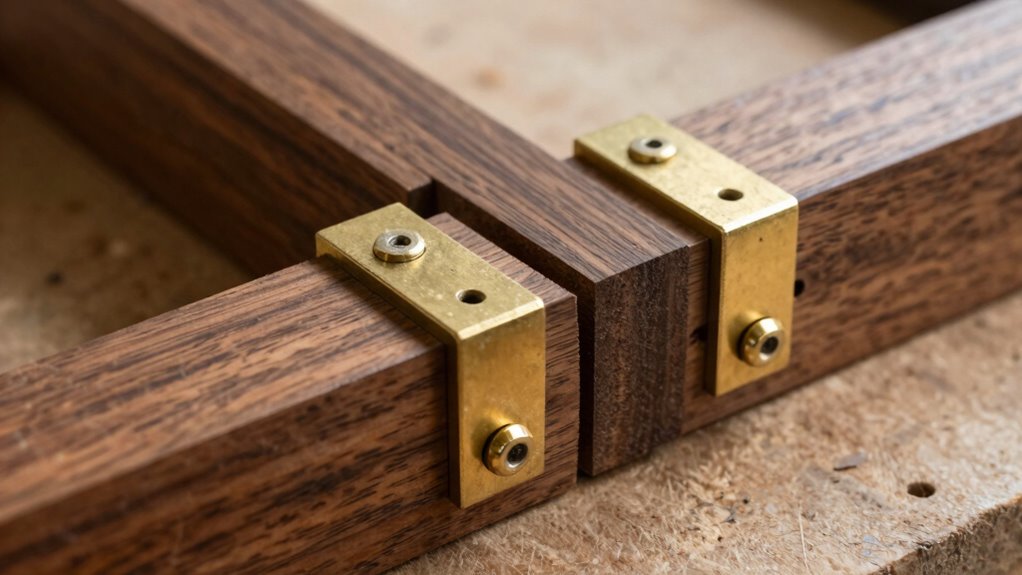
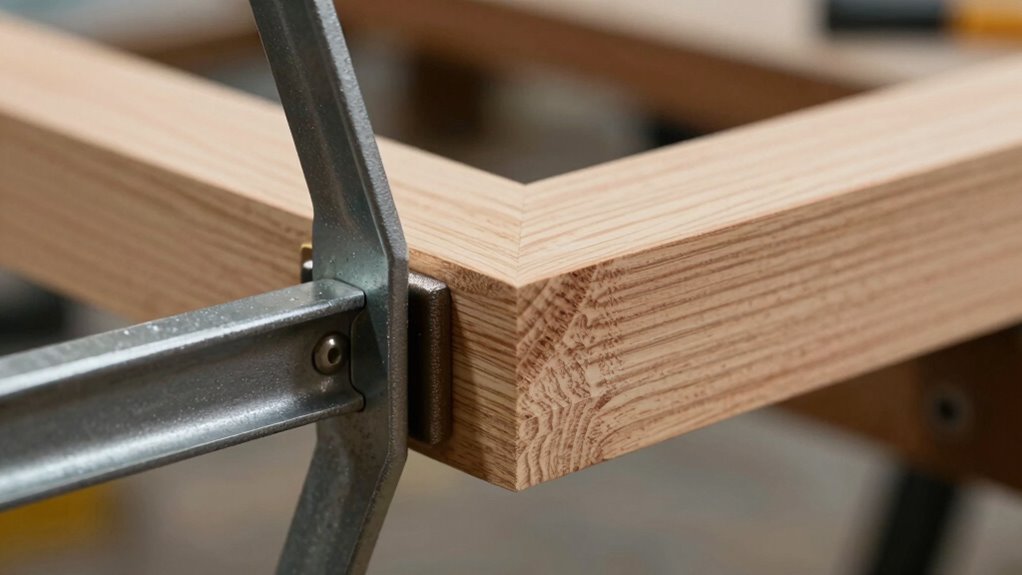
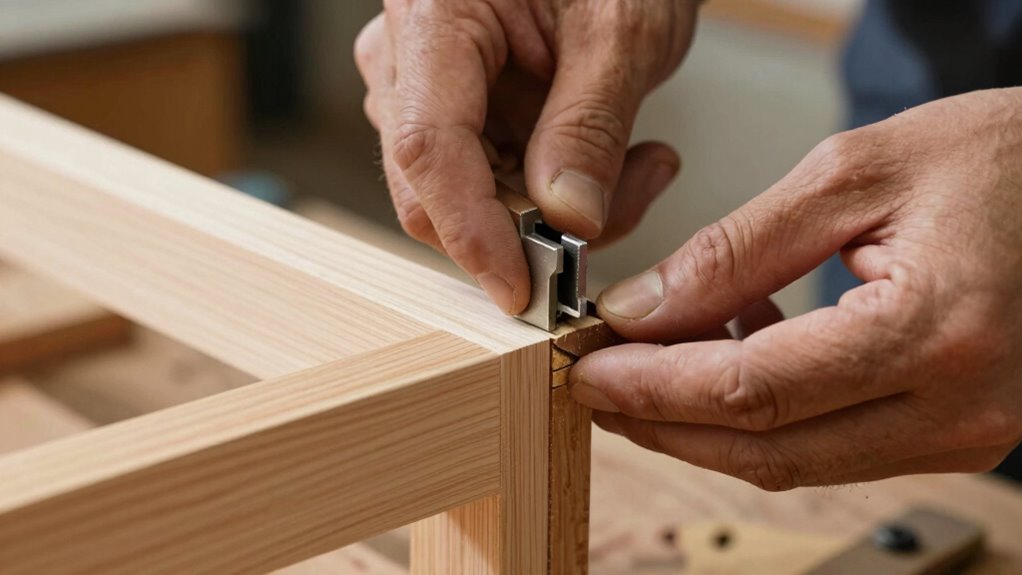
Using Corner Blocks and Cauls to Secure Your Miter Joints
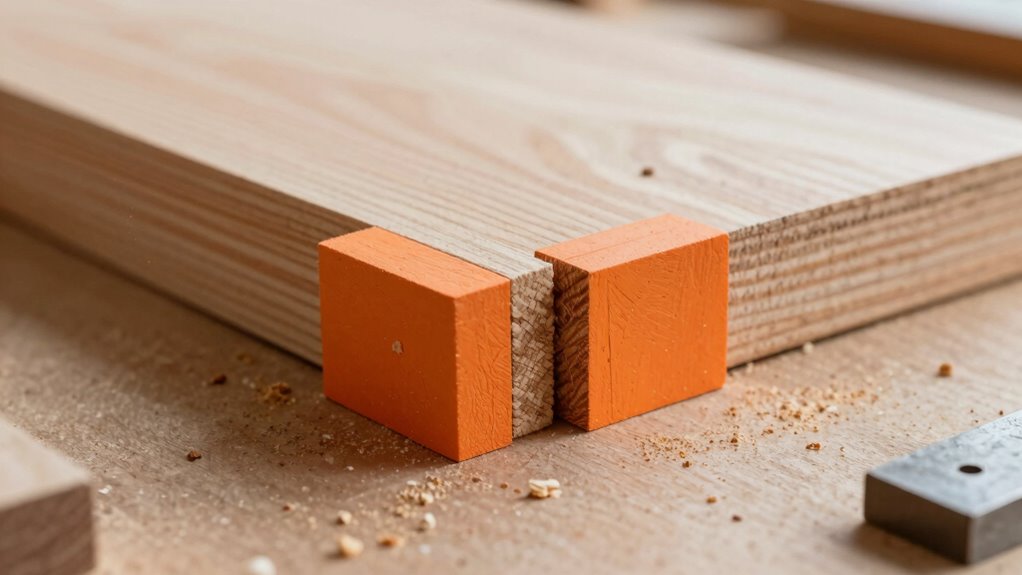
To securely hold miter joints in place as the glue sets, corner blocks and cauls are invaluable tools. Corner blocks are small, precisely cut pieces that fit snugly into the inside corners, preventing movement and maintaining perfect 90° angles. Caul clamping involves placing a flat, sturdy caul across the joint, distributing pressure evenly and preventing any misalignment. You can position the corner blocks inside the joint before applying glue, then use the caul to clamp the assembly tightly. This method guarantees consistent pressure and prevents the joint from shifting. Proper ventilation considerations during glue drying can also help ensure a strong, durable bond. With corner blocks and caul clamping, you keep your miters perfectly aligned and secure during the drying process, resulting in tight, accurate corners that require minimal cleanup or adjustments later.
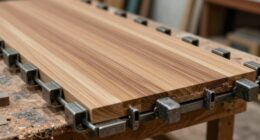
Clamping Techniques for Large Frames and Multiple Miters
When working on large frames or assemblies with multiple miters, standard clamps may not provide enough pressure or stability to keep everything aligned. To guarantee tight joints, consider using a combination of bar clamps and strap clamps. These clamp materials distribute pressure evenly and help maintain consistent angles. For larger projects, you might also use corner blocks or cauls to hold pieces in place while the joint adhesives set. Secure your miters with a mix of clamps and fasteners, applying steady pressure without over-tightening. Incorporating clamping techniques can further enhance joint accuracy and strength during assembly.
Common Clamping Problems and How to Fix Them
You might notice your clamps aren’t holding pieces tightly enough, leading to gaps or shifting. Misaligned clamping blocks can cause uneven pressure and skewed corners, while inconsistent clamp placement weakens the joint. Addressing these issues guarantees stronger, more precise corners every time. Ensuring proper clamping techniques helps improve joint accuracy and stability during assembly.
Insufficient Clamping Pressure
Insufficient clamping pressure is a common issue that can compromise the quality and safety of your project. When clamping pressure issues occur, they often lead to weak joints or misaligned miters. To fix this, verify your clamps are applying enough force to hold pieces securely. If the force is uneven, it can cause misalignment or gaps, so check that your clamps are evenly distributed across the joint. Using too few clamps or not tightening them properly can result in inadequate pressure. Consider adding more clamps or tightening existing ones gradually, alternating sides to promote even force distribution. Remember, the goal is consistent, firm pressure that keeps your miters tight without damaging the wood. Proper clamping ensures a clean, precise fit every time.
Misaligned Clamping Blocks
Misaligned clamping blocks are a common problem that can cause uneven joints and compromise project quality. When your clamps aren’t aligned properly, even slight deviations can lead to gaps or misfitted corners. To prevent this, focus on jig design—ensure your clamping blocks are securely mounted and precisely positioned. Proper jig design helps maintain consistent placement, reducing the chance of misalignment. Additionally, check material compatibility; using materials that are too soft or prone to warping can affect clamp positioning. Regularly verify that your clamping blocks are aligned before tightening, and consider using fixtures or guides to keep everything in place. By paying close attention to jig design and material compatibility, you’ll improve clamp accuracy and achieve perfect 90° miters every time.
Inconsistent Clamp Placement
Have you noticed your clamps sometimes shift or sit unevenly during setup? Inconsistent clamp placement can throw off your joint alignment, causing your mitered corners to be off 90°. To fix this, make sure your clamps are positioned evenly across the joint. Proper clamp placement maintains equal pressure, preventing one side from loosening or shifting.
- Check that clamps sit flush against the workpiece to avoid uneven pressure.
- Use multiple clamps to distribute force evenly across the joint.
- Confirm that the clamps are aligned parallel to the edges for consistent pressure.
Focusing on correct clamp placement helps keep your joints tight and your miters perfectly aligned, making your projects look professional and precise.
How to Properly Dry and Cure Your Miter Joints
To guarantee your miter joints are strong and precise, it’s essential to properly dry and cure the glue. The miter drying and curing process is vital for a durable, seamless joint. During this time, avoid moving or stressing the joint. Use clamps that apply even pressure and keep the work undisturbed. To visualize the drying process, consider this table:
| Stage | Duration | Tips |
|---|---|---|
| Initial Set | 15-30 minutes | Ensure clamps stay tight and joints aligned |
| Curing Phase | 24 hours or more | Keep joints undisturbed, avoid temperature fluctuations |
| Final Dry | 48 hours | Confirm glue is fully cured before handling |
| Complete Curing | 72 hours | Max strength achieved, ready for finishing |
| Reassessment | After curing | Check for any movement or gaps |
Final Checks and Adjustments for Flawless 90° Corners
Once the glue has fully cured, it’s time to verify and fine-tune your 90° corners to guarantee a flawless fit. Start by checking the alignment with a square, ensuring the corners form perfect right angles. If needed, adjust your miter saw calibration to correct any cutting inaccuracies. Pay attention to the wood grain matching; consistent grain flow across joints enhances both strength and visual appeal. To perfect the fit, lightly sand any high spots or uneven edges, ensuring seamless joints. Use clamps to hold the pieces tightly during final adjustments. Remember, precision now saves time later.
- Double-check miter saw calibration to avoid future miscuts
- Match wood grain direction for aesthetic consistency
- Ensure tight, even clamping for a secure joint
Frequently Asked Questions
What Are the Best Materials for Corner Clamps?
You should choose clamp material choices that offer durability and strength, like steel or aluminum, for reliable corner holding. An ergonomic clamp design makes the process easier and more comfortable, reducing fatigue during use. Plastic clamps can be useful for lighter tasks, but for precise miter joints, prioritize metal options to guarantee secure, long-lasting holds. Selecting the right material and ergonomic design helps you achieve perfect 90° corners effortlessly.
How Can I Prevent Glue From Seeping Into Joints?
Think of glue joint sealing like applying a thin, controlled layer of paint—less is more. To prevent glue seepage, use painter’s tape or apply a small amount of glue precisely. Wipe away excess quickly with a damp cloth. For a professional finish, finish with light clamping pressure and check the joint during drying. These finishing touch techniques help keep your corners neat and clean, avoiding messy seepage.
What Safety Precautions Should I Take When Clamping?
When clamping, prioritize clamp safety by wearing gloves and eye protection to prevent injuries. Always handle clamps with care, ensuring they are properly secured to avoid slipping or damage. Keep your hands clear of the clamping area during tightening, and double-check that the clamps are evenly applied to prevent uneven pressure. Proper handling not only keeps you safe but also guarantees a precise, secure joint.
Can I Use DIY or Homemade Clamps for Miters?
Yes, you can use DIY clamps or homemade solutions for miters, but make certain they’re sturdy and secure. Use common materials like C-clamps, bar clamps, or even makeshift jigs made from scrap wood. Just make sure your homemade clamps hold the pieces tightly at 90°, preventing any shifting during gluing or assembly. Always double-check the alignment before tightening completely to get perfect miter joints.
How Do Temperature and Humidity Affect Clamping Results?
Think of your project like a dance that shifts with the weather. Temperature and humidity cause wood to expand and contract, affecting clamping results. To keep your miters precise, maintain good climate control in your workspace, minimizing these fluctuations. When the air’s too humid or cold, wood might swell or shrink, making your clamps less effective. Managing these factors ensures your joints stay tight and true, no matter the season.
Conclusion
With the right clamping tricks, you’ll find your corners effortlessly snapping into place like perfectly aligned puzzle pieces. By paying attention to angles, using the proper tools, and making small adjustments along the way, your projects will come together smoothly and look professional. Think of it as gently guiding a delicate dance—your patience and technique will turn even tricky miters into flawless, seamless corners that impress every time.