A shooting board is a must-have for precise, clean woodworking cuts, and building one doubles your accuracy. Start by choosing durable materials like hardwood or quality plywood, then follow step-by-step instructions to assemble your jig, ensuring everything is aligned and secure. Adding custom features like adjustable clamps or stop blocks boosts versatility. Regular maintenance keeps it performing well over time. Keep exploring—there’s more to learn for a perfect, long-lasting setup.
Key Takeaways
- Use durable materials like hardwood or high-quality plywood for building a stable, long-lasting shooting board.
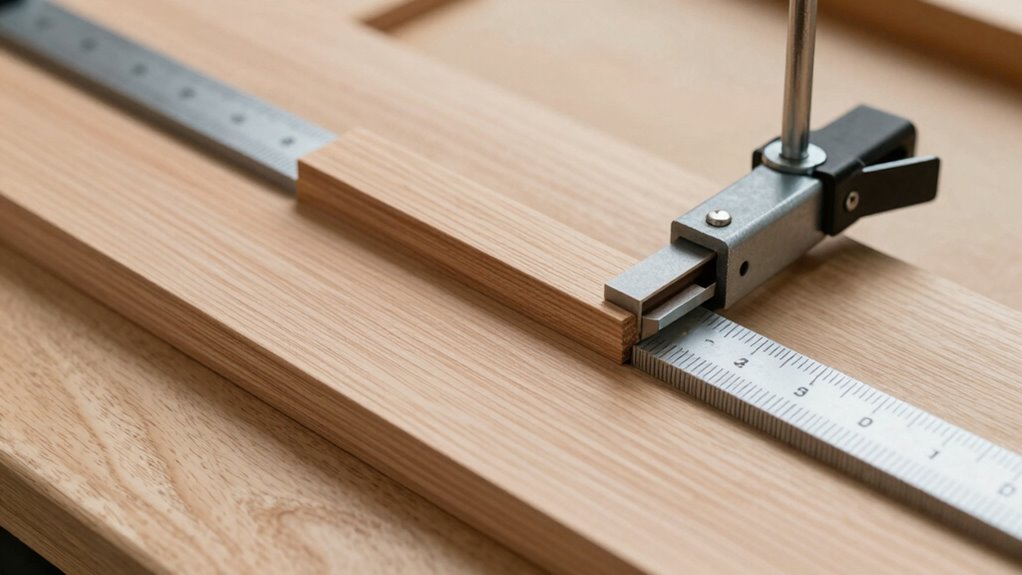
- Ensure the fence is securely attached and properly aligned with the blade for accurate, clean cuts.
- Incorporate adjustable clamps and stop blocks to enhance versatility and repeatability during woodworking projects.
- Regularly inspect and maintain the blade, surface, and hardware to preserve precision over time.
- Mount the shooting board securely to your workbench and check for flatness and alignment before each use.

Woodriver Shooting Board For Hand Planes
For use with woodworking hand planes
As an affiliate, we earn on qualifying purchases.
As an affiliate, we earn on qualifying purchases.
Why a Shooting Board Is Essential for Precise Woodworking
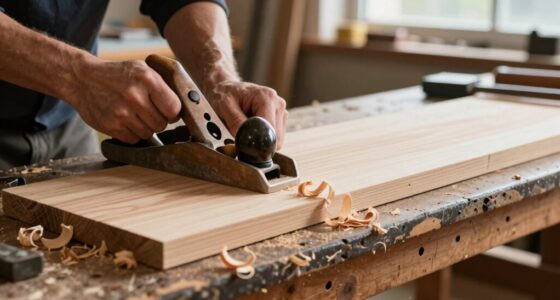
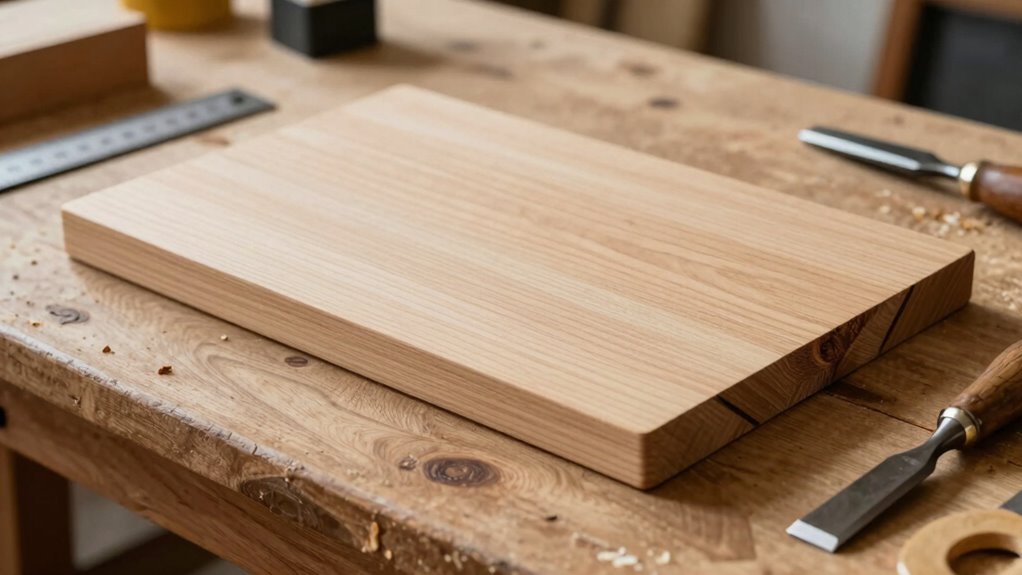
A shooting board is an essential tool for achieving precise, clean edges on your woodworking projects. It helps you make consistent, accurate cuts that enhance the overall quality of your work. One key factor is grain selection; by aligning the wood grain properly, you reduce tear-out and ensure a smoother cut. This precision is especially important when preparing edges for finish application, as it results in a seamless look without rough spots or splinters. Using a shooting board allows you to refine and perfect edges, giving your project a professional finish. Without it, you risk uneven joints and compromised durability. Investing in a shooting board makes your woodworking more accurate, improves your craftsmanship, and leads to a better finish every time. Additionally, understanding wood grain direction can significantly impact the quality of your cuts and overall project longevity.
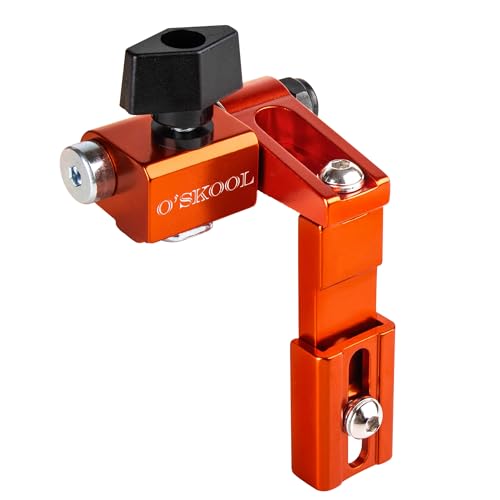
O'SKOOL Adjustable T-Track Flip Stop, Variable Arm Stop Block with 2-3/8" to 3-1/4" Adjustable Length, Fits Universal Double-Cut T-Tracks for Miter Saw & Router Table Fences, TTK021
Repeatable Accuracy for Consistent Cuts : If you’ve ever tried to cut multiple pieces to the exact same…
As an affiliate, we earn on qualifying purchases.
As an affiliate, we earn on qualifying purchases.
Choosing the Right Materials for Your Shooting Board
When selecting materials for your shooting board, you need to consider both durability and strength to ensure it stays true over time. You’ll also want to think about cost and how easily accessible the materials are, so your build remains practical. Balancing these factors helps you choose the best option for your woodworking needs. Additionally, choosing ergonomically appropriate materials can enhance your comfort during use and improve your overall workspace setup.
Material Durability and Strength
Choosing the right materials for your shooting board is essential because durability and strength directly impact its performance and longevity. You need materials with solid material composition to withstand repeated use without warping or damage. Ensuring good structural integrity means your jig remains stable and precise during cutting. Consider options like hardwoods or high-quality plywood, which offer ideal strength and resilience. Here’s a quick comparison:
| Material | Material Composition | Structural Integrity |
|---|---|---|
| Hardwood | Dense, natural wood | High |
| Plywood | Layered veneer | Moderate to high |
| MDF | Composite wood | Lower |
Choose based on your needs, but prioritize materials that maintain their shape and strength over time, ensuring accurate cuts every time. Additionally, understanding the material properties helps in selecting the best option for long-term durability.
Cost and Accessibility
Selecting materials for your shooting board involves balancing durability with affordability. To keep costs manageable, consider these options: 1. Plywood, a budget-friendly choice that’s easy to work with and readily available. 2. Hardwood like maple or oak, offering greater durability but at a higher price. 3. MDF or particleboard, affordable DIY alternatives suitable for lightweight use. 4. Reclaimed wood, a cost-effective, eco-friendly option if you can find quality pieces. Additionally, choosing materials with stable and consistent properties can help maintain accurate cuts over time color fidelity. Your choice depends on your budget and intended use. Budget options like plywood and MDF are great for casual projects, while hardwood provides longevity for frequent use. DIY alternatives can considerably lower costs, making it easier to build a quality shooting board without overspending.

WETOLS Corner Clamp for Woodworking, 90 Degree Right Angle Clamp, Wood Clamps, 4Pcs Adjustable Spring Loaded Woodworking Clamp, Gifts for Him, Birthday Gifts for Men, Photo Framing, Orange
Cool Gadgets Gifts for Men: WETOLS corner clamp comes with a nice gift box, which can be great…
As an affiliate, we earn on qualifying purchases.
As an affiliate, we earn on qualifying purchases.
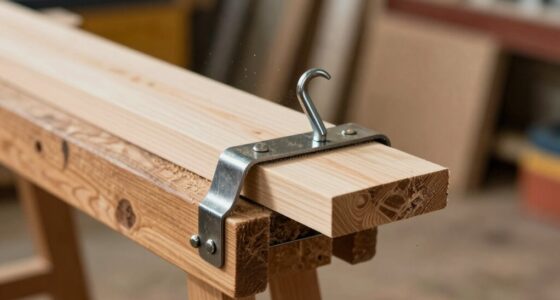
Building Your Shooting Board Step by Step
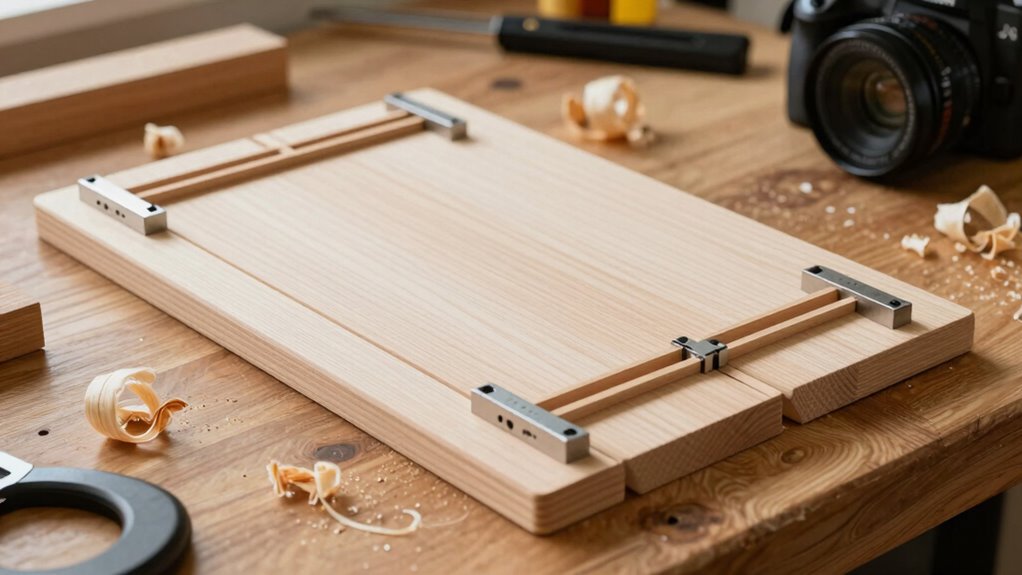
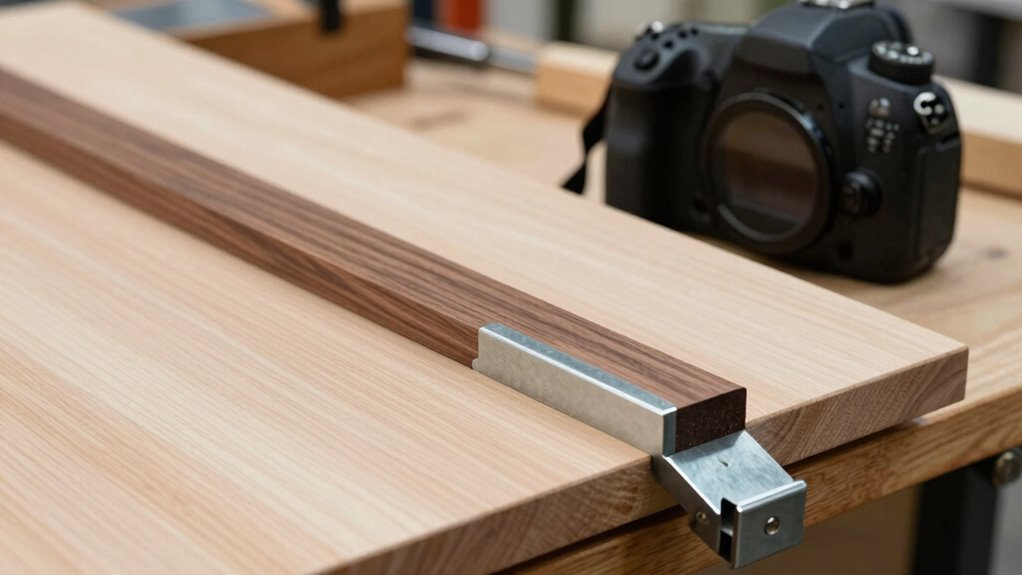
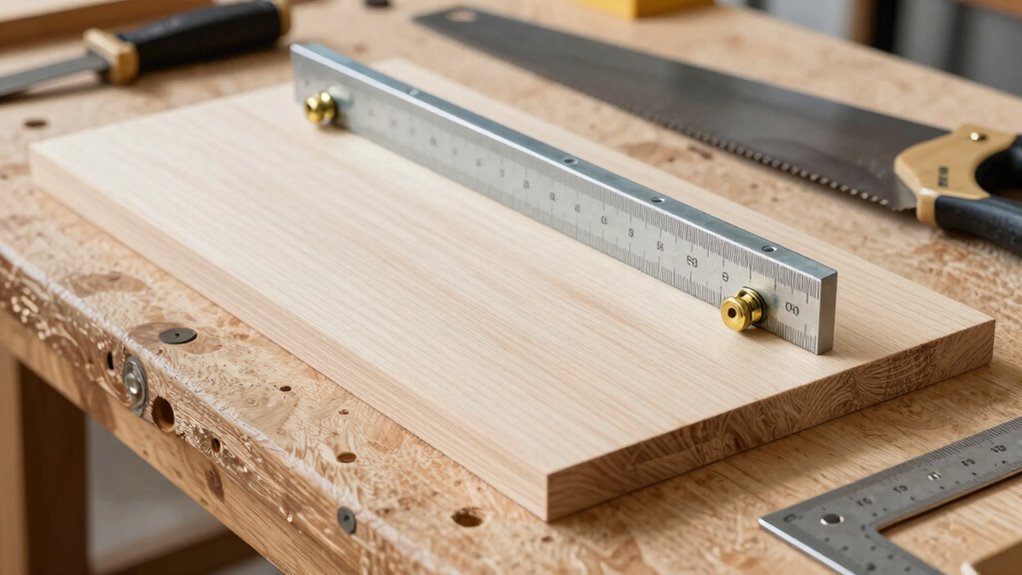
To build your shooting board step by step, start by gathering all the necessary materials and tools. Begin with the base, ensuring it’s flat and stable. Attach the fence securely, paying close attention to blade alignment; this guarantees accurate cuts. Once assembled, check that the fence is perpendicular to the base. Next, sand any rough edges and surfaces with finish sanding to prevent splinters and improve safety. Confirm that the fence moves smoothly and locks firmly in place. If needed, make small adjustments to maintain perfect alignment. Precision is key, so take your time. A well-constructed shooting board will enhance your woodworking accuracy and produce cleaner, more precise cuts. Proper alignment techniques ensure optimal performance and safety. Carefully following each step guarantees a stable, reliable jig for your projects.

MATEWORK Dowel Jig, Adjustable Width Doweling Jig for Woodworking, Biscuit Joiner with Imperial Side Scale for Centering, Drill Guide for Straight Holes Dowel Jig Kit Suitable for Carpenters & DIYers
【Adjustable Width】The doweling drill jig woodworking accommodates boards from 3/8" to 1-3/4" thick, with adjustment via rotation of…
As an affiliate, we earn on qualifying purchases.
As an affiliate, we earn on qualifying purchases.
Tips for Setting Up Your Shooting Board for Accurate Cuts
Once your shooting board is assembled and aligned, setting it up correctly guarantees your cuts are accurate every time. To optimize finish quality and grain direction, follow these tips:
- Check grain direction: position your work so the grain runs along the cut line, reducing tear-out.
- Secure your work firmly to prevent shifting during cutting.
- Adjust the fence to ensure a consistent angle and smooth, straight cuts.
- Test on scrap first, fine-tuning the fence and clamp positions for clean, accurate results.
- Regularly inspect your setup to maintain precision and consistency during your woodworking projects.
Proper setup minimizes splintering and enhances finish quality by respecting the grain flow. Consistently checking alignment and making small adjustments ensures each cut remains precise, giving you cleaner edges and better overall craftsmanship.
Common Mistakes When Building and Using a Shooting Board: And How to Avoid Them
Building and using a shooting board might seem straightforward, but common mistakes can compromise your accuracy and finish quality. One mistake is poor clamp placement, which can cause movement during cutting, leading to uneven edges. Always make certain clamps are securely positioned without interfering with the blade’s path. Another frequent error is misaligned blades; if your blade isn’t perfectly parallel to the fence, your cuts will be skewed. Double-check blade alignment before each cut, especially after adjustments. Additionally, rushing through setup or neglecting to verify clamp tightness can result in inaccuracies. Taking the time to properly clamp your workpiece and maintain correct blade alignment helps avoid these pitfalls, ensuring cleaner, more precise cuts every time. Incorporating proper setup techniques can further enhance your accuracy and safety during use.
Custom Features and Accessories to Improve Your Shooting Board

Adding custom features can make your shooting board more versatile and user-friendly. Adjustable clamping systems, custom stop blocks, and flexible mounting options help you work more accurately and efficiently. These upgrades let you tailor your setup to fit your specific woodworking needs. Incorporating specialized accessories can further enhance your shooting board’s performance and adapt it to a variety of projects.
Adjustable Clamping Systems
Adjustable clamping systems are essential for securing workpieces firmly on your shooting board, ensuring accurate cuts and safe operation. With the right system, you get precision clamping and quick adjustments, saving time and improving accuracy. Consider these options:
- Lever-operated clamps for fast, one-handed adjustments.
- Knob-based clamps offering fine-tuned control for precise positioning.
- Spring-loaded clamps for quick release and secure hold.
- Sliding clamps with scale markings to set consistent positions easily.
These features help you maintain stability during cuts while allowing you to adapt quickly to different workpiece sizes. By choosing the right adjustable clamping system, you improve your workflow and ensure each cut is as accurate as possible. Incorporating precision clamping techniques can further enhance your cutting accuracy and safety.
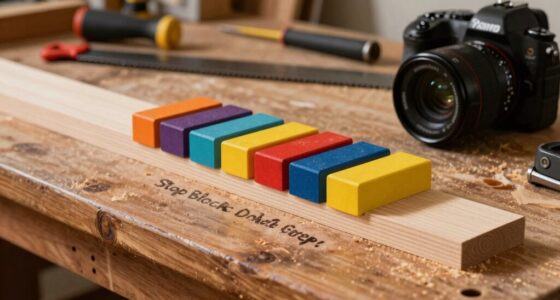
Custom Stop Blocks
Custom stop blocks can markedly enhance the accuracy and efficiency of your shooting board. By providing precise, repeatable positioning, they help ensure consistent cuts and alignment. You can tailor these stop blocks to fit specific project sizes or angles, giving you greater control over your work. Incorporating precision alignment features into your stop blocks minimizes errors and boosts overall accuracy. Additionally, custom stop blocks can include safety features, such as finger guards or non-slip bases, reducing the risk of slips and injuries during use. They are easy to adjust and secure, allowing quick changes for different cuts. With custom stop blocks, you optimize your shooting board for both precision and safety, making your woodworking projects more accurate and safer to execute. Understanding food science can also help you better grasp how materials and techniques influence your results.
Flexible Mounting Options
Enhancing your shooting board with flexible mounting options allows you to adapt it to various projects and workspace setups easily. This mounting versatility guarantees your jig stays secure and stable, no matter the task. Consider these options to improve accessory compatibility and usability:
- Attach clamps or screws to fix the board to your workbench firmly.
- Use adjustable brackets for quick repositioning across different surfaces.
- Incorporate T-tracks or slots for versatile accessory attachment.
- Add magnetic or peg-based mounts for easy, tool-free adjustments.
These features let you customize your setup, ensuring precise cuts and better control. With adaptable mounting options, your shooting board becomes a more versatile, efficient tool that fits your evolving needs.
Maintaining and Troubleshooting Your Shooting Board for Long-Term Accuracy
To guarantee your shooting board remains accurate over time, regular maintenance and troubleshooting are essential. Start by inspecting the blade for dullness or damage, and perform blade maintenance as needed to ensure clean, precise cuts. Keep the surface smooth and free of debris, checking for warping or misalignment. Proper storage solutions are vital; store your shooting board in a dry, stable environment to prevent warping or rust. If you notice inaccuracies, verify the blade’s alignment and tighten any loose screws or fittings. Regularly clean and lubricate moving parts to maintain smooth operation. Troubleshoot issues by checking for surface irregularities or damaged components, addressing problems promptly to preserve your shooting board’s precision and extend its lifespan.
Frequently Asked Questions
Can I Use a Shooting Board for Metalworking Projects?
You can use a shooting board for metalworking projects, but it’s not ideal. Shooting boards are designed for woodworking tools and techniques, so they might not withstand metal cutting forces. For metalworking, specialized jigs and fixtures are better suited to guarantee safety and precision. While you might adapt a woodworking shooting board for soft metals, always prioritize tools made specifically for metalworking to achieve the best results and avoid damage.
What Safety Precautions Should I Follow When Building a Shooting Board?
Did you know that proper safety precautions can reduce workshop accidents by up to 85%? When building a shooting board, always wear safety gear like goggles and ear protection. Keep your workspace well-ventilated to avoid inhaling dust or fumes. Use clamps securely, and never rush the process. Following these safety steps guarantees you stay safe and get the best results from your project.
How Do I Adjust for Different Angles on a Shooting Board?
To adjust for different angles on your shooting board, start with the angle adjustment mechanism, loosening the clamps or locking levers. Set your desired angle using the built-in scale or a protractor, then secure it firmly with clamping techniques to prevent movement. Double-check your setting before making cuts, ensuring accuracy. Proper clamping techniques keep the jig stable, resulting in precise, repeatable cuts at various angles.
Is a Shooting Board Suitable for Beginner Woodworkers?
A shooting board is definitely beginner friendly and perfect for skill building. You might worry it’s complicated, but with simple instructions, you’ll quickly learn how to make precise cuts. It helps you improve your accuracy and develop good woodworking habits early on. Using a shooting board builds confidence, making it an essential tool for beginners who want to refine their skills and produce professional-looking projects.
What Are the Best Storage Practices for Maintaining Accuracy?
To maintain accuracy, you should use protective storage for your shooting board to prevent damage and warping. Store it in a dry, stable environment, away from humidity and temperature fluctuations. Regularly perform calibration techniques, like checking the alignment with a precision square, to guarantee it remains true. Proper storage and routine calibration help keep your shooting board precise, so your woodworking projects stay accurate and consistent over time.
Conclusion
With your shooting board expertly crafted and finely tuned, each cut becomes a precise stroke on your woodworking canvas. Imagine the smooth glide of your stock against the sturdy surface, the crispness of every bevel and mitre, transforming raw timber into refined artistry. As you step back, you’ll see your project take shape with unwavering accuracy, a demonstration of your skill and attention to detail. Your shooting board isn’t just a tool; it’s the foundation of craftsmanship.