
To achieve splinter-free cuts, you need more than just using a splinter strip. Focus on understanding your grain direction and cutting with the grain to prevent tearing. Keep your tools sharp and handle them with care to guarantee clean slices. Support your workpiece properly to avoid excessive force, and use guides for straight cuts. Paying attention to technique and finishing edges also helps reduce splinters. If you want to master this skill, there’s more to discover below.
Key Takeaways
- Proper grain orientation prevents tearing and splintering during cutting, regardless of splinter strip use.
- Sharp tools and fine blades ensure cleaner cuts, reducing splintering beyond just applying a splinter strip.
- Supporting the workpiece securely minimizes fiber tearing caused by excessive force or movement.
- Post-cut sanding smooths edges and removes residual splinters, complementing the splinter strip’s effectiveness.
- Technique mastery, including controlled pressure and guided cuts, is essential for splinter-free results beyond splinter strips.
When you’re working with wood, splinters can be a frustrating and painful obstacle. No matter how carefully you handle your project, splinters often find their way into your skin, slowing down progress and risking injury. To achieve splinter-free cuts, it’s essential to understand that it’s not just about using splinter strips or protective measures; it’s about mastering your cutting techniques and paying close attention to the wood grain. The way the wood grain runs influences how cleanly you can cut, so aligning your tools properly and adjusting your approach accordingly makes a significant difference.
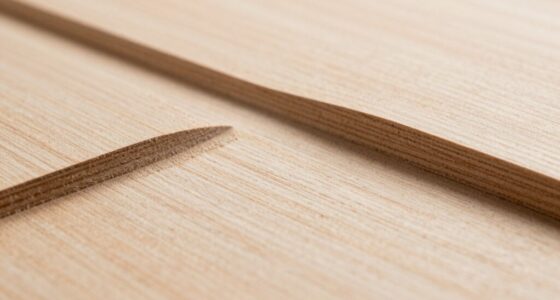
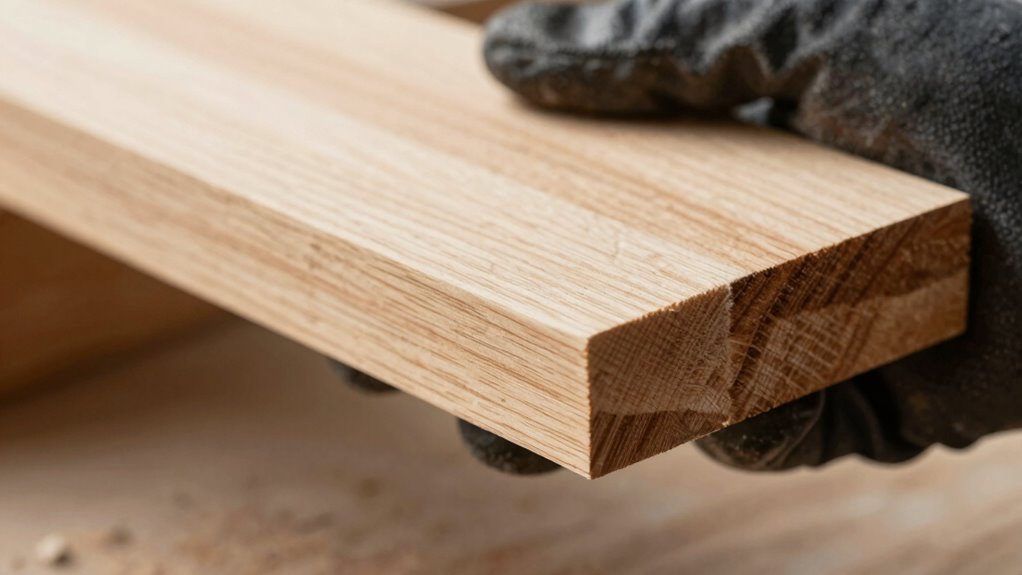
First, pay attention to the wood grain before you start cutting. If you cut with the grain, you’re more likely to produce a smooth, splinter-free edge. Cutting against or across the grain often causes fibers to tear or splinter, increasing the risk of rough edges and injury. To minimize this, always observe the direction of the grain and plan your cuts accordingly. When possible, take time to mark the grain direction with a pencil, especially on rough or uneven pieces. This simple step guides your saw or carving tool to follow the natural fibers, reducing splintering and creating cleaner results. Additionally, understanding the grain orientation helps you select the best cutting technique for a smoother finish.
Cut with the grain for smooth, splinter-free edges and safer woodworking results.
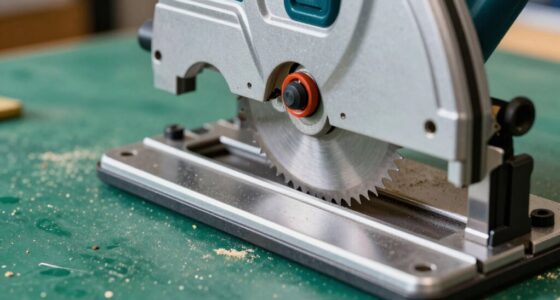
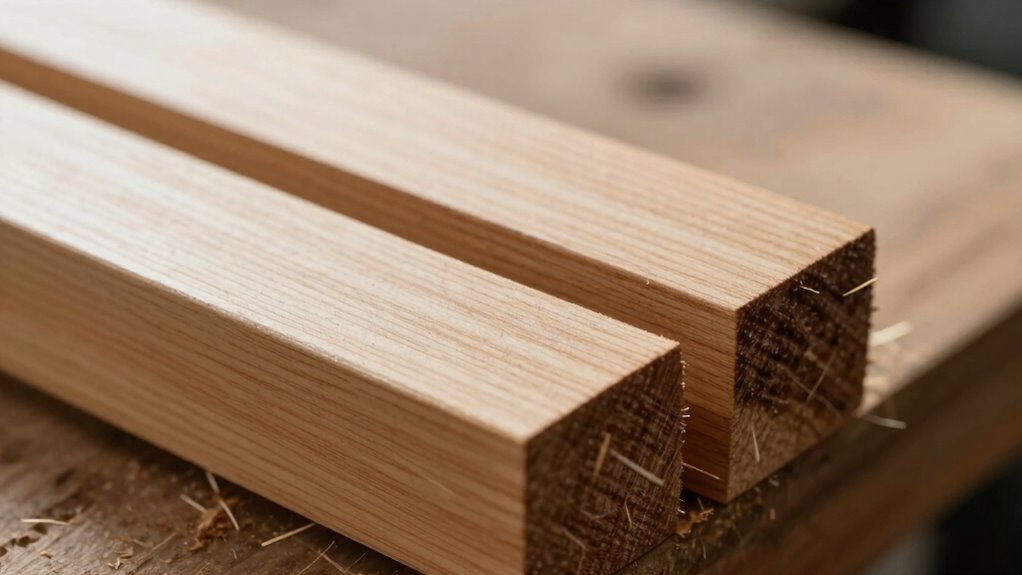
Your cutting techniques play a crucial role. Use sharp blades or saws, as dull tools tend to tear fibers rather than slice through them. When making cuts, start with a light, controlled initial pass to establish a groove, then increase pressure gradually. This technique helps maintain control and prevents tearing. Also, consider the type of saw or blade you’re using—fine-toothed blades are better for smooth cuts, while coarse blades might cause more splintering. For delicate or finishing work, sand the edges after cutting to smooth out any rough fibers, further preventing splinters from poking through.
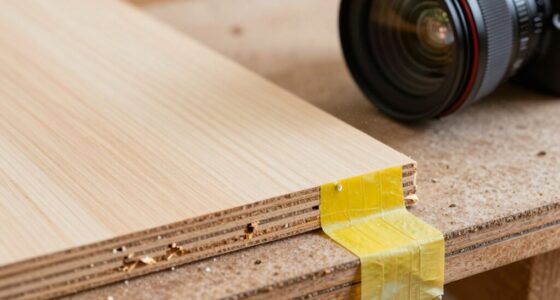
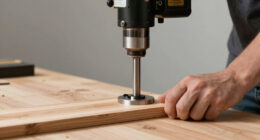
Properly supporting the wood during cutting is vital. Use clamps or a sturdy work surface to keep the piece steady, so you don’t have to apply excessive force, which can cause fibers to tear. When making long or intricate cuts, use a guide or straight edge to maintain consistent pressure and direction. These small adjustments in technique help prevent fibers from ripping and keep your cuts cleaner.

Diablo Fine Finish Saw Blade for Wood – Ultra-Smooth Cuts, 60 Hi-ATB Teeth, 10" Diameter, .098" Kerf, 5/8" Arbor – D1060X
Shock Resistant Design -azing reinforces carbide tips to withstand high impact, making this blade suitable for demanding jobs.
As an affiliate, we earn on qualifying purchases.
As an affiliate, we earn on qualifying purchases.
Frequently Asked Questions
How Do I Choose the Best Saw Blade for Splinter-Free Cuts?
To choose the best saw blade for splinter-free cuts, focus on blade materials like carbide or high-speed steel for durability. Opt for blades with a fine tooth count to reduce splinters, and consider cutting angles—bevel angles help smooth the cut surface. Also, look for blades specifically designed for clean cuts on your material type. Combining these factors guarantees you get smooth, splinter-free results every time.
Can Blade Maintenance Prevent Splintering During Cuts?
Yes, blade maintenance can prevent splintering during cuts. Regularly sharpening your blade, cleaning dust buildup, and guaranteeing proper alignment all extend blade longevity and improve cut quality. Dust management keeps debris from dulling the blade and causing rough edges, while well-maintained blades cut more smoothly, reducing splintering. By caring for your blade, you ensure cleaner cuts, longer tool life, and a safer, more efficient work process.
Do Different Wood Types Require Different Cutting Techniques?
Yes, different wood types require different cutting techniques. You should pay attention to the grain direction because cutting along the grain produces cleaner cuts, while cross-cutting can cause splintering. Additionally, consider the wood’s moisture content; wetter wood is softer and may need slower, careful cuts to prevent splintering. Adjust your blade speed and pressure accordingly, and always match your technique to the specific wood to get the best results.
How Does Feed Rate Affect Splintering?
If you increase your feed rate, you risk more splintering, especially if your cutting speed isn’t perfect. A faster feed rate pushes the blade through wood quickly, which can tear fibers apart. Conversely, a slower feed rate allows a cleaner cut, reducing splinters. The key is balancing feed rate with cutting speed, so each pass slices smoothly without causing damage—making your cuts cleaner, safer, and more precise.
Are There Specific Safety Precautions for Splinter-Free Cutting?
Yes, there are specific safety precautions for splinter-free cutting. You should always wear protective gear like gloves and safety glasses to prevent injury from splinters. Make certain your workspace is well-organized and clean, with proper lighting and stable surfaces to reduce accidents. Keep hands away from the cutting path and follow manufacturer instructions carefully. Proper workspace setup and safety gear are essential to minimize risks and achieve safe, splinter-free cuts.

Jorgensen 3-in-1 Support Block, Cabinet Master Parallel Clamp Accessory, Woodworking Bench Dog, Riser Block, Anti-Slip Pad, Clamp Spacer for Assembly and Leveling, 4-Pack
3-in-1 Multi-Use Support Block: Functions as a clamp riser, bench dog, and 90° corner guide—all in one compact…
As an affiliate, we earn on qualifying purchases.
As an affiliate, we earn on qualifying purchases.
Conclusion
So, next time you think a splinter strip’s all that matters, think again. It’s not magic; it’s science, technique, and maybe a little patience. Don’t blame the strip if your cut’s a disaster — blame your approach. Because, really, a splinter-free cut depends on more than a strip; it depends on your skill, your tools, and your willingness to learn. Surprise! It’s not just about the strip. Who knew?

GRAPHITE Hard Lead Carpenter Pencil #2 Lumber Pencil (72) PCS – Industrial Pencil Wood Flooring Marker for Wood Working Tools Marking & Concrete Marking – Yellow
DRAWS VISIBLE MARKING LINES – This GRAPHITE Carpenters Pencil is used to mark drill holes, draw out visible…
As an affiliate, we earn on qualifying purchases.
As an affiliate, we earn on qualifying purchases.

Sand Paper, 48 PCS Sandpaper, 120 to 5000 Assorted Grit Sandpaper Sheets, 9 x 3.6 Inch Premium Wet Dry Sandpaper for Wood Furniture Finishing, Metal Sanding, Automotive Polishing
Meets All Your Needs: 48 pcs sand paper kit, 16 grits sandpaper assortment, including 3 sheets of each…
As an affiliate, we earn on qualifying purchases.
As an affiliate, we earn on qualifying purchases.