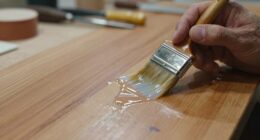
Splinter guards are designed to protect your cuts and reduce tearouts by preventing wood fibers from splitting during the cut. However, tearouts can still happen if the guard isn’t installed properly, if your blade is dull or misaligned, or if the setup isn’t perfect. Even the best guard isn’t foolproof. To find out how to minimize these issues and improve your results, explore the detailed tips and techniques that follow.
Key Takeaways
- Improper or misaligned splinter guards can fail to prevent tearouts during cutting.
- Dull or mismatched blades increase the risk of splintering despite guard use.
- Incorrect guard placement or loose fitting reduces effectiveness, leading to tearouts.
- Using low-quality materials for guards or neglecting maintenance worsens tearout issues.
- Inadequate preparation, such as not scoring or supporting the workpiece, can cause tearouts even with guards.

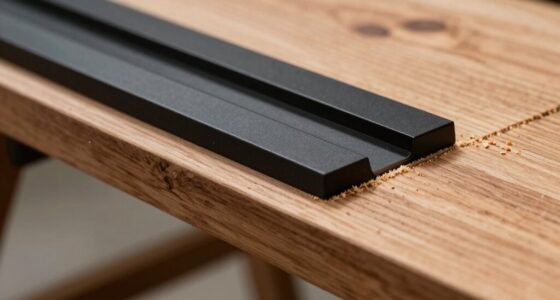
Makita 194419-4 118" Splinter Guard Replacement Strip, Black
Engineered to help prevent splintering material
As an affiliate, we earn on qualifying purchases.
As an affiliate, we earn on qualifying purchases.
What Are Splinter Guards and How Do They Protect Your Cuts
Splinter guards are small, protective covers placed over the tips of your nails or around the edges of a cut to prevent further injury. They serve as essential safety precautions, shielding your skin from sharp splinters and rough edges during woodworking. Proper material selection is key; choose flexible, durable materials like silicone or rubber that conform well to your workpiece and resist tearing. These guards help minimize splintering by preventing the wood fibers from breaking apart as the saw blade passes through. By creating a barrier, splinter guards keep your cuts cleaner and safer, reducing the risk of splinters flying into your eyes or onto your skin. Always guarantee you select the right material for your specific project to maximize protection and safety. Material selection plays a crucial role in ensuring the effectiveness of splinter guards and your overall safety. Additionally, using high-quality splinter guards can reduce material fatigue and extend their lifespan, providing consistent protection over multiple projects. When selecting a guard, consider the compatibility with your track saw to ensure proper fit and optimal performance. Moreover, understanding the role of material properties such as flexibility and resilience can significantly enhance the safety and durability of your splinter guards.
Makita 194419-4 118" Splinter Guard Replacement Strip, Black
Engineered to help prevent splintering material
As an affiliate, we earn on qualifying purchases.
As an affiliate, we earn on qualifying purchases.
How to Choose the Right Splinter Guard for Your Track Saw
Choosing the right splinter guard for your track saw involves considering the material and design to guarantee maximum protection and clean cuts. Look for a guard that fits your saw precisely to minimize tearout and ensure smooth operation. A guard with integrated dust collection helps keep your workspace clean and improves visibility, reducing the risk of tearouts caused by debris buildup. Additionally, select a guard compatible with blade lubrication options to prevent overheating and reduce friction, which can lead to splintering. The material of the guard should be durable and resistant to wear, ensuring long-lasting performance. Proper alignment of the splinter guard is essential for achieving optimal cut quality. Ensuring smart safety features are incorporated can further enhance your cutting experience by alerting you to misalignments or potential hazards. Paying attention to manufacturing standards and choosing guards that meet industry safety regulations can help prevent accidents and ensure consistent results. Furthermore, selecting a guard designed with user-friendly adjustments can make installation and fine-tuning easier, improving overall safety and performance. Incorporating industry-approved materials can also contribute to increased durability and safety. By paying attention to these factors, you’ll enhance your saw’s accuracy, extend its lifespan, and achieve cleaner, more precise cuts every time.

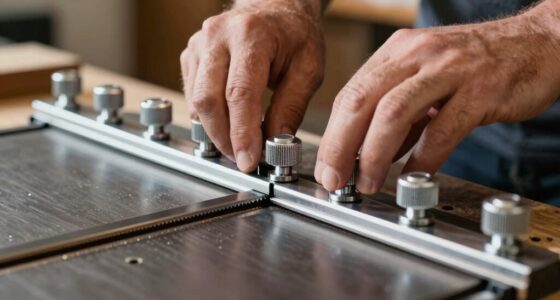
BOBOVAV Table Saw Alignment Gauge with 0.0005"Digital Dial Indicator – 18cm Rod, Fits 3/4"(19mm)+ with Screw Adjustment, CNC Machined Aluminum Bar Stable for Saw Blade Alignment and Calibration
High Precision Digital Measurement: BOBOVAV digital table saw alignment gauge features a digital dial indicator with 0.0005" (0.01mm)…
As an affiliate, we earn on qualifying purchases.
As an affiliate, we earn on qualifying purchases.
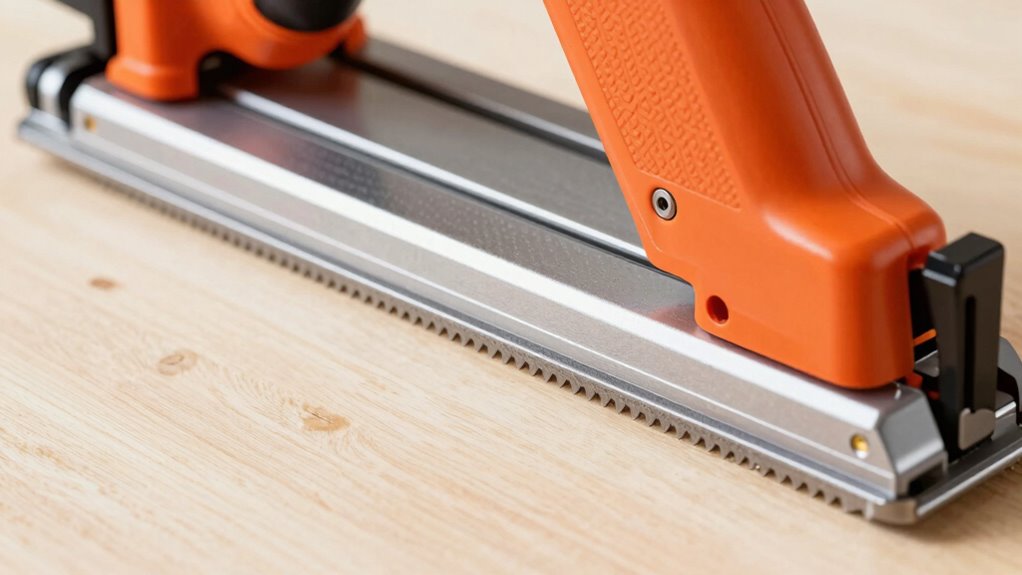
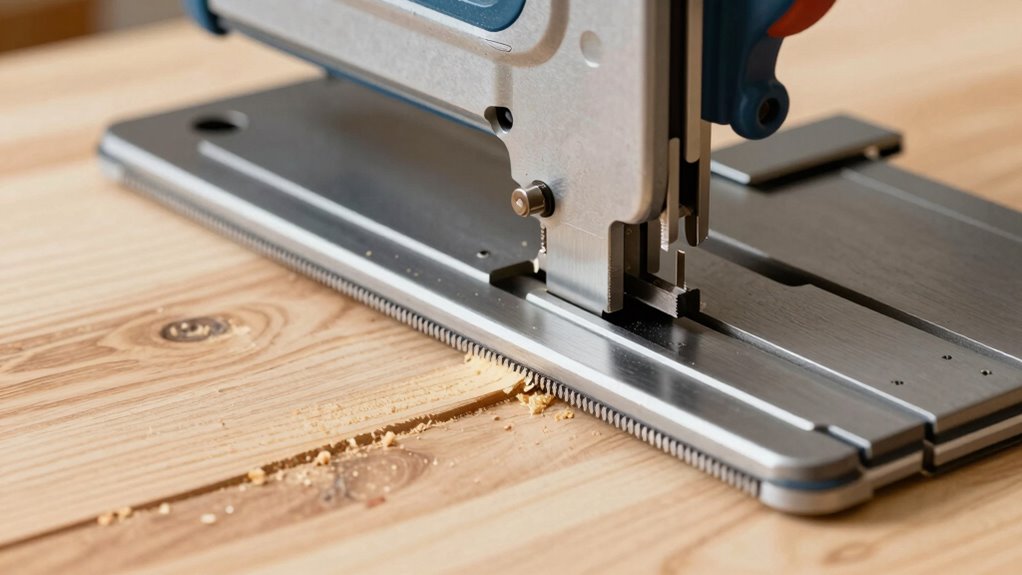
How to Install and Adjust Your Splinter Guard for Cleaner Cuts
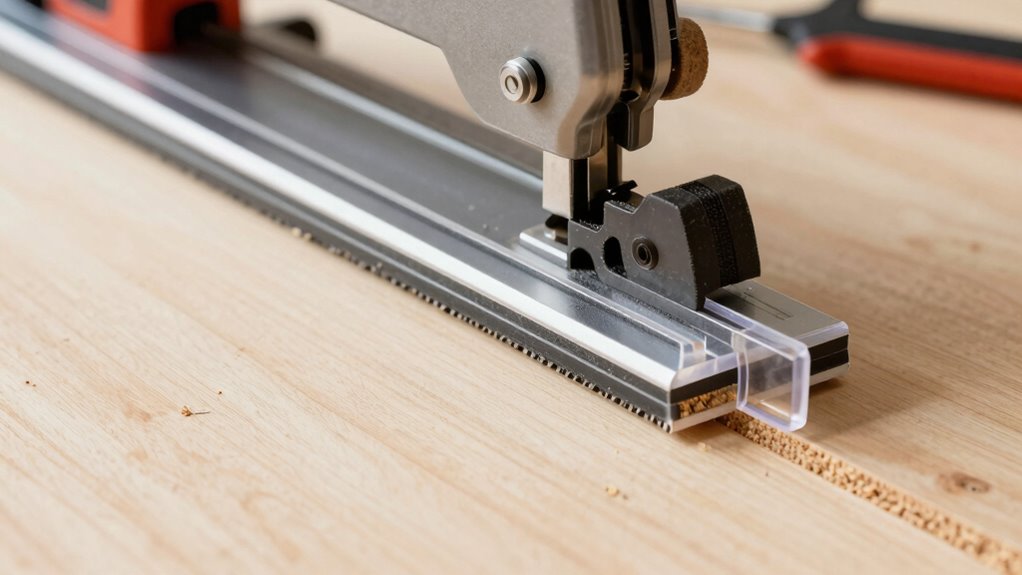
To get the cleanest cuts, start by properly placing the splinter guard close to the blade without touching it. Next, adjust the blade height so the guard aligns correctly and provides ideal protection. Finally, make sure the guard is securely fastened to prevent movement during use. Ensuring proper gadget maintenance can also help prevent unexpected tearouts and improve overall cutting performance. Regularly inspecting and cleaning your saw components can further enhance cutting precision and safety. Additionally, selecting the right insulated jackets for winter can keep you comfortable during long work sessions. Incorporating connected equipment like smart saws or sensors can help monitor blade alignment and prevent tearouts proactively.
Proper Guard Placement
Ever wonder how to guarantee your splinter guard is properly installed for the best results? Proper guard placement is vital for cleaner cuts and safety. First, ensure the guard aligns snugly with the blade, covering just enough to prevent tearouts without hindering your cut. Double-check the guard’s position before each use, especially after maintenance tips like cleaning or adjusting. Remember these safety precautions: always disconnect the saw before adjustments, wear safety gear, and confirm the guard doesn’t interfere with the track. To make installation easier:
- Confirm the guard is securely fastened to avoid shifting.
- Adjust the guard so it’s close to the workpiece without touching the blade.
- Regularly inspect for damage or wear to keep safety excellent. Proper placement ensures safer, cleaner cuts every time. Also, understanding filtration and airflow in your saw system can help maintain a dust-free environment and optimal performance.
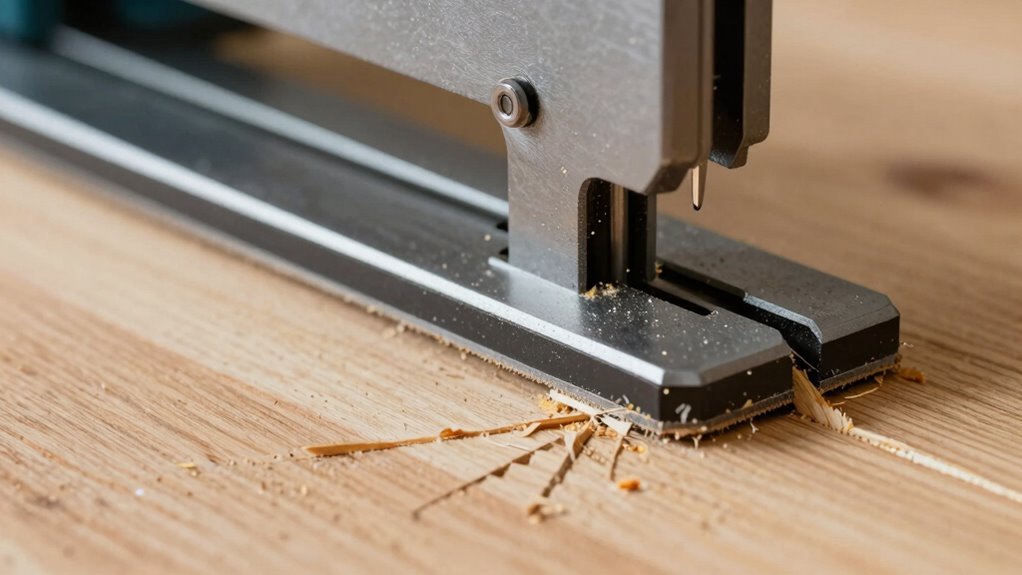
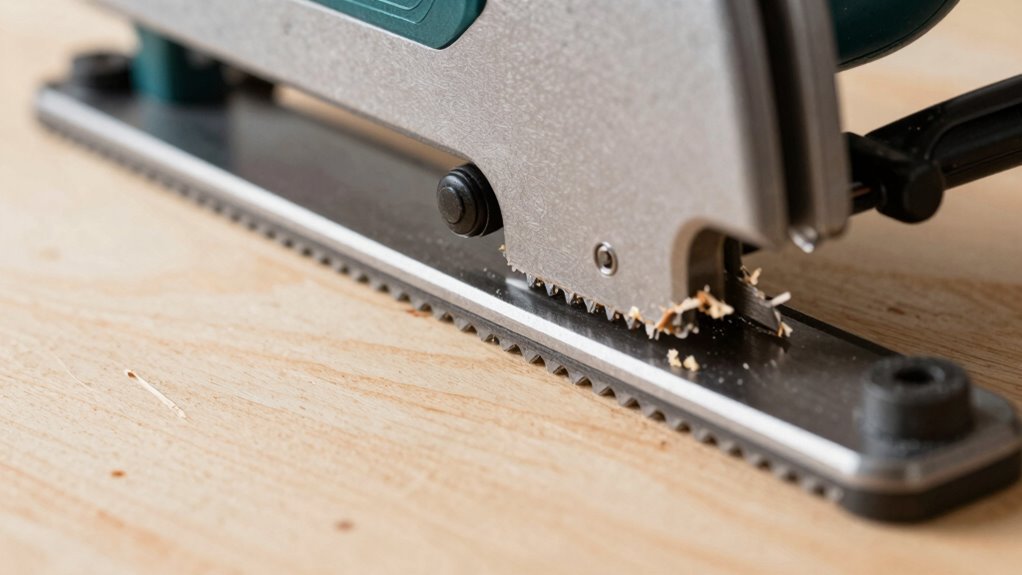
Adjusting Blade Height
Adjusting the blade height is a crucial step in ensuring your splinter guard functions effectively for cleaner cuts. Proper height allows the guard to support the material properly, minimizing tearouts. First, set your blade just above the material’s surface, ensuring it’s not too high or too low. This precision helps prevent unnecessary splintering. Regular blade sharpening is essential for smooth cuts and reduces strain on the guard. When the blade is sharp, it cuts cleaner through the material, decreasing tearouts and splintering. Additionally, adjusting the blade height optimizes dust collection by directing sawdust into your vacuum or dust port, keeping your workspace cleaner. Take your time to align everything correctly—this improves cut quality and prolongs the lifespan of your blades and splinter guard. Proper blade height adjustment ensures optimal performance and safety during cutting.
Securing the Guard Properly
Properly securing your splinter guard guarantees it functions effectively during cuts. To ensure cleaner cuts and prevent tearouts, double-check that the guard is firmly attached and aligned with the blade. A well-secured guard helps maintain dust collection efficiency and reduces debris buildup, which can affect cut quality. Remember to inspect the guard’s position regularly and adjust it if necessary. Proper blade lubrication can also minimize friction, reducing the risk of tearouts. When installing, consider these tips:
- Tighten all mounting screws securely before making a cut
- Align the guard closely with the blade to prevent splintering
- Keep the guard and surrounding components free of dust and debris for optimal performance
- Ventilation considerations are important for maintaining a safe workspace and preventing dust accumulation around the saw
- Regularly check the natural filtration system to ensure it’s functioning correctly and supporting an eco-friendly workspace.
- Additionally, maintaining proper saw blade alignment can significantly reduce tearouts and improve cut quality. Proper securing of the guard also contributes to overall safety practices during woodworking. Incorporating regular maintenance routines can further enhance the effectiveness of your saw setup and prolong its lifespan.

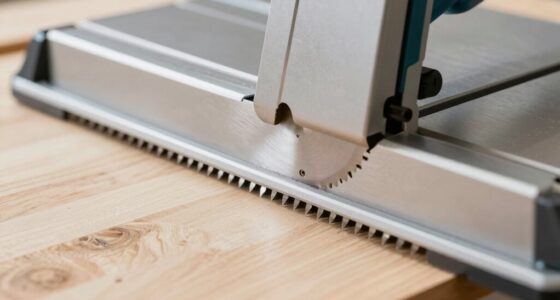
Improved Dust Collection Port for DeWalt DWS779 & DWS780 Miter Saws – Virtually No Mess – Made in the USA
Compatible with DeWalt Miter Saws DWS779 & DWS780 (Double Bevel Sliding Miter Saw, 12-inch)
As an affiliate, we earn on qualifying purchases.
As an affiliate, we earn on qualifying purchases.
Common Mistakes in Splinter Guard Setup That Cause Tearouts
One common mistake that leads to tearouts in splinter guard setup is failing to guarantee the guard is aligned correctly before cutting. Misalignment causes the blade to catch on the guard or workpiece, increasing tearouts. Additionally, neglecting dust collection can leave debris that interferes with smooth operation, and ignoring blade lubrication can cause friction that worsens tearouts. To avoid these issues, double-check your guard alignment and ensure it’s snug against the workpiece. Use the following table to identify common setup errors:
| Error | Impact | Solution |
|---|---|---|
| Guard misalignment | Tearouts, rough cuts | Verify guard is aligned properly |
| Poor dust collection | Debris buildup, tearing blades | Improve dust extraction system |
| No blade lubrication | Friction, heat, tearouts | Regularly lubricate blade edge |
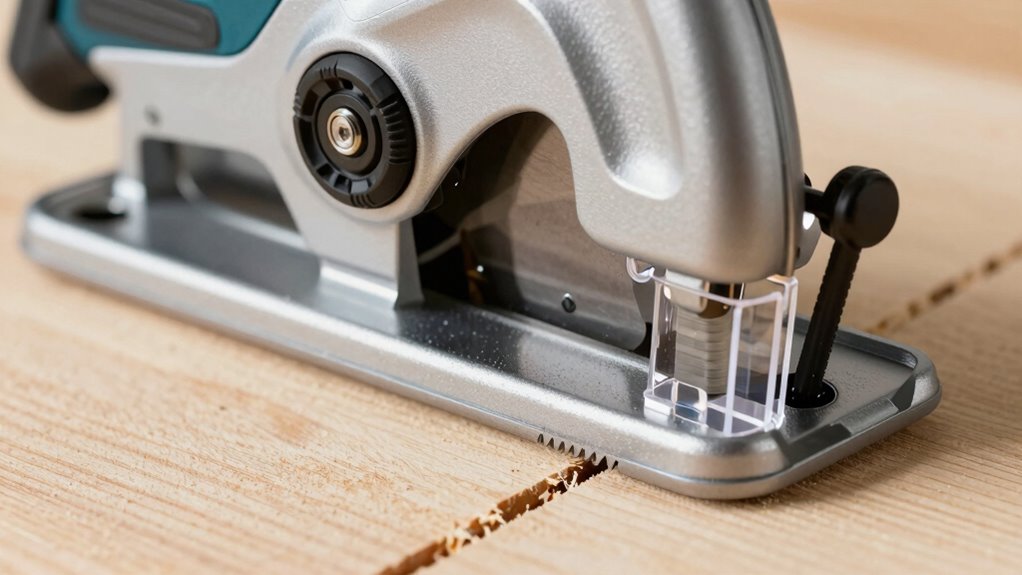
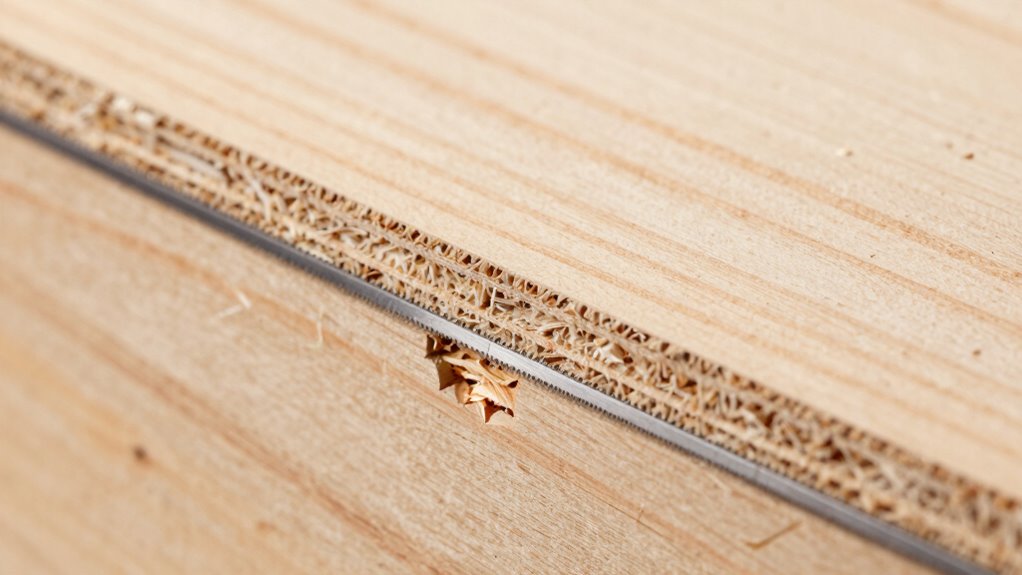
Why Do Tearouts Still Happen Even When Using a Splinter Guard?
Even with a splinter guard in place, tearouts can still occur if you don’t position it consistently. Misaligned blades or improper setup can cause the guard to fail in protecting the wood fibers. Ensuring correct placement and blade alignment is key to preventing tearouts. Additionally, using specialized dog accessories, like dog sweaters or beds, can help keep your workspace organized and safe from distractions that might lead to improper setup. Being mindful of blade height adjustment can also significantly reduce the risk of tearouts by ensuring the guard functions optimally. Proper material selection for your workpiece can further minimize tearouts and improve overall cut quality. Selecting the right wood type with a fine grain can also help achieve cleaner cuts and reduce tearout issues.
Inconsistent Guard Placement
Despite using a splinter guard, tearouts can still occur because the guard isn’t always positioned consistently or correctly. Poor guard placement can lead to uneven pressure on the workpiece, increasing the chance of tearouts. Additionally, if the blade height isn’t properly adjusted, the guard may not support the cut effectively, exposing the wood fibers to tearing. To minimize issues, consider these tips:
- Always double-check guard placement before starting.
- Adjust blade height so the guard just clears the surface.
- Maintain consistent pressure and alignment during the cut.
Blade Alignment Issues
Have you ever noticed tearouts occurring despite using a splinter guard? Blade alignment issues might be the culprit. Over time, blade wear can cause the teeth to become dull or uneven, leading to inconsistent cuts and tearouts. Even with a perfect guard setup, a dull or misaligned blade can’t produce clean edges. Additionally, the saw motor’s stability is essential; if it vibrates or wobbles during cuts, the blade may drift from its intended path. This misalignment results in tearouts despite your best efforts. Regularly inspect your blade for wear, replacing it when necessary, and ensure your saw motor is functioning smoothly. Proper blade alignment keeps your cuts clean, reducing tearouts and giving you a professional finish every time.
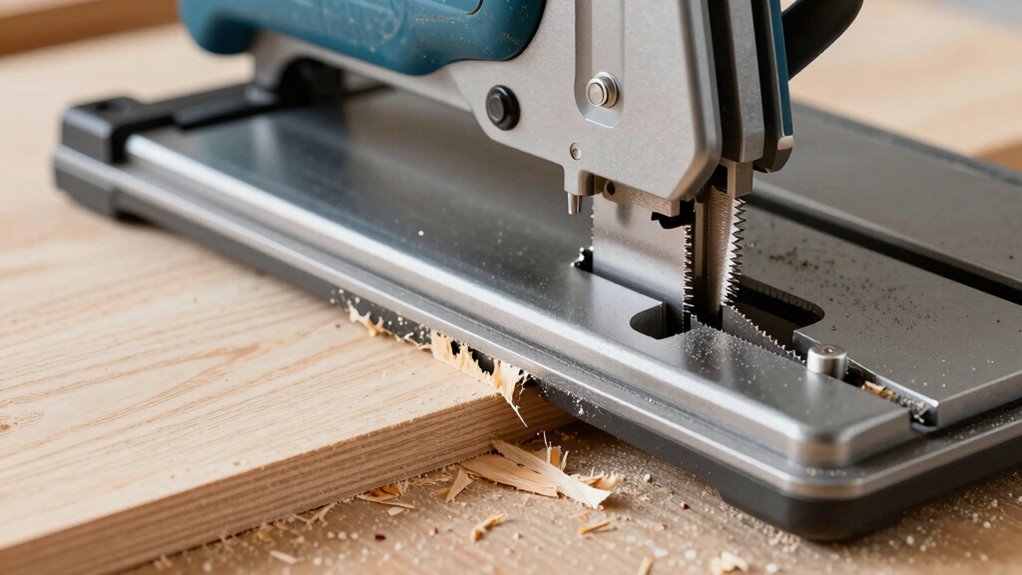
Extra Tips to Minimize Tearouts When Using a Track Saw

To reduce tearouts when using a track saw, start by making a shallow scoring cut along the cut line before making the full pass. This helps prevent splintering and keeps the cut cleaner. Additionally, guarantee your blade is sharp and maintains good blade durability, which reduces tearouts and extends blade life. Proper dust extraction is vital too; a dust port that effectively removes debris keeps the cut line clear and prevents wood fibers from lifting. To further minimize tearouts:
Make shallow scoring cuts and ensure blade sharpness for cleaner, tearout-free track saw cuts.
- Use painter’s tape along the cut line for added support.
- Adjust your saw’s speed for a smoother cut.
- Always check that the track is securely clamped and aligned.
These tips help achieve smoother cuts, reduce tearouts, and improve your overall track saw performance.
How Blade Quality and Settings Affect Tearouts
The quality of your saw blade and its settings directly influence the likelihood of tearouts during cuts. A durable blade with sharp, quality teeth reduces tearouts by providing cleaner cuts. The saw blade type also matters; thinner blades cut more smoothly, minimizing splintering. Proper blade tension and speed further improve cut quality.
| Blade Quality | Impact on Tearouts |
|---|---|
| High durability | Longer-lasting, sharper cuts, fewer tearouts |
| Low durability | Dulls quickly, increases tearouts |
| Saw Blade Type | Effect on Tearouts |
| Thin-kerf blades | Cleaner cuts, less splintering |
| Thick-kerf blades | More material removal, higher tearout risk |
What to Do When Tearouts Occur Despite Proper Setup
Even with proper setup, tearouts can still happen due to unforeseen factors like material inconsistencies or minor blade misalignments. When this occurs, focus on damage control and prevention. First, check your blade sharpening; a dull blade can cause rough cuts and tearouts. Next, improve dust collection—fewer chips and debris mean cleaner cuts and less tearout. Finally, consider applying masking tape along the cut line as a temporary barrier to hold splinters in place. You might also try scoring the cut line beforehand for a smoother finish. Regularly inspecting and maintaining your blades, along with optimizing dust extraction, helps minimize tearouts and improves overall cut quality. Taking these steps ensures your project stays precise, even if tearouts unexpectedly occur.
When Should You Upgrade or Modify Your Track Saw Setup
Recognizing the right moment to upgrade or modify your track saw setup is essential for maintaining cutting accuracy and efficiency. If you notice frequent tearouts, inconsistent cuts, or excessive blade wear, it’s time to contemplate an upgrade. Dull blades or poor blade durability can cause tearouts and compromise your work quality. Regular saw maintenance, like cleaning the track and checking for misalignments, can extend blade life and improve performance, but sometimes these steps aren’t enough. When you see persistent issues despite proper saw maintenance, it indicates you should evaluate your setup. Upgrading your blade, adjusting the track for better alignment, or investing in higher-quality components can markedly reduce tearouts and improve your overall results. Don’t wait until problems escalate—proactive modifications save time and enhance precision.
Frequently Asked Questions
Can Using Masking Tape Prevent Tearouts During Cutting?
Using masking tape can help prevent tearouts during cutting by acting as a tearout prevention technique. The tape’s benefits include holding the wood fibers together, reducing splintering on the surface. To maximize this effect, apply the tape along the cut line before cutting. This simple method is effective for achieving cleaner cuts and minimizing damage, especially on delicate or veneered surfaces.
Does the Type of Wood Affect Splinter Guard Effectiveness?
Sure, the type of wood totally affects your splinter guard’s magic. If you’re cutting soft pine or humid, moisture-laden hardwoods, expect more tearouts regardless of your fancy guard. Wood grain orientation and moisture content influence how well the guard works—some woods just refuse to cooperate. So, if you want clean cuts, choose your wood wisely and consider adjusting your technique for those tricky grain patterns.
Are There Specific Blade Types Best for Tearout Prevention?
You should choose blades with specific tooth designs like alternating top bevel (ATB) or triple-chip grind (TCG) to prevent tearout. Opt for blades made from high-quality materials such as carbide-tipped or carbide-reinforced steel, which stay sharper longer. These blade types work better with your splinter guard, reducing tearout and providing cleaner cuts. Matching the right blade material and tooth design is essential for ideal tearout prevention during your projects.
How Does Feed Rate Influence Tearouts With a Splinter Guard?
When you increase your feed rate, you risk more tearouts despite using a splinter guard. For example, if you push your saw too quickly through delicate plywood, the guard can’t fully prevent splinters. A slower feed rate gives the splinter guard time to do its job, reducing tearouts. So, controlling your feed rate guarantees cleaner cuts and protects your material, especially when using a splinter guard.
Can Adjusting the Saw’s Blade Height Reduce Tearouts?
Yes, adjusting the saw’s blade height can reduce tearouts. When you refine blade alignment and guarantee proper saw blade maintenance, you improve the cut quality. Setting the blade just slightly above the material minimizes tearouts by reducing splintering. Regularly check and calibrate the blade height to maintain clean cuts, and keep the blade sharp and clean for peak performance. Proper blade height and maintenance are key to preventing tearouts.
Conclusion
Now that you know how splinter guards work and how to set them up correctly, you’re better equipped to achieve cleaner cuts. But even with all the precautions, tearouts can still happen. Are you ready to experiment with blade quality, adjustments, and techniques to perfect your results? Keep practicing, stay patient, and don’t be afraid to tweak your setup. After all, mastering your track saw is the key to flawless woodworking.