
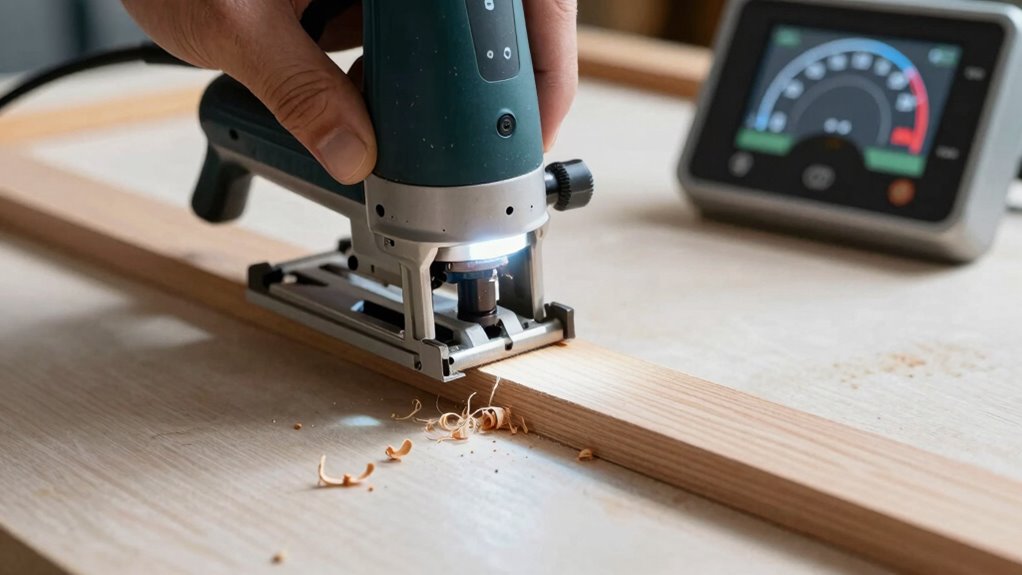
To route a perfect edge profile without burning, make certain your router bits are sharp, clean, and suitable for your material. Secure your workpiece firmly and support it properly to prevent flexing. Adjust your router’s speed based on the material’s hardness, and move steadily without forcing the tool. Using proper technique and maintaining consistent pressure will help avoid heat buildup. Keep learning about these techniques to master a flawless, burn-free edge profile.
Key Takeaways
- Use sharp, high-quality router bits and regularly maintain them to reduce friction and heat buildup.
- Set the router speed appropriately for your material, lowering it for harder woods to prevent overheating.
- Secure the workpiece firmly and support it properly to prevent movement and uneven cuts that cause burning.
- Maintain steady, even pressure during routing and avoid forcing the tool through the material.
- Inspect edges after routing, then smooth any burn marks with fine sandpaper for a flawless finish.

HILTEX 10108 Tungsten Carbide Router Bit Set, Woodworking Tools and Accessories, 1/4-Inch Shank, 24-Piece Set
WOOD ROUTER BITS: The HILTEX Tungsten Carbide Router Bit Set is the perfect addition to your woodworking tools…
As an affiliate, we earn on qualifying purchases.
As an affiliate, we earn on qualifying purchases.
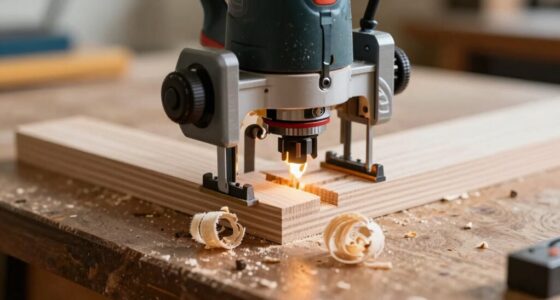
Why Does Routing Edges Sometimes Burn?

Burning edges during routing happens when the router bit generates excessive heat, often due to cutting too slowly or applying too much pressure. This heat causes discoloration and can ruin your work. One common cause is neglecting proper router maintenance, which can lead to dull bits that require more force and create more heat. Additionally, rushing the process or trying to achieve a smooth finish too quickly can increase the risk of burning. To prevent this, perform regular edge polishing before and after routing to keep edges smooth and free of debris. Using sharp, well-maintained bits reduces friction, minimizes heat buildup, and improves cut quality. Proper router maintenance, including cleaning and inspecting bits, is essential for preventing burning and achieving a clean, professional finish. Regularly checking your bit sharpness and maintaining proper feed rates can significantly reduce heat and improve overall results. Ensuring proper cutting speeds tailored to the material can also help prevent overheating and burn marks, and being mindful of router settings can further optimize the process. Moreover, adjusting the depth of cut and taking lighter passes can help manage heat generation during routing. Additionally, selecting the appropriate router bit type for your specific material can further reduce the risk of burning and provide a cleaner edge.

Cdmall AC Motor Speed Controller for Brushed Motors – 120V 15A Variable Speed Control with LED Voltage Display & Overload Protection, Fan Speed Controller for Duct Fan, Exhaust Fan, Router, Drill
IMPORTANT – FOR BRUSHED AC MOTORS ONLY: This motor speed controller works by reducing voltage to slow down…
As an affiliate, we earn on qualifying purchases.
As an affiliate, we earn on qualifying purchases.
How to Choose Router Bits That Prevent Burning

Choosing the right router bits plays a pivotal role in preventing burns during routing. Start by selecting bits designed for clean cuts and smooth finishes, such as high-quality carbide or premium-coated bits. Proper router maintenance ensures the bits stay sharp and reduce heat buildup, which minimizes burning. Also, consider tool ergonomics—comfortable, well-balanced bits allow for better control and consistent pressure, preventing unnecessary friction. When choosing bits, look for sharp edges and appropriate profiles for your project, avoiding dull or poorly manufactured ones. Using the correct bit for your material and ensuring it fits securely in your router reduces vibrations and uneven cuts, which can cause burns. Additionally, selecting bit material can significantly impact heat generation and cutting quality. Maintaining the right feed rate and cutting speed further contributes to preventing burns and achieving a cleaner finish. Being aware of cutting techniques and how they influence heat and burn risk helps in achieving optimal results. Proper bit selection, combined with regular maintenance and ergonomic considerations, helps achieve cleaner edges without scorching your workpiece. For optimal results, always follow manufacturer recommendations for your specific bits and projects.
Trend Complete Diamond Sharpening Kit: Double-Sided Credit Card Stone & Mini Taper File w/Lapping Fluid, Cleaning Block, Instructional DVD & Guide, DWS/KIT/C
DOUBLE-SIDED CREDIT CARD DIAMOND STONE: Fine (600 grit) and Coarse (300 grit) sides for precision sharpening of your…
As an affiliate, we earn on qualifying purchases.
As an affiliate, we earn on qualifying purchases.
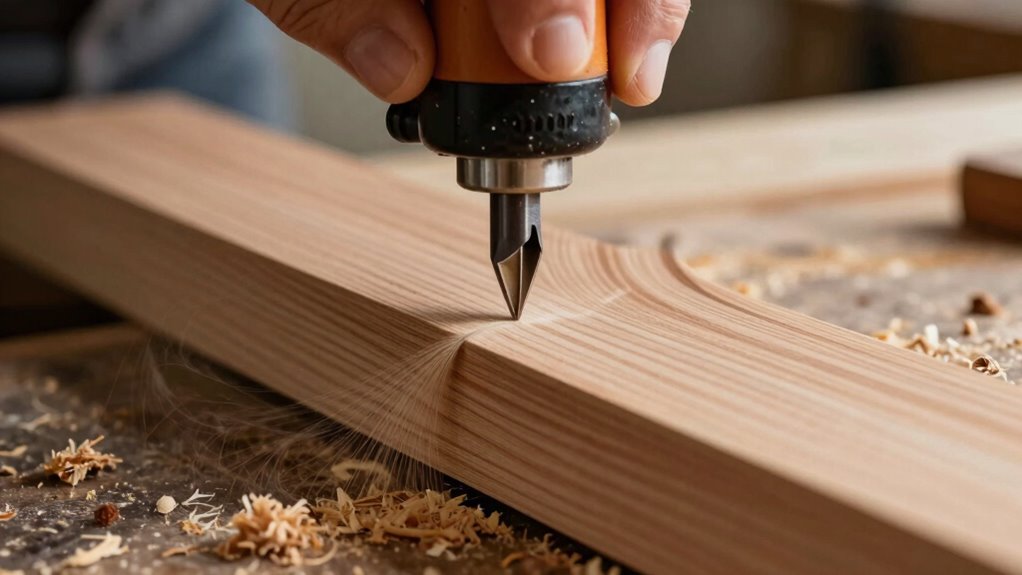
How to Prepare Your Workpiece and Router for a Clean Cut

Before starting, make sure you select the right router bits for your project to prevent burning and achieve a smooth cut. Secure and mark your workpiece properly to guarantee stability and accuracy during routing. Additionally, choosing the appropriate cutting techniques can help prevent overheating and ensure a clean, professional edge. Using the correct feed rate can significantly influence the quality of your cut and reduce the risk of burning. Ensuring proper tool setup is essential for consistent results and to avoid unnecessary heat buildup. Also, regular maintenance and inspection of your router can help identify potential issues before they cause damage or safety hazards. Being familiar with safe operating procedures ensures that you work efficiently and reduce the risk of accidents, especially when working with high-speed equipment. With your router and workpiece prepared, you’ll set the stage for a clean, professional edge.
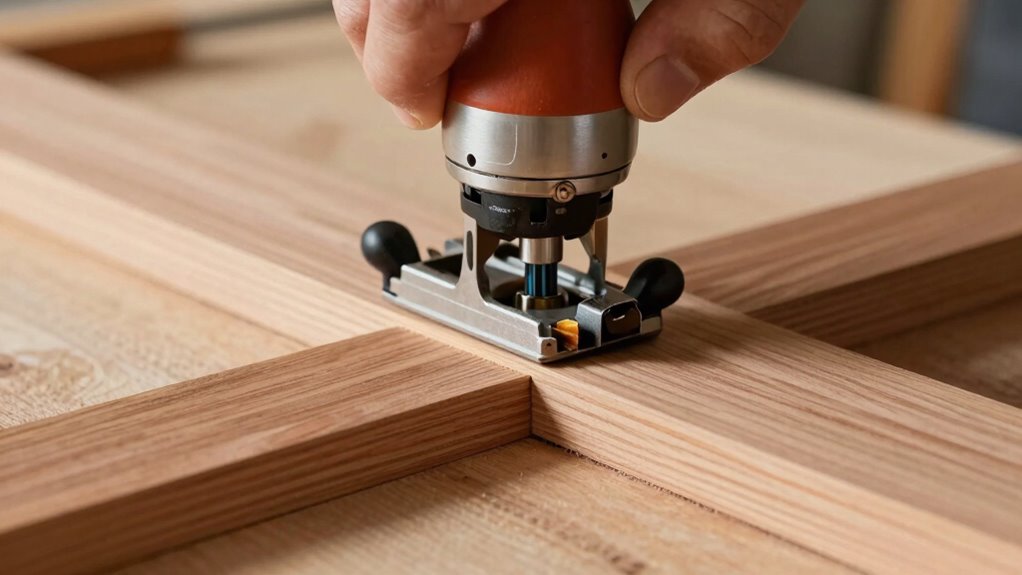
Selecting Suitable Router Bits
Selecting the right router bits is essential for achieving a clean, professional edge profile. The choice of router bit material affects durability and cutting performance; carbide bits are ideal for hard woods, while high-speed steel works well for softer materials. For edge profile shaping, select bits designed specifically for the profile you want, such as ogee, round-over, or chamfer bits. Confirm the bit’s cutting edges are sharp to prevent burning and rough cuts. Consider the size and bearing type to match your project’s detail level. Using the correct bit helps you maintain control and achieve smoother, cleaner edges. Always verify compatibility with your router and follow safety guidelines to maximize your results and avoid damaging your workpiece. Additionally, understanding European cloud innovation can inspire more sustainable practices in your woodworking projects.
Securing and Marking Workpiece
Properly securing and marking your workpiece sets the foundation for a smooth routing process. Before you start, verify your work surface is stable and clamps hold the piece firmly in place—movement causes uneven cuts and potential hazards. Mark your cut lines clearly, using a pencil or masking tape for precision. Check your router and bits for proper tool maintenance; sharp bits and clean collets prevent burning and splintering. Always follow safety precautions: wear eye and ear protection, and keep hands clear of the bit path. Confirm the router is unplugged during setup, and double-check your markings before powering up. Ensuring you select the appropriate router bits can also influence the quality of your cut by reducing vibrations and ensuring smoother operation. Using correct feed rates is equally important to prevent burns and achieve a clean edge. Additionally, inspecting your workpiece material for defects helps ensure a quality cut and minimizes the risk of damage. Incorporating proper dust collection techniques can also improve visibility and safety during routing. These steps ensure your workpiece stays secure, your cut is accurate, and you minimize risks during routing.

Milescraft 1622 Sand-It Multi-Surface Sanding Block. Sand Flat, Concave, Convex & Round Surfaces or Fit into Tight Spaces. Accepts any ¼ Sheet of Sand Paper. 150 Grit Sand Paper Included
4-in-1 sand block
As an affiliate, we earn on qualifying purchases.
As an affiliate, we earn on qualifying purchases.
Techniques for Maintaining a Smooth Edge Without Burning
Maintaining a smooth edge without burning requires careful control of your tools and technique. Proper edge smoothing depends on consistent router maintenance and precise handling. To avoid burning, focus on these key steps:
- Keep your router bits sharp and clean for clean cuts and smooth edges. Sharpness of tools directly impacts the quality of your cut and helps prevent heat buildup. Using appropriate cutting speeds can also significantly reduce the risk of burning.
- Use steady, even pressure during routing to prevent uneven heat buildup.
- Adjust your feed rate—slower for detailed work, faster for larger areas—to minimize heat.
- Regularly inspect and maintain your router to ensure it runs cool and operates smoothly. Additionally, understanding security zones can help you protect your workspace and tools effectively.
- Understanding the Gold IRA markets can help inform decisions about high-quality tools and accessories for your projects.
Following these techniques helps you achieve a flawless edge profile without burning, making your project look professional and polished. Proper router maintenance and mindful handling are vital for perfect results.
How to Control Router Speed to Avoid Overheating and Burning
Controlling your router speed is essential to prevent overheating and burning your workpiece. Proper router maintenance ensures your tool operates efficiently, reducing the risk of speed-related issues. Adjust your router’s speed settings based on the material you’re working with; higher speeds are suitable for soft woods, while lower speeds suit harder woods. Slower speeds help prevent burning because they reduce heat buildup and friction. Always monitor the router’s performance during use, listening for unusual sounds or excessive heat. Maintaining a steady feed rate and avoiding forcing the router also contributes to safer, cleaner cuts. Prioritizing woodworking safety means understanding your equipment and adjusting the speed accordingly. With proper control, you’ll achieve smooth edges without the danger of overheating or damaging your project.
Using Clamps and Supports to Keep Your Routing Sharp and Safe
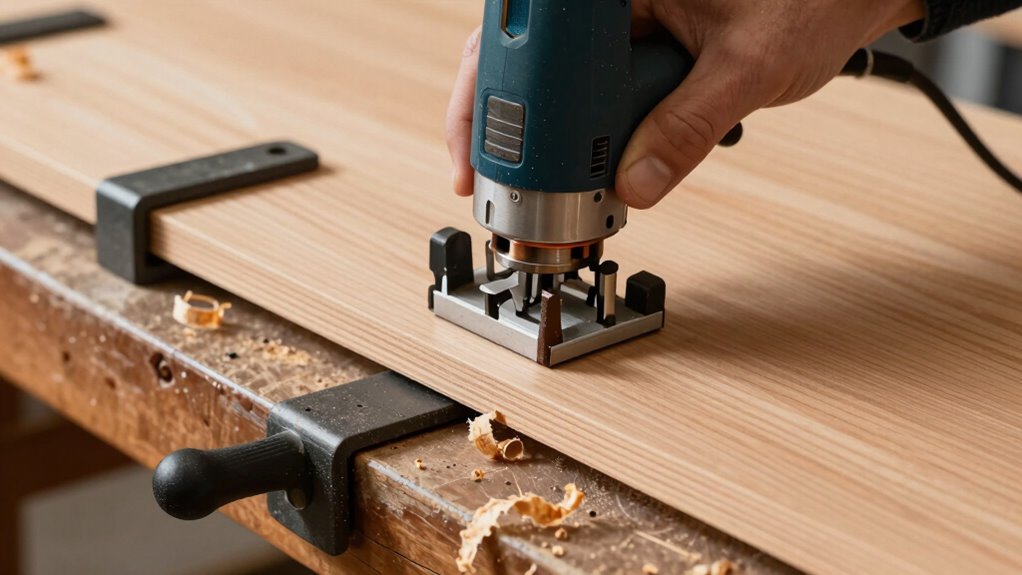
Using clamps and supports correctly is essential for a clean, safe routing process. You need to secure your work firmly with proper clamping techniques to prevent movement. Additionally, placing supports accurately guarantees stability and helps achieve a precise edge profile.
Secure Clamping Techniques
Secure clamping is essential to guaranteeing your router remains stable during the shaping process. Proper clamp placement helps distribute pressure evenly, preventing slips and vibrations that could ruin your edge profile. To achieve this, consider these tips:
- Position clamps close to the routing area for maximum control.
- Use enough clamps to firmly hold the material without causing damage.
- Ensure clamps do not obstruct the router’s path or bit movement.
- Check that the material remains stable and doesn’t shift under pressure.
Proper Support Placement
Ever wonder how to keep your workpiece steady and safe during routing? Proper support placement is key to maintaining router stability and achieving a clean edge profile. Use clamps and supports to prevent unwanted movement and reduce vibrations that can cause burning or uneven cuts. Supporting the workpiece along its edges ensures consistent contact and minimizes flexing. To emphasize this, consider the following support strategies:
| Support Type | Placement Tips | Benefits |
|---|---|---|
| Edge Supports | Clamp near the routing line | Enhances edge support, stability |
| Under Supports | Place underneath for overhang | Prevents flexing, keeps edge straight |
| Side Blocks | Position on sides for control | Improves router control, safety |
Proper support placement guarantees your work remains stable, boosting router stability and delivering flawless results.
Common Problems That Cause Burning and How to Fix Them
Burning issues often stem from improper tool settings or technique, which can lead to a rough, uneven edge. To fix this, start with proper tool maintenance—dull blades generate more heat. Next, check your material selection; harder woods or dense materials are more prone to burning. Here are common problems and how to address them:
- Incorrect feed rate: Move too fast. Slow down for better control.
- High router speed: Set your router to a lower speed to prevent overheating.
- Poor tool maintenance: Dull blades or bits cause friction. Regularly sharpen or replace them.
- Inadequate support: Lack of support can cause uneven cuts, increasing heat buildup.
Adjusting these factors ensures a cleaner, burn-free edge without sacrificing efficiency.
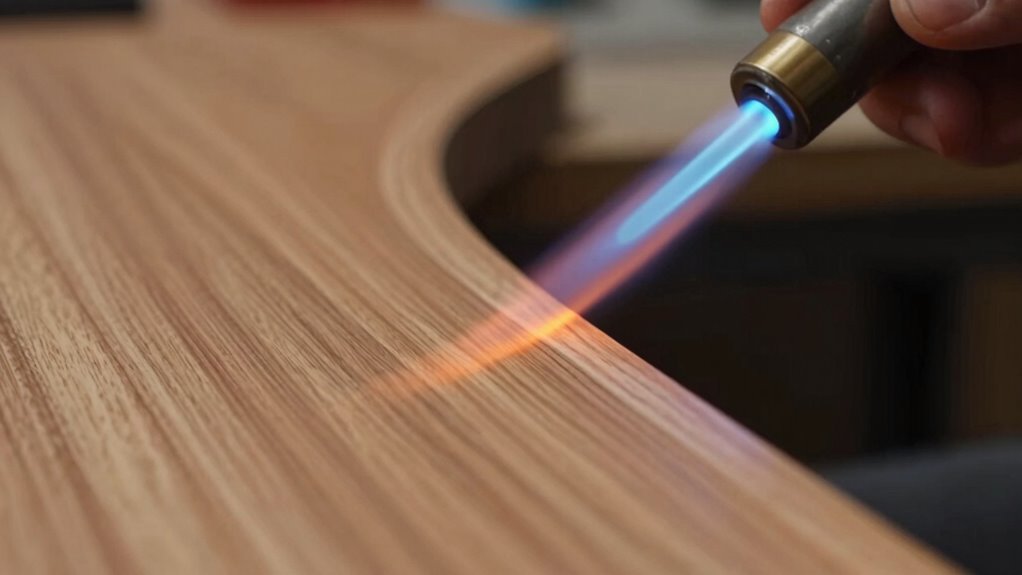
Finishing Tips for a Perfect Edge Profile After Routing

After routing, the key to achieving a smooth, professional-looking edge profile is proper finishing. Start by inspecting the edge for any rough spots or burn marks. Use fine-grit sandpaper or a sanding block to gently smooth out imperfections, ensuring you don’t remove the detailed edge profile. Always prioritize router safety by turning off the tool and unplugging it before touching the edges. When finishing, consider applying a clear coat or sealant to enhance durability and appearance, but wait until the surface is thoroughly sanded. Keep your workspace clean to prevent debris from marring the finish. Proper edge finishing not only elevates the look but also protects the edges from damage, ensuring your project remains beautiful and safe over time.
Frequently Asked Questions
What Safety Gear Should I Wear When Routing Edges?
When routing edges, you should wear safety glasses to protect your eyes from dust and debris, and a dust mask to avoid inhaling fine particles. These safety gear pieces are essential for your protection during the process. Make sure they fit properly and stay in place while you work. Additionally, consider ear protection and gloves for extra safety, ensuring a safe and efficient routing experience.
How Do I Select the Right Router Bit for Specific Edge Profiles?
Think of router bits as brushes for your woodworking masterpiece. To select the right bit, match the edge profile technique you want—such as a beveled, rounded, or chamfered edge—to the corresponding router bit. Consider the bit’s material and size to guarantee precision and safety. Use different bits for detailed or decorative edges, and always double-check your chosen bit’s compatibility with your router to achieve smooth, professional results.
Can I Use a Handheld Router for Detailed Edge Work?
Yes, you can use a handheld router for detailed edge work, but prioritize router safety to avoid accidents. Keep a firm grip, follow manufacturer instructions, and use proper bits to achieve precise edge finishing. Take your time, work slowly, and maintain control to prevent burns or uneven edges. A handheld router offers flexibility for intricate designs, but always focus on safety and steady technique for the best results.
How Do Temperature and Humidity Affect Routing Results?
When it comes to routing, don’t let weather conditions throw you for a loop. Temperature and humidity directly impact your project; higher moisture content can cause wood expansion, making routing tricky. Dry, stable conditions ensure cleaner cuts and less tear-out. Keep your workspace climate controlled and check moisture levels beforehand. This way, you prevent surprises and keep your edges crisp—nothing worse than working against nature’s whims.
Are There Specific Woodworking Projects Best Suited for Routing Edges?
You’ll find routing edges ideal for projects like furniture, cabinetry, and decorative panels, where smooth, detailed profiles enhance the finish. To achieve this, focus on proper edge sanding after routing and keep your router well-maintained to prevent burn marks. Using sharp bits and consistent feed rates will also help, ensuring clean cuts and a professional look. These steps make your routed edges both precise and beautiful.
Conclusion
With the right tools, techniques, and a steady hand, you’ll carve smooth, flawless edges that catch the light just right. Imagine your router gliding effortlessly, whispering through wood without a scorch or scar. Each pass leaves a clean, polished line—your craftsmanship shining through. Keep your speed steady, your bits sharp, and your workspace supported, and watch your project come alive with crisp, perfect edges that speak of skill and patience.