
To achieve pro-looking edge profiles, use the two-pass method: first, shape your edge with a light, precise cut following the natural lines to set a clean foundation. Next, gently refine and smooth the profile with a second, lighter pass to remove imperfections and soften corners. Proper tool selection and consistent technique are key. Mastering this approach will give you seamless, polished results that look professional—keep exploring to perfect your skills further.
Key Takeaways
- The two-pass method involves an initial shaping pass followed by a refining pass for a smooth, professional edge.
- Using appropriate tools and a light touch in both passes minimizes tear-out and ensures clean lines.
- Proper grain management during shaping reduces splintering and enhances edge precision.
- Refinement with finer tools and lighter pressure smooths imperfections for a polished finish.
- Addressing common issues like roughness or uneven bevels through technique adjustments guarantees pro-quality results.

4PCS Router Bit Set Feanron Router Bits 1/4 inch Shank, Roundover Router Bit Cutting Diameter in 1/8", 1/4", 3/16", 5/16", CNC Router Bits Edging Cutter for Woodworking Forming Molding Profiling
1. 1/4 Router Bit Set, radius 1/8", 1/4", 3/16", 5/16", good quality guide bearings provide superior wear resistance
As an affiliate, we earn on qualifying purchases.
As an affiliate, we earn on qualifying purchases.
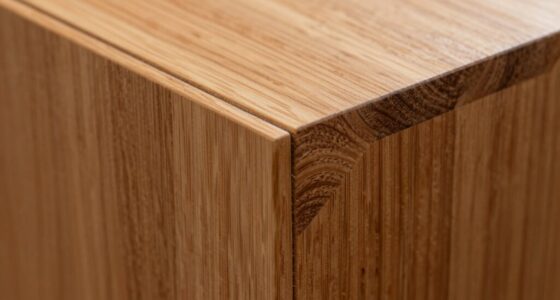
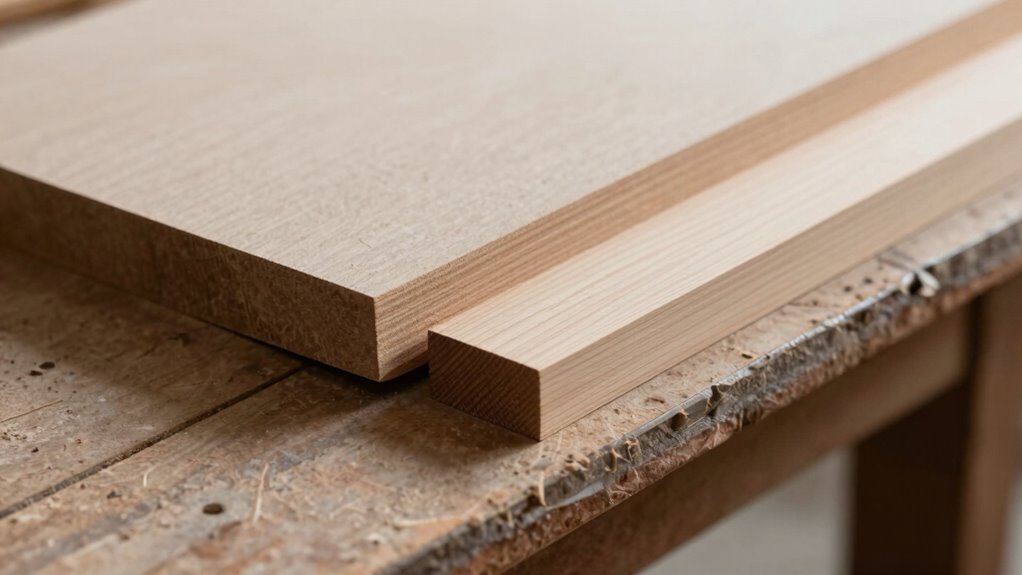
Understanding Edge Profiling and the Two-Pass Method
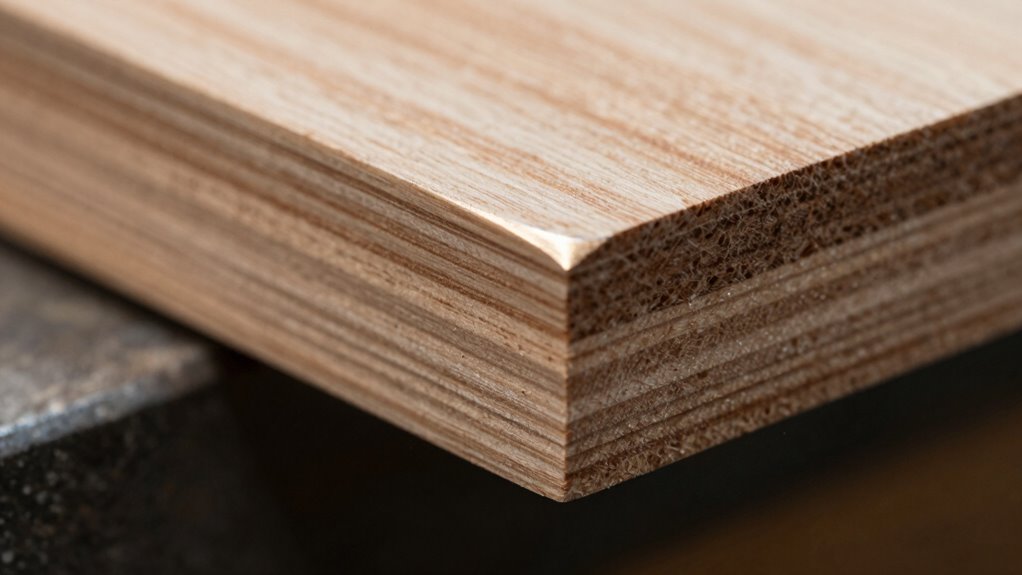
To achieve professional-looking edge profiles, understanding the two-pass method is essential. The first pass focuses on shaping the edge, where grain orientation influences how smoothly the material responds to your tools. Working with the grain helps prevent splintering and ensures cleaner cuts. During tool selection, choose bits designed for precise edge profiling, such as rounded or chamfer bits, depending on your desired finish. The second pass refines the profile by smoothing out any imperfections left from the initial cut. This step requires a lighter touch and often a different tool or a finer bit. Paying attention to grain orientation during each pass is crucial to avoid damaging the material and to achieve a consistent, polished look. Additionally, understanding how grain direction impacts tool performance can help you make more informed decisions during the profiling process. Properly managing grain behavior is key to preventing tear-out and achieving a seamless edge. By carefully selecting your tools and paying attention to grain orientation, you create cleaner, more consistent edge profiles that look polished and professional. Being aware of grain response can further enhance your control and results during edge profiling.
ROMAN’s Wallpaper Smoothing Tool for Home Improvement, Wallpaper Smoother for Installation, 7.75-Inch Wide, Plastic, White
PROFESSIONAL SMOOTH – The tool’s flexible tapered edges will create a professional smooth finish, eliminating stubborn bubbles on…
As an affiliate, we earn on qualifying purchases.
As an affiliate, we earn on qualifying purchases.
Getting Your Materials and Tools Ready
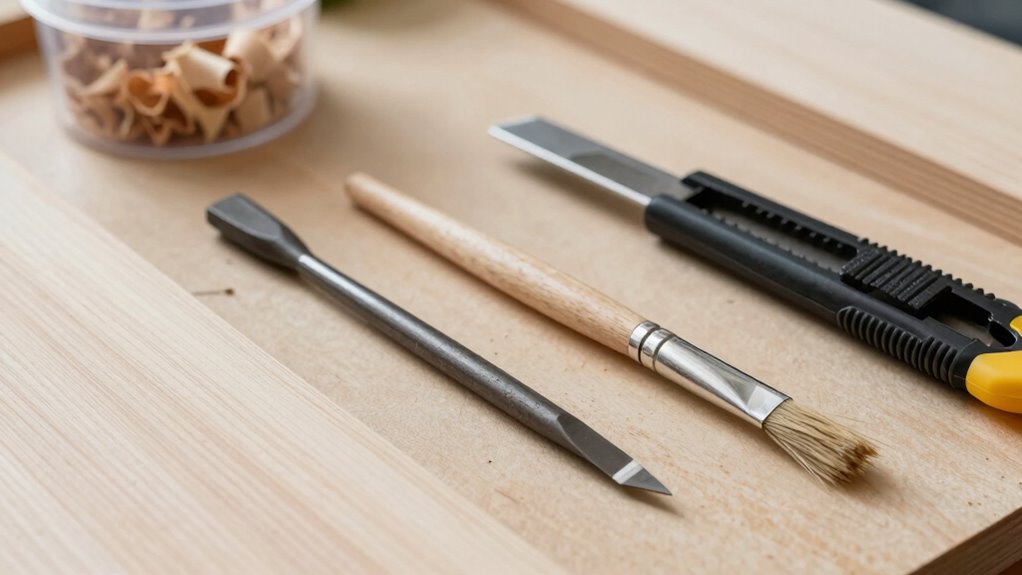
Before you start shaping your edges, it’s important to gather and prepare all your materials and tools. Proper edge preparation begins with selecting the right tools, ensuring they’re sharp and clean for precise results. Your tool selection impacts your control and the smoothness of your finish, so choose wisely. Here’s a quick overview:
| Material/Tool | Purpose/Tip |
|---|---|
| Clippers/Trimmers | For initial edge cleanup and shaping |
| Fine Comb | To check for uneven areas |
| Edge Brush | To remove debris and polish |
Having everything ready creates a seamless workflow, reduces mistakes, and boosts your confidence. Taking the time now to organize and prep sets a strong foundation for professional-looking edges. Additionally, understanding the contrast ratio of your projector can help you optimize your viewing environment for the best image quality. Recognizing the importance of creative spark can also inspire you to experiment with new techniques and styles. Moreover, understanding the Free Floating concept can assist in maintaining a natural, effortless look during styling and finishing touches. Being aware of essential oils for hair health can also motivate you to incorporate scalp care into your routine, promoting overall hair vitality.

Leather Burnishing Gum Edge Finish Kit – Clear Leather Edge Sealer for Smooth Glossy – 4oz with Wood Slicker
PROFESSIONAL QUALITY – Trusted by top leather crafters worldwide, our burnishing gum delivers exceptional results for smooth, polished…
As an affiliate, we earn on qualifying purchases.
As an affiliate, we earn on qualifying purchases.
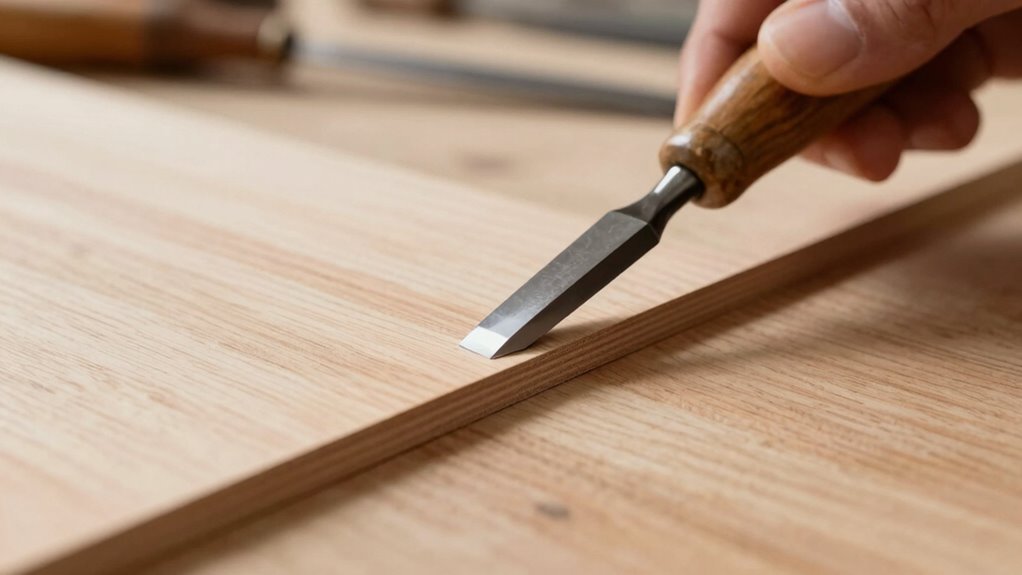
How to Shape Your Edge With the First Pass
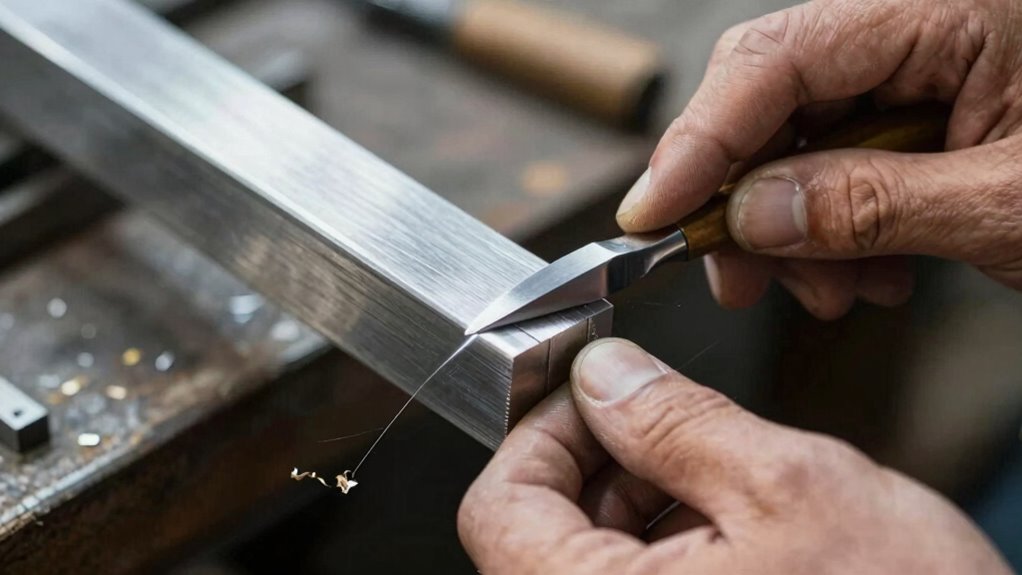
Once you’re ready to shape your edge, start by making a light, even pass with your clippers or trimmers along the entire perimeter. This initial pass sets the foundation for good edge consistency, so don’t press too hard or rush. Use a tool that’s appropriate for your desired look—smaller trimmers work well for precision, while larger clippers can speed up the process. Keep the tool steady and follow the natural line of your hairline or beard. Focus on creating a uniform shape, avoiding uneven patches or jagged lines. This first pass is about establishing a clean outline and setting the stage for refinement. Remember, a steady hand and proper tool selection are key to achieving a professional-looking edge from the start. Proper piercing care and hygiene are essential to maintain skin health and prevent infections around your new piercing. Additionally, understanding passive voice detection can help you improve clarity and professionalism in your writing. Employing proper edge profiling techniques can further ensure your results look polished and consistent.

HILTEX 10100 Tungsten Carbide Router Bits, 15 Piece Router Bit Set, 1/4” Router Bit Shank Tungsten Carbide Router Bits, Chamfer for Woodworking on Wood, Blue
CLEAN CUTTING: These router bits are tipped with precisely machined YG8 tungsten carbide blades to allow for clean…
As an affiliate, we earn on qualifying purchases.
As an affiliate, we earn on qualifying purchases.
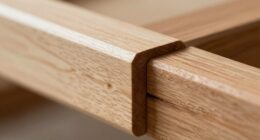
Refining the Finish With the Second Pass
After completing your initial outline, it’s time to refine your edges with a second pass. This step focuses on edge smoothing to achieve a polished look. Use a lighter touch and a finer tool to gently blend and refine the profile, removing any rough spots or inconsistencies. Pay close attention to sharp corners or uneven lines, softening them for a cleaner appearance. The goal is finish refinement—making your edges look seamless and professional. Incorporating attention to detail during this process can significantly elevate the quality of your work. Additionally, understanding edge profiles helps in achieving precise and aesthetically pleasing results. Practicing consistent technique ensures that each pass improves the overall finish. Developing a keen eye for surface quality can help you identify areas needing extra refinement. Recognizing the importance of edge smoothness can lead to more refined and realistic results. With patience and precision, you’ll create a finish that looks expertly crafted and ready for display.
Fixing Common Problems and Getting Perfect Results
Even with careful refinement, you might encounter common issues that affect the final look of your edges. One frequent problem is uneven edge beveling, which can result from improper tool selection or inconsistent pressure. To fix this, reassess your tools—using the right blade or bit for the material makes a big difference. Adjust your angle or pressure to create smoother, more uniform bevels. If edges look rough or chipped, switch to a sharper tool or fine-tune your technique. Practice makes perfect, so don’t hesitate to experiment with different tools and settings. Remember, choosing the right tool for the job and making small adjustments during edge beveling helps you achieve clean, professional results every time. Incorporating methodical testing processes can also help identify what techniques work best for your specific project.
Frequently Asked Questions
Can I Apply the Two-Pass Method to Different Types of Wood?
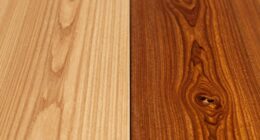
Yes, you can apply the two-pass method to different types of wood. Its material versatility makes it suitable for various wood grains and finishes. Just keep in mind that different woods might require adjustments in pressure or blade angle to handle grain directions and hardness. By considering these wood grain considerations, you’ll achieve clean, professional-looking edge profiles across a wide range of wood types.
What Safety Precautions Should I Take During Edge Profiling?
When edge profiling, always wear safety gear like goggles, ear protection, and a dust mask to protect yourself from debris and noise. Use dust control measures such as vacuum attachments or dust collection systems to minimize airborne particles. Keep your hands away from the blade and ensure the workpiece is securely clamped. Stay focused and avoid distractions to prevent accidents, maintaining a safe environment throughout the process.
How Do I Choose the Right Blade for My Project?
You should choose the right blade for your project by considering blade selection and project considerations. Think about the material you’re cutting—wood, metal, or plastic—and pick a blade designed for that purpose. Match the blade’s teeth and size to your task for cleaner cuts. Also, consider the thickness and finish you want. Doing so guarantees safe, efficient, and professional-looking results with minimal effort.
Is the Two-Pass Technique Suitable for Intricate or Detailed Edges?
Yes, the two-pass technique works well for intricate or detailed edges. It allows you to handle fine detail with precision, as the first pass removes most material, and the second refines the edge to enhance complexity and sharpness. You should use this method when working with complex edge designs, ensuring cleaner, professional results without sacrificing the intricacy of your project. It’s especially helpful for achieving smooth, detailed finishes.
How Long Does It Typically Take to Complete the Process?
The process duration for the two-pass method typically takes around 10 to 20 minutes, depending on the complexity of your edges and your familiarity with the technique. You’ll spend a few minutes on the initial pass to define the edges and a similar amount on the second pass for refinement. Your time estimation can vary, but with practice, you’ll complete the process more efficiently, achieving professional-looking results quickly.
Conclusion
By mastering the two-pass method, you’ll discover how small adjustments can transform your edge profiles into professional-looking finishes. With patience and practice, each pass brings you closer to perfection, turning tricky imperfections into polished details. Embrace the process, and you’ll find that even the most subtle techniques can elevate your work to a new level of finesse. Keep experimenting, and soon, your edges will speak volumes about your craftsmanship.