Rabbet joints are a quick, clean way to create strong edge connections in woodworking, perfect for cabinetry, framing, and furniture. They involve cutting a notch along the edge or end of a board, which fits neatly with another piece. These joints require minimal measurement and fitting, saving you time while still providing a professional look. Want to learn simple techniques and tricks to make your rabbet joints even faster and neater? Keep exploring for more tips.
Key Takeaways
- Rabbet joints are simple, quick-to-cut edge joints that provide a clean, professional appearance.
- They require minimal measurement and fitting, making assembly faster and more efficient.
- Proper finishing techniques like sanding and edgebanding enhance the clean look of rabbet joints.
- Compatible with various materials, rabbet joints ensure neat edges suitable for cabinetry and furniture.
- Using sharp tools and precise measurements results in smooth, flush joints that look clean and polished.

Rabbeting Router Bit Set with 6 Bearings, 1/4-Inch Shank, 4Pcs Bits (1/8",3/8" to 1/2" Height) for Woodworking, Rabbet, Biscuit Joiner & Slot Cutting,Bearings with 1/2" to 1/4" Router Collett
【Complete Rabbeting Set with Interchangeable Bearings】2026 Spring Gifts for Men This professional rabbeting router bit set includes 4…
As an affiliate, we earn on qualifying purchases.
As an affiliate, we earn on qualifying purchases.
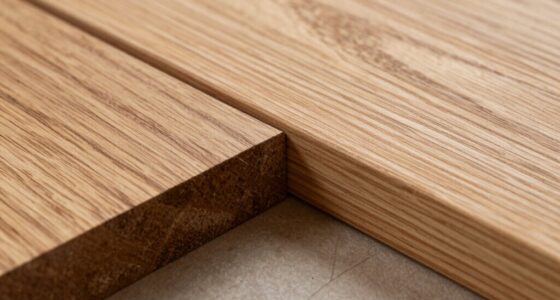
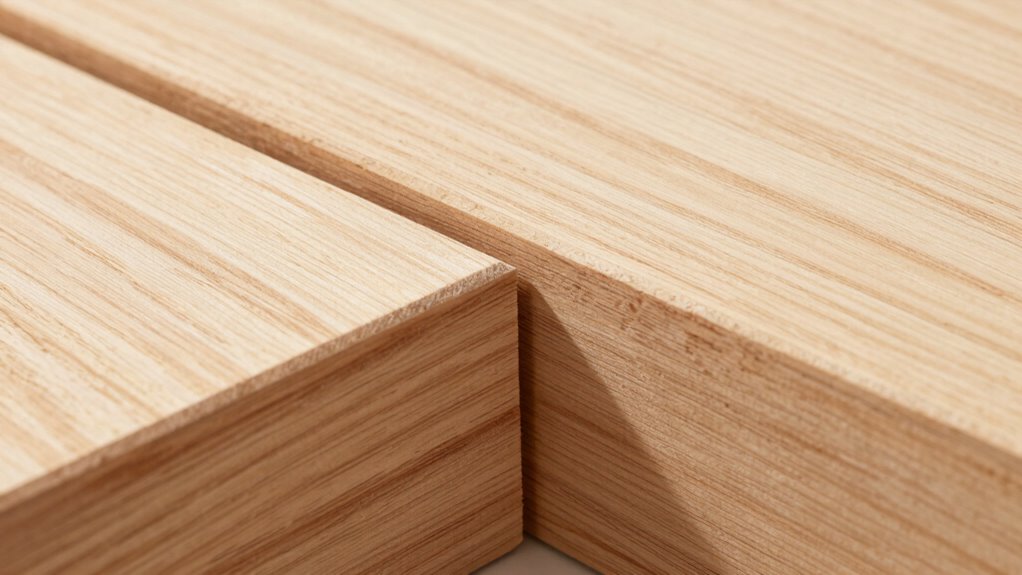
What Are Rabbet Joints and Why Are They So Fast to Make?

Have you ever wondered what makes rabbet joints so quick to produce? The answer lies in their straightforward design, which allows for rapid assembly without sacrificing joint stability. Rabbet joints are simple cuts made along the edge or end of a board, fitting neatly into corresponding cuts on another piece. This simplicity means you spend less time measuring and fitting, speeding up the process. Additionally, their material compatibility makes them versatile across different types of wood, ensuring a secure fit regardless of the project. The joint’s shape provides excellent stability, especially when glued or nailed, making it ideal for quick construction. Furthermore, cutting techniques can enhance the efficiency of creating rabbet joints, reducing errors and waste. Proper woodworking methods can also help streamline your process and improve overall results. Incorporating jig setups can further streamline your workflow and ensure consistent, precise cuts. Using standardized measurements can help you achieve more accurate and faster cuts, improving overall project efficiency. Overall, rabbet joints combine ease of fabrication with reliable strength, enabling you to complete projects efficiently. simple, effective systems can help streamline your woodworking projects and ensure consistent results.

Newdeli Rabbet Router Bit Set 1/4 Inch Shank – 4Pcs Rabbeting Router Bits(1/8",1/4",3/8", 1/2" Height) with 6 Bearings Set (3/8", 1/2", 5/8", 3/4", 7/8", 1-1/8" Bearings) – Wood Biscuit Slot Cutters
【Rabbet Router Bit Set】Newdeli 4pcs rabbet router bits 1/4" shank. 4 different cutting height: 1/8", 1/4", 3/8", 1/2",…
As an affiliate, we earn on qualifying purchases.
As an affiliate, we earn on qualifying purchases.
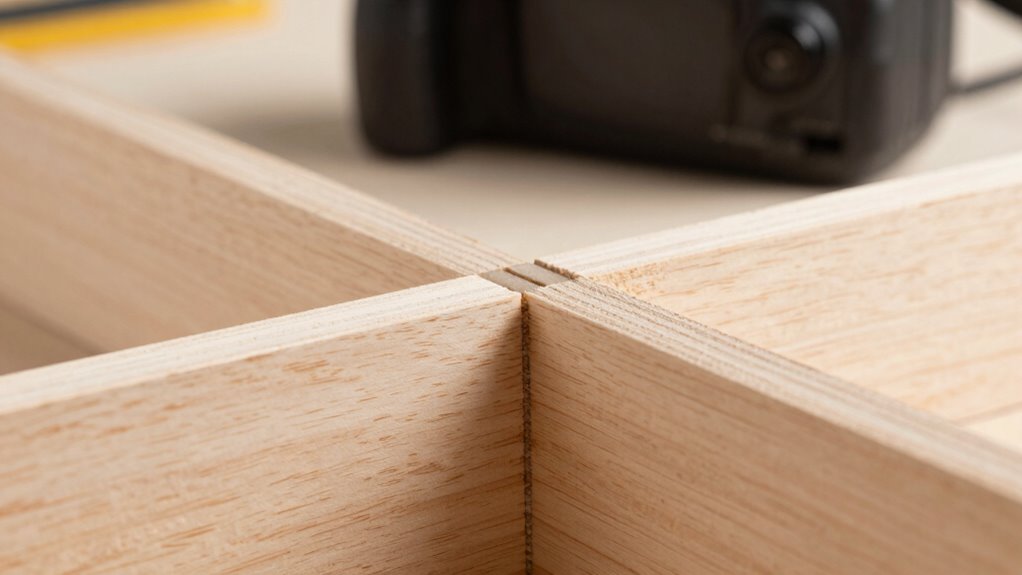
How to Cut a Rabbet Joint Quickly Using Basic Tools

To cut a rabbet joint quickly using basic tools, start by measuring and marking the cut line carefully along the edge of your board with a pencil or marking gauge. Use a handsaw or a router with a straight bit to make the cut. Keep the cut consistent to ensure joint stability and a clean, attractive look. For quick, accurate cuts, clamp a square or straightedge guide to steady your tool. Here’s a quick guide:
| Tool | Technique | Result |
|---|---|---|
| Handsaw | Follow marked line with steady strokes | Precise, clean rabbet |
| Router | Use a straight bit, guide along edge | Smooth, consistent cut |
| Chisel | Clean up corners after cut | Sharp, neat joint |
This method balances speed and precision, delivering a joint that’s both strong and visually appealing. Additionally, understanding joint stability can help you make better choices in your woodworking projects. Using proper cutting techniques also contributes to achieving a clean and professional look. Incorporating proper measurement ensures your rabbet fits perfectly and enhances the overall strength of your project. Paying attention to tool selection can further improve the accuracy and efficiency of your cuts. Being aware of cutting safety is also important to prevent accidents during your woodworking tasks.

JessEm 06300 Precision Box Joint Jig for Router Tables, Professional Woodworking Jig for Perfect Finger Joints with 1/4", 3/8", 1/2" Aluminum Indexing Keys and Smooth Bearing Glide System
Precision Joinery Made Easy – Create flawless box joints for drawers, boxes, and cabinetry with consistent, professional results.
As an affiliate, we earn on qualifying purchases.
As an affiliate, we earn on qualifying purchases.
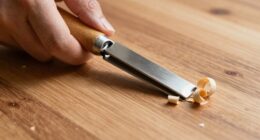
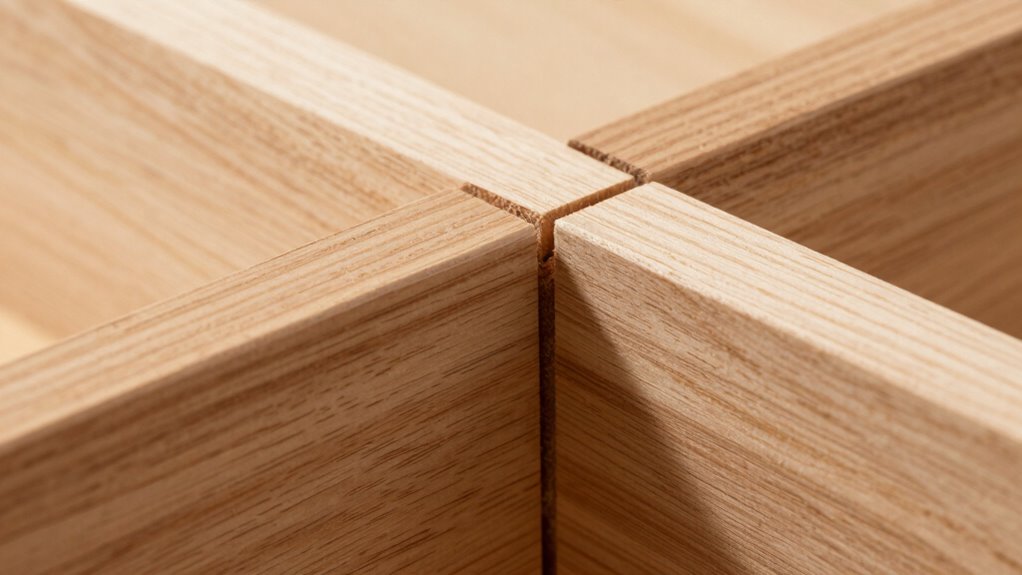
Tips for Achieving a Neat, Professional Finish on Rabbet Joints

Achieving a neat, professional finish on rabbet joints starts with careful attention to detail during the cutting process. Precise cuts ensure joint stability and create a clean look that enhances your project’s aesthetic. To improve your finish, consider these tips:
Careful cutting and finishing techniques ensure strong, attractive rabbet joints.
- Use sharp, well-maintained tools to prevent splintering or uneven edges.
- Measure twice, cut once, for accurate joint dimensions.
- Sand the joint edges lightly for a smooth, polished appearance.
- Apply wood filler or putty to any gaps before final assembly.
- Clamp pieces firmly during gluing to maintain joint stability and avoid misalignment.
- Incorporate proper ventilation considerations to ensure safe working conditions and optimal curing of adhesives. Good airflow helps in dissipating fumes and accelerating adhesive drying times.
- Additionally, ensuring proper safety precautions during cutting and finishing processes will protect you from potential hazards. Proper tool maintenance is also essential to keep blades and bits in optimal condition and prevent accidents.
- Considering proper joint fit techniques can further enhance the appearance and strength of rabbet joints, ensuring a seamless look and reliable connection.
Following these steps will help you craft rabbet joints that are both strong and visually appealing, giving your project a professional and refined look.

RUITOOL Japanese Hand Saw 6 Inch Double Edge Sided Pull Saw Ryoba SK5 Flexible Blade 14/17 TPI Flush Cut Beech Handle Wood Saw for Woodworking Tools
An Idea Gift for Woodworker, Carpenter and Craft Man
As an affiliate, we earn on qualifying purchases.
As an affiliate, we earn on qualifying purchases.
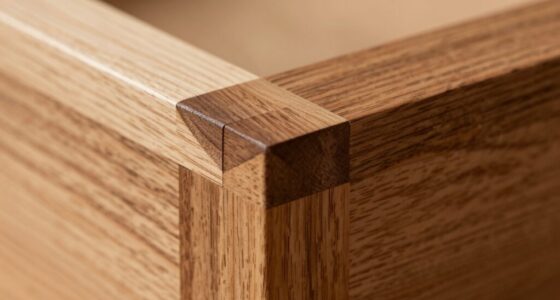
Projects That Benefit Most From Fast Rabbet Joints
Fast rabbet joints are especially beneficial for projects where speed and efficiency are priorities without sacrificing strength. They excel in applications like cabinetry, framing, and furniture assembly, where quick, reliable joints are essential. Because rabbet joints offer good joint strength when properly executed, they’re ideal for projects that require sturdy connections without complex techniques. Material compatibility is vital; these joints work best with materials that can withstand the cutting and fitting process, such as plywood, MDF, or softwoods. Using fast rabbet joints saves time during assembly and assures clean, professional-looking edges. This makes them perfect for mass production or projects with tight deadlines, where maintaining quality and durability is just as important as finishing quickly. Additionally, understanding material properties can help ensure optimal joint performance and longevity, especially when selecting materials suited for local automation and rapid assembly methods.
Different Types of Rabbet Joints for Various Materials
Different materials require specific rabbet joint types to ensure strength and durability. You’ll need to consider wood variations, as some woods hold joints better than others, and adapt your approach accordingly. For metal and plastic, you’ll want to explore compatibility tips to achieve clean, secure connections. Incorporating visual and auditory cues can also help verify proper joint fit and alignment during assembly. Additionally, understanding the properties of different materials can guide you in selecting the most appropriate rabbet joint style for your project. Being aware of how material characteristics influence joint performance can further optimize your results and prevent future issues.
Wood Rabbet Variations
Wood rabbet joints come in various forms to suit different applications and types of wood. Whether you’re creating décor accents or selecting color palettes, understanding these variations helps attain a clean, professional look. Different rabbet styles are designed for specific projects, offering flexibility and strength. For example, a simple rabbet works well for framing, while a stepped rabbet adds decorative detail. Some rabbet joints are designed for softwoods, providing ease of assembly, whereas others suit hardwoods for durability. The choice depends on the project’s purpose and aesthetic goals. Familiarity with these variations ensures you select the right joint for your needs, enhancing both the functionality and visual appeal of your woodworking projects.
- Simple Rabbet for Frames
- Stepped Rabbet for Decorative Edges
- Half-Lap Rabbet for Strong Joints
- Multiple-Groove Rabbet for Paneling
- Beaded Rabbet for Ornamental Touch
Metal Material Compatibility
Selecting the right rabbet joint for metal applications depends on the specific material you’re working with, as each type has unique requirements and strengths. Metal compatibility varies widely, influencing joint strength and durability. For example, aluminum requires different techniques than steel to prevent corrosion and ensure proper adhesion. Finishing techniques also differ; some metals need grinding or polishing post-assembly for a clean look. Here’s a quick comparison:
| Metal Type | Compatibility Notes | Recommended Finishing Technique |
|---|---|---|
| Aluminum | Lightweight, prone to dings | Anodizing or polishing |
| Steel | Strong, rust-prone | Grinding and coating |
| Copper | Corrosion-resistant | Buffing and sealing |
Choosing the right joint and finishing method guarantees a clean, lasting result tailored to each metal. Additionally, understanding the corrosion resistance of each metal ensures long-term durability of your joints. Proper surface preparation can significantly improve bonding and overall joint performance.
Plastic Application Tips
When working with plastics, choosing the right rabbet joint depends on the specific material and its properties. Proper adhesive selection is vital to guarantee a strong bond, especially since plastics can be tricky to glue. Use adhesives formulated for plastics, like solvent-based or specialized plastic epoxies, to achieve maximum joint strength. To reinforce the joint, consider mechanical methods such as screws or dowels, which improve stability. Additionally, surface preparation—cleaning and roughening—can enhance adhesion. Be mindful of plastic types, as some, like polyethylene, require specific adhesives. Proper joint reinforcement prevents separation over time, ensuring durability. By selecting the correct adhesive and reinforcing the joint effectively, you’ll create a clean, reliable rabbet joint suited for various plastics.
- Choose plastic-compatible adhesives
- Clean and roughen surfaces before gluing
- Use mechanical fasteners for reinforcement
- Test adhesive on scrap first
- Consider plastic type for compatibility
Troubleshooting Common Rabbet Joint Problems

Even with careful planning, rabbet joints can sometimes present issues that compromise your project’s integrity. Common problems include misalignment, gaps, or weak joints that don’t hold well. To troubleshoot, double-check your measurements and make certain your cuts are precise. If the rabbet is too shallow, it won’t provide enough surface for a strong bond; deepen it as needed. When facing persistent gaps, consider dovetail alternatives or pocket hole techniques to reinforce the connection. These methods can add strength and stability to your assembly without sacrificing the clean look of a rabbet. Always make sure your saw blades are sharp and your tools are properly adjusted. Proper joint design and careful execution are essential for a durable, professional-looking joint. Additionally, understanding the importance of accurate measurements can help prevent many common issues before they occur. Addressing these issues early helps you create a durable, professional-looking joint.
Comparing Rabbet Joints to Other Edge Joinery Methods

Rabbet joints are a versatile and straightforward method for joining edges, but they aren’t the only option available. When comparing rabbet joints to other edge joinery methods, consider joint strength and aesthetic appeal. Rabbet joints provide a clean look and decent strength, but methods like dado joints or box joints often offer superior durability. Dado joints can handle more stress, making them ideal for heavy-duty projects. Miter joints create a seamless appearance, enhancing aesthetic appeal, though they may lack strength without reinforcement. Tongue and groove joints offer good joint strength and a smooth finish. The choice depends on your project’s priorities—whether you value strength, appearance, or ease of assembly. Each method brings unique benefits suited to specific applications and design goals.
Essential Tools and Techniques for Faster Rabbet Joint Assembly
Using the right tools and techniques can considerably speed up rabbet joint assembly, making your woodworking projects more efficient. A router with a dedicated rabbet bit ensures precise cuts, enhancing joint stability and reducing rework. For thicker or denser materials, using a stacked dado blade on a table saw can quickly create consistent rabbets while maintaining material compatibility. Clamps or jigs help hold pieces securely, preventing shifts that compromise joint strength. Always measure carefully and mark your cuts to ensure accuracy. Using a handheld router or a dado set allows for faster, cleaner cuts, especially on multiple pieces. The right combination of tools and proper techniques minimizes errors, increases speed, and guarantees that your rabbet joints stay stable and compatible across different materials.
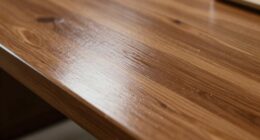
How to Seal and Finish Rabbet Joints for a Seamless Look
To achieve a seamless finish on rabbet joints, start by applying consistent sealant to fill gaps and create a smooth surface. Once the sealant cures, sand the area carefully to remove any imperfections. Finally, use edgebanding techniques to cover exposed edges and ensure a polished, professional look.
Applying Consistent Sealant
Ever wonder how to achieve a smooth, professional finish on your rabbet joints? Consistent sealant application is vital to seamless joint sealing. To do this effectively, keep your sealant tool steady and work in even strokes. Make sure the sealant fills all gaps without excess smudges. Smooth out the sealant quickly with a damp cloth or a caulking tool for a clean look. Maintain a steady hand to prevent uneven lines. Clean your tools regularly to avoid buildup that can disrupt application. Properly applied sealant not only enhances appearance but also ensures durability. Remember, consistency is essential—take your time to get an even, neat finish that blends perfectly with your project. This step guarantees a professional, polished result.
Sanding for Smoothness
Once you’ve applied sealant evenly and smoothed it out, the next step is sanding the joint for a flawless finish. Focus on the grain texture to guarantee a seamless blend with the surrounding wood. Use light, even pressure with fine-grit sandpaper—around 220 grit—to avoid damaging the surface. Sand in the direction of the grain to minimize scratches and achieve a smooth, consistent surface. Pay close attention to the edges of the rabbet joint, feathering out any uneven spots. If needed, switch to an even finer grit for a final pass to enhance smoothness. Proper sanding techniques will help you create a clean, professional look, making the joint virtually invisible once painted or finished.
Using Edgebanding Techniques
How can you achieve a seamless, professional finish on rabbet joints? Edgebanding is key. Start by selecting the right edging material to match your wood. Carefully apply the adhesive or use a hot iron to bond the edgeband to the edge. Trim excess material with a sharp blade, then sand for a smooth surface. For hinge installation, ensure the edges are flush for precise placement. During drawer construction, clean joints with edgebanding for a neat look. Finishing touches like applying a sealant or veneer edge banding help hide seams. Properly finished rabbet joints look clean and professional, enhancing the overall appearance of your project.
- Choose quality edgebanding materials
- Use a hot iron for strong adhesion
- Trim edges precisely with a sharp blade
- Sand for a smooth, flush finish
- Seal edges for added durability
Frequently Asked Questions
Can Rabbet Joints Be Used for Load-Bearing Furniture?
You can use rabbet joints for load-bearing furniture, but they’re best suited for substitute uses like shelves or cabinet backs rather than structural frames. Their joint variations provide a clean, fast connection, but they may not offer the strength needed for heavy loads. If you want durability, consider combining rabbet joints with other joints or reinforcements to ensure your furniture stays sturdy under stress.
What Safety Precautions Should I Take When Cutting Rabbet Joints?
Think of safety gear as your shield and cutting techniques as your trusted sword. When cutting rabbet joints, you should always wear safety goggles and ear protection to guard your eyes and ears. Keep your hands clear of the blade and use a steady, controlled motion. Make certain your workpiece is securely clamped, and double-check your measurements. These precautions protect you while you craft with precision and confidence.
How Do Rabbet Joints Affect the Overall Strength of a Project?
Rabbet joints can impact your project’s joint strength and load capacity, but their effectiveness depends on proper construction. When you cut and assemble rabbet joints correctly, they provide a stable connection that resists pulling apart. However, if not reinforced or glued well, their load capacity may be limited. So, guarantee precise cuts and consider additional reinforcement to maximize joint strength and support your project’s overall integrity.
Are Rabbet Joints Suitable for Outdoor or Moisture-Prone Environments?
Yes, rabbet joints can be suitable for outdoor or moisture-prone environments if you prioritize weather resistance and choose the right materials. You should use moisture-resistant wood, like cedar or treated lumber, and apply sealants or finishes to enhance durability. Properly prepared, rabbet joints can withstand outdoor conditions, but neglecting these steps may compromise their strength and longevity. Always consider material suitability and protective measures for outdoor projects.
Can You Modify Rabbet Joints for Decorative or Aesthetic Purposes?
Yes, you can modify rabbet joints for decorative purposes by adding decorative edges or intricate profiles. You might use router bits to create aesthetic enhancements, such as beveled or rounded edges, which add visual interest. Incorporate decorative inlays or contrasting woods within the rabbet for a unique look. These modifications allow you to enhance the overall aesthetic, making your project stand out with a polished, custom finish.
Conclusion
Now that you know how to make clean, quick rabbet joints, you’ll save time and effort on your projects. With the right tools and techniques, you can turn a seemingly tricky task into a walk in the park. Remember, practice makes perfect—don’t let small hiccups ruffle your feathers. Keep honing your skills, and you’ll be surprised how smoothly your craftsmanship comes together. After all, Rome wasn’t built in a day, but with patience, you’ll get there.