If you feel panic before clamp-up, practicing a dry run can boost your confidence and reduce stress. Gather your materials, set up your workspace, and position the pieces just like in the real glue-up. Use mock clamps or cauls to simulate pressure, checking alignment and even pressure distribution. Gradually tighten the clamps during practice to prevent gaps and ensure safety. Keep honing this skill, and you’ll master flawless joints—if you keep going, you’ll discover even more tips to perfect your process.
Key Takeaways
- Visualize the clamp-up process, including joint alignment and pressure, to build confidence and reduce panic.
- Practice setting up clamps and applying pressure gradually to develop muscle memory and control.
- Prepare your workspace with all tools and materials accessible to minimize stress during the clamp-up.
- Review proper clamp positioning and pressure distribution techniques to ensure even, secure joints.
- Rehearse multiple times to familiarize yourself with the process, increasing predictability and reducing anxiety.

HORUSDY 8-Pack Bar Clamps for Woodworking, 12" and 6" Bar Clamps, Wood Working Clamp Sets, Quick Clamps F Clamp with 150 LBS Load Limit (8-Pack Wood Clamps)
1. The complete set includes 4pcs 6" bar clamps,2pcs 12" bar clamps and 2pcs 6" spring clamps, which…
As an affiliate, we earn on qualifying purchases.
As an affiliate, we earn on qualifying purchases.
Overcoming Clamp-Up Anxiety: Why Rehearsing Your Woodworking Joints Matters
When you’re working with clamps, it’s easy to feel anxious about whether your joints will hold securely. To overcome this clamp-up anxiety, try visualization techniques. Picture the entire process clearly—how the clamps will distribute pressure, how the joints will align, and how the glue will set perfectly. Mental preparation helps you build confidence before you even start. Take a moment to mentally rehearse each step, imagining smooth, successful clamp-ups. This mental clarity can reduce hesitation and prevent rushed decisions during the actual glue-up. The more you visualize and prepare mentally, the more comfortable you’ll become. Incorporating proper projector setup practices can further enhance your confidence and ensure consistent results. Additionally, understanding the engineering principles behind clamp pressure distribution can help you make more informed decisions during the glue-up process. Over time, this practice trains your mind to trust your skills, making clamp-up a routine step rather than a nerve-wracking task.
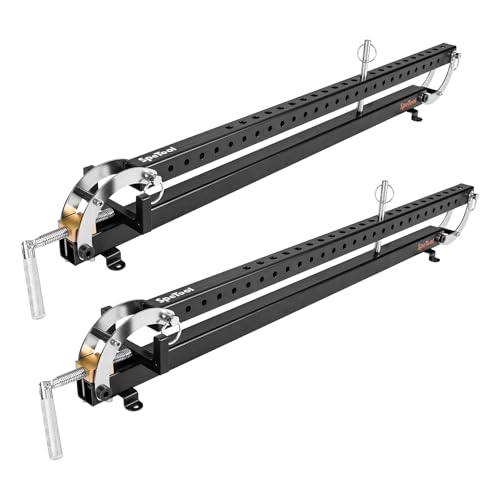
SpeTool 24 inch Panel Clamp 2 Pack, 4-Way Pressure Steel Parallel Clamp For Board Cabinet, Tabletops, Woodwork, Adjustable parallelogram Couplers, Cutting Board Clamps For Precision Projects
The 4-Way Panel Clamp:With parallelogram couplers, our 2 pack panel clamps are very convenient to use. It clamps…
As an affiliate, we earn on qualifying purchases.
As an affiliate, we earn on qualifying purchases.
Getting Your Workspace and Materials Ready for a Perfect Clamp-Up

Before you begin clamping, make sure your workspace is clean and organized so you can work efficiently. Gather and prepare all your materials ahead of time to avoid interruptions during the glue-up. A tidy setup helps guarantee everything goes smoothly for a flawless joint. Additionally, proper workspace setup can prevent mistakes and ensure safety throughout the process. Keeping your workspace organized and clutter-free also supports a calm, focused environment that can reduce stress during your project. Implementing free floating techniques for your clamps can further assist in evenly distributing pressure and achieving a seamless bond. Ensuring your clamps are properly aligned is essential for consistent pressure and a professional finish. Proper clamp application and regular checks can help maintain even pressure and improve the overall quality of your work.
Organize Your Workspace
To guarantee a smooth clamp-up, you need to organize your workspace and gather all necessary materials beforehand. Start by ensuring your work surface is clear and stable, providing a reliable base. Proper tool organization is key—keep clamps, brushes, and glue nearby and in order to save time. Use the table below to reflect on your workspace setup:
| Aspect | Importance |
|---|---|
| Work Surface | Stable, clean, and accessible |
| Tool Organization | Easy access, prevents delays |
| Material Placement | Ready for quick assembly |
| Lighting | Clear visibility |
| Space Management | Avoid clutter, maximize movement |
A well-organized workspace minimizes mistakes and stress, making your clamp-up process efficient and confident. Additionally, understanding the imaging‑scale involved can help in planning your setup more effectively.
Prepare Your Materials
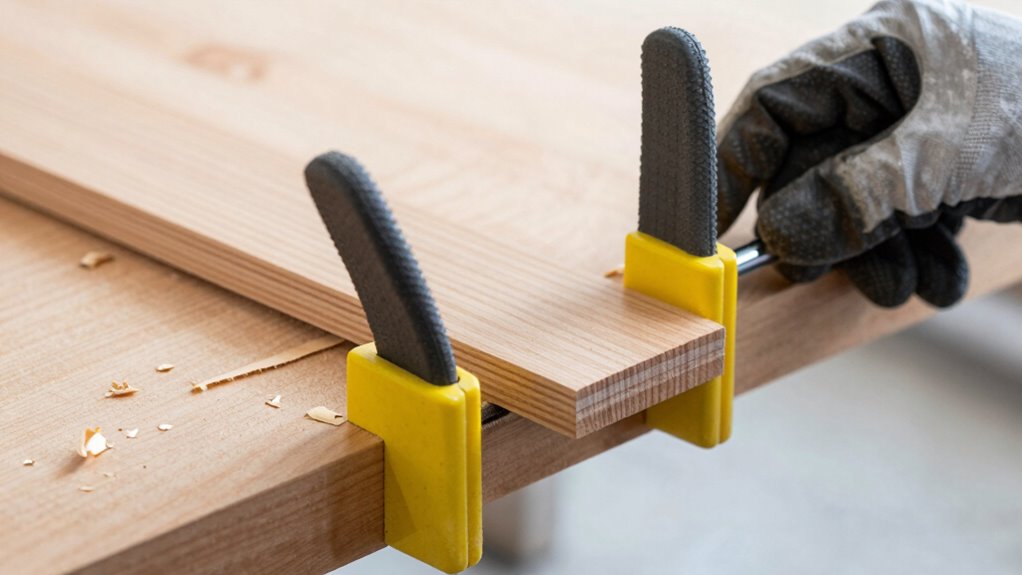
Preparing your materials thoroughly sets the foundation for a successful clamp-up. Start with careful material selection to guarantee all pieces are compatible and meet your project’s requirements. Check that your wood or other substrates are clean, dry, and free of debris. Next, focus on glue consistency; it should be smooth and easy to spread without dripping or sagging. Having your glue prepared in advance prevents delays during assembly. Gather all necessary clamps, tools, and supplies so everything is within reach. Double-check your workspace for stability and safety. Pay attention to clamp placement and ensure even pressure distribution for optimal results. Proper workspace organization and ensuring proper glue consistency help you avoid mishaps and achieve professional-looking results. Additionally, verifying your clamping pressure ensures the materials are held firmly without causing damage. It’s also helpful to review clamping techniques beforehand so you can execute the process smoothly. By organizing your materials and ensuring proper glue consistency, you minimize surprises and set yourself up for a smooth, stress-free clamp-up process. Proper preparation makes a significant difference in achieving professional results.

Sili Glue Roller with Sili Glue Tray for Arts Crafts Woodworking and Larger Projects
STREAMLINE GLUE-UP PROJECTS – The Sili Glue Roller and Sili Glue Tray are designed to streamline larger glue-up…
As an affiliate, we earn on qualifying purchases.
As an affiliate, we earn on qualifying purchases.
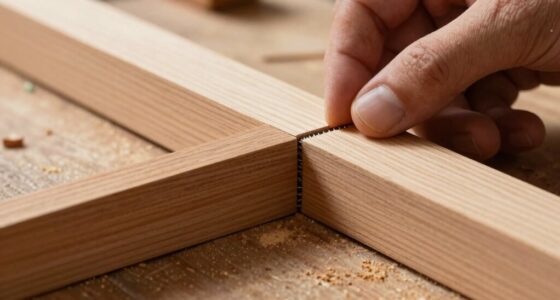
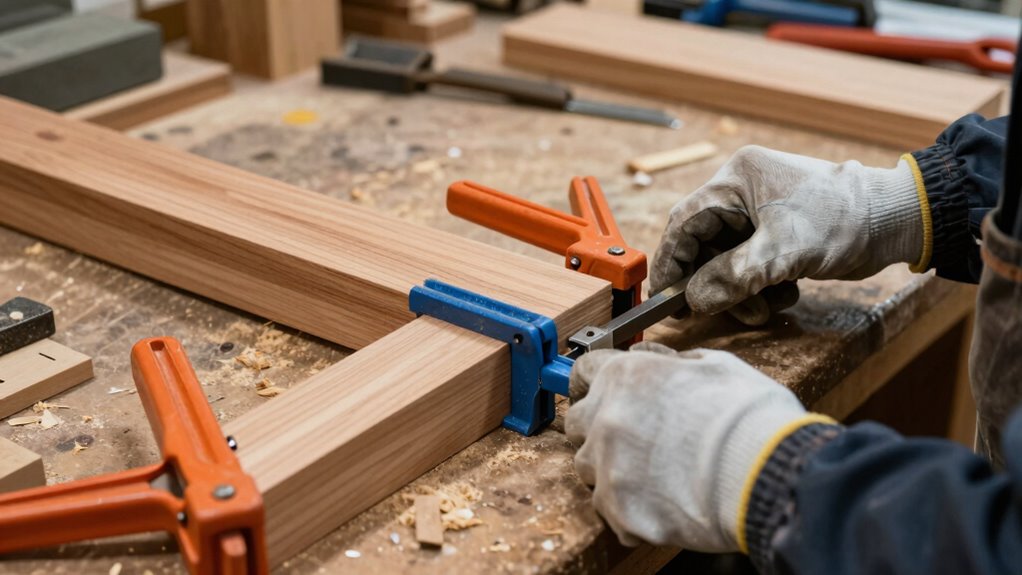
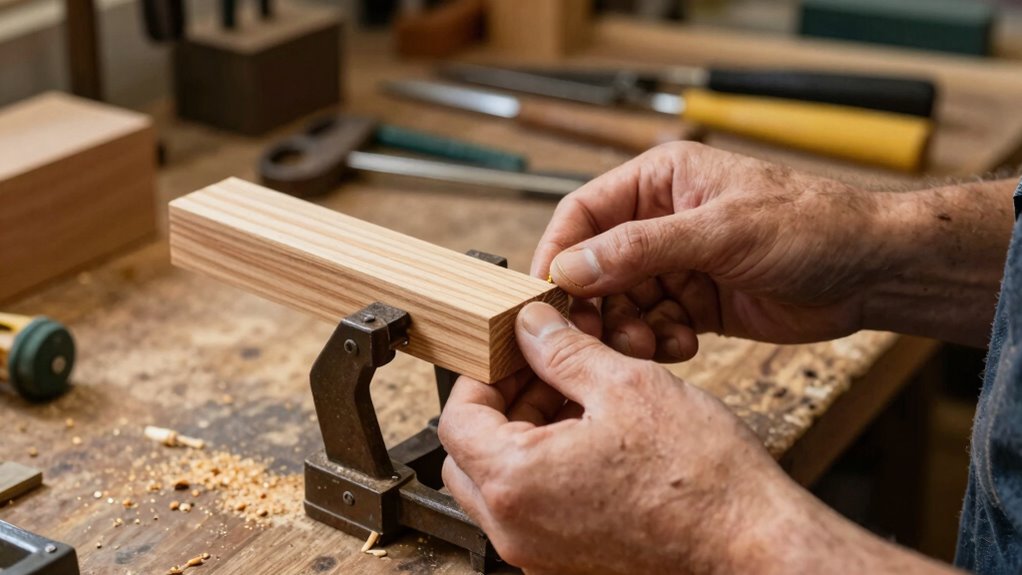
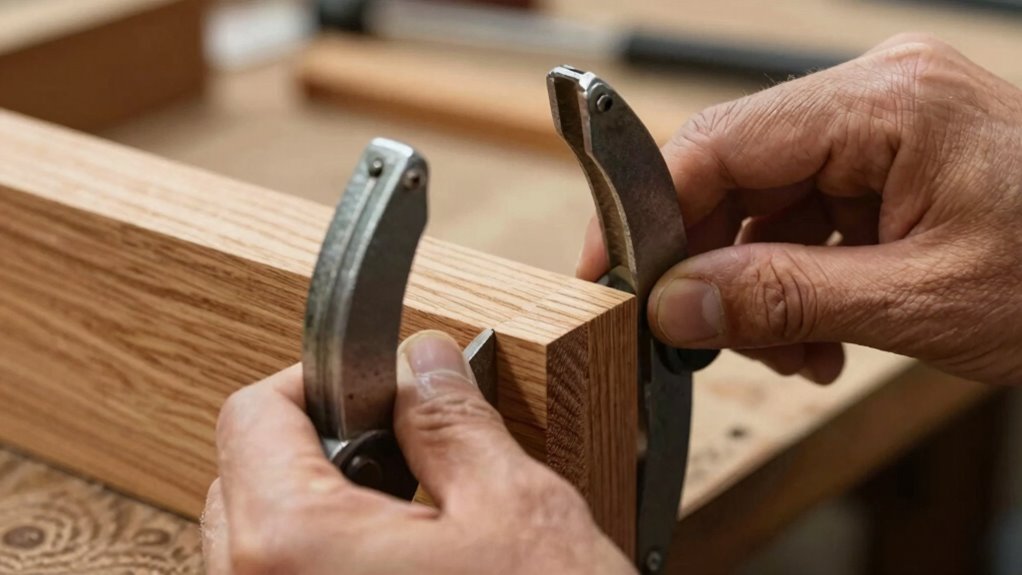
Step-by-Step: Mock-Clamping Techniques to Practice Before Final Glue-Up

Practicing mock-clamping techniques is essential to guarantee your final glue-up comes out perfect. Start by setting up your pieces as you intend, ensuring proper clamp alignment to avoid uneven pressure. Use scrap wood or cauls to distribute pressure evenly across the surface, preventing any gaps or misalignment. Tighten your clamps gradually, checking for consistent pressure and correct positioning. Adjust as needed before applying final force, making sure each clamp holds securely without causing distortion. Take notes on areas needing extra attention, and practice the entire process multiple times. This rehearsal helps you identify potential issues early, ensuring you’re confident during the real glue-up. Proper mock-clamping builds muscle memory, making your final assembly smooth and precise. Additionally, understanding clamp positioning techniques can significantly improve the quality of your work and reduce the risk of mistakes. Incorporating smart tools such as digital pressure gauges or automated clamps can further enhance your control and consistency during clamping. Developing a clamping sequence plan before starting can also streamline the process and improve results. Paying attention to pressure distribution ensures even force across your workpieces, which is vital for a perfect finish. Moreover, practicing with different clamp types can prepare you for various project requirements and help optimize your clamping strategy.
Create idea 4PCS Pressure Gauge U-Clamp Compatible with Carbo Instruments for Dials with a Surface Diameter of 2-1/2 Inches Pressure Gauge Mounting Clamp
Compatibility: Compatible with CARBO INSTRUMENTS pressure gauges, ensuring a precise fit for your equipment.
As an affiliate, we earn on qualifying purchases.
As an affiliate, we earn on qualifying purchases.
Common Mistakes When Rehearsing Your Clamp-Up and How to Avoid Them
Many woodworkers overlook the importance of proper setup before clamping, which can lead to uneven pressure and weak joints. Skipping safety checks might seem quick, but it increases the risk of accidents or damaged workpieces. To avoid these mistakes, always double-check your setup and safety procedures before rehearsing your clamp-up.
Ignoring Proper Setup
Ignoring proper setup is a common mistake that can lead to uneven pressure and unpredictable results during your clamp-up. If you skip carefully checking clamp alignment, you risk applying uneven force, which can cause warping or gaps in your project. Proper setup ensures that clamps distribute pressure evenly, preventing excessive glue squeeze in one area and insufficient in another. Take the time to verify all clamps are aligned correctly before tightening. This step is crucial for maintaining consistent clamp alignment and ensuring your project stays true to its intended shape. Rushing into the clamp-up process without attention to setup can compromise your work’s strength and appearance. Always double-check your clamp positions and adjust as needed to promote even glue squeeze and secure, professional results. Additionally, understanding the importance of proper clamping pressure can make a significant difference in achieving a flawless finish. Paying close attention to clamp pressure distribution can further improve your results and prevent damage to delicate materials. Being aware of pinball machine weight is also helpful if you plan to move or install your project, as proper handling reduces the risk of damage. Properly preparing your workspace by removing obstacles and ensuring stability can also help achieve optimal clamp-up conditions.
Skipping Safety Checks
Skipping safety checks during your clamp-up process can lead to dangerous situations and compromised results. Neglecting safety protocols increases the risk of equipment failure or accidents, which could cause injury or damage. Always verify that clamps are secure and evenly distributed before applying pressure. Ensure your workspace has clear emergency procedures in place, so you know exactly what to do if something goes wrong. Skipping these steps might save time initially but can jeopardize safety and quality in the long run. Make it a habit to double-check all safety measures before tightening clamps. Proper safety protocols protect you and your workspace, preventing mishaps that could halt your project or cause injury. Regular safety audits can help identify potential hazards before they lead to accidents. Never underestimate the importance of thorough safety checks in your clamp-up rehearsals.
Tools and Tips to Perfect Your Clamp-Up Practice

Achieving perfect clamp-ups requires more than just selecting the right clamps; it’s about using the right tools and techniques to guarantee even pressure and secure joints. To master this, focus on key tools and tips that improve your practice:
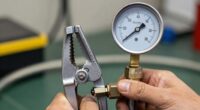
- Use clamp pressure gauges to monitor consistent force, preventing over-tightening that can warp your project.
- Employ cauls or pressure blocks to distribute force evenly, ensuring proper joint alignment.
- Incorporate scrapers or shims to fine-tune joint positioning before tightening.
- Practice applying gradual, even pressure rather than rushing, so your clamps hold securely without distorting your work.
With these tools and tips, you’ll build confidence in your clamp-up process, achieving flawless, strong joints every time.
Building Confidence: How Practicing Leads to Flawless Joints Every Time
Practicing your clamp-up techniques regularly builds the confidence needed to produce flawless joints every time. Repetition helps you master joint alignment, ensuring each piece fits perfectly before applying pressure. As you practice, you’ll become more aware of how much glue squeeze is enough—avoiding excess that can cause messes or weak joints. Consistent rehearsal also helps you develop a steady hand, so your clamps apply even pressure across the joint. Over time, you’ll trust your process, reducing hesitation and second-guessing during actual projects. This confidence leads to cleaner, stronger glue joints and a smoother workflow. Remember, the more you practice, the more natural these steps become, making flawless joints predictable rather than intimidating.
Frequently Asked Questions
How Often Should I Rehearse My Clamp-Up Before the Final Glue-Up?
You should rehearse your clamp-up at least a few times before the final glue-up, focusing on timing consistency and tool calibration. Repeating the process helps you identify potential issues, ensuring clamps are evenly applied and pressure is consistent. Practice allows you to refine your technique, reducing stress during the actual glue-up. Regular rehearsals boost confidence and help you achieve a perfect, gap-free finish every time.
What Are Signs That My Mock-Clamp Is Ready for the Real Process?
You’ll know your mock-clamp is ready when you spot clear visual cues—aligned surfaces, even pressure, and no shifting. Perform consistency checks by gently tightening and loosening to see if it maintains stability without wobbling. If everything feels firm, uniform, and predictable, it’s a sign you’ve nailed your rehearsal. Trust these subtle signs; they reveal whether your clamp-up is truly prepared for the real deal.
Can I Use Household Items for Practicing Clamp-Up Techniques?
Yes, you can use household tools as DIY alternatives to practice clamp-up techniques. Items like heavy books, clamps from your toolbox, or even rubber bands can help simulate the pressure needed. These household tools allow you to get comfortable with the process, ensuring you understand proper pressure and positioning. Just make sure the materials are sturdy and safe, so you can rehearse effectively without risking damage or injury.
How Do I Adjust Clamping Pressure During Practice Sessions?
To adjust clamp pressure during practice, start by applying light pressure and gradually tighten until the glue spreads evenly without squeezing out excess. Use adjustment techniques like tightening slowly and checking for even pressure across the joint. Keep a close eye on the pressure gauge if you have one, and make small tweaks as needed. This helps you develop a feel for the right clamp pressure, ensuring strong, clean glue-ups every time.
What Safety Precautions Should I Take During Clamp-Up Rehearsals?
During clamp-up rehearsals, you should wear proper personal protective equipment like safety glasses and gloves to protect yourself. Confirm your workspace is clean, well-lit, and free of hazards to maintain safety. Always double-check that tools and clamps are secure before applying pressure. Keep a safe distance from the clamp area and stay alert for any signs of instability. Prioritizing these precautions helps prevent accidents and keeps your workspace safe.
Conclusion
So, next time you’re sweating over that dreaded clamp-up, remember: practice makes perfect—or at least less terrifying. Rehearsing isn’t just for perfectionists; it’s your secret weapon against glue-up chaos. Skip it, and you might as well invite your joints to a slapstick comedy. Embrace the mock-clamping, laugh at your mistakes, and soon you’ll be the woodworking hero who never fears the clamp again—just don’t forget to remove the comedy props first.