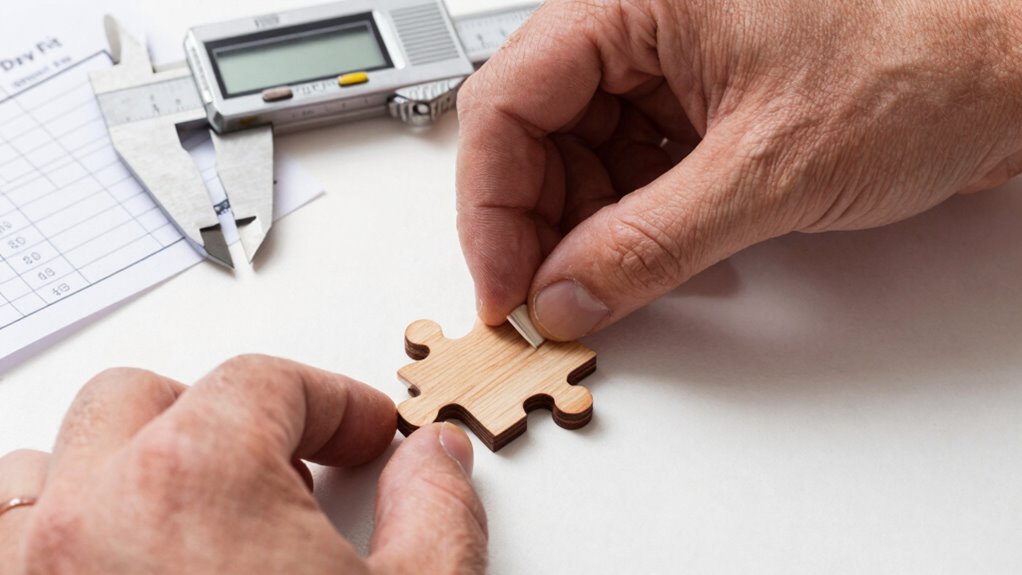
Before gluing, double-check your workspace is clean, stable, and well-lit. Organize your tools, measure precisely, and test fit all pieces without adhesive—making adjustments as needed. Confirm surfaces are free of debris and that clamps or spacers are ready. Avoid rushing or forcing parts together, and always verify alignment and fit first. Want to master each step for perfect results? Keep going—you’ll discover how to ensure a flawless dry fit every time.
Key Takeaways
- Thoroughly test assemble pieces without glue to check fit, alignment, and identify adjustments needed.
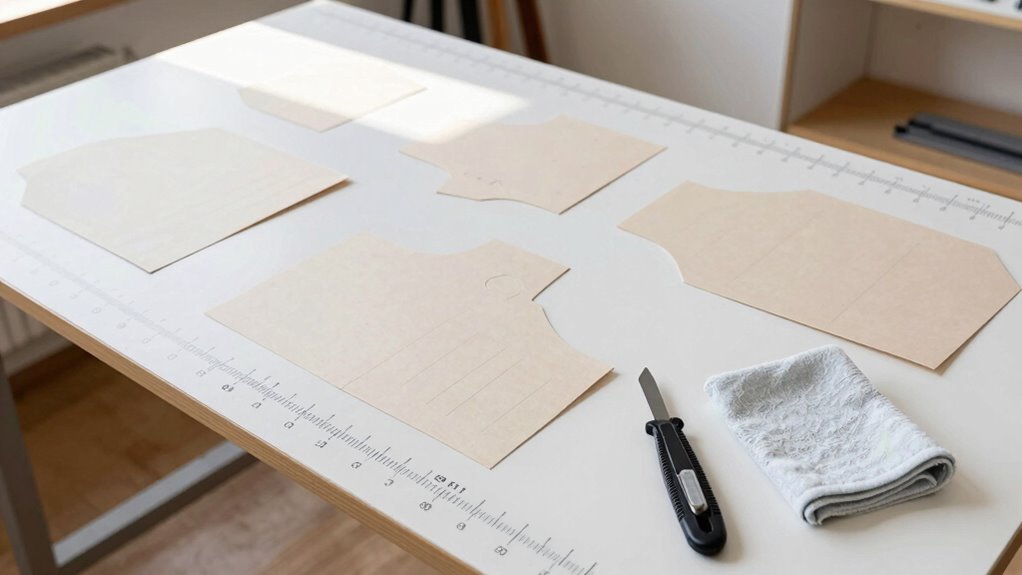
- Prepare your workspace with a clean, flat surface, proper lighting, and organized tools for accuracy.
- Verify all tools are calibrated and materials are compatible through small test sections before final fitting.
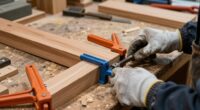
- Use clamps carefully to hold pieces securely during dry fitting, avoiding over-tightening or misalignment.
- Perform detailed visual and physical inspections to ensure perfect fit before applying glue.
![Right Angle Clamp, Housolution [4 PACK] Single Handle 90° Aluminum Alloy Corner Clamp, Clamps for Woodworking Adjustable Swing Jaw, Woodworking Tools Photo Frame Vise Holder, Gifts for Men Dad](https://m.media-amazon.com/images/I/51fhtK3TMXL._SL500_.jpg)
Right Angle Clamp, Housolution [4 PACK] Single Handle 90° Aluminum Alloy Corner Clamp, Clamps for Woodworking Adjustable Swing Jaw, Woodworking Tools Photo Frame Vise Holder, Gifts for Men Dad
【Premium Quality Clamps for Woodworking】: Woodworking gifts for men. Sturdy 90 degree wood corner clamps, made of premium…
As an affiliate, we earn on qualifying purchases.
As an affiliate, we earn on qualifying purchases.
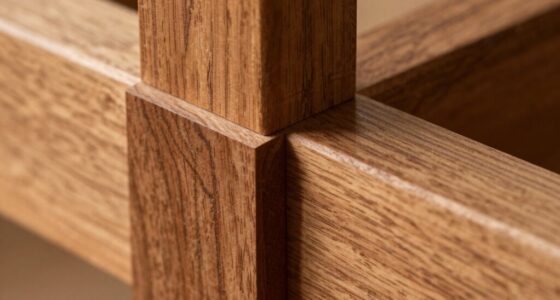
Why a Dry Fit Before Gluing Saves Time and Fixes Mistakes
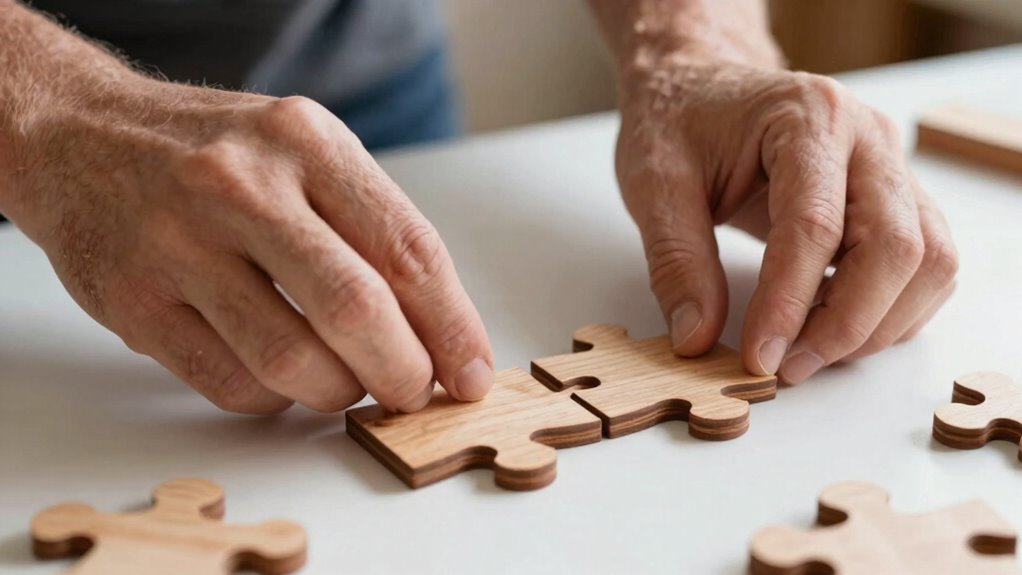
Performing a dry fit before gluing your pieces is a crucial step that can save you time and prevent mistakes. When you test how parts fit together first, you ensure measuring accuracy and proper alignment before committing to glue. This process allows you to identify any discrepancies early on, which is essential for achieving precise joinery techniques. Dry fitting also reveals if any modifications are necessary, preventing the frustration of having to undo glued pieces later. Additionally, material compatibility can be assessed during the dry fit, helping to avoid issues like warping or improper adhesion. Understanding color accuracy and how it influences the final appearance can also be beneficial during this stage, ensuring the colors match as intended. By previewing the final assembly, you can fine-tune your approach, making the actual gluing process smoother and more precise. Incorporating a quality control check into this step can further ensure a successful outcome. Being aware of smart home automation integration options can also help coordinate your workshop environment for better oversight. Skipping this step risks misaligned joints, wasted materials, and extra work, so take the time to dry fit and double-check everything beforehand.

Woodworking Measuring Tools with Box, Aluminum Scribeing Ruler, Multi-Purpose Marking Ruler, Precision Layout Measuring Tool Carpentry Square Kits for Engineer Carpenter (10pcs with Box)
Multi-purpose Woodworking Kit: This carpentry square kits includes an array of tools catering to diverse woodworking tasks, ensuring…
As an affiliate, we earn on qualifying purchases.
As an affiliate, we earn on qualifying purchases.
How to Prepare Your Workspace for Accurate Dry Fitting
To guarantee your dry fitting is as accurate as possible, start by organizing your workspace. Clear clutter and create a dedicated area for your project, ensuring all tools and materials are within reach. A tidy workspace helps you focus and prevents accidental damage to your pieces. Pay attention to workspace organization by setting up a flat, stable surface that supports precise fitting. Additionally, follow safety precautions: wear protective gear if necessary, keep sharp tools away from the work area, and ensure good lighting to see details clearly. Proper setup minimizes distractions and accidents, allowing you to concentrate on the dry fit. A well-prepared workspace not only boosts accuracy but also keeps you safe during the process. workspace organization is a key part of creating calm and functional homes, as it reduces stress and promotes safety. Incorporating proper lighting can further enhance your visibility and precision during the dry fitting process. Being mindful of essential oils for workspace health can also contribute to a more comfortable and focused environment. Including workspace ergonomics can help prevent fatigue and improve your overall comfort during detailed tasks.

HITTI 12X Square Magnifying Glass with Light and Clamp, Hands-Free Lighted Stand with Ultra Long 3-Section Arm | 5 Color Modes & Stepless Dimming LED Desk Lamp for Workbench, Crafting, Reading -Yellow
ONE-BUTTON MAX BRIGHTNESS: Our magnifying desk lamp apart from other square models is its one-button max brightness function….
As an affiliate, we earn on qualifying purchases.
As an affiliate, we earn on qualifying purchases.
What Materials and Tools You Need for a Perfect Dry Fit
To achieve a perfect dry fit, you need the right tools and materials on hand. Make sure to check your essential tools checklist and verify your materials are compatible for the job. Additionally, preparing your work surface helps keep everything organized and accurate throughout the process. Remember, understanding your tools and materials is key to a successful project, so take the time to familiarize yourself with their proper use and specifications to avoid mistakes. Being aware of your power tool safety practices ensures a safer working environment and helps prevent accidents during your project. Also, considering the performance ratings of your vacuum tools can help maintain a clean workspace and protect your materials from dust and debris. Knowing how to properly handle and maintain your tools can extend their lifespan and ensure consistent results.
Essential Tools Checklist
Before you start your dry fit, gathering the right tools and materials is vital for a smooth process. You’ll need basic measuring techniques to guarantee precision, like a ruler or tape measure, for accurate placement. A sharp utility knife or scissors is essential for trimming materials to fit perfectly. Keep your tools in top condition with proper tool maintenance—clean blades and well-oiled hinges prevent mishaps. A straightedge or square helps verify right angles, making sure your pieces align correctly. Additionally, having a pencil or marker on hand allows you to mark cut lines easily. Double-check that your tools are functioning properly before beginning, as dull blades or faulty tools can compromise accuracy. Ensuring tool calibration can further enhance precision during your project. Proper storage and care for your tools help sustain their sharpness and reliability, making future projects easier. Using techniques for accuracy, such as measuring twice and cutting once, ensures your dry fit is precise and professional. Incorporating quality tools from reputable sources can also significantly improve your results. With the right tools in place, your dry fit will proceed efficiently and accurately.
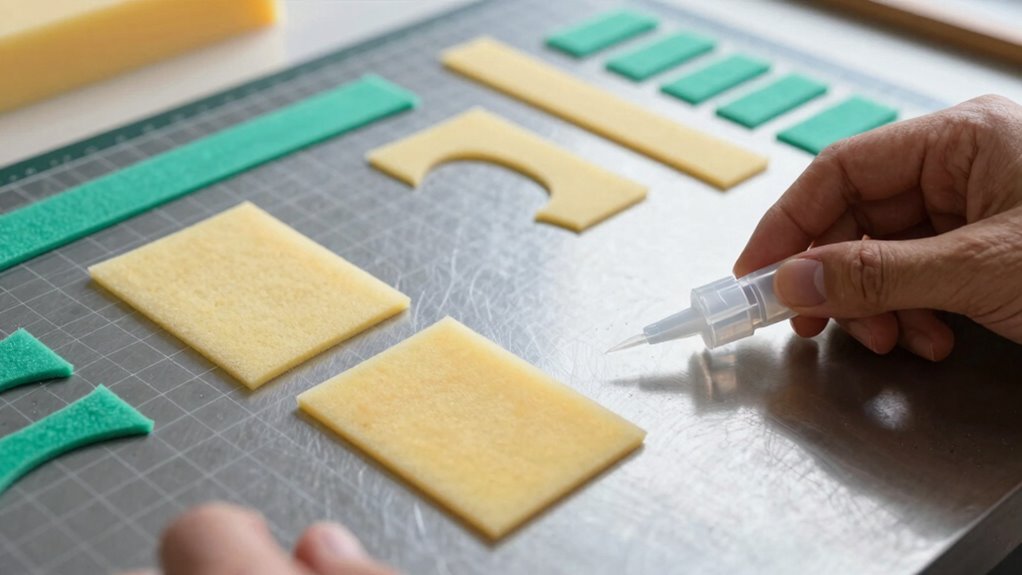
Material Compatibility Tips
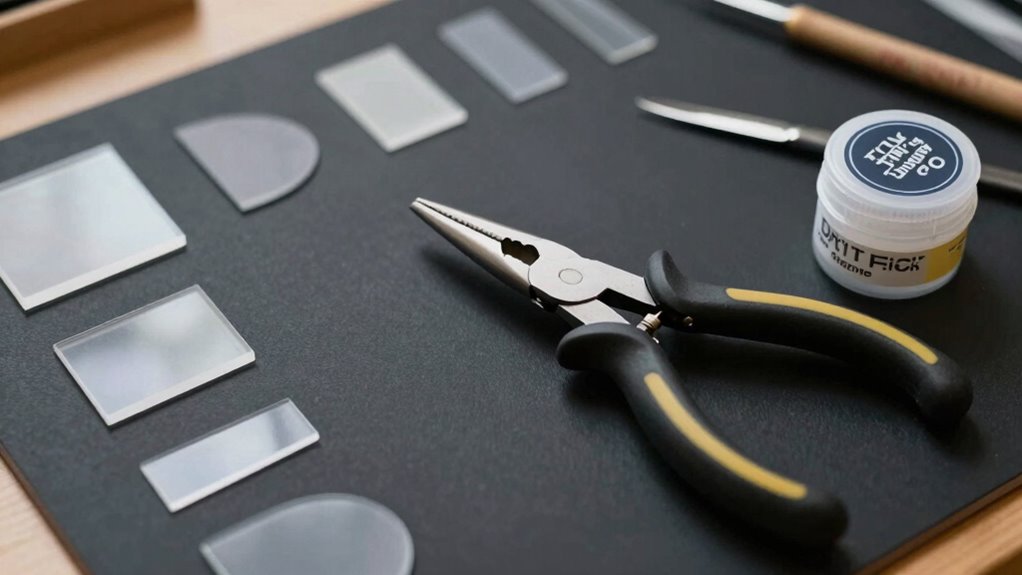
Choosing the right materials and tools is essential for a perfect dry fit. Before you start, consider how different materials respond to adhesion techniques—some may require specific primers or preparation methods to guarantee a strong bond. Always perform material testing on small sections to confirm compatibility and avoid surprises later. For example, test how wood reacts to adhesives or if plastics hold well with certain glues. Using compatible tools, like clamps or spacers, helps you accurately assess fit without damaging components. Don’t skip this step; incompatible materials can lead to misalignment or weak joints. Proper understanding of Free Floating principles can also guide you in selecting materials that naturally integrate and settle into your design. Additionally, being aware of Material Compatibility can help prevent issues during assembly and ensure a durable finish. Testing different materials for Adhesive Strength prior to full assembly can save time and materials in the long run. By verifying material compatibility through testing and selecting the right tools, you set a solid foundation for a smooth, efficient dry fit process that ensures your project turns out just right. Incorporating knowledge of Material Behavior can also help you anticipate how materials will perform under different conditions, contributing to more reliable results.
Work Surface Preparation
Preparing your work surface is a crucial step to guarantee a flawless dry fit. A clean, organized work surface ensures accuracy and prevents debris from messing with your measurements. Before starting, clear any clutter and wipe down the area thoroughly. Use a soft cloth and mild cleaner to maintain cleanliness and avoid scratches or dust. Your work surface should be stable and level to ensure precise fitting. Keep tools like a measuring tape, pencil, and clamps nearby for efficiency. To evoke emotion, consider this table:
| Materials & Tools | Purpose |
|---|---|
| Clean work surface | Ensures accuracy and prevents errors |
| Soft cloth | Maintains cleanliness and surface care |
| Measuring tape | Precise measurements |
| Clamps | Secures pieces for dry fitting |
A prepared surface boosts confidence and sets the stage for success. Proper work surface preparation is essential for achieving professional results and avoiding costly mistakes.

HORUSDY Wall Mounted Storage Bins Parts Rack 30PC Organizer Garage Plastic Shop Tool for Men's Gift, Blue,Orange,Red
Adjustable and Removable Bins Are Color Coded for Easy Organization of Parts and Tools
As an affiliate, we earn on qualifying purchases.
As an affiliate, we earn on qualifying purchases.
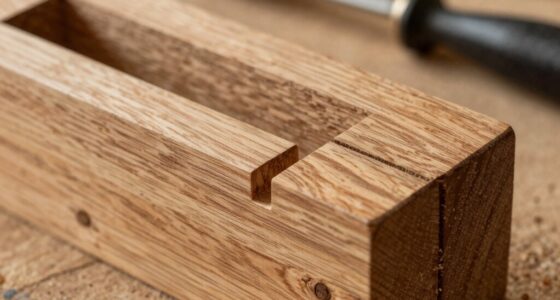
How to Test and Adjust Your Pieces for the Best Fit
To guarantee your dry fit is perfect, you need to actively test how your pieces come together and make precise adjustments. Begin by carefully assembling the pieces without glue, paying close attention to clamp positioning to ensure even pressure. Check measurement accuracy by verifying that all joints align correctly and fit snugly. If gaps or tight spots appear, gently sand or adjust the pieces as needed. Reassemble and recheck, focusing on consistency and tightness. Use clamps strategically to hold everything in place, but avoid over-tightening, which can distort the fit. This iterative process helps you identify and fix minor issues early, ensuring your final assembly will be strong and precise. Accurate testing and adjustment are key to a flawless dry fit.
Common Dry Fit Mistakes and How to Avoid Them
Even experienced woodworkers can make mistakes during the dry fit process, which can lead to issues in the final assembly. Common errors include rushing the test, ignoring slight misalignments, or relying on incorrect measurements. These mistakes often cause assembly errors or gaps that are hard to fix later. To avoid this, double-check all measurements before fitting and take your time adjusting pieces. Be cautious of forcing parts together, which can cause damage or misalignment. Here’s a quick guide:
| Mistake | How to Avoid | Consequence |
|---|---|---|
| Rushing the dry fit | Take your time and plan ahead | Assembly errors, misalignment |
| Ignoring slight gaps | Use clamps and adjustments | Gaps or weak joints |
| Relying on incorrect measurements | Measure twice, cut once | Final fit issues |
| Forcing pieces together | Test fit multiple times | Damage, misalignment |
Final Checks to Do Before Gluing for Seamless Results

Before applying glue, it’s essential to perform final checks to guarantee your pieces align perfectly and fit seamlessly. These steps ensure you maximize dry fit advantages and set the stage for a flawless bond. Start by confirming your pieces are correctly oriented and that all edges meet evenly. Double-check the dry fit to identify any misalignments or gaps. Make sure your work surface is clean and free of dust or debris, which can affect glue preparation. Inspect the glue itself—make sure it’s fresh and properly mixed if needed. Also, verify that clamps or supports are ready for immediate use after gluing. These final checks help prevent mistakes, saving time and effort while producing professional results.
Frequently Asked Questions
How Do I Identify the Best Starting Point for Dry Fitting?
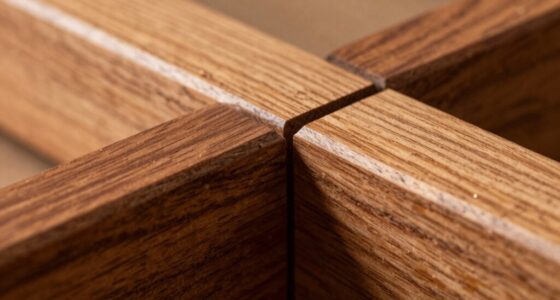
To identify the best starting point for dry fitting, focus on wooden joints that align well and offer fitting accuracy. Begin by assembling the most critical joints first, such as corners or key structural connections, to ensure stability. Check each joint for proper fit, making adjustments if needed, before progressing. This approach helps you spot potential issues early, ensuring your final assembly is precise and secure.
Can I Dry Fit With Glue Residues From Previous Projects?
Think of glue residue as stubborn weeds in your garden; they can cause dry fit contamination if not cleared first. You can dry fit with leftover glue, but it’s a gamble—residues might cause misalignment or weak joints. To guarantee a perfect fit, clean off all glue residues thoroughly. Otherwise, you risk your project looking like a puzzle with missing pieces—imperfect and frustrating. Always start fresh for the best results.
How Do Temperature and Humidity Affect Dry Fitting Accuracy?
Temperature and humidity greatly impact dry fitting accuracy. When you maintain climate control, you prevent materials from expanding or contracting unexpectedly. High humidity adds moisture, making materials swell and misaligning your fit. Conversely, low humidity can cause shrinkage. By managing moisture levels and controlling temperature, you guarantee precise dry fits, reducing errors and ensuring your project aligns perfectly. Proper moisture management and climate control are key to accurate dry fitting.
What Are the Signs of an Improper Dry Fit?
You can tell your dry fit is improper if you notice misaligned joints or uneven gaps between pieces. These signs indicate that components weren’t correctly positioned or the fit isn’t precise. You might also see parts that don’t sit flush or move easily, suggesting issues with the fit or shape. Pay close attention to these details to guarantee your project’s accuracy before applying glue.
How Long Should I Wait Before Gluing After Dry Fitting?
Think of dry fit timing like letting paint dry; rushing can cause issues. You should wait at least 15-30 minutes after dry fitting before gluing, making sure the pieces stay in place. This wait allows the fit to settle and minimizes movement during glue curing. Rushing this step risks misalignment, much like smudging wet paint. Patience ensures a strong, precise bond, so don’t skip this essential waiting period.
Conclusion
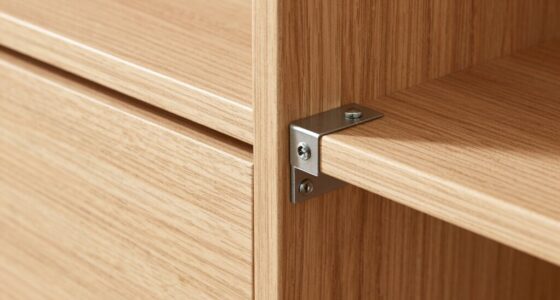
Always perform a thorough dry fit before gluing to save time and prevent mistakes. For example, imagine fitting a cabinet door; without dry fitting, you might discover misaligned hinges only after glue dries, causing headaches later. By double-checking your pieces first, you guarantee a seamless, professional finish. So, take that extra moment to dry fit—your future self will thank you for the perfect, hassle-free results.