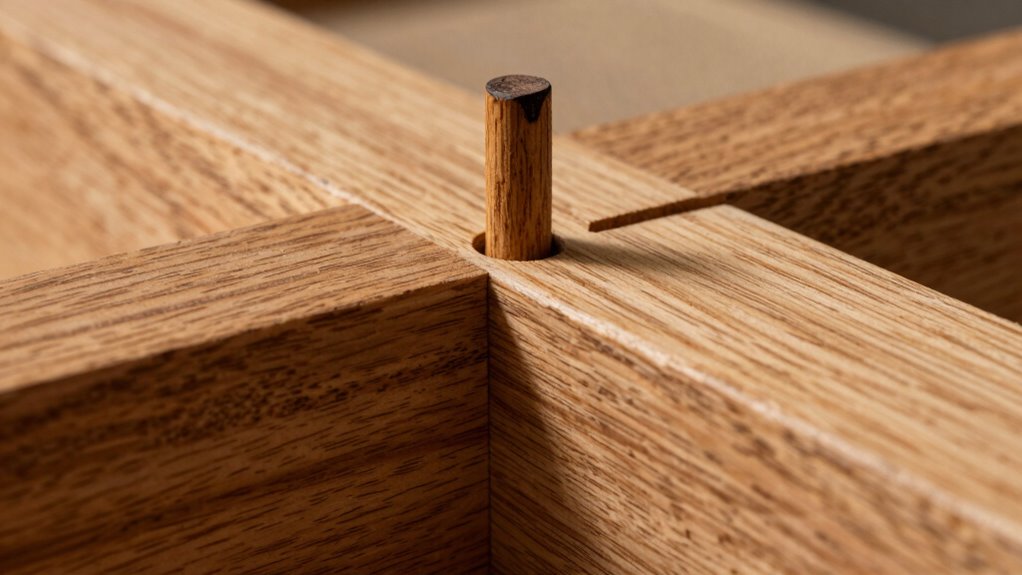
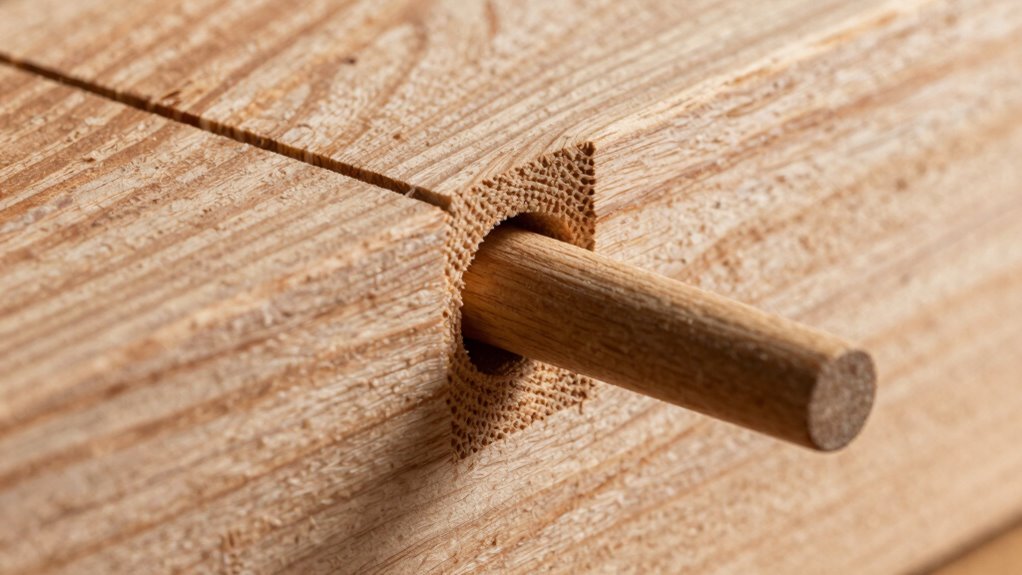
Drawbored tenons use an offset peg to pull joints tight by relying on the wood’s natural tension. When you drill an offset hole and insert the peg, it acts like a wedge, pulling the joint together securely. This traditional trick creates strong, durable furniture joints without nails or screws. If you want to master this technique and make sure your joints stay perfectly tight, explore the detailed steps and tips outlined in the following guide.
Key Takeaways
- The drawbored tenon uses an offset hole and peg to generate tension, pulling the joint tight as the peg seats.
- Driving the peg through the offset hole creates friction and compression, ensuring a secure, lasting fit.
- Properly drilled and fitted pegs act like wedges, tightening the joint during assembly for increased strength.
- The tension from the peg compensates for wood movement and prevents joint loosening over time.
- Accurate alignment and peg sizing are essential to maximize the tension and pull the joint tightly together.
5 Pieces Reducer Sleeve Woodworking Square Tenon Machine Converter Eyelet Joint Mortiser Bit
【Features】: Reducer sleeve for woodworking, ensuring accurate and drill.
As an affiliate, we earn on qualifying purchases.
As an affiliate, we earn on qualifying purchases.
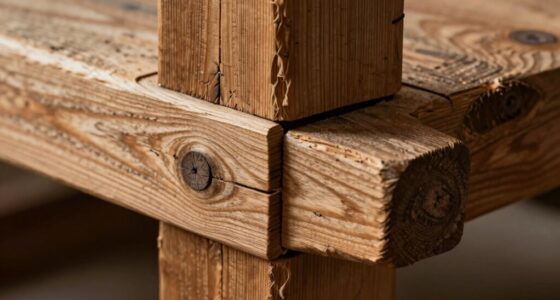
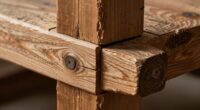
Why Choose Drawbored Tenons for Strong Joints
Drawbored tenons are a popular choice for creating strong, durable joints because they rely on precise craftsmanship and effective friction fit. By aligning the wood grain properly, you enhance the joint’s strength, making it resistant to movement over time. The natural patterns of the wood grain also add to the joint’s aesthetic appeal, giving your project a professional, polished look. Unlike other methods, drawbored tenons don’t require metal fasteners, which can detract from the visual flow. Instead, the fit and subtle detailing improve the overall appearance, blending seamlessly with the surrounding wood. When you focus on the grain orientation and craftsmanship, you’ll enjoy a joint that’s both visually pleasing and incredibly sturdy, making it ideal for fine woodworking projects. Incorporating innovative techniques can further enhance the durability and appearance of your joints.

ALLECIN 8 Values Wood Dowels Kit 1/4 3/8 5/16 Inch Fluted Wooden Dowel Pins Pegs Assortment for Furniture Woodworking DIY Crafts (Pack of 225Pcs)
ALLECIN Fluted Wooden Dowel Set – Includes 1/4 x 1-3/16Inch & 1/4 x 1-1/2Inch & 1/4 x 2Inch…
As an affiliate, we earn on qualifying purchases.
As an affiliate, we earn on qualifying purchases.
What Are Drawbored Tenons and How Do They Work?
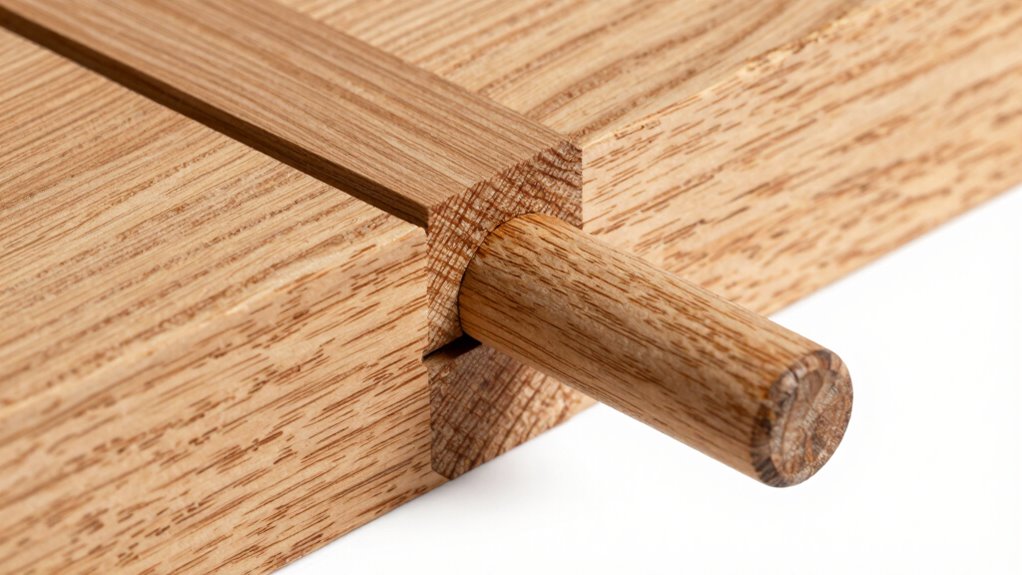
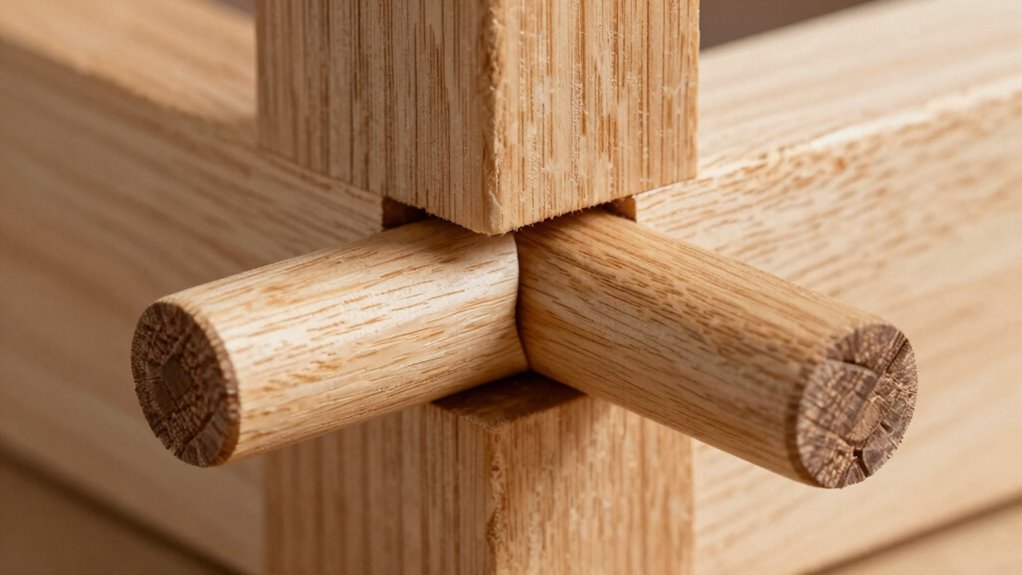
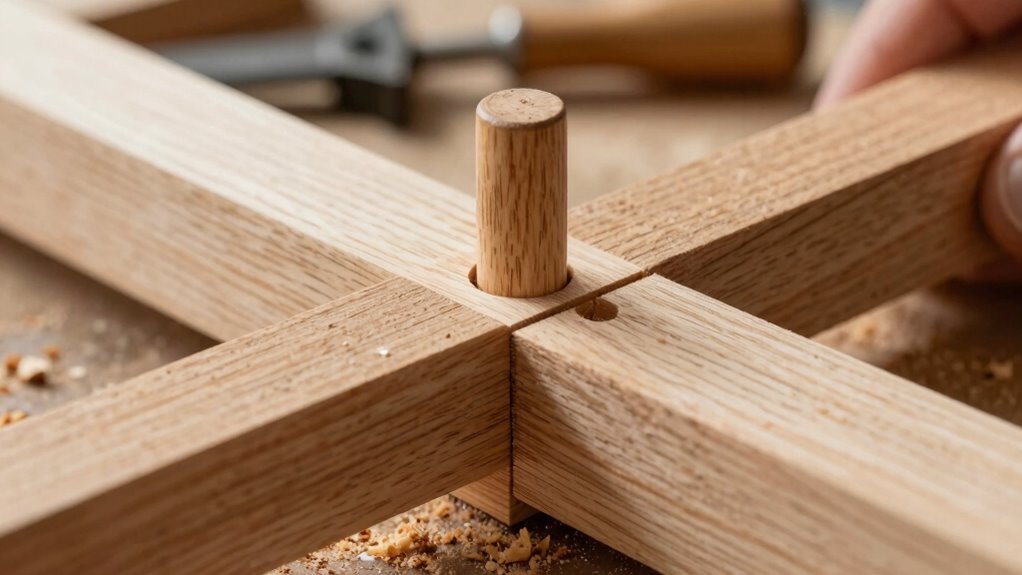
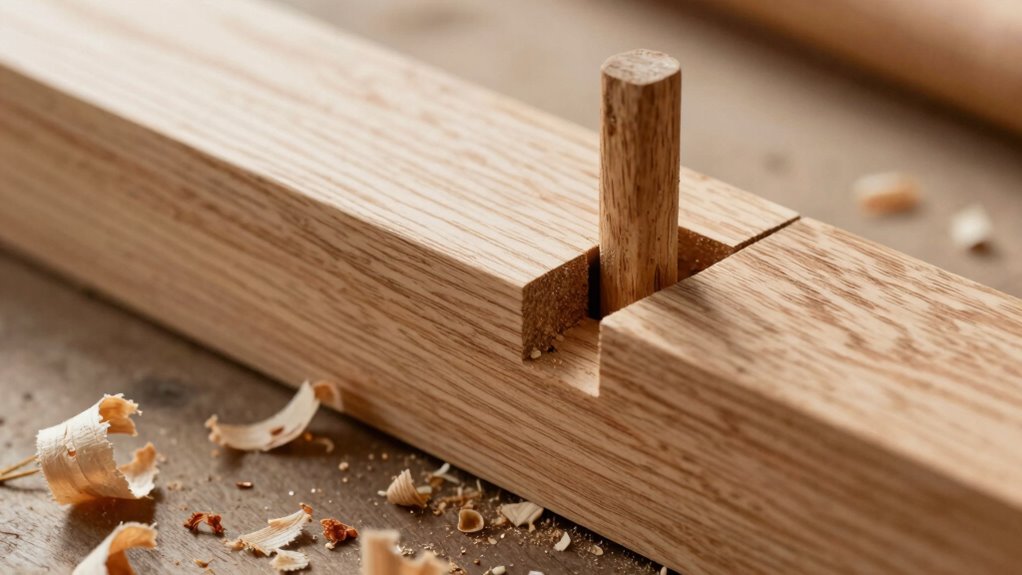
Ever wonder how a joint can be both strong and seamless without metal fasteners? That’s where drawbored tenons come in. In traditional joinery, a mortise and tenon joint is cut precisely, then a peg is driven through a hole offset in the tenon. This creates tension, pulling the joint tight as the peg seats. The key is the offset hole: it causes the peg to act like a wedge, tightening the joint as you drive it home. This method enhances stability without metal fasteners. The timber movement and flexibility of wood are also factors that drawbored tenons help accommodate, making them a reliable choice for durable furniture. Here’s a quick look at how it works:
| Step | Action | Result |
|---|---|---|
| 1 | Drill offset hole in tenon | Creates tension for tightening |
| 2 | Insert peg through mortise and tenon | Peg pulls joint tight as it seats |
| 3 | Drive peg to lock in place | Secures the joint without nails or screws |
| 4 | Joint becomes stable and seamless | Strength from traditional joinery |

POWERTEC Chisel Plane with Flat Blade – Compact Edge Trimming Tool for Woodworking, Plug Trimming, Joinery Cleanup – Includes Wrench (72162)
PRECISION AND VERSATILITY: Ideal for detailed woodworking tasks such as trimming plugs, paring joinery surfaces, cleaning dried glue,…
As an affiliate, we earn on qualifying purchases.
As an affiliate, we earn on qualifying purchases.
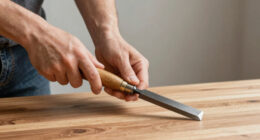
Gather Your Tools and Materials for Crafting Drawbored Joints
Before you begin crafting your drawbored joints, it’s essential to gather all the necessary tools and materials. Ensuring proper tools will help you achieve a tight mortise fit and work with the wood grain effectively. You’ll need sharp chisels, a drill with bits, a mallet, a marking gauge, and a dowel or peg for tightening the joint. Select wood with a straight grain for stability and strength. The grain orientation influences how the joint pulls tight and resists splitting. Having the right tools on hand allows you to control the fit precisely, especially when creating the mortise and aligning the tenon. Proper grain orientation is crucial for the success of your drawbored joint, as it affects the joint’s strength and durability. Preparing these materials beforehand streamlines your process and helps you craft durable, tight-fitting drawbored joints that stand the test of time.

WETOLS Corner Clamp for Woodworking, 90 Degree Right Angle Clamp, Wood Clamps, 4Pcs Adjustable Spring Loaded Woodworking Clamp, Gifts for Him, Birthday Gifts for Men, Photo Framing, Orange
Cool Gadgets Gifts for Men: WETOLS corner clamp comes with a nice gift box, which can be great…
As an affiliate, we earn on qualifying purchases.
As an affiliate, we earn on qualifying purchases.
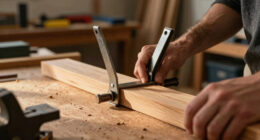
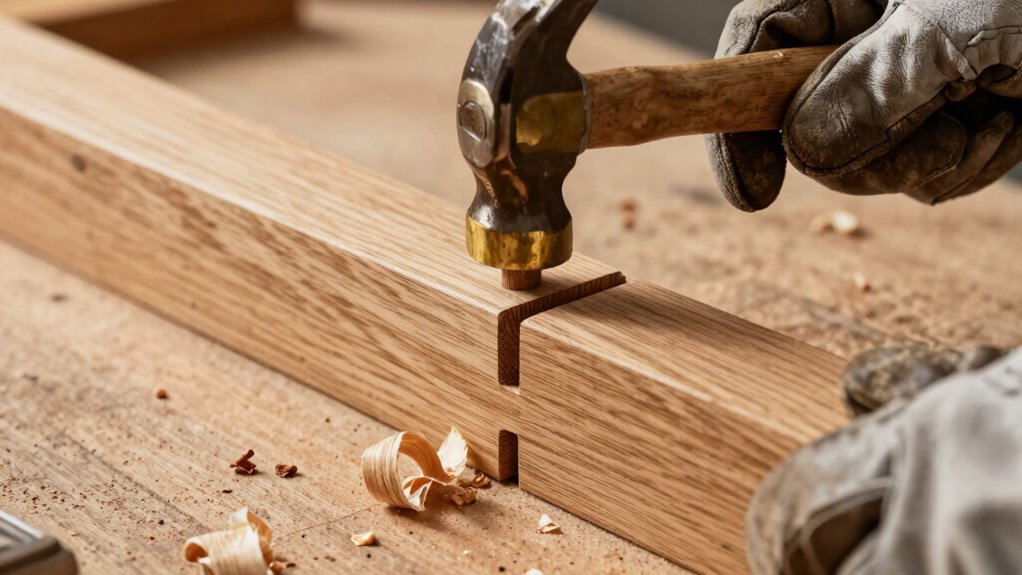
How to Make a Drawbored Tenon Joint: A Step-by-Step Guide
Start by preparing your materials, ensuring the tenon and mortise are precisely cut and clean. Next, align the pieces correctly and insert the drawbore pin, then tighten the joint to draw everything together. Proper alignment is crucial to ensure the joint is tight and secure. Finally, secure the assembly by tying or pinning it in place for a strong, lasting connection.
Preparing the Materials
To guarantee a strong and secure drawbored tenon joint, you need to carefully prepare your materials before assembly. Start with proper wood selection, choosing seasoned, straight-grain hardwoods like oak or maple for stability and strength. Ensure your tools are sharp and well-maintained; dull tools can cause inaccuracies. Check the dimensions of your tenons and mortises for a precise fit, avoiding overly tight or loose joints. Sand all surfaces smooth to prevent splinters and ensure accurate drilling. Finally, plan your layout carefully, marking the positions of holes and joints clearly. Proper preparation reduces errors, saves time, and results in a durable, tight-fitting joint that will stand the test of time. Incorporating a proper fit and careful measurement ensures optimal joint performance and longevity.
Assembling and Tying
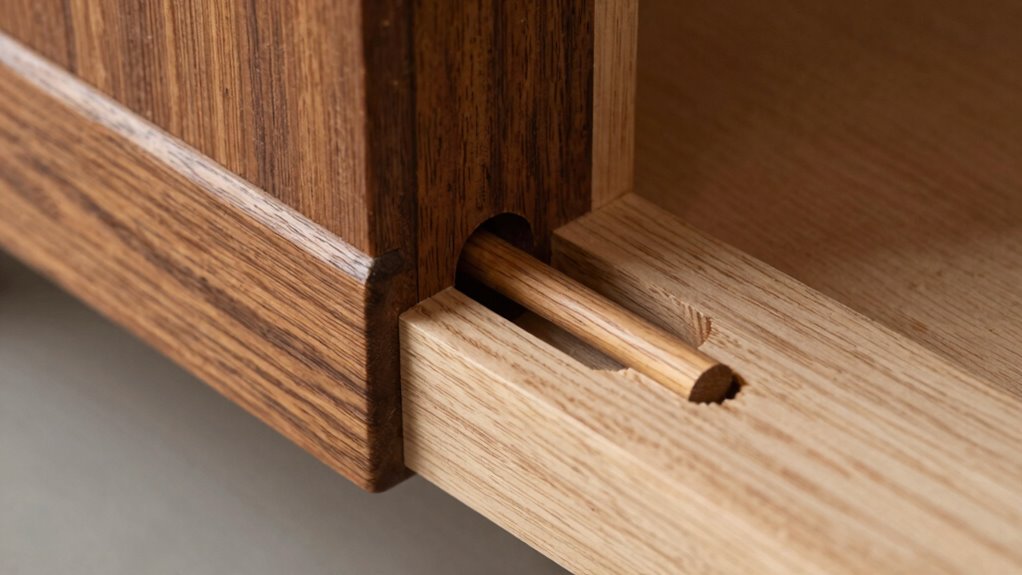
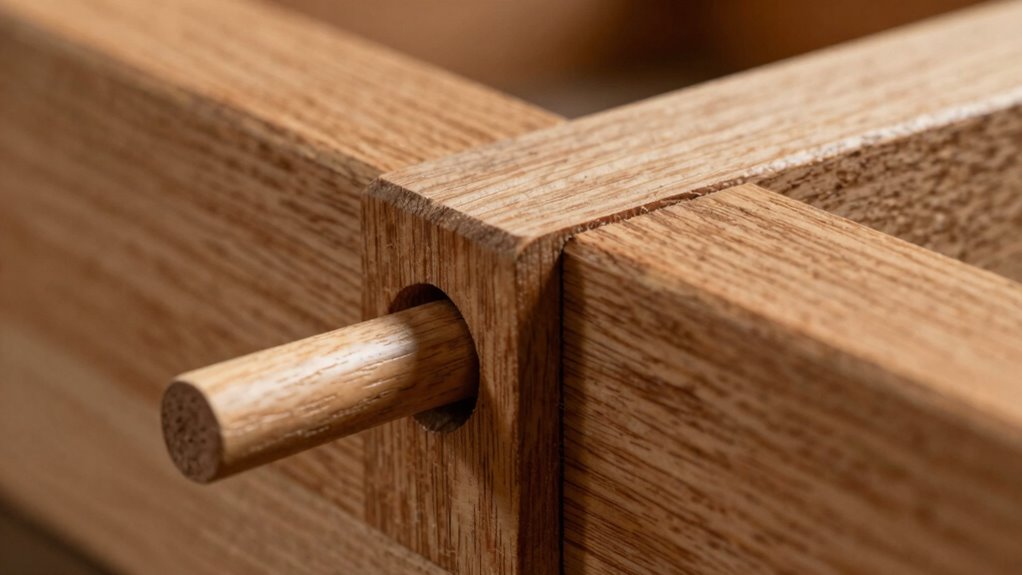
Assembling and tying a drawbored tenon joint requires careful alignment and precise execution. First, insert the tenon into the mortise, ensuring the holes align perfectly. This alignment is vital for joint stability and allows the drawbore peg to pull the joint tightly. When driving the peg through the hole, apply steady pressure, making sure it seats fully without splitting the wood. As the peg compresses the joint, it compensates for wood movement over time, maintaining tightness. Keep an eye on the joint’s fit and adjust if necessary before finalizing. Proper tying ensures the joint remains secure despite natural wood expansion or contraction. Additionally, understanding the local woodworking traditions can enhance the craftsmanship and durability of your joints. With patience and attention to detail, you create a durable, stable connection that resists loosening and maintains its integrity over years of use.
Benefits of Using Drawbored Tenons in Furniture Making
Using drawbored tenons can considerably strengthen your furniture joints, making them more durable over time. You’ll also find that these joints require less clamping during assembly, saving you time and effort. Overall, they provide a reliable and efficient solution for solid, lasting furniture pieces. Additionally, understanding wood joint types can help you choose the best method for your project.
Enhanced Joint Strength
Drawbored tenons considerably enhance the strength of furniture joints by creating a tight, self-tightening fit that resists pulling apart under stress. This method improves joint durability, ensuring your furniture withstands daily use over time. The increased mechanical interlock diminishes the likelihood of joint failure, making your projects more reliable. Additionally, drawbored tenons contribute to woodworking aesthetics, providing a clean, seamless appearance without visible dowels or fasteners. The technique’s precision ensures consistent tightness, which helps maintain the joint’s integrity even with wood expansion and contraction. This results in furniture that’s not only sturdy but also visually appealing. Overall, using drawbored tenons elevates your craftsmanship by combining strength, longevity, and a polished look.
- Superior load resistance
- Reduced joint movement
- Long-lasting stability
- Improved visual quality
- Less need for repairs
Reduced Need for Clamping
One of the key advantages of drawbored tenons is that they markedly reduce the need for clamping during assembly. Instead of relying solely on clamps, you can use clamping alternatives like the drawbore peg to generate joint compression. By driving the peg through the offset hole, you pull the joint tightly together, creating secure joint compression naturally. This method minimizes the tools and effort required for clamping, saving time and guarantee potential damage to delicate wood surfaces. Additionally, it assures even pressure across the joint, resulting in a tighter fit. You’ll find that drawbored tenons streamline your assembly process, especially when working on complex or large projects, making your furniture stronger and more stable without excessive clamping. Understanding the mechanics of joint compression helps optimize the effectiveness of this technique.
Common Mistakes and How to Avoid Them When Using Drawbored Joints
Even experienced woodworkers can make mistakes with drawbored joints if they aren’t careful. One common issue is poor joint alignment, which can cause uneven tension and weaken the fit. Ignoring wood movement can lead to cracks or gaps over time, especially if the wood isn’t acclimated properly. To avoid these pitfalls, keep these points in mind:
- Double-check joint alignment before drilling.
- Use the right amount of fit; don’t make joints too tight or loose.
- Consider seasonal wood movement when designing your joints.
- Avoid over-drilling, which can weaken the tenon.
- Test fit and adjust before driving the peg to ensure proper tension and fit.
- Be aware of wood expansion and contraction to maintain joint integrity over time.
Staying mindful of joint alignment and wood movement ensures durable, tight joints that last.
Techniques to Strengthen and Variate Drawbored Joints
To enhance the strength and versatility of your drawbored joints, you can incorporate various techniques that go beyond the basic method. Adjusting joint flexibility by slightly modifying tenon or mortise dimensions allows you to better accommodate material behavior and improve fit. Using materials with compatible expansion rates, like seasoned hardwoods or stable softwoods, reduces stress and improves longevity. Adding a backup dowel or a secondary peg can reinforce the joint’s hold, especially in high-stress applications. Incorporating subtle variations, such as slight chamfers or rounded edges, can improve joint alignment and ease assembly. Always consider material compatibility to prevent issues like splitting or warping. Considering wood movement and how it affects joint stability is essential for long-lasting results. These techniques help you create joints that are not only strong but adaptable to different project requirements.
Troubleshooting Tips for Perfect Drawbored Tenon Joints
Achieving perfect drawbored tenon joints requires careful troubleshooting to address common issues that can compromise strength and alignment. If your joint isn’t tight enough or looks off, check these areas:
- Ensure the wood grain runs parallel to the joint for better stability and grip.
- Verify that the joint alignment is accurate before drilling; misalignment causes weak spots.
- Use the correct peg size to match the mortise and tenon for a snug fit.
- Make sure the peg hole is drilled straight and clean, avoiding wood splits.
- Adjust the peg tension if the joint feels loose; too tight can crack the wood, too loose won’t pull the joint tight.
Focusing on these details helps you troubleshoot effectively and achieve a strong, aligned drawbored tenon joint.
Frequently Asked Questions
Can Drawbored Tenons Be Used With Modern Fasteners?
Yes, you can use drawbored tenons with modern fasteners like metal fasteners, but they’re typically designed as a glue alternative. While drawbored tenons rely on pegs to pull joints tight naturally, combining them with metal fasteners can enhance strength and stability. However, it’s important to guarantee compatibility and avoid weakening the traditional technique. Using both methods together can yield a more secure, long-lasting joint in your woodworking projects.
What Types of Wood Are Best Suited for Drawbored Joints?
You should choose hardwoods like oak or maple for drawbored joints, as their durability guarantees long-lasting strength. While softwoods like pine offer flexibility, they might not hold the peg tension as well over time. Imagine your joint tightening securely, resisting movement and wear—hardwoods provide that dependable, sturdy connection. If you prefer easier work with softer woods, just be aware they may require extra reinforcement for enduring use.
How Long Do Drawbored Tenons Typically Last?
Drawbored tenons can last for decades if crafted properly, thanks to their joint durability and use of traditional techniques. You’ll find that when you carefully select quality hardwoods and guarantee tight fit and proper peg placement, your joints remain strong and stable over time. Regular maintenance and avoiding excessive moisture help preserve their integrity, allowing you to enjoy the benefits of this time-tested method for generations.
Are Drawbored Tenons Suitable for Outdoor Furniture?
Yes, drawbored tenons are suitable for outdoor furniture because they handle wood movement well and provide strong, weather-resistant joints. An interesting fact is that properly crafted drawbored joints can last over 50 years with minimal loosening. Their design allows for natural expansion and contraction of wood, making them ideal for outdoor conditions. Just make certain you use durable, weather-resistant wood and seal it properly for added longevity.
Can I Disassemble Drawbored Joints Easily?
Yes, you can disassemble drawbored joints, but it takes careful disassembly techniques. To remove tenon joints, gently tap or use a wedge to loosen the peg, then carefully extract it without damaging the wood. Keep in mind that repeated disassembly might weaken the joint, so handle it delicately. With patience and proper tools, you can disassemble drawbored joints when needed, making repairs or adjustments easier.
Conclusion
Mastering the art of drawbored tenons transforms your furniture projects into durable, dependable delights. By blending basic techniques with boldness, you’ll build better bonds and banish boring joints. Don’t neglect details or delay diligence—each step strengthens your skills and the structure. With patience, practice, and a passion for precision, you’ll produce perfectly pressed, perfectly poised joints that last a lifetime. Embrace the craft, and let your woodworking wonders wow!