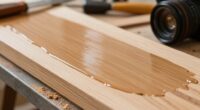
Cauls are simple, cost-effective tools you can use to get flat, tight glue-ups in woodworking. They’re usually made from hardwood and help distribute pressure evenly across joints, preventing gaps or warping. By choosing the right materials and applying even force, you can improve your glue-up quality without expensive clamping setups. Want to discover how to make your own DIY cauls and avoid common mistakes? Keep going for all the tips you need.
Key Takeaways
- Cauls are specialized clamping tools that ensure even pressure and flatness during glue-ups.
- They can be made from affordable materials like scrap wood or household items, making them budget-friendly.
- Properly used cauls distribute force evenly, preventing gaps, warping, and damage to delicate surfaces.
- Soft padding or flexible edges on cauls help achieve smooth, even joints without indentations.
- Correct technique involves matching caul size to workpieces and avoiding over-tightening for optimal results.

Wood Super Glue 60 Gram, Thin Liquid CA Glue for Woodworking Furniture Repair Wooden Crafts Carpenter, Clear High Strength Cyanoacrylate Adhesive Instant and Strong Bond Superglue for Everything
🔗 Strong Bonding: Our wood glue can provide a firm bonding force, forming a stable connection effect at…
As an affiliate, we earn on qualifying purchases.
As an affiliate, we earn on qualifying purchases.
What Are Cauls and How Do They Help Achieve Flat, Tight Glue-Ups?
Cauls are specialized clamping tools used in woodworking to hold pieces together tightly while glue dries. They help you achieve flat, even glue-ups by applying consistent pressure across surfaces. Using proper clamping techniques guarantees your joints stay aligned, preventing warping or gaps. When working with cauls, always prioritize woodworking safety—wear gloves and eye protection, and make sure your work area is clear. Cauls distribute force evenly, reducing the risk of damaging delicate or uneven surfaces. They’re especially useful for flattening panels or aligning edges. Additionally, selecting the appropriate clamp materials and applying them correctly will further improve your glue-up results and ensure durability. Proper clamp application is essential for avoiding damage and ensuring a tight seal. By choosing the right cauls and applying them correctly, you’ll improve your glue-up results and maintain safe practices in your workshop. Incorporating sustainable woodworking practices can help reduce waste and promote environmentally responsible craftsmanship. Remember that understanding how to properly apply pressure with your cauls is key to achieving consistently flat and professional-looking joints.

3-Piece 12 Inch Bar Clamps for Woodworking with Clamp Connector, 12" Quick-Release Wood Clamps with 150 LBS Load Limit, Trigger Clamp Set, One-Handed Clamps/Spreader Ideal for Woodworking DIY Projects
EASY OPERATION – Smooth trigger design enables one-hand operation for fast tightening and release. Ensures quick alignment, clean…
As an affiliate, we earn on qualifying purchases.
As an affiliate, we earn on qualifying purchases.
How Do You Pick the Best Caul Materials and Designs for Your Project?
Choosing the right caul materials and designs depends on your project’s specific needs and the surfaces you’re working with. Start with wood selection—opt for hardwoods like maple or oak, which resist denting and provide stability. Softwoods may be easier to shape but can compress under pressure, risking uneven results. Consider design considerations such as size, shape, and the ability to distribute pressure evenly. A well-designed caul should match the contours of your workpiece without causing indentations. Think about how the caul will sit on the surface and whether it needs padding or a flexible edge to accommodate irregularities. Ultimately, selecting durable, properly sized materials and focusing on functional design will help you achieve flat, tight glue-ups efficiently.

Rockler Box Joint Cauls (4-Piece) – Perfect Alignment Plastic Cauls Woodworking Tools for Small to Large Sized Boxes – Box Joint Clamps for Woodworking (6-3/8")
Router Box Joint Corner Clamp Caul Set: Making the perfect box isn’t a big task, but aligning them…
As an affiliate, we earn on qualifying purchases.
As an affiliate, we earn on qualifying purchases.
How Can You Use Cauls Effectively for Perfect Flat Joints?
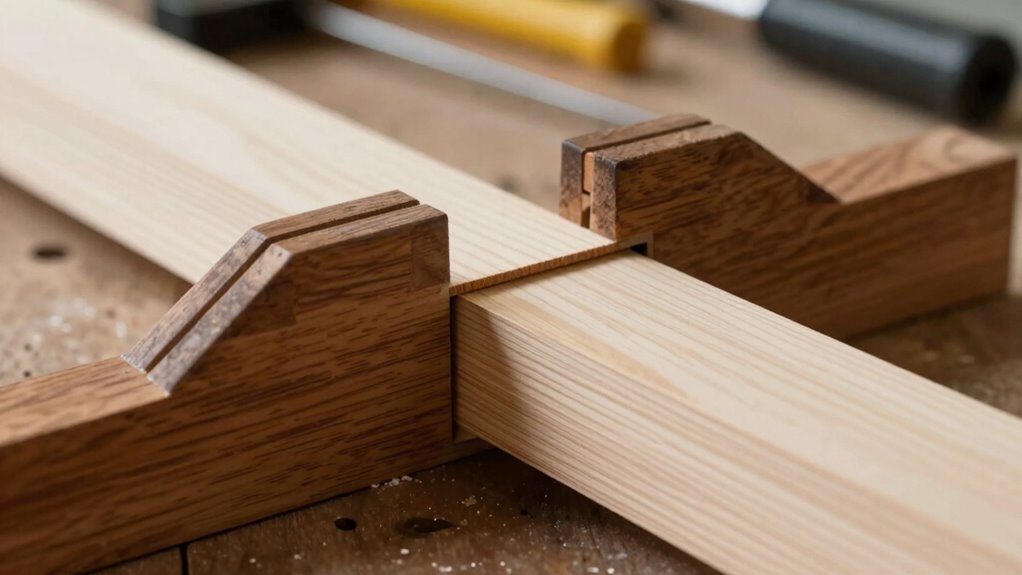
To achieve perfect flat joints, you need to apply consistent pressure evenly across the entire surface. Cauls help distribute clamping pressure uniformly, preventing uneven glue lines. Make sure your caul is flat and slightly wider than the joint to avoid creating dips or high spots. When positioning the caul, pay attention to the wood grain, as crossing or mismatched grain directions can cause uneven tightening or surface imperfections. Use enough clamps to press the caul firmly without over-tightening, which can squeeze out too much glue or cause bowing. Check the joint regularly during clamping to ensure even contact and pressure. Properly using cauls with attention to clamping pressure and wood grain alignment guarantees a flat, professional-looking glue-up. Additionally, understanding clamping pressure distribution helps optimize your technique for better results. Being mindful of pressure points ensures that the force applied is truly even across the entire joint.

GADFISH Panel Clamps Woodworking, Panel Clamp, 2 Pack of 4 Way Pressure Clamps, Compatible with Two Mounting Methods, Suitable for Bonding Tabletops, Shelves, and Laminate Surfaces(2pc)
Wooden boardTwo Installation Options: Two installation solutions are provided, allowing users to select the most suitable option based…
As an affiliate, we earn on qualifying purchases.
As an affiliate, we earn on qualifying purchases.
What Are Common Caul-Usage Mistakes and How Can You Avoid Them?
One common mistake when using cauls is applying uneven pressure across the joint, which can cause gaps or bowed surfaces. To avoid this, carefully control clamping pressure, making sure it’s firm but not excessive. Too much pressure can squeeze out glue or deform the workpiece, while too little may lead to weak bonds. Proper surface preparation is essential; surfaces should be clean, flat, and free of dust or debris to ensure even contact. Failing to check surface flatness beforehand can result in uneven pressure distribution. Additionally, skipping protective padding between the caul and the workpiece can leave marks or indentations. Using the correct clamping technique and tools can help distribute pressure evenly and improve results. Ensuring the body jewelry measurements are precise and appropriate for the workpiece can also prevent uneven pressure and improve the overall glue-up. Incorporating proper planning into your setup can help identify potential issues before clamping. Paying attention to clamping pressure control and surface preparation is vital; even slight variations can significantly impact your glue-up quality. By paying attention to clamping pressure and surface preparation, you’ll considerably improve your glue-up results and prevent common caul-usage mistakes.
How Can You Make DIY Cauls on a Budget? Tips and Tricks

If you’re looking to create effective DIY cauls without spending a fortune, you can repurpose everyday materials and tools you already have around the house or workshop. Using common objects as clamp alternatives can save money and still provide strong pressure for flat glue-ups. For example, scrap wood, shims, or even heavy books can act as makeshift cauls. To guarantee even pressure, place a soft cloth between your DIY cauls and the workpiece. Here’s a quick comparison:
| Material | Use Case | Pros |
|---|---|---|
| Scrap Wood | Large surfaces | Reusable, sturdy |
| Clamps (if available) | Precise pressure | Adjustable |
| Heavy Books | Small projects | Inexpensive |
Additionally, understanding the proper use of cauls can help ensure your glue-ups are flat and secure, making your DIY projects more professional-looking. Proper material selection is essential to achieve optimal results with your homemade cauls. Selecting the right clamping techniques can also improve the efficiency and quality of your woodworking. Choosing the right space‑saving techniques for your workshop can also make your woodworking more efficient. Using quality assessment techniques for your materials can also improve the overall outcome of your work. These tips help you master DIY woodworking while keeping costs low.
Frequently Asked Questions
Can Cauls Be Reused for Different Projects?
Yes, you can reuse cauls for different projects. They offer great reusable applications, making them a smart investment for woodworkers. Just clean and inspect them before each use to guarantee they stay flat and effective. Cauls provide project versatility, helping you achieve consistent glue-ups across various projects. With proper care, your cauls can be a reliable tool in your workshop for many future projects.
What Safety Precautions Should I Take When Using Cauls?
When using cauls, you should wear personal protective equipment like gloves and safety glasses to prevent injuries. Make sure your workspace has proper ventilation to avoid inhaling fumes from adhesives. Keep your area clean and free of clutter, and handle cauls carefully to avoid pinching or crushing fingers. Always follow the manufacturer’s safety instructions and be cautious when applying pressure to prevent accidents. Safety first keeps your project smooth and injury-free.
How Do Temperature and Humidity Affect Caul Effectiveness?
Temperature and humidity critically impact caul effectiveness. High humidity can cause wood to swell, reducing the pressure the caul applies, while low humidity may lead to shrinking and gaps. Temperature considerations are vital because heat can soften glue, making it less effective, and cold can slow curing times. To guarantee ideal results, keep your workspace at a stable temperature and humidity level, avoiding extreme fluctuations that compromise caul pressure and glue bond strength.
Are There Eco-Friendly Materials Suitable for Making Cauls?
Yes, you can make eco-friendly cauls using biodegradable options and recycled materials. You might choose bamboo plywood or reclaimed wood, which are sustainable and biodegradable, reducing environmental impact. Recycled plastics or cardboard can also work, especially if treated for durability. Opting for these materials helps you create effective cauls while supporting environmental conservation, making your woodworking projects more sustainable and eco-conscious.
How Long Should I Leave a Caul in Place for Best Results?
You should leave the caul in place for at least the recommended drying time, usually 1 to 2 hours, to guarantee ideal glue bonding. Applying proper clamp pressure helps maintain even contact, preventing gaps or uneven glue lines. Rushing the process can weaken the bond, so patience is key. For the best results, follow your glue manufacturer’s instructions and allow the glue to cure fully before removing the caul.
Conclusion
Think of cauls as the steady hand guiding your project’s journey toward perfection. They’re the silent guardians ensuring your glue-ups stay flat and true, like anchors holding a ship steady amid rough seas. With the right choice and technique, you can turn simple materials into your most trusted allies. Embrace these tools, and let them symbolize your commitment to craftsmanship—reminding you that even in the smallest details, your skill and patience steer the course toward flawless results.