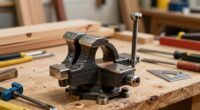
To stop racking in your bench vise, start by ensuring it’s properly aligned on a flat, clean mounting surface. Check that the jaws are level and parallel using a level or straightedge, and adjust the mounting bolts to achieve perfect alignment. Regularly verify stability and make small tweaks as needed. Proper surface preparation and precise tightening prevent misalignment and damage. Keep progressing through the steps to maintain a secure, racking-resistant setup.
Key Takeaways
- Ensure the vise and jaws are properly leveled using a bubble level, with the bubble centered for accurate alignment.
- Thoroughly clean the mounting surface and vise to remove debris, rust, or old paint before installation.
- Check the flatness of the mounting surface with a straightedge and address any high or low spots.
- Tighten mounting bolts incrementally while periodically verifying levelness to prevent racking during installation.
- Regularly inspect and adjust the vise to maintain parallel jaw contact and prevent misalignment over time.

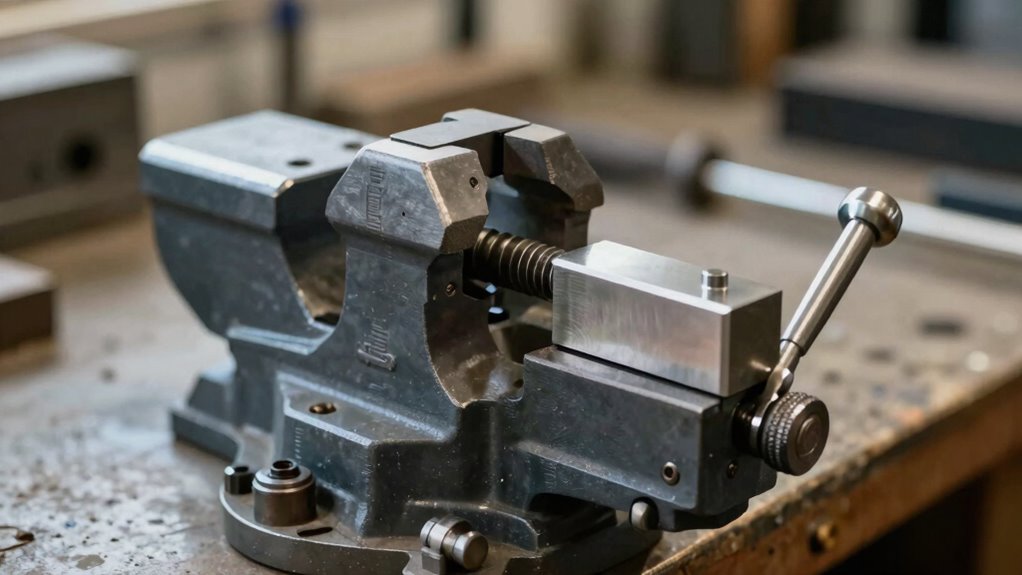
VEVOR Bench Vise, 6-inch Jaw Width 5.9-inch Jaw Opening, 360-Degree Swivel Locking Base Multipurpose Vise w/Anvil, Heavy Duty Ductile Iron Workbench Vise w/Bolts & Nuts, for Drilling, Pipe Cutting
Built to Last: The swivel vise is forged from sturdy 60,000 PSI ductile iron, with a powder coating…
As an affiliate, we earn on qualifying purchases.
As an affiliate, we earn on qualifying purchases.
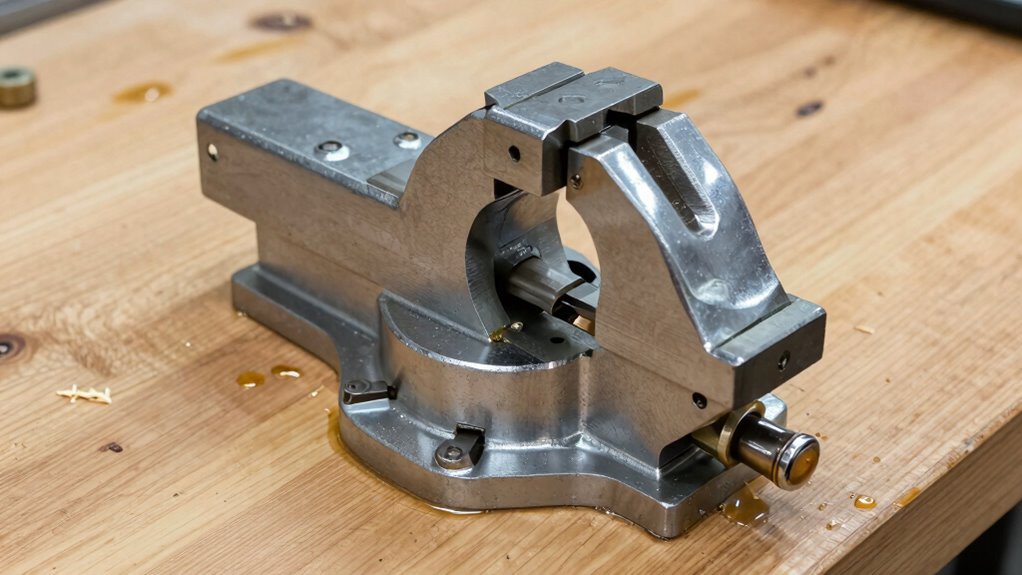
Why Proper Vise Alignment Prevents Racking and Damage
Proper vise alignment is imperative because it guarantees your workpiece stays stable and evenly clamped. Correct clamp positioning ensures that pressure distributes uniformly, reducing the risk of distortion or damage. When the jaws are properly aligned, jaw parallelism is maintained, keeping the workpiece secure without unnecessary stress. Misaligned jaws can cause uneven clamping, which leads to racking—a twisting force that can warp or damage your material. Racking not only compromises the workpiece but also puts unnecessary strain on the vise itself, shortening its lifespan. Ensuring precise alignment enhances overall safety and helps maintain the integrity of your tools and materials. By ensuring your vise is correctly aligned, you prevent these issues, improve safety, and achieve more precise, consistent results. Proper setup is the key to avoiding damage and ensuring your projects are accurate and durable.

LAIESYA 3Pcs Circular Bubble Level Bullseye Degree Marked Surface Round Spirit Levels Measuring Tool for Leveling Phonograph, Camera, Turntable, Tripod, Telescope (32X7mm)
Product: Circular Bullseye Degree Marked Surface Round Bubble Spirit Levels Measuring Tool.
As an affiliate, we earn on qualifying purchases.
As an affiliate, we earn on qualifying purchases.
How to Check if Your Bench Vise Is Out of Alignment
Ever wonder if your bench vise is still aligned correctly? To check, start by inspecting the jaw alignment. Close the vise and look for any gaps or uneven contact between the jaws; they should meet evenly across their entire surface. If the jaws don’t align properly, it may indicate a need for vise calibration. Next, try clamping a flat piece of metal or wood and observe if it stays steady without twisting or slipping. If it moves or the clamping feels uneven, your vise could be out of alignment. You can also use a machinist’s square to verify if the jaws are perpendicular to the guide rails. Regularly performing these checks helps ensure your vise maintains proper jaw alignment, preventing racking and ensuring safe, accurate work. Additionally, understanding the role of contrast ratio can help you better assess the clarity of your workpiece images when inspecting your setup.

24 Inch Anodized Aluminum Straight Edge Guaranteed Straight to Within .001 Inches Over Full 24 Inches Length SE24
Guaranteed straight to within 0.001” (that's one thousandth of an inch!) over the entire 24” length
As an affiliate, we earn on qualifying purchases.
As an affiliate, we earn on qualifying purchases.
Prepare Your Workspace and Tools for Vise Adjustment

Before you start adjusting your vise, you need to clear and organize your workspace to guarantee safety and efficiency. Proper workshop lighting ensures you can see all components clearly, reducing mistakes. Check that your tools are calibrated to avoid inaccuracies during alignment. Gather essential items like a wrench, level, and calibration gauges. Keep your work area free of clutter to prevent accidents or misplaced tools. Ensure your workbench is stable and well-lit, so you can focus precisely on the adjustment process. Good lighting and calibrated tools help you perform accurate adjustments, saving time and preventing errors. Organizing your workspace according to workplace safety practices ensures a smooth and safe adjustment process.

8 PCS Post Attachment Kit, Sign Mounting Hardware, Sign Post Mounting Bolts and Nuts, 4 Bolts for Heavy Duty Posts and 4 Bolts for Economy Posts
Application: The post attachment kit is designed for fasten signs easily and securely,suitable for U-shaped channel posts, square…
As an affiliate, we earn on qualifying purchases.
As an affiliate, we earn on qualifying purchases.
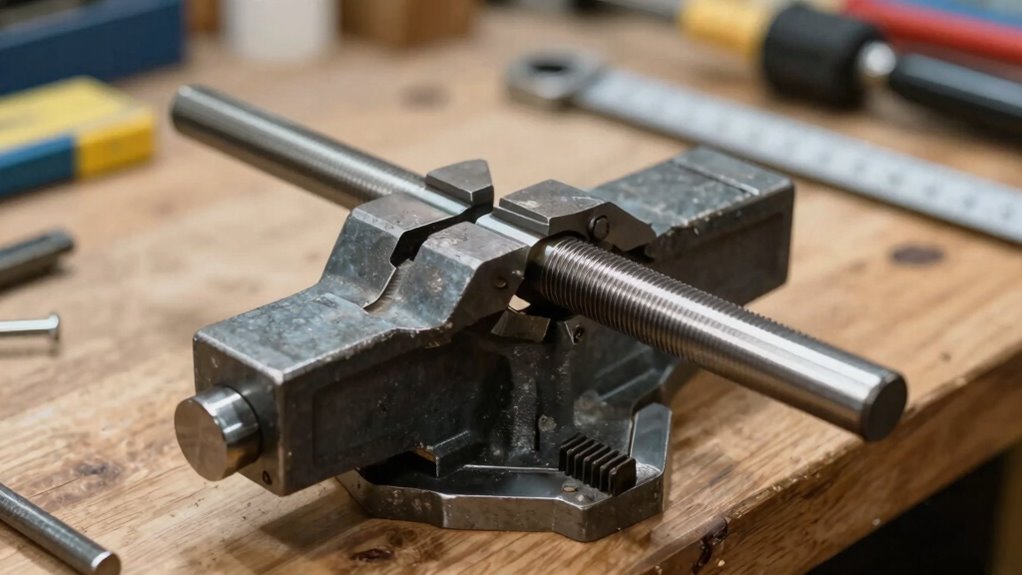
Loosen and Remove Your Vise for Alignment
To begin aligning your vise, start by loosening the bolts securing it to the workbench. Once the bolts are free, carefully detach the vise from its mounting surface. Take a moment to clean both the mounting area and the vise for a smooth reinstallation.
Loosen Vise Bolts
Loosen the bolts that secure your vise to the workbench to prepare for alignment. This step allows you to adjust and guarantee proper positioning. Before removing the vise completely, consider these key points:
- Check for vibration damping materials around the bolts to minimize racking during use.
- Use the appropriate tools to avoid stripping bolt heads and ensure a secure fit upon reinstallation.
- Pay attention to material selection for your bolts; stronger, high-quality steel resists loosening under pressure.
- Keep track of all hardware, as proper reassembly depends on matching bolts and washers.
- Be aware of heat distribution in your work area, as it can affect the material properties of your tools and hardware during reinstallation.
Loosening the bolts gives you flexibility to reposition the vise accurately. Once loosened, you can safely detach it for precise alignment or inspection. Proper handling prevents unnecessary wear and ensures long-term stability.
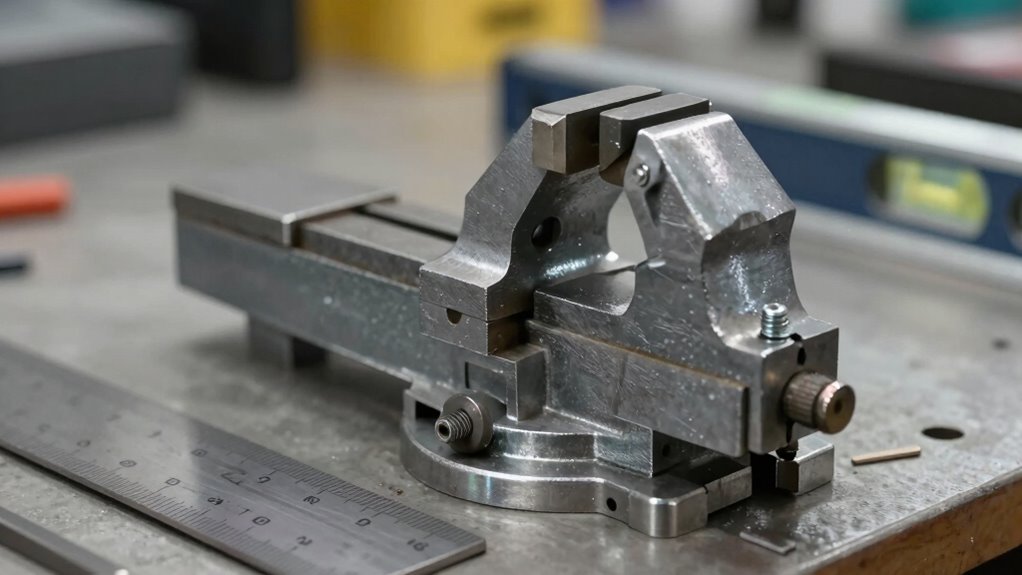
Detach the Vise
Carefully detaching your vise is essential for proper alignment, and it begins with fully loosening the mounting bolts. Use the appropriate tool selection, such as a wrench or socket set, to ensure you can remove the bolts securely without stripping them. Once the bolts are loosened, gently lift the vise away from the workbench, taking care not to damage the mounting surface. If the vise is heavy or stuck, tap gently with a rubber mallet to loosen it. Keep track of all hardware to prevent loss. Removing the vise allows you to inspect the mounting surface and prepare for realignment. Take your time during this process to avoid damaging the hardware or the workbench. Proper vise removal sets the foundation for accurate bench vise alignment. Proper setup is crucial for ensuring the vise functions correctly and stays aligned during use.
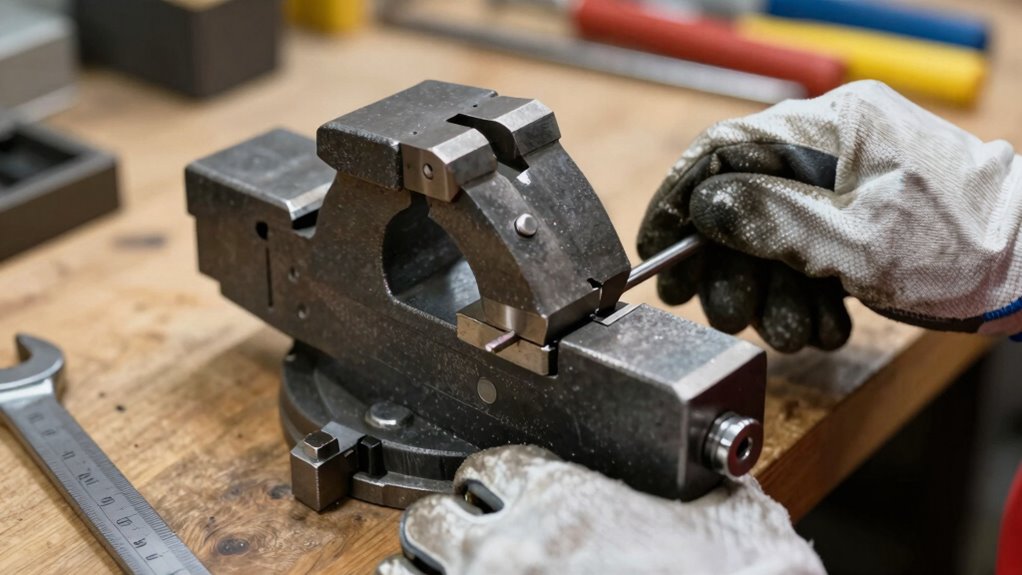
Clean the Mounting Surface
Before you reinstall or realign your vise, it’s important to thoroughly clean the mounting surface. Proper surface preparation guarantees your vise sits flat and functions smoothly. Start by removing any debris, rust, or old paint that may hinder a secure fit. A clean surface prevents misalignment and racking issues. Here are four steps to follow:
- Use a wire brush or scraper to clear away rust and old paint.
- Wipe the surface with a clean rag to remove dust and dirt.
- Apply a degreaser or solvent if there’s grease or oil buildup.
- Ensure the surface is completely dry before mounting the vise again.
Additionally, verifying the flatness and levelness of the mounting surface ensures optimal alignment and stability.
Make Sure Your Mounting Surface Is Flat and Clean
Start by checking that your mounting surface is level to guarantee proper alignment. Next, clear away any debris or obstructions that could interfere with a secure fit. Finally, confirm that the support underneath is sturdy enough to hold the vise firmly in place. Additionally, ensuring your mounting surface is free from dust and residues can help prevent slipping or uneven pressure during use.
Verify Surface Levelness
Ensuring your mounting surface is flat and clean is essential for proper bench vise alignment. You need to verify surface flatness and perform level verification to prevent racking. Here’s how:
- Use a straightedge or a precision level to check for high or low spots on the surface.
- Place the level across different sections of the surface, ensuring it reads true in all directions.
- Confirm that the entire surface is uniformly level to avoid uneven stress on the vise.
- Address any irregularities by grinding or filling, maintaining a flat, even surface for secure mounting.
- Regularly surface maintenance and inspection help maintain proper alignment over time.
A flat, level surface prevents misalignment and racking, ensuring your vise functions accurately and safely. Proper verification guarantees a stable foundation for your setup.
Remove Debris Thoroughly
Cleaning the mounting surface thoroughly is crucial to achieve proper bench vise alignment. Debris removal is a critical step because dirt, dust, or old paint can create uneven contact points, leading to misalignment. Before mounting your vise, inspect the surface carefully and remove any loose debris using a wire brush, vacuum, or compressed air. Surface cleaning ensures a flat, smooth base, preventing wobbling or racking during use. Take your time to sweep or wipe the area, removing all particles that could interfere with secure attachment. A clean, debris-free surface provides a solid foundation, making sure your vise remains stable and aligned over time. Proper surface cleaning is a simple but essential step toward a precise, racking-resistant setup.
Ensure Firm Support
A flat, clean mounting surface is essential to support your bench vise securely. Without a level surface, clamping pressure won’t be evenly distributed, risking racking or instability. To guarantee firm support:
- Check for flatness with a straightedge or spirit level to avoid uneven material support.
- Clean dust, grease, and debris from the surface and mounting holes for a solid grip.
- Tighten mounting bolts securely, ensuring the vise remains flush against the surface.
- Inspect the surface periodically for warping or damage to maintain consistent clamping pressure.
- Verify that the support surface is free of irregularities to prevent misalignment during work.
A stable, flat surface guarantees your vise stays aligned during use, preventing racking caused by uneven support. Proper preparation ensures your vise holds workpieces firmly and safely every time.
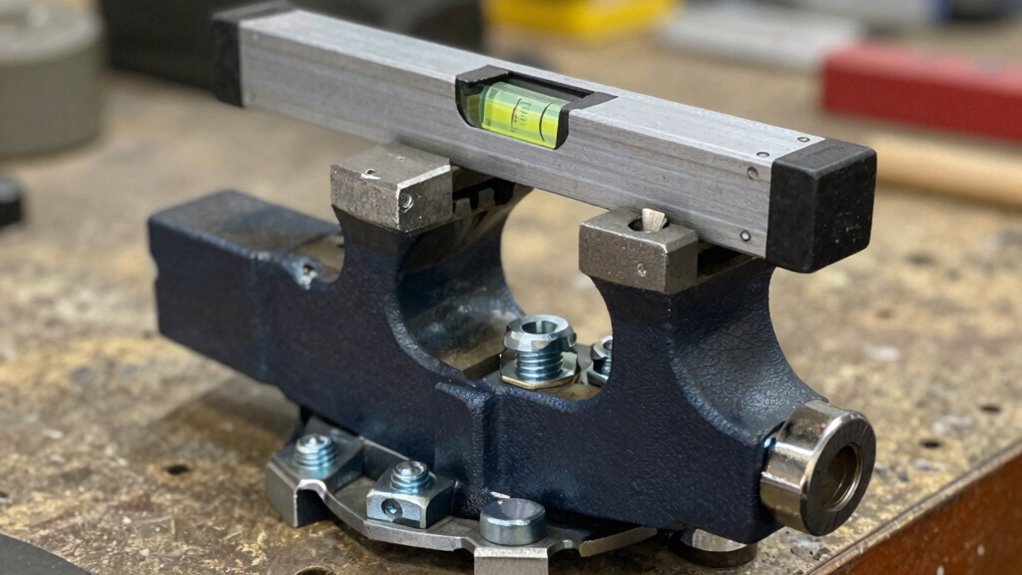
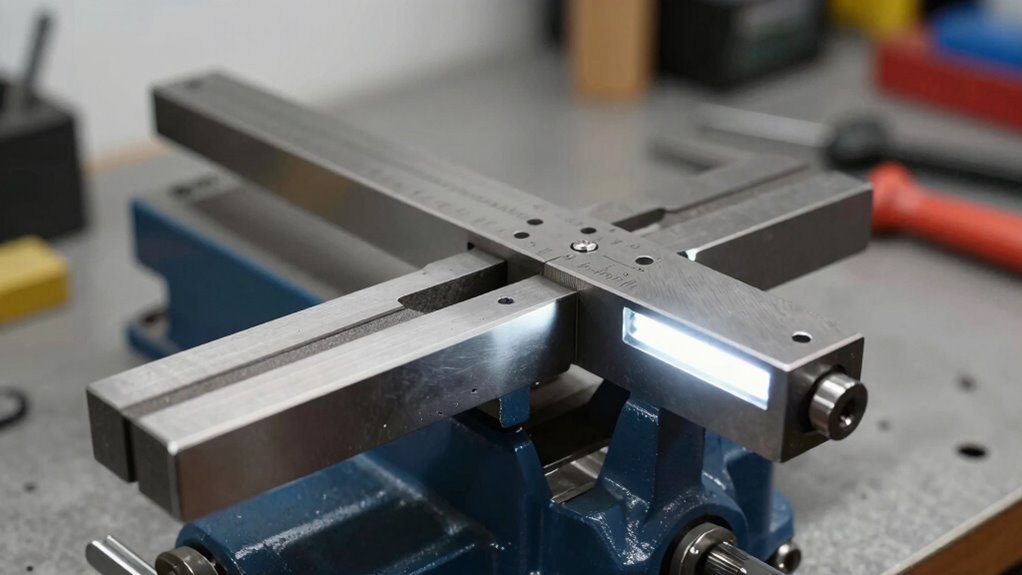
Use a Level to Align the Vise Jaw Correctly
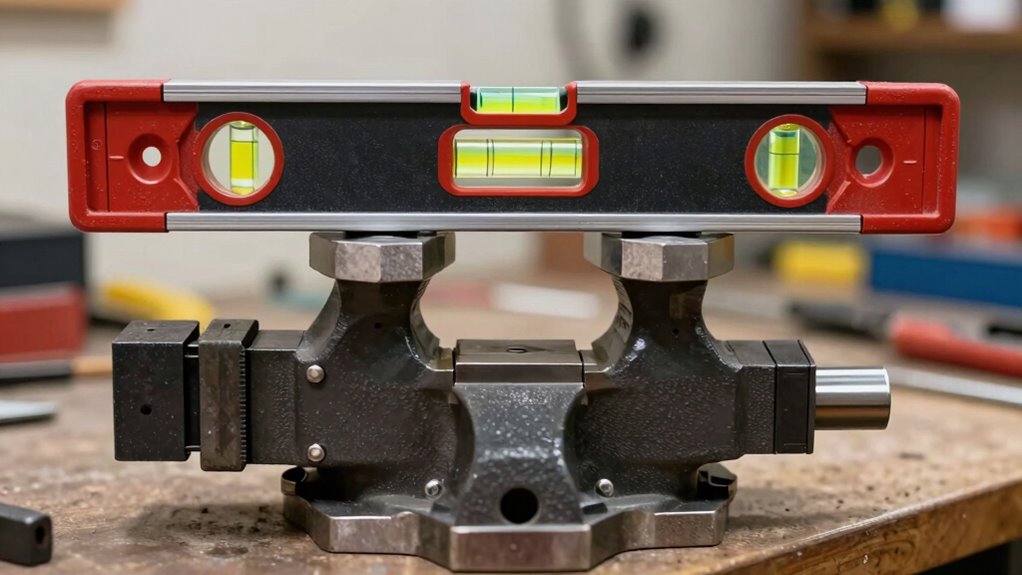
Have you ever struggled to align your vise jaws properly? Using a level is essential for achieving accurate alignment. Place the level across the jaws and check the bubble positioning carefully. For precise level accuracy, ensure the bubble is centered between the lines. If it’s off-center, adjust the vise or jaw position until the bubble sits exactly in the middle. This simple step helps confirm the jaws are perfectly horizontal, preventing racking during use. Remember, even slight tilts can cause issues with workpiece stability. Keep checking the bubble’s position as you make adjustments to maintain precision. Using a level consistently ensures your vise jaws are aligned correctly, leading to better work quality and fewer frustrations. It’s a quick, effective method to guarantee your setup is spot-on. Proper tools and techniques play a crucial role in achieving optimal results in your projects.
Adjust the Mounting Bolts to Achieve Perfect Alignment
Once you’ve confirmed the jaws are level, the next step is to adjust the mounting bolts to fine-tune their alignment. Properly aligned bolts ensure your vise maintains stability and reduces racking during use. To do this effectively:
- Loosen all mounting bolts slightly to allow movement.
- Use a level to check the vise’s position as you tighten each bolt incrementally.
- Alternate tightening bolts to distribute pressure evenly.
- Recheck alignment after each adjustment, ensuring the vise remains square.
This process improves your clamping techniques and promotes better vise maintenance by preventing misalignment. Fine-tuning mounting bolts helps keep your vise steady, ensuring precision work and extending its lifespan. Proper setup is key to a racking-free operation.
Verify Your Vise Is Aligned and Prevent Racking During Use

To guarantee your vise stays aligned and prevents racking during use, it’s essential to verify its position regularly. Start by checking vise stability; a wobbling vise can cause misalignment. Next, examine jaw parallelism; uneven jaws lead to racking and compromised holding power. Use a straightedge or calipers to ensure the jaws are flush and parallel. If you notice any misalignment, tighten or adjust mounting bolts as needed.
| Step | Action | Purpose |
|---|---|---|
| 1 | Check for wobbling or movement | Ensure vise stability |
| 2 | Measure jaw alignment with a straightedge | Confirm jaw parallelism |
| 3 | Tighten or realign mounting components | Prevent racking during use |
Tips for Maintaining Proper Vise Alignment Over Time
Regularly inspecting your vise and making small adjustments can keep it properly aligned over time. Proper vise maintenance ensures consistent performance and prevents racking issues. Here are some tips:
- Check for signs of wear or misalignment and address them promptly.
- Tighten bolts and screws regularly to maintain stability.
- Replace worn or damaged jaws to preserve true alignment.
- Clean and lubricate the screw mechanism to prevent sticking and maintain smooth operation.
Troubleshooting Common Vise Alignment Problems
When your vise isn’t holding workpieces properly, it’s likely due to misalignment issues. Recognizing signs like uneven clamping or wobbling helps identify the problem quickly. You can fix these issues with effective adjustment techniques tailored to common causes of misalignment.
Common Misalignment Causes
Misalignment in a bench vise often results from common issues that can be easily overlooked. These causes can disrupt proper alignment and affect your work quality.
- Incorrect clamping pressure: Too much force can warp the vise or misalign the jaws, while too little causes slipping and uneven grip.
- Material incompatibility: Using incompatible materials or dirty surfaces can cause uneven wear, leading to misalignment.
- Worn or damaged components: Jaws, screws, or guide rails that are worn out or damaged can throw off the vise’s alignment.
- Improper setup: Failing to secure the vise tightly or installing it on an uneven surface can contribute to misalignment issues.
Addressing these common causes helps ensure your vise remains properly aligned and functions smoothly.
Signs of Misaligned Vise
You can often spot a misaligned vise by observing how it holds or releases workpieces. Signs include a vise wobble during operation or uneven pressure when tightening, indicating jaw misfit. If the jaw doesn’t clamp evenly or shifts under load, it’s a clear sign of misalignment. You might also notice difficulty in closing or opening the vise smoothly. These issues can cause inconsistent results and reduce accuracy.
| Symptom | Possible Cause |
|---|---|
| Vise wobble | Bent or loose components |
| Uneven clamping | Jaw misfit |
| Hard to operate | Misaligned slides |
Addressing these signs early prevents further damage and ensures precise, stable holding.
Effective Adjustment Techniques
To effectively troubleshoot and correct common vise alignment problems, start by inspecting the jaws and sliding components for any visible signs of wear, damage, or debris. Proper clamp positioning is vital; ensure the vise is securely mounted and the jaws sit evenly. Next, check the vise lubrication—apply oil to the sliding mechanisms to reduce friction and prevent sticking. Then, adjust the screw and guide rods to correct misalignment, making small, precise turns. Finally, verify the vise’s body is square and stable on the workbench. Regular maintenance, including cleaning debris and confirming clamp positioning, helps prevent future issues. These steps guarantee smooth operation and accurate alignment, reducing racking and improving safety during use.
Frequently Asked Questions
How Often Should I Check My Bench Vise Alignment?
You should check your bench vise alignment every few months as part of your maintenance schedule. Regular checks help you catch misalignment early before it affects your work. Use alignment indicators to verify that the jaws are parallel and properly aligned. If you notice any issues, adjust the vise promptly. Consistent maintenance guarantees your vise stays accurate, safe, and effective for all your projects.
Can I Realign My Vise Without Removing It From the Workbench?
Yes, you can realign your vise without removing it from the workbench. Use appropriate alignment tools like a straight edge or a level to check for misalignment. Then, loosen the mounting bolts slightly and adjust the vise carefully to improve its position. Tighten the bolts securely afterward. Regular vise maintenance, including checking alignment, helps prevent racking and ensures your vise functions smoothly and safely during every project.
What Tools Are Best for Precise Vise Alignment?
You’ll want to use calibration gauges and alignment jigs for precise vise alignment. Studies show that proper setup reduces workpiece inaccuracies by up to 30%. Start with calibration gauges to check the vise’s jaw parallelism, then employ alignment jigs to fine-tune positioning. These tools help guarantee the vise stays true, preventing racking and improving your overall work quality. Proper calibration is key for accurate, reliable results.
How Do I Fix a Vise That Keeps Going Out of Alignment?
If your vise keeps going out of alignment, start by inspecting for dirt or debris and clean the components regularly. Use alignment tools like a straightedge or dial indicator to check the jaws and base. Tighten any loose bolts or screws, and consider re-tightening or replacing worn parts. Proper vise maintenance is key; ensuring everything is clean and secure will help maintain proper alignment and prevent racking during use.
Is Professional Help Necessary for Complex Vise Repairs?
You can often handle complex vise repairs yourself with DIY adjustments and proper vise calibration. However, if the problem persists or you’re unsure about the process, professional help can be beneficial. Experts have the tools and experience to diagnose and fix more complicated issues, ensuring your vise stays aligned and functions smoothly. Don’t hesitate to seek professional assistance if your DIY efforts don’t resolve the problem efficiently.
Conclusion
When you align your bench vise properly, everything just clicks into place—your projects become smoother, and damage becomes less likely. It’s funny how a simple adjustment can unexpectedly save you time and frustration in the long run. Keep checking and maintaining that alignment, because sometimes the tiniest tweaks make the biggest difference. In the end, the right setup isn’t just about tools—it’s about trusting your craft to hold steady, even when the unexpected arises.