To trim veneer cleanly without tearing the face, always use a sharp utility knife and change blades often to prevent jagged edges. Cut in the same direction as the grain and secure the veneer firmly to your work surface. A straightedge can guide your cuts for precision. Apply even pressure throughout the cut for the best results. With the right techniques and tools, you can achieve a flawless finish, and there’s more to master as you work.
Key Takeaways
- Always cut veneer in the direction of the grain to minimize the risk of tearing the face.
- Use a sharp utility knife, changing blades frequently to maintain clean cuts.
- Secure the veneer firmly to the work surface to prevent shifting during cutting.
- Employ a straightedge for guided cuts, ensuring accuracy and reducing tear-out.
- For thicker veneers, utilize a veneer saw, maintaining steady hands and consistent angles.

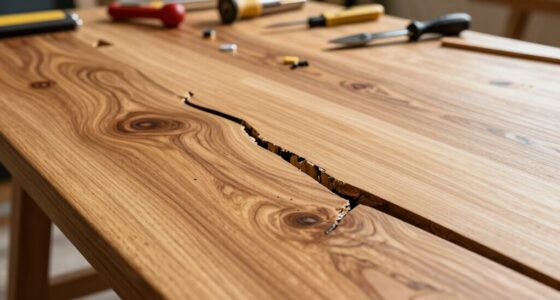
Trimming veneer cleanly can elevate your woodworking project from ordinary to exceptional. When you apply the right veneer cutting techniques, you’ll see how a well-finished edge can transform your piece. No one wants to ruin a beautiful veneer with ragged edges or tears, so using clean edge tools becomes indispensable. You want tools that’ll help you achieve that flawless finish, ensuring your hard work pays off.
Start by selecting the right veneer for your project. Whether it’s a thin slice of mahogany or a more exotic wood, understanding the grain direction is essential. Always cut in the same direction as the grain. This simple practice can prevent tear-out, keeping your veneer looking sharp. If you’ve got a particularly delicate veneer, using a utility knife with a sharp blade is a great option. Make sure to change the blade frequently; a dull blade is more likely to create jagged edges.
When you’re ready to trim, secure the veneer firmly. Using a straightedge can help guide your cuts, so you don’t stray off course. Clamp the veneer down to your work surface, ensuring it doesn’t shift while you’re cutting. This stability allows you to apply even pressure, which is critical for achieving a clean cut. Always take your time; rushing can lead to mistakes that you’ll regret later. Paying attention to grain direction can make all the difference in avoiding tear-out and rough edges. Additionally, understanding wood properties can help you choose the most suitable trimming method for your material. Knowing how different woods react to cutting and sanding can help prevent damage and ensure a professional finish.
If you’re working with thicker veneers or multiple layers, consider using a veneer saw. This specialized tool is designed for precision and can handle tougher cuts without damaging the face. Remember to keep your hands steady and maintain a consistent angle as you saw through the material. It might take a bit of practice, but mastering this technique will greatly enhance your results.
For the final touch, use a sanding block with fine-grit sandpaper to smooth any rough edges. This step is often overlooked, but it can make a significant difference in your project’s overall appearance. Just a few strokes can remove any minor imperfections and give your veneer that polished look. Properly finishing the edges can also help protect the veneer from future damage or peeling.

WORKPRO Premium Utility Knife, Retractable All Metal Heavy Duty Box Cutter, Quick Change Blade Razor Knife, with 10 Extra Blades
Heavy-Duty Utility Knife : Aluminum alloy design with rust-free powder-coat makes the box cutter durable and lightweight (3.2…
As an affiliate, we earn on qualifying purchases.
As an affiliate, we earn on qualifying purchases.
Frequently Asked Questions
What Tools Are Best for Trimming Veneer Cleanly?
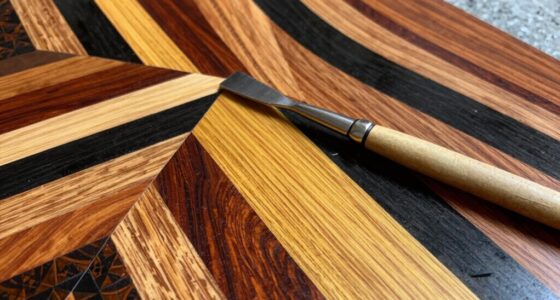
For trimming veneer cleanly, you’ll want to use a sharp utility knife or a veneer saw, as they offer precision. Pair these with a straightedge to guide your cuts. Consider using a chisel for delicate edges. When exploring veneering techniques, remember that scoring the veneer before cutting can help prevent tearing. Finally, for trimming methods, try a flush-cut saw for clean, smooth edges. You’ll achieve professional-looking results with these tools!
Can I Use a Regular Utility Knife for Veneer?
You can use a regular utility knife for veneer, but remember, “a sharp knife is a safe knife.” For the best results, focus on proper knife maintenance; keep your blade sharp to avoid tearing. Employing effective veneering techniques also helps in achieving clean cuts. Guarantee you apply even pressure and cut along a straight edge. This way, you’ll make your veneer project look professional without the hassle of jagged edges.
How Do I Prevent Veneer From Chipping?
To prevent veneer from chipping, you should use proper veneering techniques. Start by scoring the veneer before cutting; this creates a clean edge. Additionally, apply edge protection like painter’s tape along your cut line. This helps minimize chipping during the cutting process. Always use a sharp utility knife for precise cuts, and consider cutting on a sturdy surface for better control. These steps will keep your veneer looking smooth and intact.
Is There a Recommended Adhesive for Veneering?
Oh sure, you could use water as an adhesive—just watch your veneer float away! Instead, go for PVA or contact cement for reliable adhesion. These adhesive types bond well and withstand the test of time. When applying, make sure you spread it evenly; no one likes a lumpy mess. Use a roller or brush for a smooth application, and remember to clamp it down. Trust me, your veneer will thank you!
How Do I Finish the Edges After Trimming?
After trimming, you should seal the edges to prevent damage. Use a thin coat of edge banding or a suitable finish to protect the veneer. For sanding techniques, start with a fine-grit sandpaper to smooth out any rough spots, then progress to a higher grit for a polished look. Always sand lightly and in the direction of the grain to avoid tearing. This’ll give your veneer a clean, professional finish.
Fulton 38" Anodized Aluminum Straight Edge Tool with .002 Tolerance Precision Edge, Check Straightness On Metal Surface Tops & Machinery, Layout Tool for Marking and Scribing Lines
ACCURATELY CHECK FLATNESS – Achieve perfectly flat surfaces effortlessly! This aluminum straight edge tool lets you identify gaps…
As an affiliate, we earn on qualifying purchases.
As an affiliate, we earn on qualifying purchases.
Conclusion
To trim veneer cleanly, remember that patience pays off. Taking your time with the right tools and techniques will help you avoid tearing the face. As the saying goes, “Measure twice, cut once.” By ensuring your cuts are precise and using a sharp blade, you can achieve a professional finish. So, stay focused and don’t rush; your careful approach will make all the difference in the final result. Happy woodworking!

Kunz Veneer Saw
Cranked handle to make it easier to use against a straight-edge.
As an affiliate, we earn on qualifying purchases.
As an affiliate, we earn on qualifying purchases.

3M Sanding Sponge Single Angle, Fine grit, 4.875-in x 2.875-in by 1-in
Use wet or dry
As an affiliate, we earn on qualifying purchases.
As an affiliate, we earn on qualifying purchases.