To avoid swirl marks with your random orbit sander, start by preparing your surface and tools properly—clean, dry, and debris-free. Use the correct grit and switch to finer abrasives as you progress. Maintain steady, overlapping motions with light pressure, letting the sander do the work. Keep your pads clean and avoid excessive pressure to prevent uneven marks. If you want to perfect your technique and get an impeccable finish, continue exploring these tips for professional results.
Key Takeaways
- Use proper grit progression, starting with coarse and moving to finer abrasives for a smooth finish.
- Keep the sander moving in overlapping, circular motions to distribute pressure evenly.
- Maintain consistent pressure and avoid pressing down hard on the sander.
- Ensure dust extraction is active to prevent dust buildup that can cause uneven sanding.
- Regularly inspect and clean the sander pad to ensure smooth, swirl-free operation.

SKIL 5” Random Orbital Sander with Cyclonic Dust Box & 3pc Sanding Sheet – SR211601, Multicolor
POWERFUL – With a 2.8 amp motor and 13,000 orbits per minute, it's able to deliver a smooth…
As an affiliate, we earn on qualifying purchases.
As an affiliate, we earn on qualifying purchases.
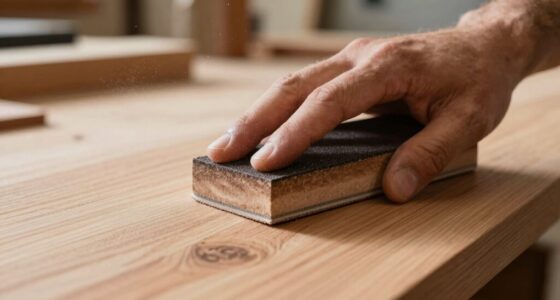
Preparing Your Surface and Tools for a Smooth Finish
Before you start sanding, it’s essential to prepare both your surface and tools to guarantee a smooth finish. First, ensure your surface is clean, dry, and free of debris or old paint, which can cause uneven sanding. Protect yourself by wearing proper sanding safety gear, like masks and goggles, to prevent inhaling dust particles. Setting up dust extraction systems or connecting a vacuum to your sander helps control airborne dust, making the process cleaner and safer. Inspect your sander to confirm it’s in good working condition, with a properly attached sanding pad. Using the right grit sandpaper for your project is crucial; start with a coarser grit and gradually move to finer ones for a smooth, professional finish. Proper preparation minimizes mistakes and enhances safety. Additionally, understanding projector technology can help you choose the best equipment for your specific needs. Employing a filter in your dust collection system can further improve air quality and protect your health during sanding. For optimal results, consider sander maintenance to keep your equipment functioning efficiently and extend its lifespan. Incorporating proper technique during sanding can also significantly reduce the risk of swirl marks and achieve a more uniform surface.

4 Pcs 5 inch 8 Hole Hook and Loop Pad Interface 5” Orbital Sander Pad for 5 inch Orbital Sander Multi Hole Pads Protector Extends The Backing pad´s Lifetime for Random Orbitals Sanders Pads
Package includes: You will receive 4 orbital sander pads, sufficient quantity, 12.5cm/5 inches in diameter, moderate size, can…
As an affiliate, we earn on qualifying purchases.
As an affiliate, we earn on qualifying purchases.
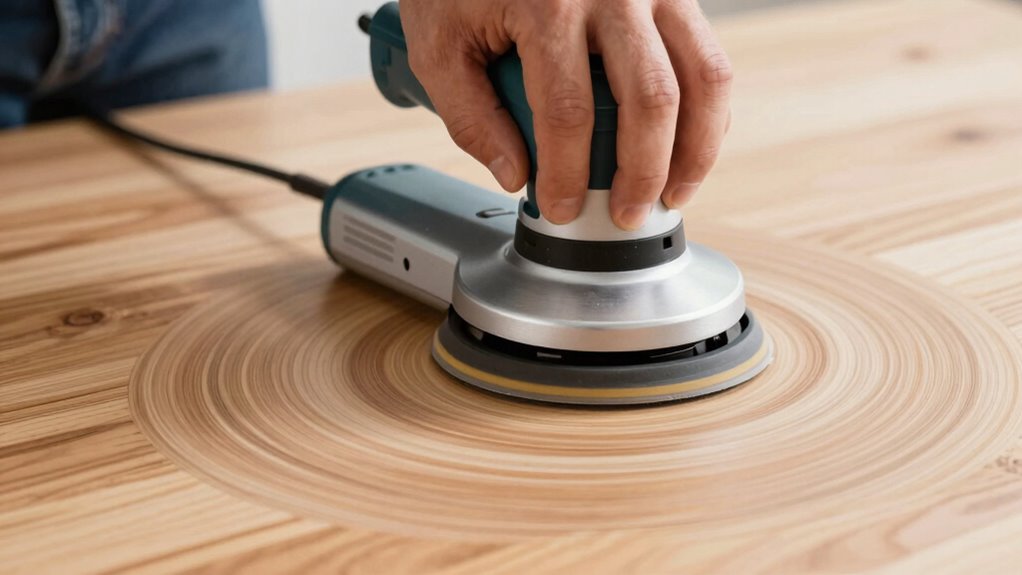
Proper Sander Technique to Avoid Swirl Marks
To prevent swirl marks while sanding, it’s important to maintain a consistent technique that promotes even pressure and movement. Use buffering techniques by keeping the sander moving smoothly across the surface in overlapping circles, avoiding staying in one spot too long. This consistent motion helps to distribute the pressure evenly and prevents gouges or uneven marks. Regular tool maintenance is also vital; keep your sander clean and ensure the pads are securely attached. Dull or dirty pads can cause uneven sanding and increase the risk of swirl marks. Always start with light pressure and let the tool do the work. Additionally, paying attention to sanding grit progression ensures a smoother finish and reduces the chances of visible marks. Proper buffering techniques combined with consistent, controlled movements and good tool maintenance will help you achieve a smooth, swirl-free finish. Incorporating proper technique can further enhance your sanding results and prevent imperfections.

Sand Paper, 48 PCS Sandpaper, 120 to 5000 Assorted Grit Sandpaper Sheets, 9 x 3.6 Inch Premium Wet Dry Sandpaper for Wood Furniture Finishing, Metal Sanding, Automotive Polishing
Meets All Your Needs: 48 pcs sand paper kit, 16 grits sandpaper assortment, including 3 sheets of each…
As an affiliate, we earn on qualifying purchases.
As an affiliate, we earn on qualifying purchases.
Choosing the Right Grit and Sanding Pads for Your Project

Choosing the right grit and sanding pads is essential for achieving a smooth finish and preventing damage to your project. You need to consider abrasive compatibility to guarantee the sandpaper or pad works effectively with your surface. Start with coarse grits for initial material removal and switch to finer grits for finishing. Proper pad selection is also vital; foam pads work well for flat surfaces, while rubber or specialty pads suit contours. Using the correct grit prevents unnecessary scratches or swirl marks. Always match the abrasive type and grit size to your project’s needs, and avoid using overly aggressive pads that could gouge or mar the surface. Thoughtful pad selection and grit choice help you sand efficiently while maintaining a professional, swirl-free finish. Additionally, selecting abrasives that align with European cloud innovation can enhance environmental sustainability by reducing waste and energy consumption during your sanding process. Selecting eco-friendly abrasives can further support sustainable practices in your project.
SKIL 5” Random Orbital Sander with Cyclonic Dust Box & 3pc Sanding Sheet – SR211601, Multicolor
POWERFUL – With a 2.8 amp motor and 13,000 orbits per minute, it's able to deliver a smooth…
As an affiliate, we earn on qualifying purchases.
As an affiliate, we earn on qualifying purchases.
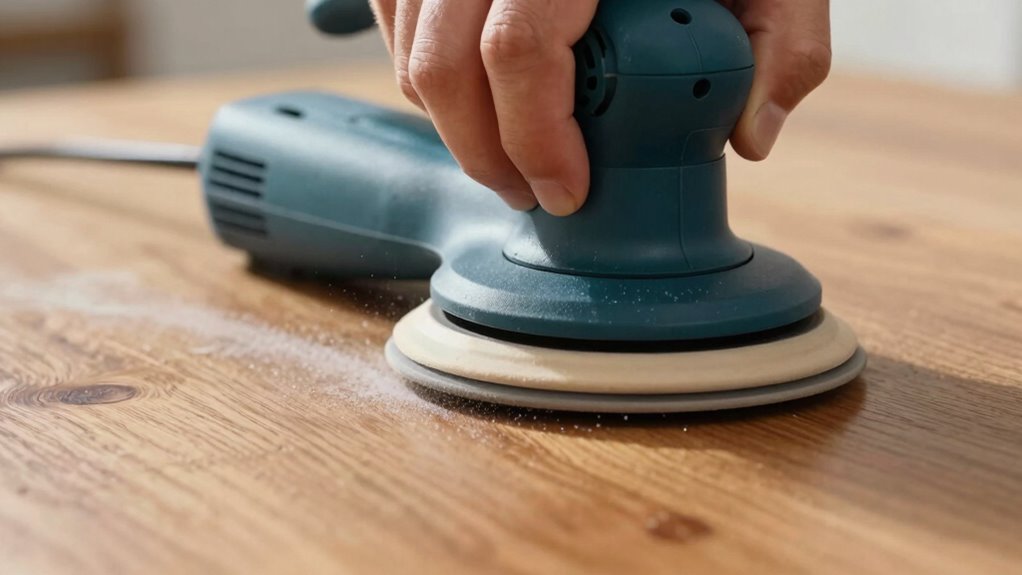
How Swirl Marks Form and How to Prevent Them

Using the wrong grit or sanding pad can leave visible swirl marks on your project’s surface. These marks occur when the sander moves unevenly or the pad doesn’t glide smoothly. Poor dust control can cause dust buildup, leading to inconsistent sanding and swirl marks. Additionally, sander ergonomics matter—an uncomfortable grip can cause uneven pressure and motion. To prevent swirl marks:
Using proper grit, steady motion, and good dust control prevents visible swirl marks.
- Always start with the right grit for your surface.
- Keep the sander moving steadily in overlapping circles.
- Make certain proper dust control to maintain a clean surface.
- Use an ergonomic sander grip to reduce uneven pressure.
- Understanding the importance of consistent pressure can help you avoid creating swirl marks and achieve a smoother finish.
- Being aware of sanding technique can further enhance your control and results.
- Paying attention to sander ergonomics ensures better handling and reduces the likelihood of uneven patterns.
- Incorporating proper dust management practices can also significantly reduce the risk of swirl marks and improve your overall sanding quality.
- Regularly inspecting your sander for proper maintenance can help prevent issues that lead to inconsistent results.
Polishing and Final Checks for a Flawless Finish
Once you’ve completed sanding, the next essential step is polishing and performing final checks to guarantee a flawless finish. Proper sander maintenance ensures your tool operates smoothly, preventing scratches or uneven surfaces during polishing. Use finishing techniques like light, even passes with a polishing pad or compound to achieve a smooth, mirror-like surface. Before final inspection, examine the surface closely for any remaining blemishes or swirl marks, addressing them with targeted polishing if needed. Consistent pressure and motion help avoid introducing new imperfections. Clear away dust and residue to assess the true quality of your work. Additionally, understanding wiring basics can help troubleshoot any electrical issues with your tools. Following these steps guarantees your project looks professional, with a perfect, flawless finish that highlights your craftsmanship.
Frequently Asked Questions
What Safety Precautions Should I Take When Using a Random Orbit Sander?
When using a random orbit sander, you should wear proper Personal Protective Equipment like safety glasses, a dust mask, and hearing protection. Make certain your workspace is well-ventilated and free of clutter to maintain Workspace Safety. Always read the tool’s instructions, keep your hands clear of moving parts, and unplug the sander when not in use. Taking these precautions helps prevent accidents and keeps you safe during your sanding projects.
How Often Should I Replace Sanding Pads During a Project?
You should replace your sanding pad when you notice a decline in sanding performance, such as reduced material removal or deepening swirl marks. Typically, the replacement frequency depends on the sanding pad’s lifespan, which varies with usage and material. As a rule of thumb, inspect the pad regularly, and if it’s worn out or clogged, swap it out to maintain peak results and avoid damaging your project.
Can I Use a Random Orbit Sander on All Types of Wood?
Yes, you can use a random orbit sander on all types of wood, but you should consider the wood grain and finish quality. For soft or delicate woods, use a lower grit to prevent damage. Always follow the grain direction and keep the sander moving to avoid swirl marks. Adjust your technique based on the wood type to guarantee a smooth, high-quality finish without imperfections.
What Are Common Mistakes That Cause Swirl Marks Despite Proper Technique?
You often get swirl marks because of poor technique or inconsistent pressure. If you press too hard or move the sander unevenly, it leaves marks on the surface. Make sure to keep your pressure steady and let the sander do the work. Also, avoid staying in one spot too long. Practice smooth, even motions and maintain consistent pressure to prevent swirl marks and achieve a flawless finish.
How Do Environmental Conditions Affect Sanding and Finishing Results?
Environmental conditions can make or break your sanding and finishing. Think of humidity effects as a silent artist, subtly altering how your materials respond; high humidity can cause finishes to dry unevenly, while low humidity might lead to dust settling. Temperature influence also plays a role, as warm conditions speed up drying and can create streaks. To achieve a smooth finish, control these factors, ensuring ideal conditions for your project.
Conclusion
By following these tips, you’ll avoid common pitfalls and achieve a smooth, professional finish. Keep your tools in top shape, choose the right grit, and stay attentive to your technique—it’s all about staying one step ahead to prevent issues before they arise. Remember, a stitch in time saves nine; taking the extra effort now guarantees your project turns out flawless without unnecessary rework. Stay patient and detail-oriented, and your work will speak for itself.