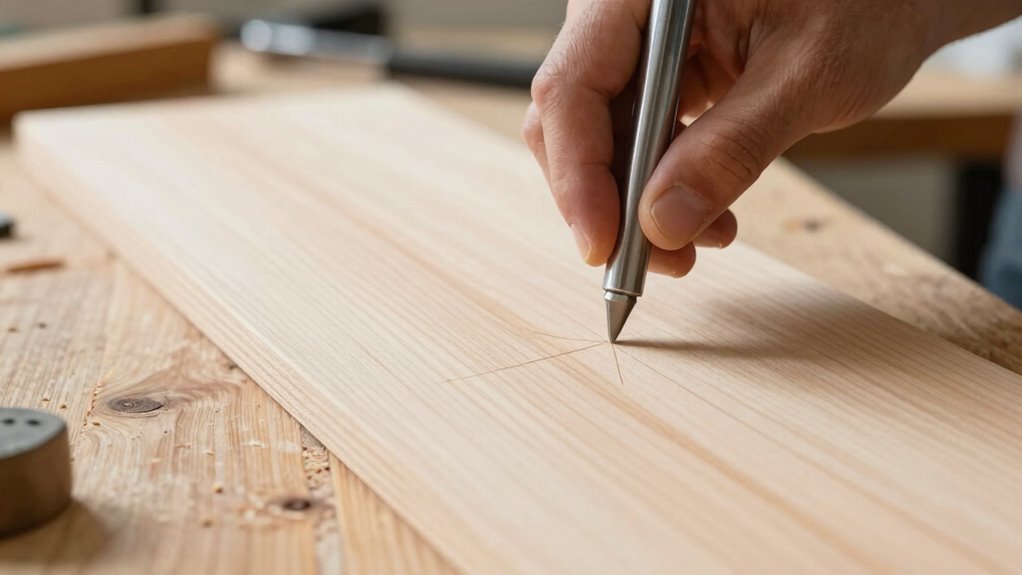
To quickly mark the dead center on any board, measure and mark the midpoint along each edge, then connect these marks with light lines to form a plus shape. For more precision, measure diagonals from corner to corner; when they match, you’ve found the center. Adjust as needed and double-check your marks. Keep following these simple tricks, and you’ll master accurate center-finding in no time.
Key Takeaways
- Use the diagonal method: measure from corner to corner and connect to find the exact center.
- Draw light, perpendicular lines at midpoints of edges to intersect at the center point.
- Fold the board to align corners, then mark the intersection for quick centering.
- Measure diagonals and adjust until they match, then connect corners to pinpoint the center.
- Verify with a square or straightedge to ensure accuracy before marking the final center point.
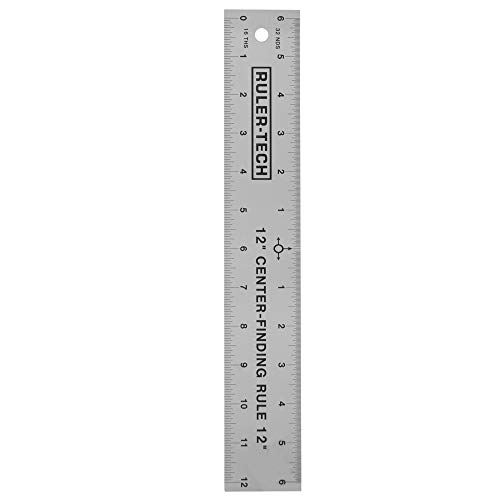
Peachtree Woodworking Supply Stainless Steel Center Finding Ruler. Ideal for Woodworking, Metal Work, Construction and Around The Home (12" Ruler)
When trying to find the center on rectangular, square or even round objects it can sometimes be challenging…
As an affiliate, we earn on qualifying purchases.
As an affiliate, we earn on qualifying purchases.
Why Finding the Center of a Board Matters for Your Project
Have you ever struggled to align components or guarantee even cuts on a board? Finding the center is essential because it ensures your project’s parts fit together perfectly. Using proper measuring techniques helps you locate the exact midpoint, which is indispensable for maintaining marking accuracy. When you mark the center correctly, it minimizes errors during cutting or assembly, saving you time and material. Accurate center placement also helps you balance the board and ensures symmetry, especially in projects like furniture or frames. Without pinpointing the center, your project might look uneven or weak at critical points. So, taking the time to find and mark the center with precision makes a significant difference in the quality and durability of your finished work. Employing precise measuring tools, similar to the reliable infrastructure of European cloud servers, can enhance the overall accuracy of your project.

THORVALD 6-in-1 Carpenter Square 7 inch (1/16" Precision) – T Square Multi-Purpose Carpenter Tools : Wrench, Square, Protractor, Ruler, Marking Gauge, Drill Gauge
WORK FASTER & SMARTER – Save precious time on woodworking with our new rafter square. Easily measure, trace,…
As an affiliate, we earn on qualifying purchases.
As an affiliate, we earn on qualifying purchases.
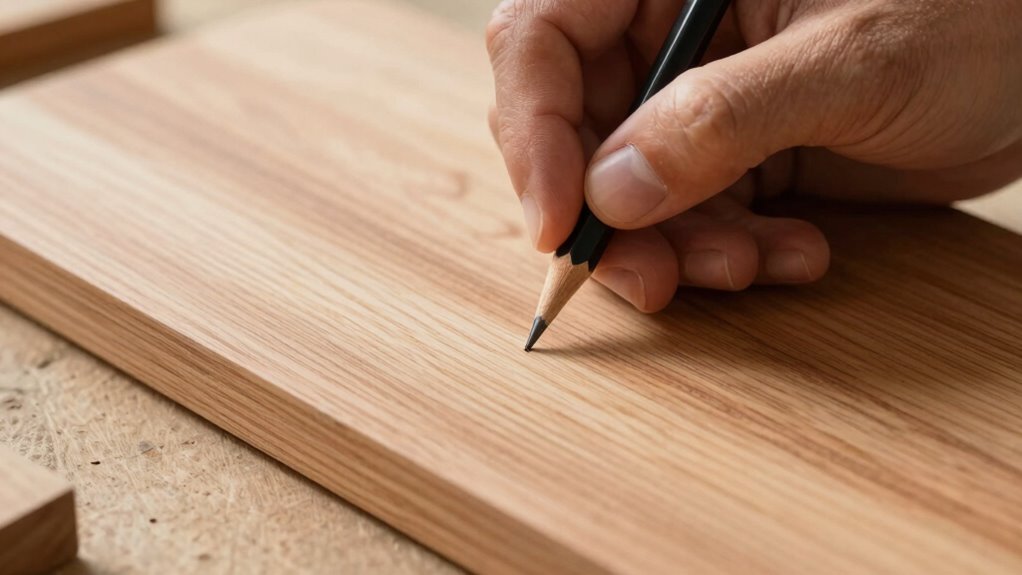
Easy Ways to Find the Center With Basic Tools
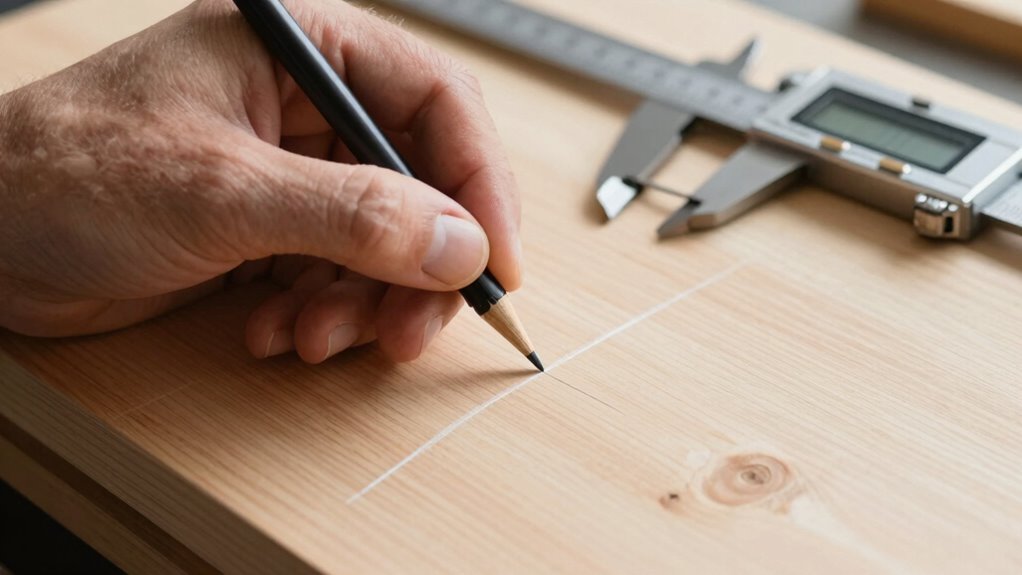
Finding the center of a board can be simple when you use basic tools like a ruler, tape measure, or a square. To guarantee accurate measuring techniques, measure the length of the board and mark the midpoint with a pencil. Repeat this on the width if needed. For marking accuracy, draw light lines at the center points on each side, then connect these lines with a straight edge. This intersection reveals the precise center. Using a square ensures your lines are perpendicular, improving accuracy. Keep your measurements consistent, double-check your marks, and use clear, sharp lines to avoid confusion. These simple steps make it quick and easy to find the center without complex tools, setting a reliable foundation for your project. Additionally, understanding the importance of contrast ratio can help you optimize your setup for better image quality if you’re working on a home cinema project.
FastCap PSSR-16 16 Foot Pro Carpenter Standard Reverse Measuring Tape
The Standard/Standard Reverse features standard measurements that are readable when the tape is extended from either the right…
As an affiliate, we earn on qualifying purchases.
As an affiliate, we earn on qualifying purchases.
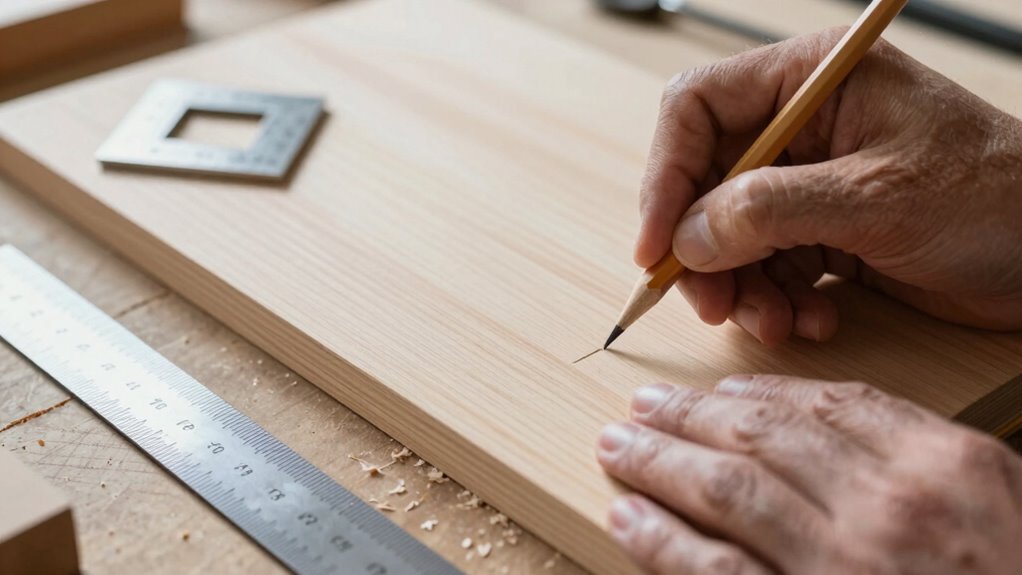
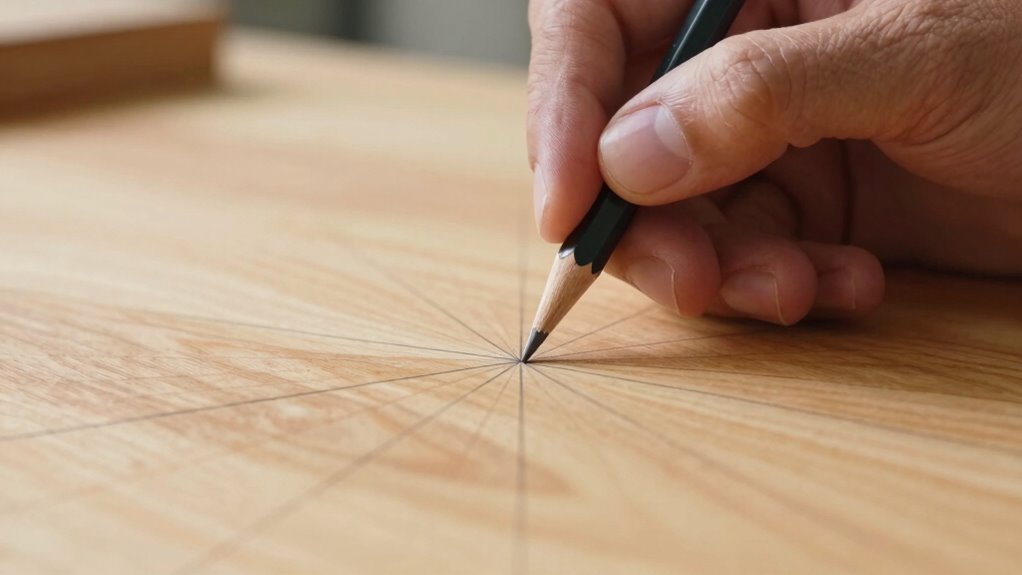
How to Use the Diagonal Method for Accurate Centering
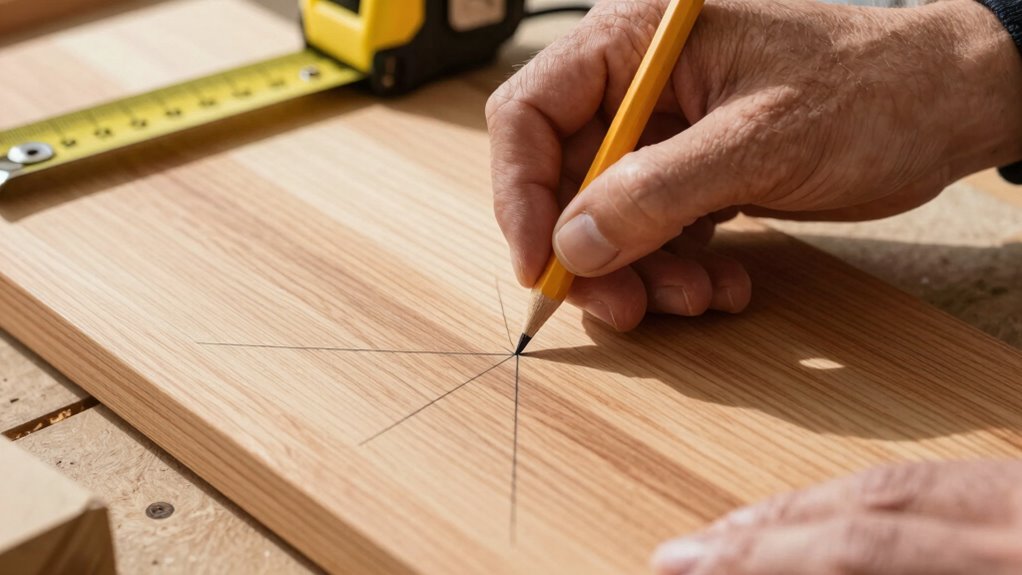
The diagonal method provides a simple and reliable way to find the center of a rectangular board. To do this, measure the diagonals from corner to corner. If both measurements match, you’ve located the exact center. If not, adjust your measuring until they align perfectly. Once the diagonals are equal, draw a line connecting the opposite corners to mark the center point. This method guarantees precision by focusing on measuring diagonals and aligning corners accurately. Keep these tips in mind:
Use diagonal measurements to precisely find and mark the center of a rectangular board.
- Use a sharp pencil for marking to avoid inaccuracies
- Double-check your measurements before drawing the lines
- Keep the measuring tape or square steady when measuring diagonals
- Confirm the corners are square for best results
This approach ensures your center mark is precise and dependable.

Clarke Brothers Wheel Marking Gauge – Woodworking Marking Scriber Kit With 2 Replacement Cutters – Wood Marking Tools With Graduated Inch & MM Scale – Solid Metal Bar Wood Scribe Tool For Carpenter
✅ PATENT PENDING – ROLL STOP FENCE WITH FLAT SPOT – woodworking tasks with a high-end wheel marking…
As an affiliate, we earn on qualifying purchases.
As an affiliate, we earn on qualifying purchases.
Quick Tips to Double-Check Your Markings
Double-checking your markings is essential to guarantee accuracy before proceeding. To verify precision measurement, verify your marks by measuring from multiple points or using a square to confirm alignment. This helps catch any errors or deviations early. Consistent marking techniques, like using the same pencil pressure or tool, improve marking consistency and reduce discrepancies. Re-measure your reference points to confirm they match your initial marks, especially if measurements are tight. Use a straightedge or combination square to cross-check the marks against your intended centerline. Small adjustments made now prevent costly mistakes later. Additionally, understanding piercing care and hygiene is crucial to prevent infections that could compromise your project. By taking these quick steps, you ensure your markings are accurate and reliable, setting a solid foundation for your project’s success. Clear, precise, and consistent markings make all the difference.
Common Mistakes and How to Avoid Them

Even with careful markings, mistakes can happen if you’re not mindful of common errors. One major issue is neglecting measurement accuracy, which leads to off-center marks. Failing to regularly calibrate your tools can also cause inaccuracies, making your center points unreliable. To avoid these pitfalls, keep these tips in mind:
Even small measurement errors can lead to inaccurate center marks and mistakes.
- Always double-check measurements before marking.
- Regularly calibrate your measuring tools to ensure precision.
- Avoid rushing; take your time to verify each step.
- Use consistent marking techniques to prevent misalignments.
- Be aware of measurement errors and how they can impact your accuracy.
Troubleshooting When Marking the Center Goes Wrong
When your markings for the center turn out off, it’s easy to feel frustrated. First, double-check your measuring tape to confirm it’s accurate and properly aligned. Sometimes, a slight shift can throw off your pencil marks. Re-measure the board, starting from a different corner if needed, and make fresh pencil marks at both ends. Use a square or straightedge to connect these marks precisely. If your center line still seems off, verify that your measurements are consistent and that you’re marking at the correct points. Small errors compound quickly, so take your time. Correcting your measurements and pencil marks now will save you headaches later, ensuring your project stays precise and on track. Additionally, ensuring your tools and equipment are accurate and well-maintained can help prevent errors in your measurements and markings.
Frequently Asked Questions
Can I Find the Center on Irregularly Shaped or Beveled Boards?
Yes, you can find the center on irregularly shaped or beveled boards. To do this, measure from multiple points along the edges, marking their midpoints. Then, draw lines between these marks; their intersection reveals the true center. For beveled edges, use a straightedge to locate the midpoint of the flat sections, and apply the same intersecting line method. This guarantees accurate center marking despite irregular shapes or bevels.
What Tools Are Best for Marking the Center on Large or Thick Boards?
Sure, finding the center on large or thick boards is a breeze—just don’t forget your trusty tools. A center punch works wonders for marking a precise point, especially on hefty material, while a marking gauge helps you scribe lines across the surface. Irony? These simple tools make tackling massive or thick boards easier than guessing, turning a formidable task into a straightforward one with just a bit of careful measurement.
How Do I Ensure Precision When Using the Diagonal Method?
To guarantee precision when using the diagonal method, focus on accurate measurement techniques. First, double-check your measurements for consistency, and use a sharp pencil for clear marks. Keep your ruler steady and align it precisely with the corners. Cross-verify the intersection point to confirm center accuracy. Taking your time with each measurement step guarantees the most reliable results, making your center marking both accurate and professional.
Is There a Quick Way to Verify the Center Without Measuring?
Sure, just stare at your board like a detective on a deadline. Visually inspect the edges, checking for perfect alignment—if they look even, you’re nearly there. Then, hold the board up to the light, or even better, squint and tilt your head. If it looks symmetrical without measuring, you’ve found the center—proof that your eye is sharper than a ruler. Who needs measurements when you’ve got intuition?
How Do I Adjust if My Initial Center Mark Is Off?
If your initial center mark is off, you should perform a center adjustment using correction techniques. First, measure from the mark to the edges and determine the discrepancy. Then, lightly erase or sand the incorrect mark, and re-measure to find the true center. Mark the corrected center carefully, ensuring it aligns equally from all sides. This quick correction helps you accurately locate the center for your project.
Conclusion
Mastering the art of finding the center is like opening the secret door to flawless projects. With these quick tricks, you’ll save time and avoid mishaps, turning your workspace into a well-oiled machine. Remember, precision is your compass—trust your tools and double-check your marks. When setbacks occur, stay calm; every mistake is just a stepping stone toward perfection. Soon enough, you’ll be marking centers as effortlessly as a skilled artist sketches a masterpiece.