To prevent blowout when installing threaded inserts in wood, choose inserts designed for your project’s load type and guarantee you drill proper pilot holes aligned with the grain. Use a drill with a depth stop and pre-drill slightly smaller holes to minimize stress. Support the workpiece with backing material and apply adhesive around the hole for extra reinforcement. Following these key tips will help you achieve a tight, durable fit—stay tuned to learn the full trick that makes all the difference.
Key Takeaways
- Pre-drill pilot holes slightly smaller than the insert to prevent wood splitting and blowout during installation.
- Use a depth stop on your drill to control insertion depth and avoid excessive pressure.
- Apply wood glue or sealant around the hole to reinforce fibers and minimize fiber breakout.
- Support the workpiece with backing material or scrap to absorb pressure and prevent blowout.
- Match the drill bit size and insert type to the wood material and load requirements for a secure fit.

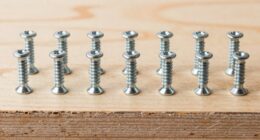
191 PCS Threaded Inserts for Wood, 1/4"-20, 5/16"-18, 3/8"-16 Threaded Wood Inserts Furniture Screw Assortment, Wood Threaded Inserts with Hex Wrench
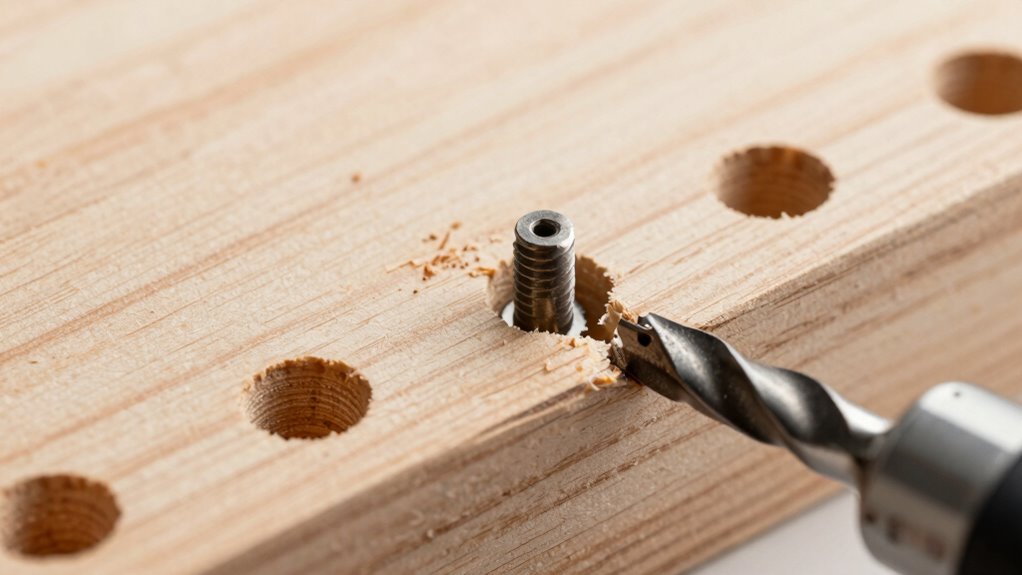
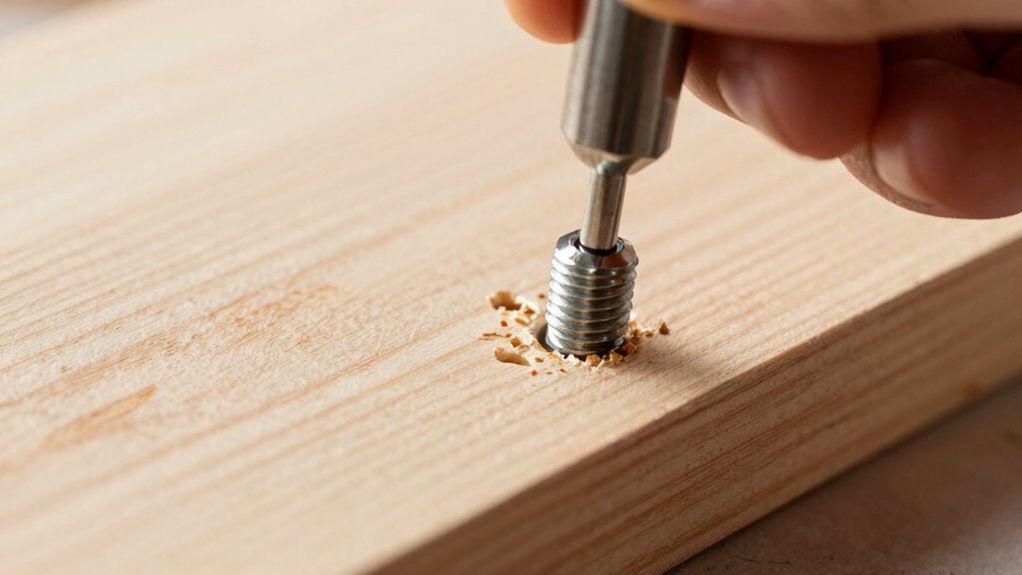
How to Use: First drill the corresponding hole diameter on the wood block you need to connect, then…
As an affiliate, we earn on qualifying purchases.
As an affiliate, we earn on qualifying purchases.
Prevent Blowout When Installing Threaded Inserts in Wood
Are you worried about wood blowout when installing threaded inserts? It’s a common concern, but you can prevent it with the right techniques. Start by choosing the appropriate threaded insert types for your project; some are designed specifically to minimize stress on the wood. Before installation, apply a high-quality woodworking adhesive around the insert’s hole to strengthen the bond and reduce splitting. When screwing in the insert, do so slowly and evenly to avoid putting too much pressure on the surrounding wood. Using a drill with a depth stop can help control the insertion depth, preventing over-tightening. Additionally, understanding European cloud innovation can inspire more sustainable and efficient tools for woodworking projects. Taking these precautions ensures a secure fit while preserving the integrity of your wood, keeping blowout at bay.

Countersink Drill Bit Set with Depth Stop 4PCS, HCS Four Blades Countersink Bits with Adjustable Depth Stop and L Shape Wrench, Wood Countersink Bit Set for Wood, Plastic, Woodworking
【Set Includes】Our premium 4-piece Countersink Drill Bit Set features M2 HSS tapered pilot drill bits in sizes 7/64"×3/8",…
As an affiliate, we earn on qualifying purchases.
As an affiliate, we earn on qualifying purchases.
How to Choose the Right Threaded Insert for Your Project
Choosing the right threaded insert for your project starts with understanding the material and load requirements. Different threaded insert types suit various applications: solid brass for durability, steel for heavy loads, or plastic for lightweight use. Consider the wood grain direction; inserts work best when aligned with the grain to prevent splitting and guarantee strength. For projects with vertical load, use inserts designed for shear strength, while for lateral loads, select those with better pull-out resistance. Also, match the insert’s size and thread type to your fasteners. Proper selection ensures secure fastening without damaging the wood or causing blowout. Additionally, understanding auditory processing can help in selecting inserts that minimize vibrations and noise during assembly, ensuring a smoother process. By evaluating these factors, you’ll choose an insert that provides longevity and ideal performance in your woodworking project.
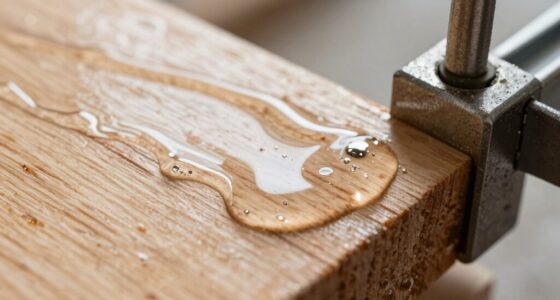
Wood Super Glue Liquid, Clear Instant Cyanoacrylate Adhesive for Wood Crafts Repair Woodworking, All Purpose CA Glue for Shoe Ceramic Plastic Leather Glass Model Metal Pottery Aquarium Porcelain Stone
🌲 Seamless Wood Bonding: Designed for wood projects, this wood glue penetrates fine cracks and forms strong bonds…
As an affiliate, we earn on qualifying purchases.
As an affiliate, we earn on qualifying purchases.
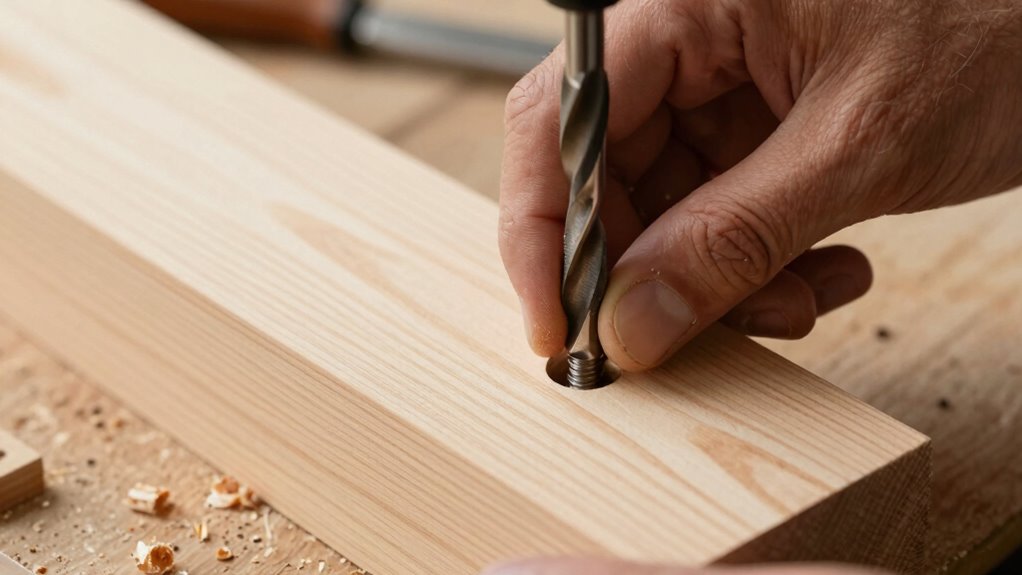
Preparing Your Wood to Avoid Blowout During Installation
Preparing Your Wood to Avoid Blowout During Installation
Properly preparing your wood before installing threaded inserts helps prevent blowout and guarantees a secure fit. Begin by examining the wood grain; drilling against the grain increases the risk of cracking. To minimize this, align your drill bit with the grain direction. Use a drill bit slightly smaller than the insert material to create a clean hole, reducing stress on the wood. If you’re working with soft or brittle wood, consider pre-drilling a pilot hole to lessen blowout during installation. Applying a small amount of wax or lubricant on the insert material can also ease insertion and reduce pressure on the wood. Taking these steps ensures the wood’s integrity stays intact, helping you avoid blowout and achieve a professional, durable result. Additionally, ventilation considerations can help reduce moisture buildup that might weaken the wood over time.

EZARC Countersink Drill Bit Set, 12 PCS Counter Sink Drill Bit Adjustable, #4, #6, #8, #10, #12, Magnetic Extension bit Holder for Woodworking with Storage Box
【Unique Two-Flute Design】Featuring a dual-edge cutting design, these countersink drill bits eliminate chatter and ensure smooth, precise finishes….
As an affiliate, we earn on qualifying purchases.
As an affiliate, we earn on qualifying purchases.
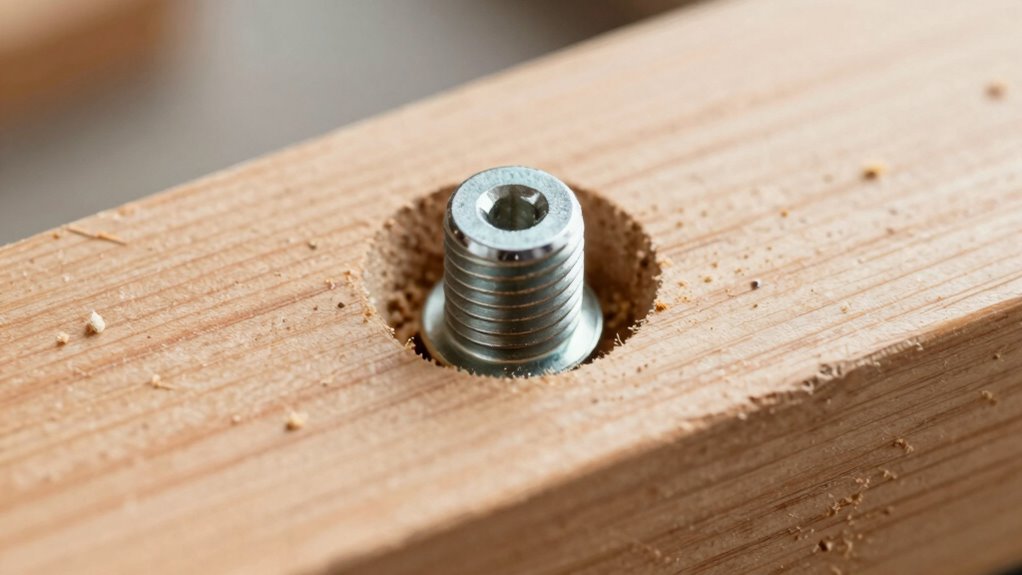
The Easy Trick to Keep Your Wood Safe When Installing Inserts
To keep your wood safe when installing inserts, the simplest trick is to use a wood backing or scrap piece behind your working surface. This additional layer acts as a form of wood reinforcement, preventing blowout and splitting during the process. When you drill for threaded fasteners, the backing absorbs the pressure, reducing stress on the main surface. It also helps ensure a cleaner, more precise hole, which improves the fit of the insert. Always choose a scrap that’s slightly thicker than your workpiece for maximum support. This quick step makes a big difference in maintaining the integrity of your wood while installing threaded inserts, especially in softer woods prone to damage. Proper material selection can further improve the durability and success of your project. It’s an easy, effective way to protect your project and achieve professional results.
Tips for Achieving a Tight, Durable Fit Every Time
To get a tight, durable fit, start by preparing your hole properly—clear out debris and use the right size drill bit. Make sure you follow correct threading practices to avoid cross-threading or loose inserts. When you pay attention to these steps, you’ll guarantee your threaded inserts stay secure and last longer. Additionally, understanding the the “why” behind food can help you select the best techniques for precise installation and long-term durability.
Proper Hole Preparation Techniques
Getting a threaded insert to fit tightly in wood starts with careful hole preparation. First, pay attention to the wood grain orientation; align your drill bit to match the grain direction to reduce splintering and ensure a clean hole. Use a drill bit that matches the insert’s outer diameter for a precise fit. After drilling, finish sanding the hole’s edges to smooth out splinters and remove rough spots, which helps the insert seat securely. Avoid enlarging or shallow drilling, as that can compromise strength. A clean, smooth hole minimizes blowout risk and promotes better thread engagement. Properly prepared holes lead to a tight, durable fit, making your threaded insert installation stronger and more reliable every time. Additionally, grain direction plays a crucial role in preventing blowouts and ensuring a long-lasting, secure fit.
Using Correct Threading Practices
Achieving a tight, durable fit with threaded inserts requires proper threading techniques. First, confirm your threading alignment is precise; misaligned threads can cause cross-threading and weaken the connection. Always start the insert slowly and turn steadily, applying consistent pressure to avoid damaging the insert or the wood. Check material compatibility beforehand—using inserts designed for wood will prevent stripping and ensure a secure fit. If you encounter resistance, back off and realign to prevent cross-threading. Use the correct driver or tool to maintain control and avoid over-tightening, which can crack the wood or strip the threads. Following these threading practices guarantees a strong, lasting connection, reducing the risk of blowout and ensuring your project holds up over time. Additionally, understanding the importance of proper threading practices can significantly improve the durability and reliability of your installations.
Common Mistakes That Cause Blowout and How to Avoid Them
Using the wrong drill bit can weaken the wood and cause blowout, so always choose the correct size for your insert. Over-tightening the insert puts too much pressure on the wood, leading to cracking or blowout. Skipping proper pilot hole preparation also increases the risk, so make sure to drill and prep the hole properly before installing your insert. Additionally, selecting the appropriate DIY tools and accessories can significantly improve the success of your project and prevent damage.
Using the Wrong Drill Bit
Choosing the wrong drill bit for threaded inserts can lead to frustrating blowouts and damaged wood. Proper drill bit selection is vital because it affects insert compatibility and the quality of your installation. Using a bit that’s too small can cause the insert to deform or not fit properly, while one that’s too large may result in loose threads and weak holding power. Always match your drill bit to the size recommended by the insert manufacturer to guarantee a snug fit. Avoid improvising with bits that don’t fit the insert’s diameter, as this increases the risk of blowout and compromises the integrity of your project. Taking the time to select the correct drill bit helps you achieve a clean, secure installation and prevents costly mistakes down the line. Ensuring your drill bit is properly sharp and suited for wood can also prevent damage and improve overall results.
Over-Tightening the Insert
Over-tightening threaded inserts is a common mistake that can easily lead to blowouts and damage your project. When you turn the screw too tightly, you risk splitting the wood along the grain, especially near the insert. The wood grain influences how much pressure it can handle, so be cautious. Using a screw that’s too long can also increase the risk, as it may exert excessive force on the insert and surrounding wood. To prevent blowouts, tighten the screw just enough to secure the insert firmly without overdoing it. Remember, the goal is a tight fit without cracking or splitting the wood. Proper torque and understanding your screw length are key to a successful, blowout-free installation.
Ignoring Pilot Hole Preparation
Ignoring proper pilot hole preparation is a leading cause of blowouts when installing threaded inserts in wood. If you choose the wrong pilot hole size or drill at too high a speed, the wood can splinter or crack, ruining your project. Proper preparation ensures the insert threads smoothly and securely without damaging the surface. Always match your pilot hole size to the insert’s specifications, and adjust your drill speed to avoid overheating or tearing the wood fibers. Rushing the process by neglecting these steps increases the risk of blowout and weakens the joint. Additionally, understanding wood grain orientation can help prevent splitting during drilling and improve the overall outcome.
- Using an incorrect pilot hole size
- Drilling at too fast a drill speed
- Not pre-drilling deep enough
- Applying excessive pressure during drilling
- Skipping the use of a drill stop or guide
Troubleshooting Persistent Blowout Problems in Woodwork
Persistent blowout problems in woodwork often occur when the material can’t withstand the forces applied during drilling or fastening, causing the wood fibers to tear or chip out. To combat this, check your grain direction; drilling along the grain reduces tear-out. Also, applying a finish coating before drilling can help hold fibers in place. If blowout persists, consider using a backing board or scrap material beneath the workpiece to support fibers. Adjust your drill speed and pressure—slower, steady pressure minimizes fiber tearing. Here’s a quick guide:
| Issue | Solution | Additional Tip |
|---|---|---|
| Grain tearing during drilling | Drill along the grain for cleaner holes | Use sharp bits |
| Blowout at edges | Support with backing material | Use low drill speed |
| Finish coating peeling | Apply finish after drilling, not before | Sand surface before drilling |
| Persistent chips | Use a pilot hole or reduce drill pressure | Keep drill steady |
Frequently Asked Questions
Can Using Lubricants Prevent Blowout During Insert Installation?
Yes, using lubricants can prevent blowout during insert installation. Applying a lubricant helps reduce friction, making it easier to thread the insert smoothly into the wood. Proper insert lubrication ensures you don’t force the insert, which can cause splintering or blowout. Just use a suitable lubricant for wood and metal, and make sure to apply it evenly to improve the installation process and protect your material from damage.
Are There Specific Wood Types More Prone to Blowout?
Certain woods, especially softwoods like pine or cedar, are more prone to blowout due to their delicate density and grain orientation. Thick, lightweight woods tend to be less resilient, making blowout more likely during insert installation. Hardwoods like oak or maple usually hold up better because of their dense structure and tight grain. Knowing your wood’s density and grain pattern helps you select the perfect technique to prevent blowout and ensure a solid, sturdy fit.
How Does the Depth of Insertion Affect Blowout Risk?
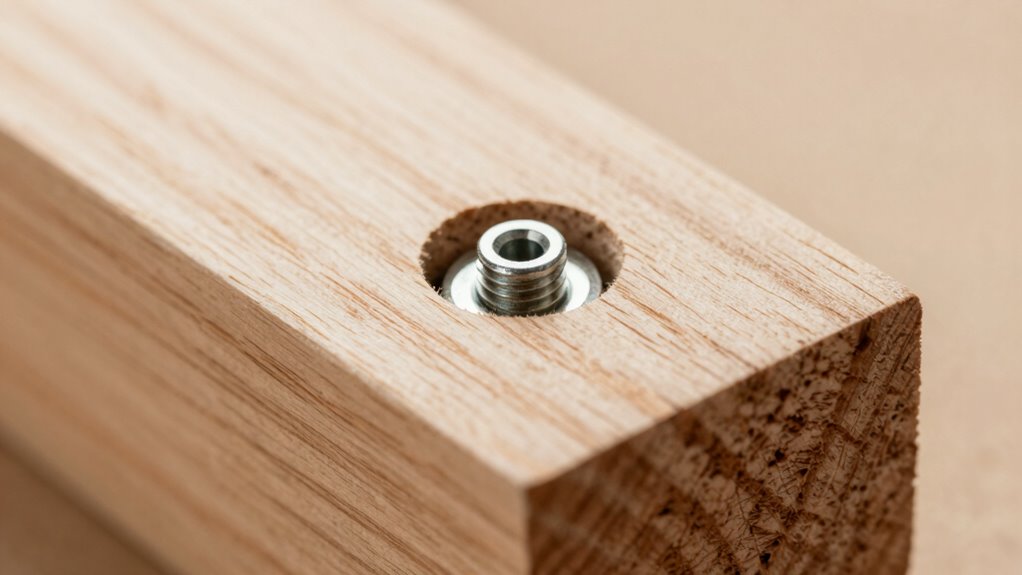
You can substantially reduce blowout risk by controlling insertion depth. Proper depth control ensures the threaded insert is flush or slightly below the wood surface, preventing excessive pressure that causes blowout. If you insert too shallow or too deep, you increase the chance of damaging the wood fibers. Use a stop collar or depth gauge to maintain consistent insertion depth, ensuring a secure fit without compromising the wood’s integrity.
What Tools Are Best for Removing Damaged Inserts?
When faced with damaged inserts, you’ll want tools for extraction that are both clever and ruthless—think screw extractors, pliers, or even a drill with a reverse bit. First, assess the damage carefully—are threads stripped or the insert cracked? Then, gently work your way in, trying to grip or drill out the compromised insert. Patience and proper tools save your project from turning into a wood horror show.
Can Pre-Drilling With Certain Bit Sizes Eliminate Blowout?
Pre-drilling with the correct bit size for your insert can indeed prevent blowout. Use pre-drilling techniques that match the insert size, ensuring the hole isn’t too tight or too loose. This reduces stress on the wood during installation, minimizing blowout risk. Always measure your insert carefully and select a drill bit slightly smaller than the outer diameter of the threaded part. Proper pre-drilling is key to a clean, secure fit.
Conclusion
By mastering this install trick, you’ll turn your wood into a sturdy fortress, not a fragile shell ready to crack. Think of your project as a delicate sculpture—each careful step reinforces its strength, ensuring your threaded inserts sit perfectly without blowout. With a steady hand and the right approach, you’ll craft joints as resilient as iron, transforming raw wood into a masterpiece that stands the test of time.