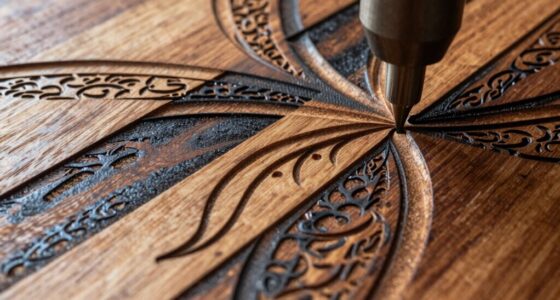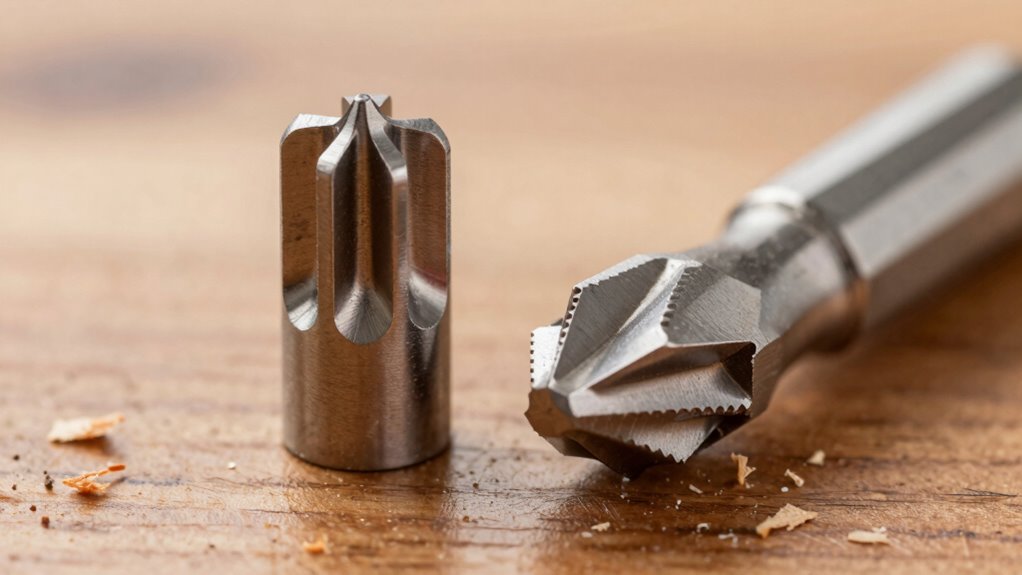
When you’re choosing between upcut and downcut bits, it’s all about chip direction and edge quality. Upcut bits pull chips upward, making them great for softer materials like wood, but they can leave rough edges. In contrast, downcut bits push chips downward, providing cleaner edges, perfect for visible surfaces like furniture. However, they can struggle with chip removal in thicker materials. Want to know how these choices impact your project’s outcome? There’s more to explore!

Get business pricing on tools and workshop supplies
- Business-only prices and quantity discounts
- Tax-exempt purchasing
- Multiple users, one account, clear invoices
Key Takeaways
- Upcut bits pull chips upward, enhancing chip removal but may leave rough edges on the top surface.
- Downcut bits push chips downward, resulting in cleaner edges ideal for visible surfaces and intricate designs.
- Edge quality is crucial; upcut bits may not suit high-quality finishes while downcut bits minimize fraying.
- Material compatibility is essential; upcut bits work well with softer materials, while downcut bits excel with plywood and laminates.
- Proper chip evacuation prevents overheating; upcut bits are better at preventing clogging compared to downcut bits.

When you’re diving into the world of milling, understanding the difference between upcut and downcut bits is vital for achieving the best results. Each type of bit employs distinct cutting techniques that influence how material is removed and the quality of the finished edge. Upcut bits pull the material up and away from the workpiece, while downcut bits push the material down into the workpiece. This fundamental difference shapes not just how the bit interacts with the material, but also the overall outcome of your project.
Using an upcut bit, you’ll notice that the chips are ejected upward, which can be beneficial for clearing debris quickly. This technique is particularly effective with softer materials like wood and some plastics, where you want to avoid clogging the flutes. However, it can leave a rougher edge on the top surface, which might not be ideal for every application. If you’re working on a project where edge quality is paramount, such as furniture making or intricate designs, you might find that an upcut bit doesn’t meet your needs.
Using an upcut bit efficiently clears debris but may leave a rough edge, making it less suitable for high-quality finishes.
On the other hand, downcut bits excel in providing a clean edge on the top surface of your material. By pushing the chips down, they minimize fraying and splintering, making them a go-to choice for materials like plywood or laminate. This cutting technique enhances material compatibility, guaranteeing a smoother finish that’s essential for visible surfaces. However, the downside is that downcut bits can sometimes struggle with chip removal, especially in thicker materials, which may lead to overheating or burn marks. Proper chip evacuation is essential to prevent such issues and ensure a high-quality finish. Additionally, understanding the cutting direction can help you optimize your milling process and improve overall results. Moreover, selecting the appropriate bit for the material is crucial to achieving the desired quality and efficiency. Being aware of material properties can help you choose the right bit for your specific application, ensuring optimal performance.
As you weigh your options, consider the material compatibility of each bit type. If you’re milling dense materials, an upcut bit could be more effective, allowing for better chip clearance. Conversely, if your project requires a polished edge, a downcut bit might be the better choice, despite its limitations in chip removal. It’s also important to consider the application-specific requirements of your project to select the most suitable bit type.
Ultimately, the choice between upcut and downcut bits boils down to the specific requirements of your project. Think about the material you’re working with and the finish you aim to achieve. By aligning your cutting technique with your project’s demands, you’ll elevate your milling game and guarantee precision in your work.
As an affiliate, we earn on qualifying purchases.
Frequently Asked Questions
What Materials Are Best for Using Upcut or Downcut Bits?
When choosing materials for upcut or downcut bits, consider your project’s needs. Upcut bits work best with softer materials like wood and plastic, as they efficiently remove chips. For harder materials, such as composites or laminates, downcut bits excel because they reduce fraying and tear-out. Always guarantee your chosen materials match the bit’s compatibility to achieve the best edge quality and finish. This’ll help you get the results you’re aiming for.
How Do I Choose the Right Bit Diameter?
Choosing the right bit diameter isn’t just about size; it’s about meeting your project requirements. For intricate designs, a smaller bit size gives you precision, while larger bits speed up the process for bigger cuts. Consider the material too—thicker materials often need a wider diameter to handle the load. Ultimately, balance your project needs with the bit size to achieve the best results and maintain quality throughout your work.
Can I Use Both Types of Bits in One Project?
Yes, you can use both types of bits in one project, enhancing your project versatility. Just guarantee bit compatibility with your material and desired finish. For instance, using an upcut bit for roughing cuts can efficiently remove material, while a downcut bit provides a clean edge for finishing. Mixing them strategically allows you to achieve different effects and optimize performance without compromising quality. Experimenting with both can elevate your results considerably.
What Is the Impact of Feed Rate on Bit Performance?
When you’re working on a project, the right feed rate can make the difference between a clean cut and a rough edge. If you feed too slowly, your bit might overheat, losing its sharpness. Conversely, feeding too quickly can lead to chipping or breakage. Finding that sweet spot is essential for peak bit performance. So, adjust your feed rate carefully, and you’ll see how it transforms your results, elevating your craftsmanship.
How Do I Maintain My Bits for Longevity?
To maintain your bits for longevity, start with regular bit cleaning to remove debris and buildup. Use a soft brush or compressed air for this. Incorporate sharpening techniques, like using a dedicated sharpening tool, to keep the edges crisp and effective. Check for wear often, and replace bits when necessary to guarantee consistent performance. Proper storage also helps; keep them in a dry, organized space to prevent damage.
As an affiliate, we earn on qualifying purchases.
Conclusion
When choosing between upcut and downcut bits, remember that the direction of chip removal considerably impacts edge quality. Some might think downcut bits are always superior, but they can lead to more heat buildup and potential material damage. Upcut bits, while they may leave a slightly rougher edge, effectively clear chips and reduce heat, ultimately enhancing the longevity of your tools and the overall finish of your project. So, weigh your priorities carefully before making a decision.
woodworking bit set for edge finishing
As an affiliate, we earn on qualifying purchases.
As an affiliate, we earn on qualifying purchases.
laminate and plywood router bits
As an affiliate, we earn on qualifying purchases.
As an affiliate, we earn on qualifying purchases.
Fall yard work Picks
leaf blowers
As an affiliate, we earn on qualifying purchases.