
To prevent twisting when assembling face frames, start by clamping corners first. Position your clamps for even pressure and guarantee they hold the structure firmly. Next, add clamps along the edges, checking for any misalignment or gaps. Adjust pieces as necessary for a snug fit before the glue sets. After removing the clamps, inspect for straight edges. Mastering this clamp order is key for sturdy results, and there’s more to learn about perfecting your technique.
Key Takeaways
- Start clamping at the corners to establish a stable foundation for the face frame assembly.
- Use additional clamps along the edges to maintain even pressure and alignment.
- Monitor for gaps between joints and adjust clamps as necessary to ensure a snug fit.
- Prioritize alignment by repositioning clamps if uneven spaces are detected during the process.
- Allow sufficient time for glue to set before removing clamps to maintain structural integrity.
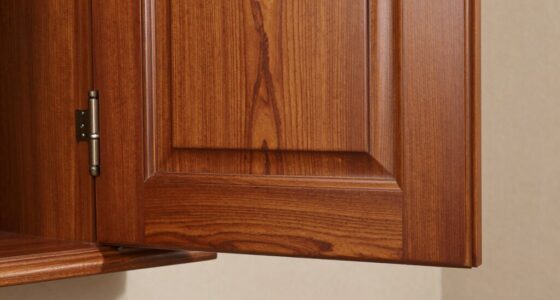
When you want to enhance your cabinetry without the hassle of twists and turns, face frames can be your best friend. They provide a sturdy structure that not only supports your cabinet doors but also adds a polished look to your overall design. However, achieving perfect frame alignment is essential to avoid any unwanted twists. The right clamp techniques can make all the difference in guaranteeing your face frames come together seamlessly.
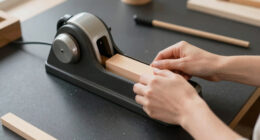
First, start by laying out your face frame pieces on a flat surface. This gives you a clear view of how everything fits together. Take a moment to double-check your measurements and verify each piece is cut accurately. Misalignment at this stage can lead to significant problems down the line. Once you’re satisfied with the layout, it’s time to get clamping.
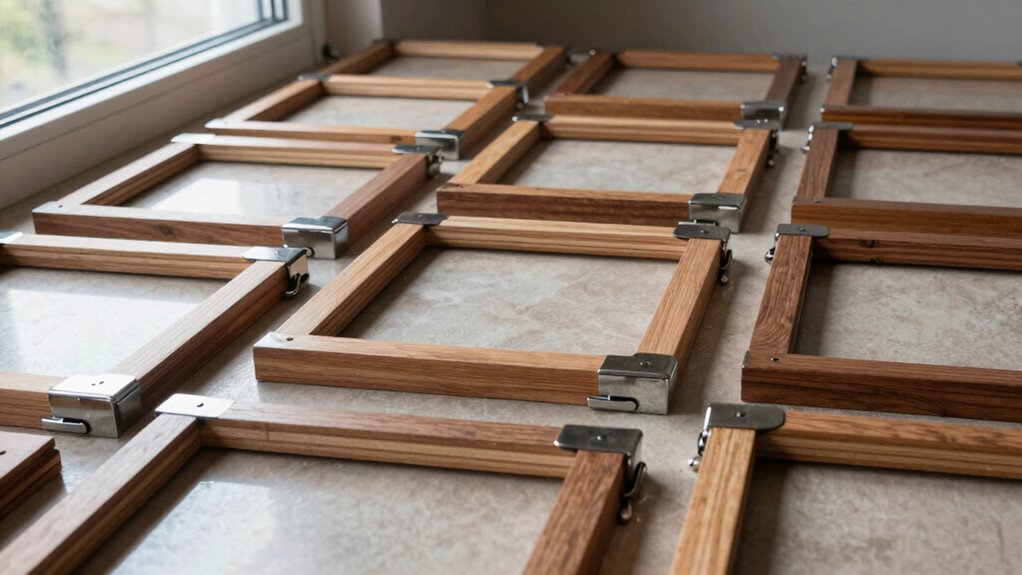
Using clamps effectively is key. You’ll want to position your clamps in a way that applies even pressure across all joints. This helps keep everything aligned while the glue dries. A common mistake is to place clamps haphazardly. Instead, focus on the corners and edges first. Apply a clamp to each corner to hold the structure in place. Then, add additional clamps along the sides, adjusting them as necessary to maintain frame alignment. Additionally, proper clamping techniques are crucial for ensuring consistent pressure and avoiding warping or twisting.
Positioning clamps for even pressure at corners and edges ensures proper alignment and a flawless finish for your cabinetry.
While clamping, keep an eye on the gaps between joints. If you notice any uneven spaces, you might need to reposition your clamps or adjust the pieces slightly until everything fits snugly. Remember, the goal is to create a tight bond between the wood pieces, so don’t rush the process. Allow the glue to set properly before moving on to the next steps.
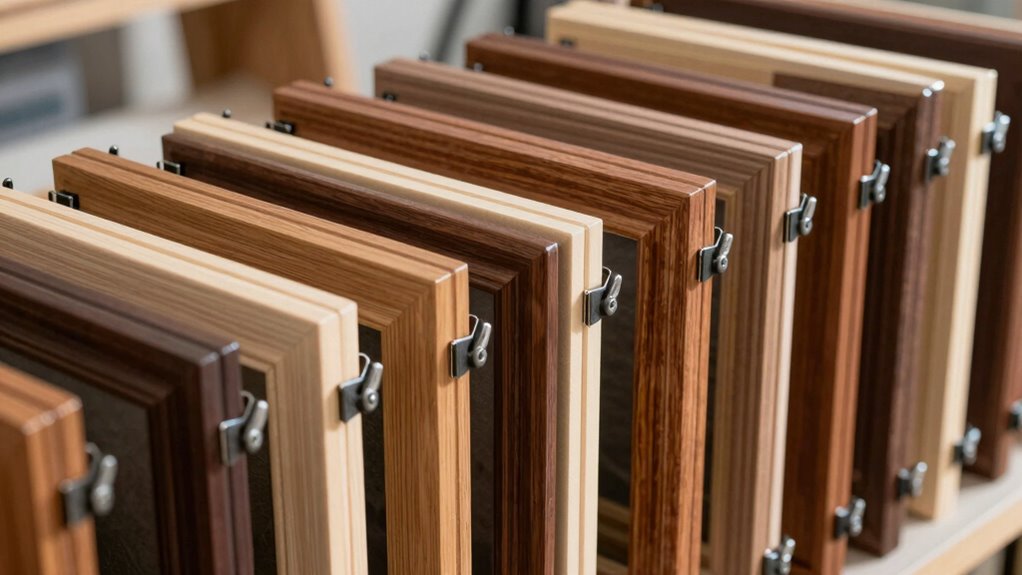
After the glue has dried, you can remove the clamps and inspect your work. A well-aligned face frame should display straight edges and even joints. If you spot any issues, take the time to sand or fill gaps as needed. A little extra effort now can save you headaches later when you attach doors or apply finish.
Finally, once everything’s in place, you’ll be able to appreciate the beauty of your cabinetry without any twists compromising the design. By mastering these clamp techniques and guaranteeing proper frame alignment, you’ll not only enhance the look but also the durability of your cabinets. Practicing proper clamping techniques and ensuring each joint is aligned correctly can significantly improve your results. With practice, you’ll find that achieving a flawless finish becomes second nature, allowing you to create stunning cabinetry with confidence.

PONY 2-Pack Cabinet Clamps, 8510 Cabinet Claw, Face Frame Clamps for Installing Cabinets, 440 lbs Load Limited Orange
【PONY 8510 Cabinet Claw】Complete your cabinetry projects in a fraction of the time with Pony cabinet claw. This…
As an affiliate, we earn on qualifying purchases.
As an affiliate, we earn on qualifying purchases.
Frequently Asked Questions
What Tools Are Best for Assembling Face Frames?
For assembling face frames, you’ll want a few essential tools. A pocket hole jig helps with joint alignment, ensuring your pieces fit snugly together. A reliable clamp is vital for frame stability, holding everything in place as the adhesive sets. A square can check your corners, while a power drill can speed up the process. With these tools, you’ll create sturdy, well-aligned face frames that stand the test of time.
How Do I Choose the Right Wood for Face Frames?
Choosing the right wood for face frames is like selecting the perfect canvas for your masterpiece. You’ll want to explore hardwood options like oak or maple for durability and elegance. If you’re after a lighter feel, softwood choices like pine or fir can work wonders too. Consider your project’s style and function, then let the wood speak to you. Ultimately, the right choice enhances both beauty and resilience in your creation.
What Are Common Mistakes to Avoid When Clamping?
When clamping, avoid common mistakes like poor alignment and uneven pressure. Make certain your pieces are properly aligned before tightening clamps; otherwise, you’ll face alignment issues that can ruin your project. Also, don’t over-tighten the clamps; it can warp your materials. Use effective clamping techniques, like starting from the center and working outward, to guarantee even pressure across your frame. These tips will help you achieve a solid, twist-free assembly.
How Long Should Glue Dry Before Unclamping?
You’ve just finished a project, and the anticipation builds. Typically, you should let glue dry for at least 30 minutes to an hour before unclamping. However, glue types and drying conditions matter. For instance, PVA glue may require more time in humid environments, while polyurethane glue can take longer. Always check the manufacturer’s instructions for the best results. Trust the process, and you’ll guarantee your project holds strong.
Can I Use Screws Instead of Glue for Face Frames?
Yes, you can use screws instead of glue for face frames. While screws provide excellent joint strength, they may not offer the same screw durability as glued joints over time. If you choose screws, make sure to pre-drill to avoid splitting the wood and guarantee a tight fit. Combining both methods can enhance stability, giving you the best of both worlds. Just remember, the right approach depends on your project’s specific needs.

WETOLS Corner Clamp for Woodworking, 90 Degree Right Angle Clamp, Wood Clamps, 4Pcs Adjustable Spring Loaded Woodworking Clamp, Gifts for Him, Birthday Gifts for Men, Photo Framing, Orange
Cool Gadgets Gifts for Men: WETOLS corner clamp comes with a nice gift box, which can be great…
As an affiliate, we earn on qualifying purchases.
As an affiliate, we earn on qualifying purchases.
Conclusion
To sum up, when it comes to face frames, following the right clamp order is key to avoiding twists. By taking the time to do it right, you’ll save yourself from headaches down the road. Remember, a stitch in time saves nine—getting those clamps in the proper sequence means your frame will come together smoothly. So, keep this in mind next time you’re working on your project, and you’ll see the difference in your results!

HORUSDY 8-Pack Bar Clamps for Woodworking, 12" and 6" Bar Clamps, Wood Working Clamp Sets, Quick Clamps F Clamp with 150 LBS Load Limit (8-Pack Wood Clamps)
1. The complete set includes 4pcs 6" bar clamps,2pcs 12" bar clamps and 2pcs 6" spring clamps, which…
As an affiliate, we earn on qualifying purchases.
As an affiliate, we earn on qualifying purchases.
Kreg Edge Band Spring Clamp – One-Handed Edge Banding Clamp with Stretch Band – Non-Marring with Pivoting Jaws for Uniform Pressure Glue-Ups – For Cabinetry, Trim & More – Set of 4
Stretchable Band Grip: The Kreg Edge Band Spring Clamp is equipped with a stretchable band that securely grips…
As an affiliate, we earn on qualifying purchases.
As an affiliate, we earn on qualifying purchases.