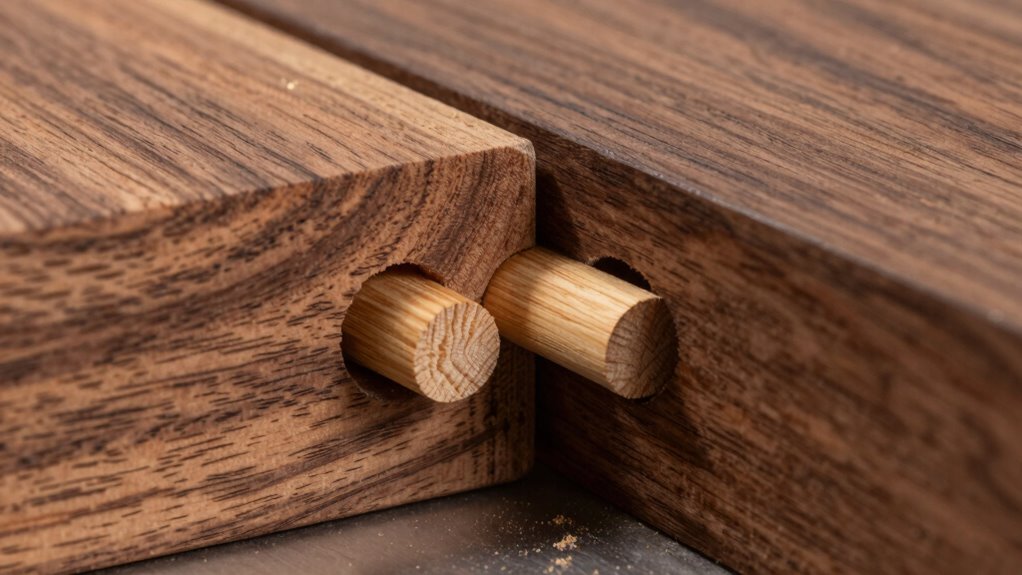
Proper dowel alignment is essential for strong, stable furniture joints that look professional. Many DIYers skip careful measuring and clamping, leading to crooked holes, weak connections, and uneven surfaces. To get the best results, you need precise marking, the right tools like doweling jigs, and secure clamping during drilling. If you want to avoid common mistakes and guarantee perfect fit, keep an eye on these critical steps—you’ll find out more if you keep going.
Key Takeaways
- Proper dowel alignment ensures joint strength, stability, and a professional appearance.
- Use precise measurements, marking tools, and clamps to avoid off-center holes.
- Employ doweling jigs and drill guides for consistent angles and depths.
- Double-check measurements and dowel placement before drilling to prevent misalignment.
- Maintaining steady alignment throughout the process guarantees durable, seamless furniture joints.

Beaiguna Self Centering Dowel Jig Kit, Drill Guide Jig Block for Straight Holes with 6PCS Drill Bushings, Premium Self Centering Doweling Jig Kit for Woodworking, Adjustable Width Biscuit Joiner Tool
FLEXIBLE ADJUSTMENT: Our wood dowel jig can clamp a wide range of wood blocks from 0.4 to 2…
As an affiliate, we earn on qualifying purchases.
As an affiliate, we earn on qualifying purchases.
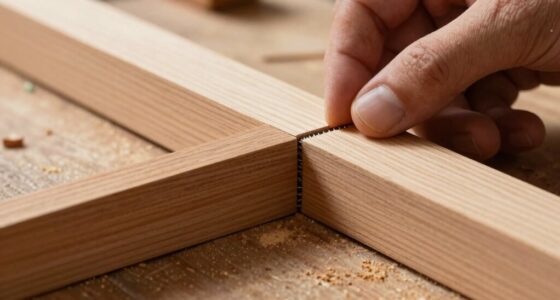
Why Proper Dowel Alignment Is Key to Strong Furniture Joints
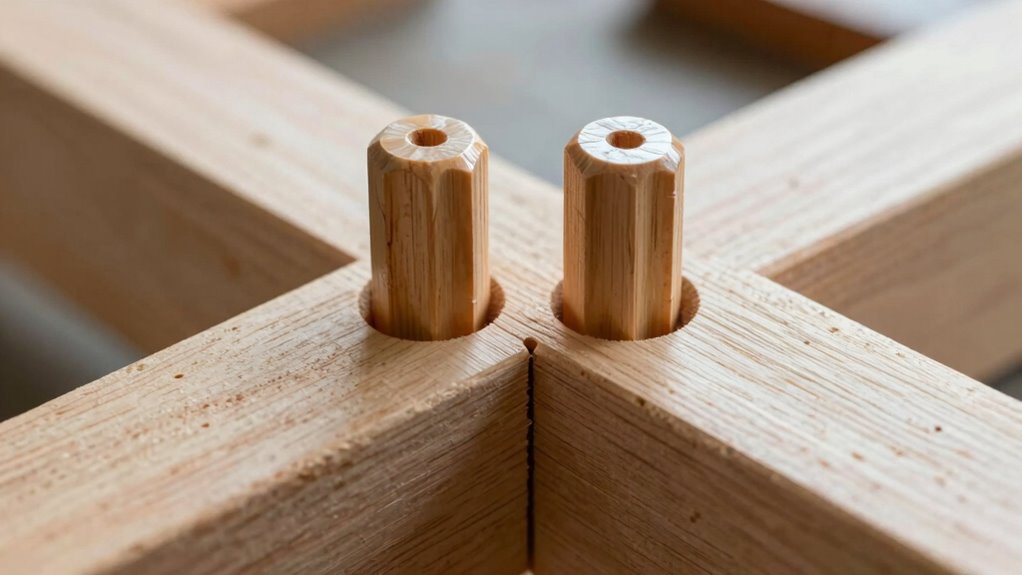
Proper dowel alignment is essential because it directly affects the strength and stability of your furniture joints. When dowels are aligned correctly, they create a tight, secure fit that withstands daily use. The dowel material you choose also impacts this stability; hardwood dowels like oak or maple provide durability, while softer woods may wear faster. Aesthetic considerations matter too—well-aligned dowels ensure clean, seamless joints that look professional. Misaligned dowels can cause gaps, weakening the joint and compromising the furniture’s integrity. Precise alignment ensures the dowels sit flush and distribute stress evenly, preventing wobbling or splitting over time. Additionally, understanding dowel placement techniques can help achieve perfect alignment more consistently. Using proper clamping methods during assembly can further improve joint accuracy. Paying attention to both dowel material and alignment, along with accurate measurement techniques, guarantees a sturdy, attractive finished piece that lasts. Moreover, incorporating proper drilling practices can significantly enhance the overall alignment process, leading to better results. Developing a clear step-by-step process can also help ensure consistent, high-quality results in your projects.

Self Centering Doweling Jig, Dowel Drill Guide 2/3/4/5/6/7/8/9/10mm Handheld Drill Guide for Straight Holes Wood Panel Hole Puncher Locator
Advanced Materials:Made of high-grade aluminum alloy, it has high hardness, wear resistance, oxidation resistance, firmness and excellent use…
As an affiliate, we earn on qualifying purchases.
As an affiliate, we earn on qualifying purchases.
Common Mistakes That Lead to Misaligned Dowels
One common mistake is rushing the marking process, which can cause your dowels to be off-center. Ensuring accurate measurement before marking helps prevent errors from the start. Using proper measurement tools like calipers or rulers can improve your accuracy significantly. Paying attention to these steps helps guarantee your dowels stay aligned and your joints are strong. Additionally, understanding proper tools and techniques can make a significant difference in achieving accurate results. For example, utilizing precision measurement tools ensures your markings are correct before drilling. Being aware of alignment techniques used by professionals can further improve your project outcomes.
Rushing the Marking
Rushing the marking process is a common mistake that often leads to misaligned dowels. When you hurry, you risk sacrificing marking accuracy, which is vital for proper alignment. Inconsistent measurement can result in holes that don’t line up properly, causing headaches during assembly. Take your time to double-check your measurements and confirm your marking tools are stable. Use a sharp pencil or marking gauge for precise lines, and verify each measurement before making a mark. Rushing creates room for errors that compound quickly, making adjustments difficult later. Prioritize accuracy over speed to get consistent measurements. This simple step saves you time and frustration down the line, ensuring your dowels align perfectly and your project stays true to its design. Additionally, understanding the importance of measurement accuracy can significantly improve your overall project quality.
Ignoring Clamping Techniques
Ignoring clamping techniques during dowel drilling is a common mistake that can easily lead to misalignment. Without proper clamping, your workpiece shifts or vibrates, compromising alignment accuracy. When you skip secure clamping, you risk uneven pressure, causing crooked holes or angled dowels. Imagine the drill slipping, creating jagged edges or off-center holes that throw off your entire project. To avoid this, use clamps that:
- Hold pieces firmly in place
- Prevent movement during drilling
- Distribute pressure evenly
- Keep your drill aligned precisely
Proper clamping ensures steady, controlled drilling, maintaining the correct angle and position. Neglecting this step makes misaligned dowels almost inevitable, jeopardizing the strength and appearance of your finished piece. Clamping techniques are essential for accurate, professional results. Additionally, understanding the alignment process helps prevent common pitfalls and ensures your dowels stay perfectly in line. Using the right workholding methods is crucial for achieving consistent, precise joint connections. Applying proper clamping pressure can further improve accuracy by reducing vibrations and movement during drilling. Ensuring consistent clamping pressure helps maintain stability and prevents shifting during the drilling process.

Relitec R 90 Degree Corner Clamp Clamping Squares Woodworking Tools Positioning Squares Right Angle Clamp Wood Clamps for Gluing Cabinets Picture Frames or Drawers Set of 8(3" 4")
ABS Material: Featuring a high-impact plastic construction that insures optimal and lightweight usability
As an affiliate, we earn on qualifying purchases.
As an affiliate, we earn on qualifying purchases.
Essential Tools and Techniques for Accurate Dowel Placement
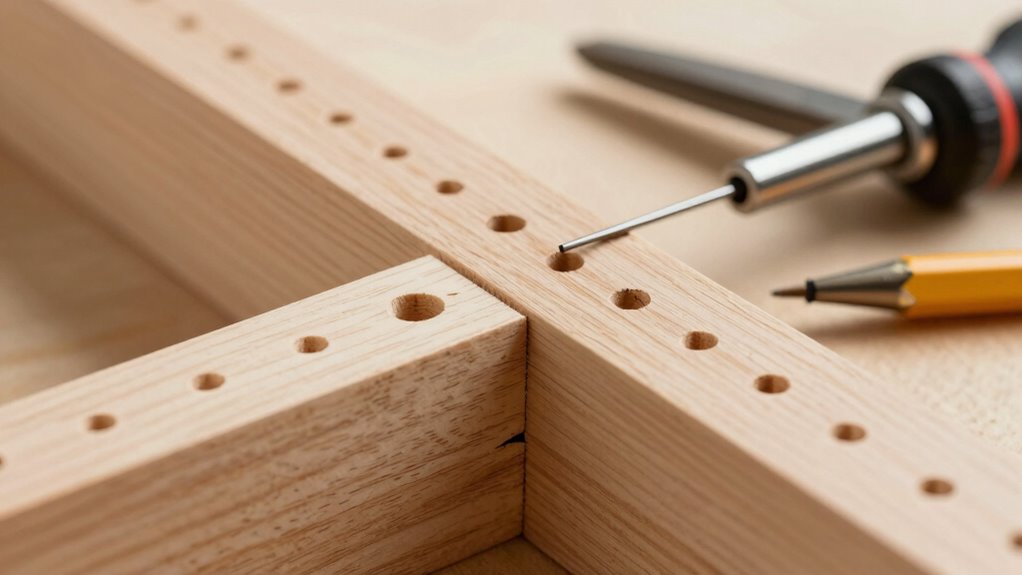
To guarantee your dowels are perfectly aligned, start with precise marking techniques that give you accurate placement points. Choosing the right drill and bit size is vital for clean, consistent holes, while maintaining a steady, repeatable alignment method helps prevent errors. Mastering these tools and techniques will greatly improve your results and save you time. Additionally, understanding proper alignment techniques ensures your project maintains structural integrity and aesthetic appeal. Paying attention to filtration and dust management during drilling can also help keep your workspace cleaner and safer. Proper body jewelry measurements can also prevent discomfort and ensure a secure fit during the project. Incorporating techniques for accurate measurements into your process will further enhance the precision of your dowel placement.
Precise Marking Techniques
Accurate dowel placement starts with precise marking, ensuring your holes align perfectly for strong joints. To achieve this, use sharp pencil marks that follow the wood grain’s direction, reducing visibility and ensuring a seamless finish match. Proper marking tools and techniques help you avoid misaligned holes that compromise strength and appearance. Visualize your work with these key steps:
- Aligning a square or marking gauge along the wood grain for consistent lines
- Using a fine-tipped pencil to trace precise, clear marks
- Confirming measurements with a reliable ruler or caliper for exact placement
- Double-checking mark positions for finish matching and proper spacing
Mastering these techniques guarantees your dowels sit perfectly, giving your project a professional look and durable strength.
Proper Drill Selection
Choosing the right drill is essential for guaranteeing your dowel holes are perfectly aligned and cleanly cut. Start by selecting a drill bit that matches the dowel diameter you plan to use; this secures a snug fit and strong joint. Using a bit that’s too small can weaken the connection, while a bit that’s too large may cause misalignment. Opt for high-quality, sharp drill bits designed for woodworking to prevent splintering and assure smooth holes. Consider a drill with adjustable speed settings to control the cutting process, especially in hardwoods. Additionally, using a drill guide or jig can help maintain consistent angles and depths. Proper drill selection streamlines your project, resulting in precise dowel placement and stronger, more professional-looking joints. Ensuring your drill is compatible with the correct oil for maintenance can also prevent overheating and prolong tool lifespan.
Consistent Alignment Methods
Ensuring your dowels align perfectly every time requires reliable tools and techniques. Consistent alignment methods help you achieve professional results, regardless of the dowel material or finishing techniques. Use a drill guide to ensure straight holes and prevent misalignment. Clamps keep pieces steady, preventing shifting during drilling. Marking jigs help you position dowels accurately, avoiding guesswork. Finally, double-check measurements before drilling to maintain precision. Visualize these tools in action:
- A sturdy drill guide clamped securely to your workpiece
- Clamps holding parts in perfect alignment
- A marking jig guiding your drill bit for consistent placement
- A measuring tape or square confirming measurements before drilling
Mastering craftsmanship guarantees that your dowels are aligned correctly, providing strength and a seamless finish every time.
Beaiguna Self Centering Dowel Jig Kit, Drill Guide Jig Block for Straight Holes with 6PCS Drill Bushings, Premium Self Centering Doweling Jig Kit for Woodworking, Adjustable Width Biscuit Joiner Tool
FLEXIBLE ADJUSTMENT: Our wood dowel jig can clamp a wide range of wood blocks from 0.4 to 2…
As an affiliate, we earn on qualifying purchases.
As an affiliate, we earn on qualifying purchases.
How to Align Dowels Step by Step for Perfect Results
To achieve perfectly aligned dowels, you need to follow a careful step-by-step process. First, select the appropriate dowel types based on your furniture design and the strength needed. Mark the dowel holes precisely using a pencil and a measuring square to ensure correct placement. Drill the holes straight and at the correct depth, using a drill guide if possible. Insert the dowels into one piece, then align the second piece carefully, making sure the dowels line up perfectly with their corresponding holes. Use clamps to hold pieces steady during assembly. Double-check alignment before tightening joints. Paying attention to wood movement and how it affects joint positioning can help prevent misalignment over time. Incorporating proper joinery techniques can also enhance the durability and appearance of your project. This method ensures your dowels are perfectly aligned, resulting in a sturdy, professional-looking finished piece.
Tips to Ensure Consistent and Precise Dowel Alignment

Maintaining consistent and precise dowel alignment requires careful attention to detail throughout the assembly process. To achieve this, double-check your dowel spacing before drilling, ensuring even gaps for a clean look and strong joints. Use a doweling jig to keep dowels aligned accurately, preventing skewed joints that compromise aesthetics. Keep your workpiece steady with clamps, so movement doesn’t throw off your measurements. Visualize the joint as a seamless connection—proper dowel placement enhances both strength and visual appeal. Remember these tips for consistent alignment:
Ensure precise dowel alignment with careful measurement, a jig, and steady clamps for strong, attractive joints.
- Measure and mark dowel locations carefully
- Use a jig for uniform dowel spacing
- Clamp workpieces to prevent shifting
- Verify alignment before final assembly
Following these steps helps you create precise, attractive joints that stand the test of time.
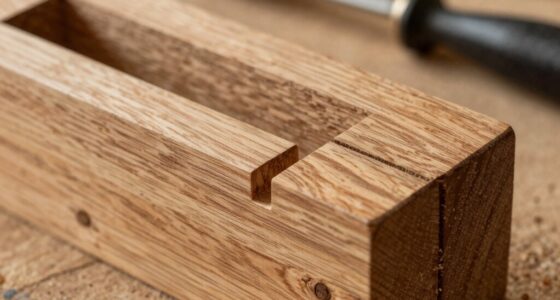
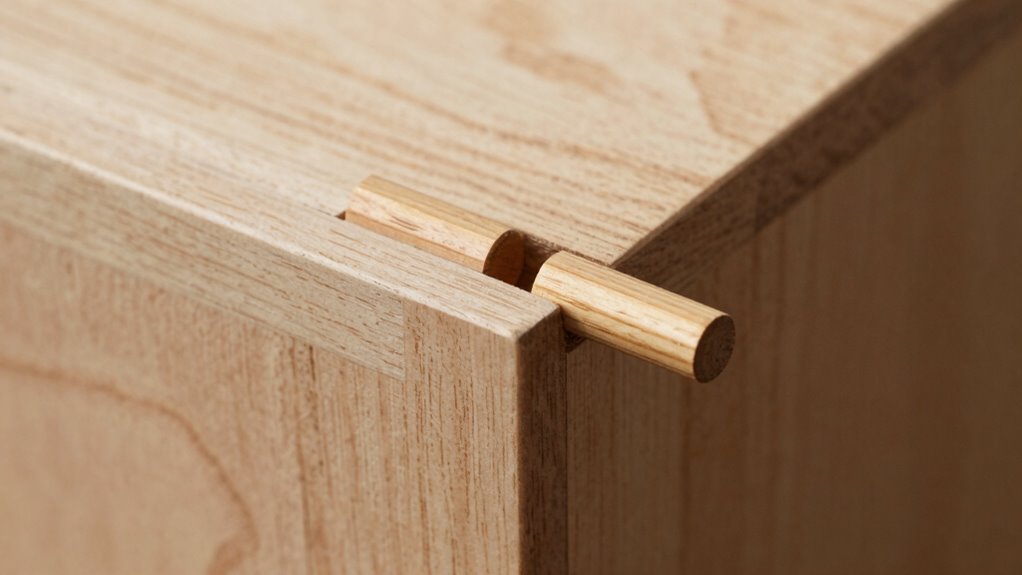
How Misaligned Dowels Weakens Your Furniture and Ruins the Look
When dowels are misaligned, they compromise the strength and stability of your furniture. Incorrect dowel diameter or poor alignment causes joints to be weak, increasing the risk of wobbling or breaking over time. Misaligned dowels also disrupt the natural flow of the wood grain, making the furniture look uneven or sloppy. When the dowel doesn’t follow the wood grain properly, it can cause splitting or chipping, further weakening the piece. Poor alignment results in gaps or crooked surfaces that ruin the aesthetic appeal. Even if your dowels are sturdy, improper positioning undermines the entire project. To guarantee your furniture stays strong and looks polished, always pay attention to proper dowel placement, matching the dowel diameter closely to the hole, and aligning with the wood grain.
Troubleshooting Dowel Alignment Problems and Fixing Errors
Misaligned dowels can be frustrating, but identifying and fixing these issues is straightforward with the right approach. First, check the dowel diameter to ensure it fits snugly without forcing. Examine the wood grain direction—opposite grain can cause misalignment or splitting. When troubleshooting, look for these signs:
- Dowel holes that don’t line up
- Gaps between joints
- Wobbly or loose fit
- Dowel that’s crooked or tilted
If you notice mismatched holes, adjust the drill angle or re-drill with the correct dowel size. For crooked dowels, remove and re-drill aligned with the grain. Always verify the wood grain direction to prevent future errors. Correctly matching dowel diameter and aligning with the grain ensures a tight, seamless fit.
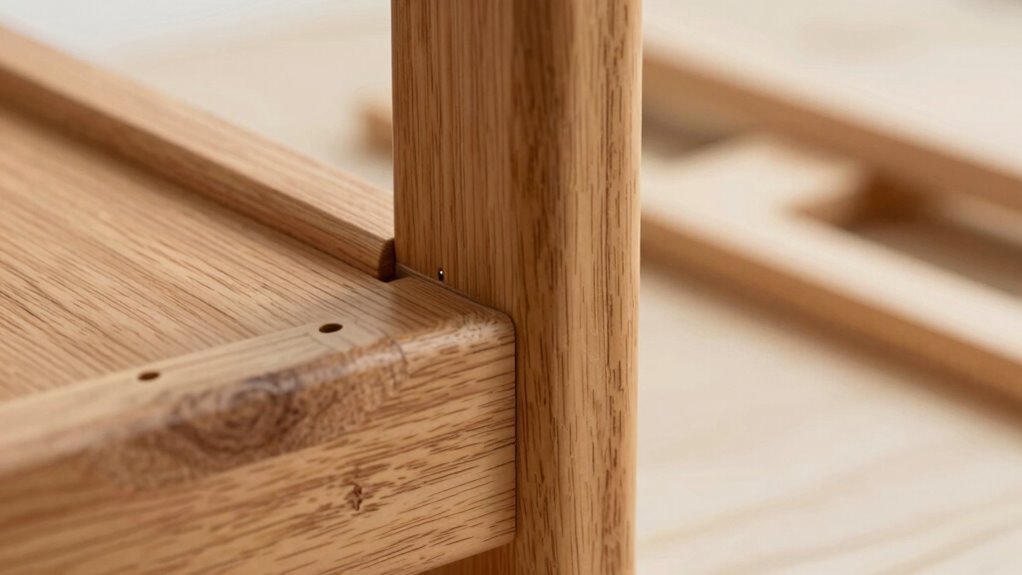
Final Checks and Best Practices for Seamless Dowel Joints
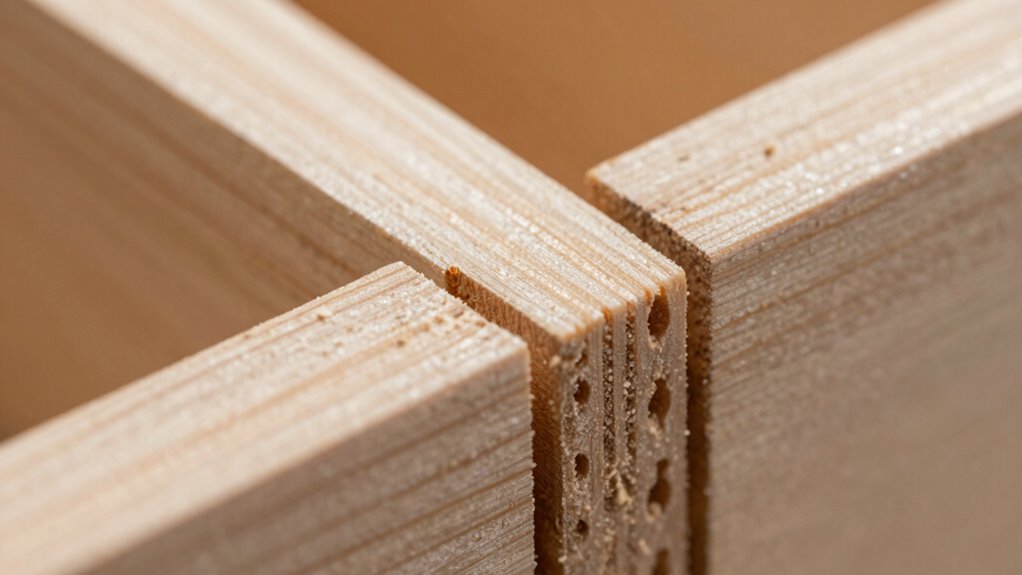
To guarantee your dowel joints are seamless and durable, it’s essential to perform thorough final checks before completing assembly. Start by inspecting the alignment of dowel materials—ensure all dowels are flush and properly seated. Check that the holes are clean and free of debris, which can compromise strength. Confirm that the joints are tight and that the pieces are flush, avoiding gaps. Use a square to verify right angles. Once assembled, apply finishing techniques like sanding and sealing to enhance durability and appearance. Consider the wood type and finish compatibility for a professional look. Here’s a quick checklist:
| Checkpoint | What to Inspect | Why It Matters |
|---|---|---|
| Dowel Seating | Properly seated, flush | Ensures strength and alignment |
| Joint Tightness | No gaps or looseness | Prevents future splitting |
| Finishing Compatibility | Suitable finishing techniques | Extends lifespan, aesthetic appeal |
Frequently Asked Questions
How Do I Choose the Right Size and Type of Dowels?
You should choose a dowel diameter that matches the thickness of your wood, typically around one-third of the thickness, for strength. Consider the wood grain direction—using dowels aligned with the grain guarantees better support and reduces splitting. Opt for hardwood dowels like oak or maple for durability. Measure precisely, and select a size that fits snugly without forcing, ensuring a secure, aligned joint every time.
Can I Fix Misaligned Dowels After Assembly?
Yes, you can fix misaligned dowels after assembly, but it’s no small feat—like trying to straighten a hurricane’s path! For dowel repair and misalignment correction, carefully drill out the misaligned dowel, then re-drill and reinsert a properly sized one. Use wood glue for a secure fit, and clamp everything tight. Patience is key; with steady hands, you can salvage your project and restore perfect alignment.
What Are the Best Clamps to Use During Dowel Alignment?
You should use bar clamps or C-clamps during dowel alignment for the best results. These clamp types provide even pressure, ensuring the dowels stay in perfect alignment as you drill and assemble. For ideal alignment techniques, place the clamps across the joint, tighten gradually, and check the fit frequently. This approach prevents misaligned dowels and guarantees a sturdy, professional finish.
How Does Wood Type Affect Dowel Placement Accuracy?
Think of wood like a river—its grain and moisture content influence how it flows and holds. Different wood types, like oak or pine, have varying grain patterns, which can shift or warp, affecting dowel placement accuracy. For example, high moisture content causes swelling, making alignment tricky. You need to take these factors into account to ensure the dowels stay true, especially when working with diverse woods.
Are Power Tools Necessary for Perfect Dowel Alignment?
Power tools aren’t strictly necessary for perfect dowel alignment if you use manual drilling with a quality dowel jig. The jig helps you keep the drill steady and aligned, ensuring accurate placement. While a drill makes the process faster, manual drilling combined with a dowel jig can achieve precise results. Focus on steady hands, proper jig setup, and patience to get perfectly aligned dowels without needing power tools.
Conclusion
Remember, proper dowel alignment is the backbone of strong, beautiful furniture—skipping this step is like building on shifting sands. By paying close attention to your measurements, tools, and technique, you’ll guarantee your joints stay tight and true. Think of aligned dowels as the keystone in an arch; when they’re right, everything else falls into place seamlessly. Master this step, and your craftsmanship will stand the test of time.