To fix snipe on your planer, you need to check and adjust several key factors. Make sure your bed is level and aligned, blades are sharp, and rollers are properly tuned. Use support boards near the infeed and outfeed to stabilize your material, and set the feed roll tension correctly. Avoid common mistakes like uneven blade height or insufficient dust collection. If you keep these tips in mind, you’ll markedly reduce snipe—keep going to learn more effective setup techniques.
Key Takeaways
- Ensure the planer bed is perfectly level and properly aligned to prevent uneven cuts and snipe.
- Regularly inspect and sharpen or replace blades to maintain consistent, clean cuts.
- Use supporting boards near the ends and mid-span to stabilize material and reduce snipe.
- Calibrate feed rate and tension settings to promote smooth movement and minimal snipe occurrence.
- Have a professional inspect internal components like rollers and internal parts for precise adjustments.
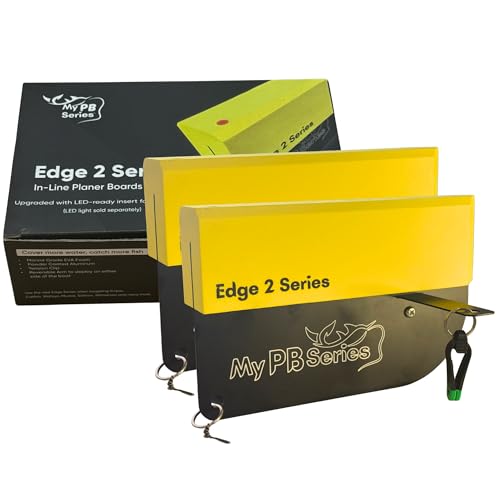
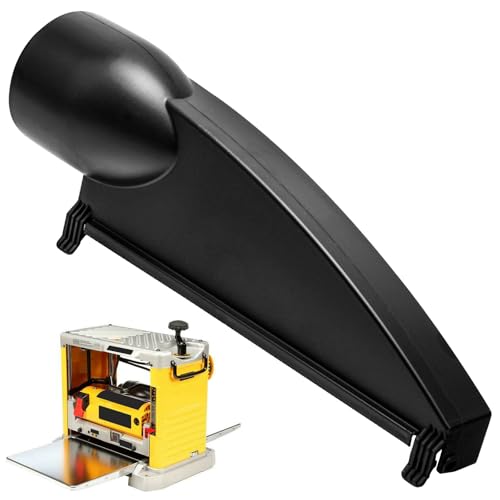
My PB Series Edge 2 Planer Boards | Heavy-Duty 10" Aluminum & EVA Foam | Lightweight, Curved Front for Low Drag | Adjustable for Catfish, Striper & More | 2-Pack (Yellow, Medium)
HEAVY DUTY PERFORMANCE – The new My PB Series Edge 2 planer boards are built 10" long with…
As an affiliate, we earn on qualifying purchases.
As an affiliate, we earn on qualifying purchases.
Why Does Snipe Happen in Your Planer Boards?

Snipe occurs in your planer boards primarily because of uneven pressure or movement during the planning process. When your blades aren’t sharp enough, it can cause inconsistent cuts, leading to snipe. Regular blade sharpening ensures the blades cut smoothly and evenly, reducing the chances of uneven pressure that causes snipe. Dust collection also plays a vital role; if dust isn’t cleared efficiently, it can interfere with the planer’s movement and stability. Accumulated dust can cause the board to shift or tilt slightly during planning, resulting in snipe at the ends. Proper maintenance, including keeping blades sharp and maintaining an effective dust collection system, helps guarantee consistent pressure throughout the process, minimizing snipe and producing cleaner, flatter results. Additionally, using advanced dust extraction systems can further improve the overall quality of your planning. Ensuring your planer is well-calibrated and pressure distribution is even across the board also significantly reduces the risk of snipe.

AUXTUR Sharpening Stone with Honing Guide Tool Set for Woodworking,Flattening Stone,Complete Sharpening System Woodworking Tools for Chisel Sharpening and Plane Restoration(guide+stone)
New Angle Fixing Tool – This honing guide can secure and fine-tune the angle where the chisel edge…
As an affiliate, we earn on qualifying purchases.
As an affiliate, we earn on qualifying purchases.
What Parts of Your Planer Need Checking to Prevent Snipe?
To prevent snipe, you need to check several key parts of your planer. Start by ensuring the bed is properly aligned and leveled, as misalignment causes uneven cuts. Also, examine the cutter head and rollers for wear or damage that could lead to uneven feeding and snipe.
Bed Alignment and Leveling
Making sure your planer’s bed is properly aligned and leveled is essential for preventing snipe. If the bed isn’t flat, uneven cuts cause dips at the ends of your boards. Check the bed surface for warping or dents and adjust the leveling screws accordingly. You should also verify that the infeed and outfeed supports are level with the bed to avoid uneven feeding. Proper dust collection keeps debris from affecting bed alignment, while regular motor maintenance prevents vibrations that could throw off leveling. Use this table to guide your checks:
| Part to Check | What to Look For |
|---|---|
| Bed Surface | Warping, dents |
| Supports | Level with bed |
| Dust Collection | Blockages, leaks |
| Motor Mounts | Vibrations, looseness |
Ensuring all these parts are properly maintained is key to achieving a snipe-free surface, resulting in cleaner, smoother cuts every time.
Cutter Head Condition
Since the cutter head directly influences the quality of your cut, it’s essential to check its condition regularly. A dull or damaged cutter head can cause uneven cuts and increase snipe issues. Inspect the cutter head for any signs of wear, cracks, or corrosion. Verify the blades are sharp; dull blades force the cutter head to work harder, leading to inconsistent results. Proper blade sharpness not only improves cut quality but also reduces strain on the motor. Remove and examine the blades frequently, replacing or sharpening them as needed. Keep the cutter head clean and free of debris to prevent buildup that can affect performance. Regular maintenance of the cutter head condition ensures smooth operation and helps eliminate snipe caused by dull or misaligned blades. Additionally, checking the blade alignment and ensuring it is precise can significantly reduce snipe problems. Paying attention to vibration levels during operation can also help detect any issues with the cutter head or blades before they cause more significant problems. Incorporating routine inspections and adjusting cutting parameters into your maintenance schedule can further prevent unexpected snipe issues and prolong the lifespan of your equipment. To further optimize performance, consider the impact of blade sharpness on overall cutting efficiency.
Feed Rollers and Rollers
Feed rollers and rollers play an essential role in maintaining consistent pressure on your workpiece, which helps prevent snipe. Regular feed roller maintenance ensures they stay clean, free of debris, and properly aligned. Check for wear or damage that could cause uneven feeding. Adjust roller pressure if your planer has this feature; proper roller pressure adjustment is key to ensuring consistent contact with the wood. Too little pressure can lead to slipping, while too much can cause snipe. Make sure the rollers are set according to your planer’s specifications. Properly maintained and adjusted rollers promote smooth feeding and help eliminate snipe, resulting in a cleaner, more professional finish on your projects. Regular checks and adjustments are crucial to achieving ideal results.

Filament Friday E-Leveler 2 – The Original 3D Printer Electronic Bed Leveling Tool
FILAMENT FRIDAY E-LEVELER 2: The original electronic bed leveling tool created and featured by Chuck Hellebuyck on the…
As an affiliate, we earn on qualifying purchases.
As an affiliate, we earn on qualifying purchases.
How to Properly Adjust Your Planer Bed for Better Results
To achieve smooth, accurate cuts, you need to properly adjust your planer bed before starting work. First, ensure the bed is level and securely supported, preventing any dips or uneven surfaces that can cause snipe. Adjust the cutting speed to match the material and keep the feed steady; a consistent speed reduces vibrations that impact cut quality. Proper dust collection is also essential—clogged or inefficient systems can obscure your work area, leading to errors. Clear dust regularly and use appropriate collection attachments to maintain visibility and safety. Double-check the bed’s alignment after adjustments, and run a test piece to verify results. When the bed is correctly set, you’ll notice cleaner cuts and fewer snipe issues, making your projects more precise and professional. Understanding tool maintenance and regular calibration can also extend the life of your planer and improve performance. Additionally, maintaining proper bed alignment ensures consistent results and minimizes the risk of snipe. Regularly inspecting the planer components helps prevent unexpected issues that could affect your work quality.
5140006-97 Planer Dust Hood Compatible with D-eWalt DW734 Type 1
Planer Dust Hood Replaces 5140006-97, 514000697
As an affiliate, we earn on qualifying purchases.
As an affiliate, we earn on qualifying purchases.
How to Set Feed Roll Tension to Reduce Snipe

Adjusting the feed roll tension correctly plays a key role in minimizing snipe during planning. If the tension is too tight, it puts unnecessary strain on the blade and causes uneven cutting. Too loose, and the board may slip, increasing snipe risk. To set the tension effectively:
- Start with a moderate tension, ensuring the feed roll holds the wood securely without excessive force. Proper tension helps prevent material slippage and ensures consistent feed.
- Check your blade sharpness; a sharp blade reduces the need for high tension to achieve a clean cut.
- Make small adjustments, then test with scrap material, observing the snipe level. Fine-tune until you find the best tension for smooth, even planning. Proper feed roll tension balances grip and pressure, minimizing snipe and improving overall finish.
- Regularly monitor your equipment to ensure consistent tension and optimal performance, especially as blades and belts wear over time. Maintaining proper tension levels can prevent unnecessary strain on components and improve operational safety. Additionally, understanding the lifecycle and performance metrics of your equipment can help in scheduling timely maintenance, preventing unexpected issues. Considering the net worth of individuals involved in equipment upgrades can also inform investment decisions, ensuring you allocate resources effectively. Maintaining proper tension and equipment health helps sustain ideal tension levels and prolongs tool life.
Why Supporting Boards Correctly Matters During Planning
Supporting boards properly during planning is essential to achieve a smooth and even finish on your workpiece. They stabilize your material, preventing vibrations that cause uneven cuts and snipe. Properly supported boards also enhance woodworking safety by reducing the risk of kickback or slipping. To ensure your setup is correct, consider these factors:
| Support Position | Material Compatibility | Safety Tips |
|---|---|---|
| Near Planer Bed | Use sturdy, flat boards | Secure boards firmly |
| End Supports | Avoid overhangs | Wear safety gear |
| Mid-Span Support | Prevent sagging | Keep hands clear |
Using supporting boards correctly minimizes snipe, improves cut quality, and keeps you safe during planning. Proper support is a critical step for effective woodworking. Additionally, understanding the safe installation practices ensures your setup remains stable and reduces the risk of accidents. Employing the correct support techniques can further enhance the precision and safety of your woodworking projects. Regularly checking your supports for stability is also an important maintenance consideration to prevent issues during operation.
Step-by-Step: Calibrate Your Planer for Snipe-Free Cuts

To get snipe-free cuts, you need to carefully calibrate your planer. Start by checking the blade alignment to guarantee clean cuts, then adjust the bed leveling for even support. Finally, fine-tune the feed rate to prevent uneven movement and minimize snipe. Additionally, understanding the latest in electronics and gadgets can help you select the most advanced planer features for optimal results.
Check Blade Alignment
Ensuring your planer’s blades are properly aligned is crucial for achieving smooth, snipe-free cuts. A precise blade check helps identify misalignments that cause snipe. To correct this, follow these steps:
- Remove the blade guard and inspect the blades for uneven wear or damage.
- Use a straightedge to verify blade alignment, checking for any tilt or wobble.
- Perform alignment correction by adjusting the blade height and tilt screws until the blades sit perfectly flush and parallel to the planer bed.
Proper blade check and alignment correction prevent uneven cuts and minimize snipe. Confirm that blades are securely tightened after adjustments. Regular maintenance ensures consistent results and prolongs blade life. Proper setup makes all the difference in achieving professional-quality finishes.
Adjust Bed Leveling
Adjusting your planer’s bed leveling is vital for achieving consistent, snipe-free cuts. Start by ensuring your planer is on a flat, stable surface, and check for any wobbling. Proper bed leveling prevents uneven pressure that causes snipe, especially at the start and end of cuts. Use a dial indicator or straightedge to verify the bed’s levelness, making adjustments as needed. Efficient dust collection is essential during this process to keep the workspace clear and avoid debris that could affect measurements. Additionally, regularly sharpen your blades; dull blades can lead to uneven cuts and increase snipe. Once the bed is level and blades are sharp, run a test cut to confirm your adjustments. Incorporating bed-leveling techniques can also help you assess the quality of your cuts from different angles. Maintaining a flat, stable surface is crucial for consistent results and helps prevent movement that could introduce snipe. These steps help create a smooth, snipe-free surface every time.
Fine-Tune Feed Rate
Fine-tuning your feed rate is essential for achieving consistent, snipe-free cuts. Proper speed adjustment ensures the planer moves smoothly without causing snipe at the ends. To maximize your feed rate:
- Start with the manufacturer’s recommended feed rate and gradually increase or decrease it.
- Observe the cut quality at different speeds, noting where snipe begins to appear.
- Adjust the feed rate incrementally, testing each time until you find the best balance.
Common Mistakes That Cause Snipe and How to Avoid Them
One common mistake that causes snipe issues is misaligning the planer blades or improperly setting the cutting depth. When your blades aren’t aligned, it can lead to uneven cuts and increased snipe at the ends of your boards. Also, neglecting proper dust collection can cause debris buildup, which affects blade performance and worsens snipe. To avoid this, check blade alignment regularly and set the correct depth for your project. Proper dust collection not only keeps your workspace cleaner but also reduces noise, making operation smoother and more controlled. Ensuring your planer is well-maintained and calibrated prevents unnecessary mistakes that cause snipe, saving you time and frustration. Focus on these details to achieve cleaner, more consistent results every time.
How to Test Your Setup and Confirm Snipe Is Gone

To verify that your setup is free of snipe, you should conduct a simple test by running a scrap piece through your planer and carefully inspecting the cut. Look closely at the ends of the board where snipe typically appears. To confirm snipe is gone, consider these steps:
- Check board tension—ensure your stock is flat and stable during planing.
- Examine the cut edges for smoothness, which indicates proper blade sharpening.
- Run multiple tests, adjusting your setup as needed until ends are consistently clean and snipe-free.
If snipe persists, revisit blade sharpening and ensure your planer bed is properly aligned. Proper tension and sharp blades are key to confirming your setup is effective.
Extra Tips and Accessories to Help Minimize Snipe

Using the right accessories and extra tips can substantially reduce snipe even further. One effective method is improving dust collection; a well-maintained dust port keeps debris away from the cutter, reducing uneven cuts. Consider using a sled or support system to stabilize your workpiece, minimizing movement that causes snipe. Always wear proper safety gear—gloves, goggles, and hearing protection—to stay safe during adjustments and operation. Additionally, adding feather boards or push sticks helps maintain consistent pressure, preventing snipe at the ends. Using a roller stand or extension table can support thicker stock, reducing strain on the planer. These accessories and tips work together to refine your setup, leading to cleaner, snipe-free results with less effort and increased safety.
When to Seek Professional Help for Persistent Snipe Problems

Despite applying all the recommended tips and adjustments, some snipe issues may persist. If you’ve checked blade maintenance, optimized dust collection, and fine-tuned your setup without success, it’s time to seek professional help. Persistent snipe could indicate underlying problems with your planer’s mechanism or alignment that require expert assessment. Consider consulting a technician if:
- You notice uneven blade wear or difficulty maintaining sharp blades.
- Dust collection isn’t effectively removing debris, affecting machine performance.
- The snipe remains despite proper setup and routine maintenance.
Professional inspection can identify issues like misaligned rollers or internal components needing repair, ensuring your planer operates smoothly and minimizes snipe consistently. Don’t hesitate to get expert help if DIY fixes fall short.
Frequently Asked Questions
Can Snipe Occur With Different Types of Wood?
Yes, snipe can occur with different types of wood because each wood grain reacts differently during planing. When you adjust the planer thickness, you might notice snipe more on certain woods, especially those with uneven grain or softer textures. To minimize snipe, make sure your wood is properly supported and your planer setup is correct, regardless of the wood type. Proper technique helps achieve a smooth finish across all wood varieties.
Does Blade Sharpness Affect Snipe Occurrence?
Imagine your planer blade as the sharp edge of a well-tuned sword—when it’s sharp, cuts are clean and smooth. Dull blades cause uneven pressure, leading to snipe. Proper blade maintenance and regular planer calibration are essential to prevent this. A sharp blade reduces snipe occurrence, ensuring your project stays flat and flawless. Keep your blades sharp and your planer calibrated, and you’ll slice through woodworking with precision, avoiding those pesky dips.
How Does Humidity Influence Snipe Problems?
Humidity impacts snipe problems because higher moisture content makes wood more prone to warping during planing. When humidity levels fluctuate, the wood expands and contracts, increasing the likelihood of snipe. You should regulate the environment or acclimate your wood to stable humidity to minimize warping. Properly managing moisture content helps ensure smoother passes and reduces snipe, giving you cleaner, more consistent results.
Is Snipe More Common With Certain Planer Brands?
Yes, snipe tends to be more common with certain planer brands, especially those with inconsistent manufacturer quality. You’ll notice that some brands lack the build precision needed to prevent snipe, leading to uneven cuts. To minimize this, choose a planer known for brand consistency and reliable construction. Regularly maintaining your planer and using proper setup techniques also help reduce snipe, regardless of the brand.
Can Using a Sled or Jig Eliminate Snipe Entirely?
Using a sled or jig can critically reduce snipe, but it might not eliminate it entirely. Studies show that proper dust collection and adjusting feed roller pressure are vital in minimizing snipe. When you stabilize your workpiece with a sled or jig, you guarantee even pressure and better support, preventing dips at the ends. Combine this with good dust collection and correct roller pressure to get the best results.
Conclusion
Fixing snipe is like tuning a fine instrument—you need to get each part just right. By checking your planer’s setup, adjusting the bed and feed tension, and supporting your boards properly, you can banish snipe for good. Don’t rush these tweaks; patience is your best tool. When your planer sings in harmony instead of screeching snipe, you’ll know you’ve struck the right chord. Keep troubleshooting, and smooth, snipe-free boards will become your new normal.