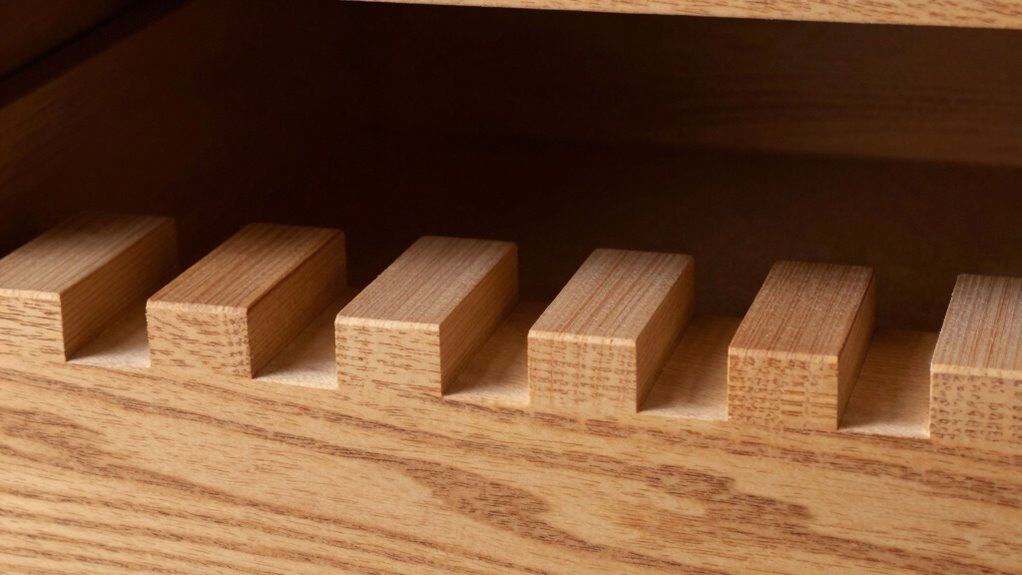
To prevent drawer blowouts, you should position the bottom groove away from the center, typically near the rear or sides, where it provides maximum support and distributes weight evenly. Proper depth and accurate placement are vital, especially for heavy loads, since shallow or misaligned grooves weaken the structure. Ensuring precise marking, using quality tools, and considering drawer style help achieve durable results—keep going to learn how to master this essential technique.
Key Takeaways
- Place grooves near the rear or sides of the drawer, avoiding the center, to evenly distribute support and prevent blowouts.
- Ensure grooves are deep enough to securely hold the bottom panel without weakening the material, typically near the top or bottom edges.
- Use precise measurements and marking tools to align grooves accurately, maintaining proper spacing for load distribution.
- Avoid overly shallow or misaligned grooves that can cause the bottom panel to slip or crack under stress.
- Reinforce groove edges with glue or supports to maintain structural integrity and prevent blowouts over time.

Kreg KHI-Slide Drawer Slide Jig – Drawer Slide Jig Kit – Drawer Slide Tool – for Cabinets, Drawers, Desks & More – Easily Install Drawer Slides – Set of 2
Premium Home Improvement Tool: Take the guesswork out of drawers with the Drawer Slide Jig; easily create level…
As an affiliate, we earn on qualifying purchases.
As an affiliate, we earn on qualifying purchases.
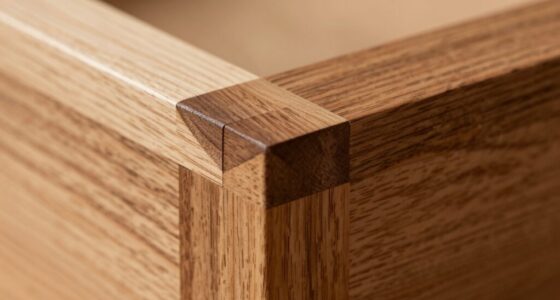
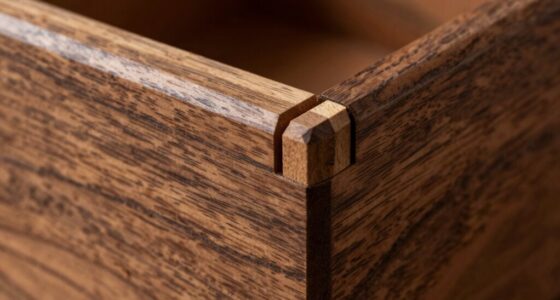
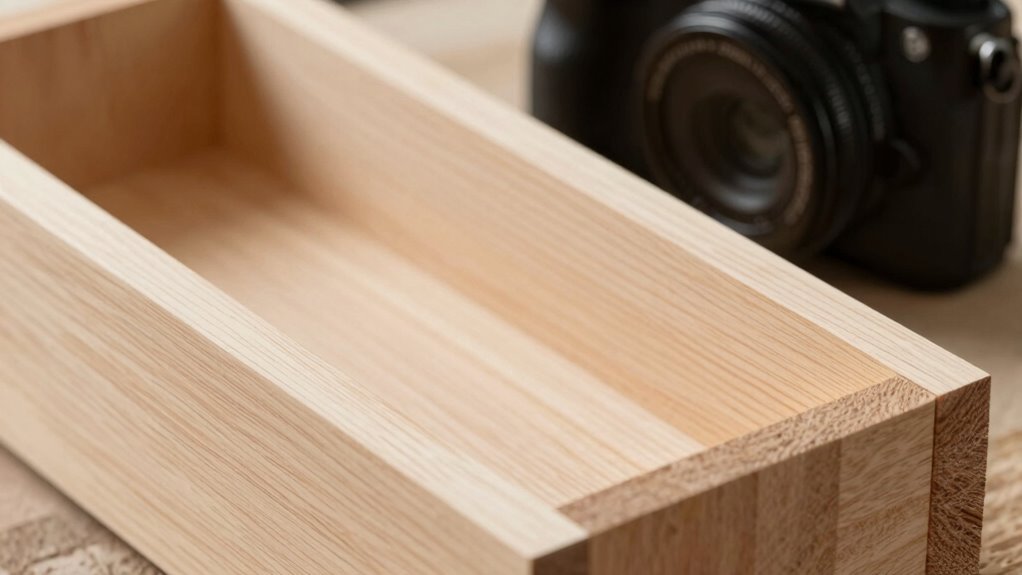
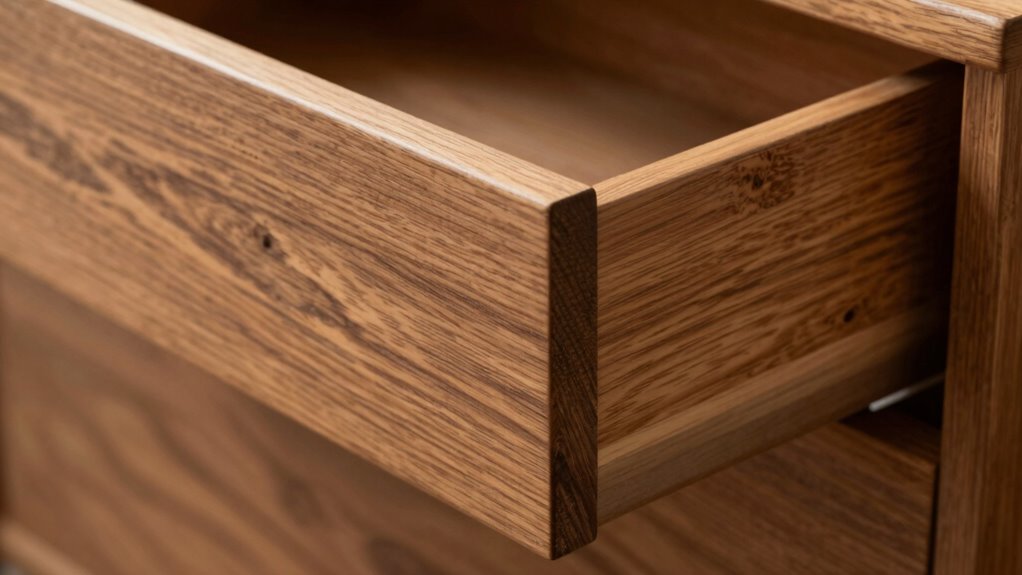
Why Drawer Bottom Grooves Are Critical for Strength and Durability
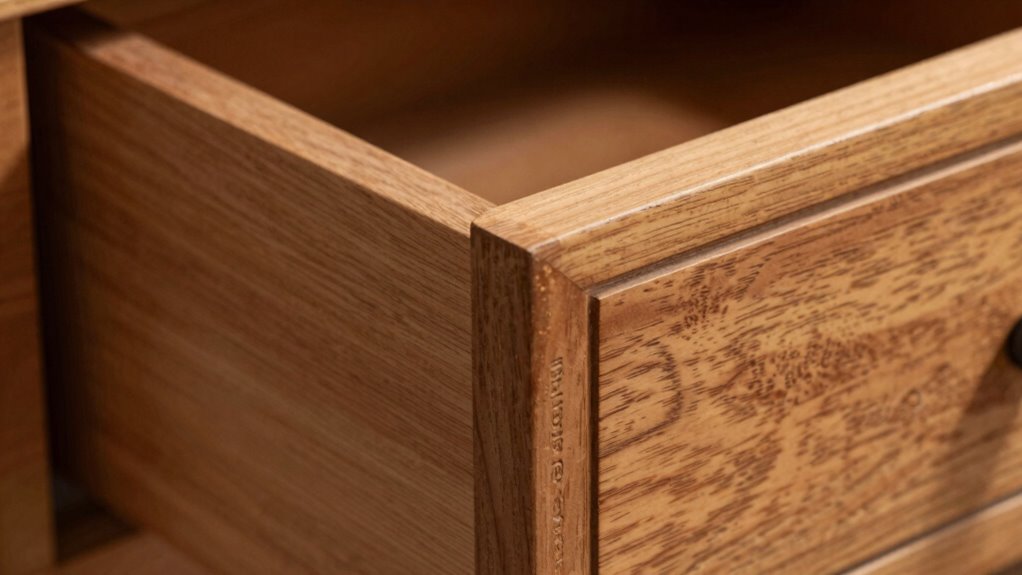
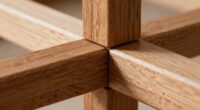
Drawer bottom grooves are essential because they markedly enhance the strength and durability of the drawer. Proper drawer bottom reinforcement relies on precise groove alignment techniques, ensuring the bottom panel fits securely within the sides. When grooves are accurately aligned, it distributes weight evenly across the drawer, preventing sagging or warping over time. This innovative design approach also minimizes stress points that could lead to blowouts or failures. Using consistent groove depths and spacing helps maintain the structural integrity of the drawer, especially under heavy loads. Well-executed groove alignment not only strengthens the connection but also simplifies assembly, reducing the risk of misfit or damage. Ultimately, attention to these details ensures your drawer remains sturdy and long-lasting.

FRMSAET Drawer Repair Kit – Used to Reinforce and Repair Wooden/MDF/Chipboard Drawers Cabinet Reinforcement Heavy Duty Steel Hardware Furniture Accessories – Includes Screws (4 Pack)
Widely application: The bracket has two mounting methods.Work perfectly for most drawers, Used to reinforce and repair wooden…
As an affiliate, we earn on qualifying purchases.
As an affiliate, we earn on qualifying purchases.
What Factors Matter When Positioning Drawer Bottom Grooves

Proper positioning of drawer bottom grooves directly impacts the strength and longevity of the drawer. When placing grooves, consider the drawer material, as softer woods might require deeper or more frequent grooves to prevent weakening. Your drawer design also matters; a wider or taller drawer may need additional grooves or different placement to evenly distribute stress. Focus on positioning grooves near the rear or sides, avoiding the center where weight concentrates. Ensure the grooves are aligned with the drawer’s construction and intended use—this helps prevent warping or failure over time. Remember, precise placement enhances structural integrity, especially for heavier loads. Additionally, understanding the material properties of your drawer wood can guide optimal groove spacing and depth, further preventing blowouts. By considering your drawer material and design, you can optimize groove positioning to maximize durability and prevent future issues.
Saker Woodworking Scriber Marking Line Ruler, Adjustable Aluminum Alloy Sliding T-Square Ruler,Precision Line Drawing aid Ruler with Angle Adjustment Scale
【multifunctional T-Square Ruler】The combination of ruler and protractor makes it can measure length and angles easily. The angle…
As an affiliate, we earn on qualifying purchases.
As an affiliate, we earn on qualifying purchases.
How Incorrect Placement Can Cause Blowouts and Failures
If you place your drawer bottom groove incorrectly or too shallow, it can weaken the structure and lead to blowouts. Using excessive force during assembly can also damage the groove or cause it to fail prematurely. Paying close attention to proper placement and gentle assembly helps prevent these failures. Additionally, understanding the importance of auditory processing skills can enhance your ability to follow detailed assembly instructions accurately.
Misaligned Groove Placement
When groove lines are placed incorrectly, they can substantially weaken the drawer’s bottom panel, increasing the risk of blowouts and failures. Misaligned grooves disrupt joint alignment, causing uneven support and stress concentration along the panel edges. This misplacement prevents the bottom from fitting snugly, making it vulnerable during use. Additionally, improper groove placement doesn’t account for material expansion caused by humidity or temperature changes. When the drawer material expands, a misaligned groove can restrict movement or create tension points, leading to cracks or blowouts. Ensuring precise, correctly aligned grooves supports joint integrity and allows for natural material movement. Proper placement not only strengthens the drawer but also prolongs its lifespan by preventing failures linked to misaligned grooves and material stresses. Understanding pool terminology can help clarify the importance of accurate groove positioning in various applications.
Overly Shallow Grooves
Have you ever wondered how shallow groove placement can lead to drawer failures? When the groove is too shallow, it doesn’t provide enough support for the drawer bottom. This creates a loose or unstable fit, which increases the risk of the bottom rattling or slipping out. A shallow groove also weakens the overall structure, making the drawer more prone to blowouts under load. To prevent this, ensure the groove is deep enough to allow a tight fit, securely holding the bottom panel in place. If the groove is overly shallow, the drawer can’t handle normal stresses, leading to failure. Proper groove depth balances ease of assembly with sufficient support, reducing the chance of damage and ensuring durability. Additionally, understanding the concept of Free Floating can help optimize drawer design by avoiding overly restrictive or loose fits, thereby increasing longevity.
Excessive Force During Assembly
Did you realize that applying too much force during assembly can easily cause damage to the drawer? During drawer assembly, excessive force, especially when inserting the bottom panel, risks splitting the material or damaging the grooves. Choosing the right material is vital; softer woods or low-quality materials may not withstand heavy pressure, increasing the likelihood of failure. Incorrect placement of grooves or forcing panels into tight spaces can lead to blowouts or warping. To prevent this, use proper tools and gentle, consistent pressure. Focus on aligning the grooves correctly and selecting durable, appropriate materials. This guarantees a secure fit without risking damage. Remember, patience and proper technique during assembly save you from costly repairs and ensure the longevity of your drawers. Additionally, understanding the importance of drawer bottom groove placement can help prevent blowouts and ensure a sturdy, long-lasting drawer.

2 Pack Drawer Front Installation Clamps,Quick-Install Drawer Mounting Clips,Cabinet Installation Tool For Woodworking Cabinet Drawer Fronts Clamps, Adjustable Width 21 Mm – 50 Mm, With Batch Corners
【Quick Installation】: Adjustable drawer front clamps are ergonomically designed, you can easily fix the drawer with just one…
As an affiliate, we earn on qualifying purchases.
As an affiliate, we earn on qualifying purchases.
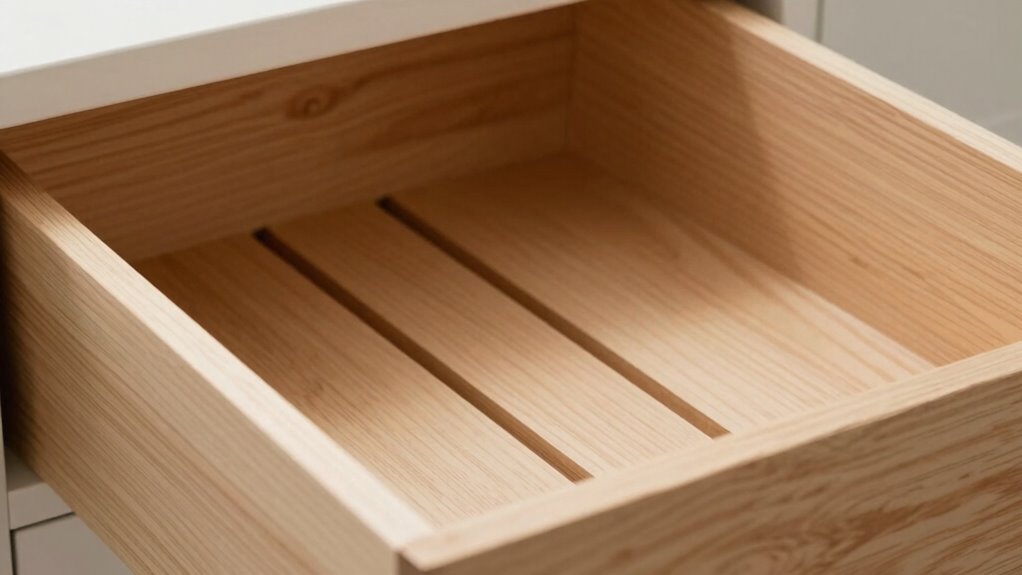
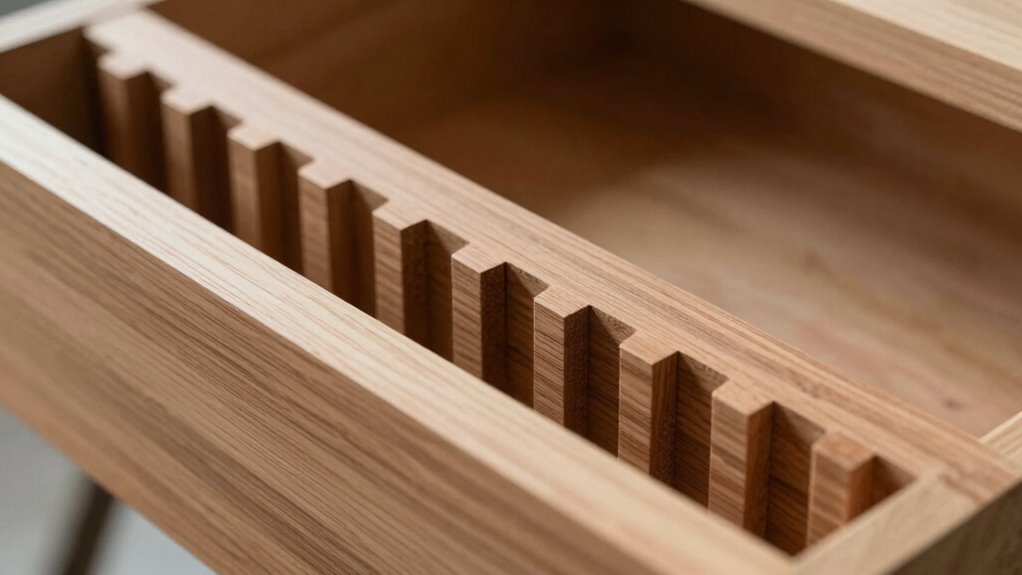
Best Practices for Groove Depth and Spacing

Achieving ideal drawer performance depends considerably on selecting the right groove depth and spacing. Your choice should consider the drawer material to guarantee proper fit and support. The groove pattern influences how well the bottom panel stays secure and prevents blowouts. To optimize results:
- Maintain groove depth at about one-third of the drawer material’s thickness for strength.
- Space grooves evenly, typically 1/4 to 1/2 inch apart, to distribute stress evenly.
- Match groove pattern to the drawer’s design, ensuring consistent support without weakening the sides. Proper wood grain orientation also plays a critical role in preventing stress and ensuring durability.
Tools and Techniques for Accurate Groove Placement
To guarantee your grooves are perfectly placed, you need reliable measuring tools and precise techniques. Accurate marking depends on using the right tools and maintaining consistent saw settings throughout the project. Mastering these details helps you achieve clean, professional results every time. Paying attention to essential tool selection ensures your measurements are precise and your cuts are accurate.
Measuring Tools Accuracy
Accurate groove placement relies heavily on the precision of your measuring tools. To guarantee consistent results, regularly check and calibrate your measuring tools for accuracy. Proper accuracy calibration helps prevent errors that could compromise the fit and strength of your drawers. Use high-quality tools, such as precise rulers, marking gauges, and calipers, to improve measurement reliability. Keep these tips in mind:
- Regularly verify measurements against a known standard
- Calibrate tools periodically to maintain accuracy
- Use sharp, well-maintained tools for clearer, more precise marks
- Selecting tools with high suction power can enhance their performance and ensure more accurate measurements.
Proper Marking Techniques
Using proper marking techniques is essential for guaranteeing your grooves are placed precisely where they need to be. Start with careful layout planning by measuring and marking your reference points accurately. Use a pencil and a straight edge or square to draw clean, straight lines for your groove placement. Double-check measurements before marking to prevent errors. Apply marking techniques that clearly indicate the groove location, such as using a marking gauge or a combination square. Keep your marks visible but not so deep that they interfere with cutting. Consistent marking ensures your grooves are aligned correctly, reducing the risk of mistakes. Additionally, understanding the role of skilled trades can help you appreciate the importance of precision in woodworking. Precise layout planning combined with effective marking techniques results in well-placed grooves that contribute to a durable, professional drawer bottom.
Consistent Saw Settings
Maintaining consistent saw settings is essential for ensuring your grooves are uniform and precisely placed. Proper saw blade calibration guarantees each cut aligns perfectly, reducing errors. When selecting material, choose consistent thickness and density to prevent variations that can affect groove depth. To achieve this, consider the following:
- Regularly verify saw blade calibration for accurate height and angle
- Use the same type and grade of material for all cuts
- Lock your saw’s fence and depth settings before each cut
These practices help maintain uniformity and prevent mistakes that could lead to blowouts. Consistent saw settings ensure your grooves fit perfectly and maintain structural integrity. By paying attention to calibration and material selection, you improve overall accuracy and craftsmanship.
Common Mistakes When Cutting Drawer Bottom Grooves
One of the most common mistakes when cutting drawer bottom grooves is not properly measuring and marking the cut lines. Rushing this step can lead to uneven or misaligned grooves, negatively affecting drawer aesthetics. Accurate measurements ensure the groove fits snugly and maintains a professional look. Additionally, neglecting careful material selection can cause issues; softer woods may dent or split, while harder woods can be difficult to cut smoothly. Choosing the right material enhances the quality of the groove and reduces errors. Failing to double-check measurements before cutting often results in waste or the need for rework. Taking your time during measurement and selecting appropriate materials guarantees clean, precise grooves that improve both the drawer’s appearance and durability.
How to Customize Groove Placement for Different Drawer Types
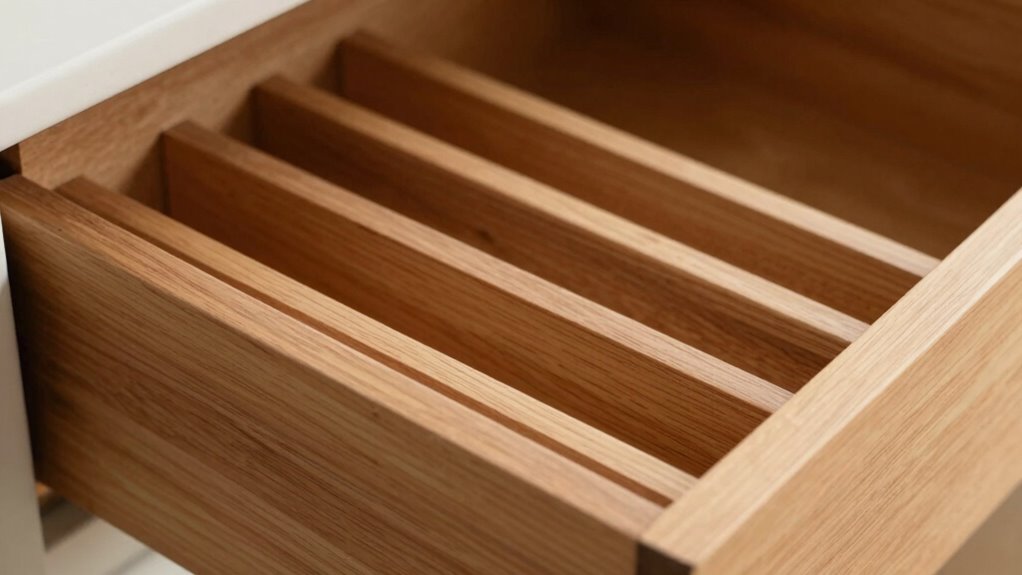
Customizing groove placement for different drawer types requires understanding how each design impacts the ideal positioning. Different drawer styles, such as inset or overlay, influence where you should position the grooves to ensure strength and prevent blowouts. Material considerations also play a role; softer woods may need shallower grooves, while harder materials can handle deeper placements. To optimize your groove placement, consider these factors:
- Drawer style: Inset drawers often require closer-to-the-edge grooves, while overlay styles need more central positioning.
- Material strength: Softer woods benefit from shallower grooves to avoid weakening the structure.
- Functionality: Heavy-load drawers demand stronger, well-supported grooves placed strategically for durability.
Adjusting your groove placement based on these variables guarantees a secure fit and long-lasting drawers.
Troubleshooting Groove Placement Problems and Fixes
Even with careful planning, groove placement can sometimes cause issues that compromise the drawer’s fit and durability. If the grooves are too shallow or misaligned, they may interfere with drawer slide compatibility, making the drawer difficult to open or close smoothly. Material expansion due to humidity changes can also cause problems, as the wood swells and tightens around the groove, leading to sticking or difficulty fitting the drawer into the frame. To fix these issues, double-check your measurements and ensure grooves are accurately placed according to slide specifications. If swelling occurs, consider using stable materials or allowing for expansion gaps. Adjusting groove depth and location can restore proper fit and prevent future problems related to material movement and slide compatibility.
Final Tips for Making Long-Lasting, Blowout-Resistant Drawers
To guarantee your drawers last long and resist blowout, focus on using durable materials and proper construction techniques. Selecting high-quality drawer material, such as hardwood or reinforced plywood, provides strength and resilience. Ensure your hardware is compatible with your chosen materials to prevent stress points that can cause failure. Additionally, pay attention to groove placement, avoiding excessive depth or width that weakens the bottom panel. Here are some final tips:
- Use hardwood or thick plywood for the drawer sides and bottom to enhance durability.
- Verify hardware compatibility to ensure smooth operation and reduce strain.
- Reinforce groove edges with glue or additional support to prevent splitting over time.
These steps help create long-lasting, blowout-resistant drawers that stand up to daily use.
Frequently Asked Questions
Can Drawer Bottom Grooves Be Adjusted After Assembly?
Yes, you can adjust drawer bottom grooves after assembly using various adjustment techniques. To modify them, carefully remove the drawer, then use a chisel or router to deepen or widen the grooves as needed. This allows for post-assembly modifications to confirm a proper fit or to reinforce the drawer. Just take your time, measure precisely, and work gently to avoid damaging the surrounding wood during these adjustments.
What Materials Are Best Suited for Groove Cutting?
You should select materials like plywood or hardboard for groove cutting because they withstand well under cutting techniques and provide durability. Hardwood options like oak or maple are also suitable if you prefer a solid feel. Use sharp blades and proper depth settings to guarantee clean cuts. Always choose materials that resist splitting and blowouts, making your drawer bottoms secure and long-lasting.
How Does Drawer Size Influence Groove Placement?
When considering drawer size, you must prioritize proper groove positioning based on drawer dimensions. Larger drawers require deeper and more strategically placed grooves to prevent blowouts, while smaller drawers need shallower, carefully aligned grooves. You should measure accurately, plan your groove placement accordingly, and make certain of consistent spacing. This approach guarantees structural integrity, balances aesthetics, and enhances durability—making sure your drawer withstands daily use without compromise.
Are There Safety Precautions When Cutting Grooves?
When cutting grooves, you should wear safety glasses to protect your eyes from flying debris and make certain the blade guard is securely in place to prevent accidental contact with the blade. Always double-check your equipment before starting, keep your hands clear of the blade, and work on a stable surface. These precautions help prevent injuries and ensure a safe, accurate cut every time.
What Are Alternative Methods to Prevent Drawer Blowouts?
To prevent drawer blowouts, you can reinforce the drawer bottom with a thicker material or add a rabbet joint for extra support. Adjust the groove depth to avoid weakening the drawer sides, and consider using a dado blade for cleaner, more precise cuts. Additionally, applying glue or clamps during assembly helps secure the bottom firmly, reducing stress on the drawer material and preventing blowouts even with heavy loads.
Conclusion
By mastering the art of groove placement, you’re building a fortress that stands strong against time and wear. Think of your drawer as a ship, where every groove is a vital plank—place them wisely, and it’ll sail smoothly through years of use. Avoid the pitfalls, follow best practices, and your craftsmanship will shine like a beacon of durability. With attention to detail, your drawers will resist blowouts and keep performing like a well-oiled machine.