To prevent tearout in the planer, you need to understand the grain direction. Begin by inspecting the wood’s surface and end grain to identify the fiber flow. Position the board so you’re viewing the grain flow clearly, then adjust the planer settings—slower feed rate, finer cut, and matching cutter speed—to align with the grain. Mastering these techniques helps you achieve a smooth finish. Keep reading to discover how to fine-tune your approach for perfect results.
Key Takeaways
- Rotate and observe the wood from different angles to identify grain flow and tearout-prone areas before planing.
- Read the grain pattern by visualizing straight, wavy, or irregular lines and feeling surface textures.
- Adjust planer settings: lower feed rate, finer cut depth, and match cutter speed to grain direction for cleaner cuts.
- Plan your workpiece orientation to cut along the grain, reducing resistance and tearout during planing.
- Practice consistent grain reading techniques and inspect moisture content to anticipate how wood will behave.

4 Pieces Wood Graining Tool Wood Grain Paint Tool Wood Grain Tool Kit Decorative Wood Grain Tools Wood Graining Tool Set Simulated Wood Grain Brushes for Wall Room Decoration
DIY MUST HAVE: With our woodgrain tool kit, you can easily create a variety of beautiful woodgrain patterns,…
As an affiliate, we earn on qualifying purchases.
As an affiliate, we earn on qualifying purchases.
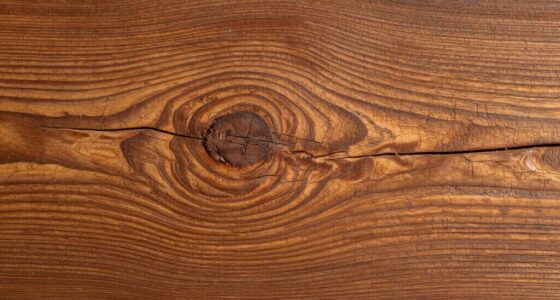
Why Tearout Happens and How Grain Affects It

Tearout occurs when the planer removes fibers unevenly, leaving rough or torn surfaces. The key factor influencing this is grain orientation. When the grain runs parallel to the planer’s cutting direction, the wood texture allows for smooth cuts. However, if the grain runs against or across the feed, the planer struggles to cut cleanly, causing tearout. Wood with irregular or unpredictable grain patterns is especially prone to tearing. The toughness and density of the wood also play roles, but understanding how grain orientation interacts with your tool is vital. By recognizing how the wood’s natural texture influences cutting, you can anticipate potential tearouts and adjust your approach accordingly. Properly reading the grain helps you achieve smoother finishes and reduces damage during planing. Additionally, European cloud innovation can provide tools and resources to analyze material properties, enhancing your ability to plan and prevent tearout effectively. Developing a keen eye for grain reading techniques can further improve your results and prevent costly mistakes. Paying attention to the grain direction before and during planing allows you to better adapt your technique for optimal results.
DANAIXZ Professional Planer Blades 5Pcs Premium Steel Replacement Blades for Woodworking Tools High Precision Hand Planer Accessories for Carpentry DIY Projects 38MM Golden Horse M
[INDUSTRY-GRADE DURABILITY] Engineered from hardened steel alloy, these planer blades offer exceptional wear resistance and longevity. The specialized…
As an affiliate, we earn on qualifying purchases.
As an affiliate, we earn on qualifying purchases.
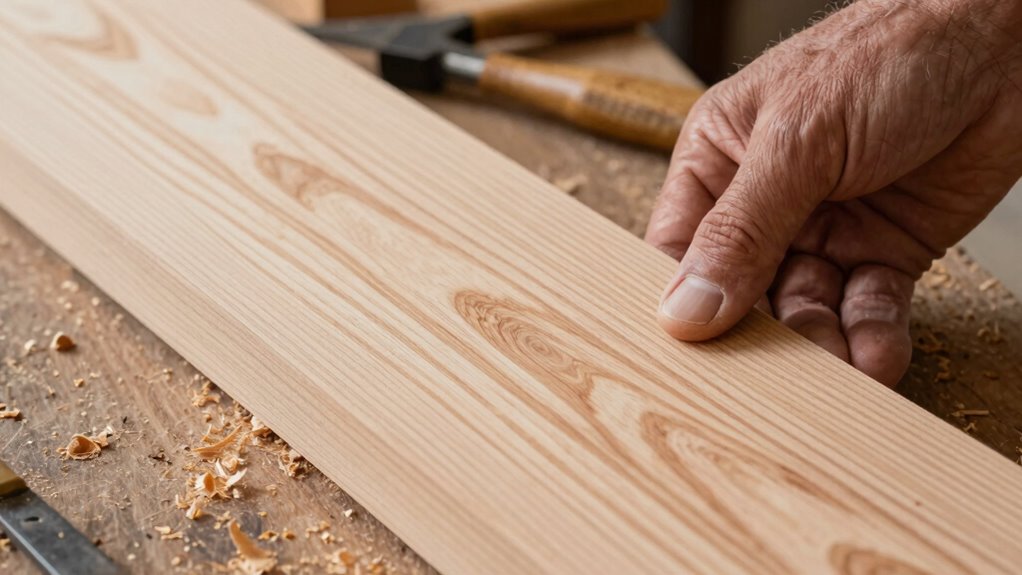
How to Read Wood Grain Before Planning
Before you start planing, taking a moment to read the wood’s grain can save you time and improve your results. To do this effectively, look closely at the grain pattern and wood texture. Here are three steps:
- Observe the direction of the grain lines—are they straight, wavy, or irregular?
- Feel the wood surface to identify areas with more pronounced texture, indicating grain peaks and valleys.
- Check the end grain to see how the fibers run—this helps determine the best planing direction.
- Recognizing the type of wood and its grain pattern characteristics can also inform your approach. Being familiar with Free Floating woodworking techniques can further enhance your understanding of how to handle different wood types.
Understanding the grain pattern and wood texture guides you in aligning your planing tools correctly, reducing tearout and ensuring a smooth finish. Taking this small step makes a big difference in your woodworking projects.

JORGENSEN No.101 Mini Wood Planer – Mini Hand Planer for Woodworking, Block Plane, Small Hand Plane for Trimming, Wood Planing, Craft, Professional Ductile Iron Body, Adjustable Cutting Depth
Professional Level Blade: The blade is made of professional level O1 tool steel, improving cutting efficiency while minimizing…
As an affiliate, we earn on qualifying purchases.
As an affiliate, we earn on qualifying purchases.
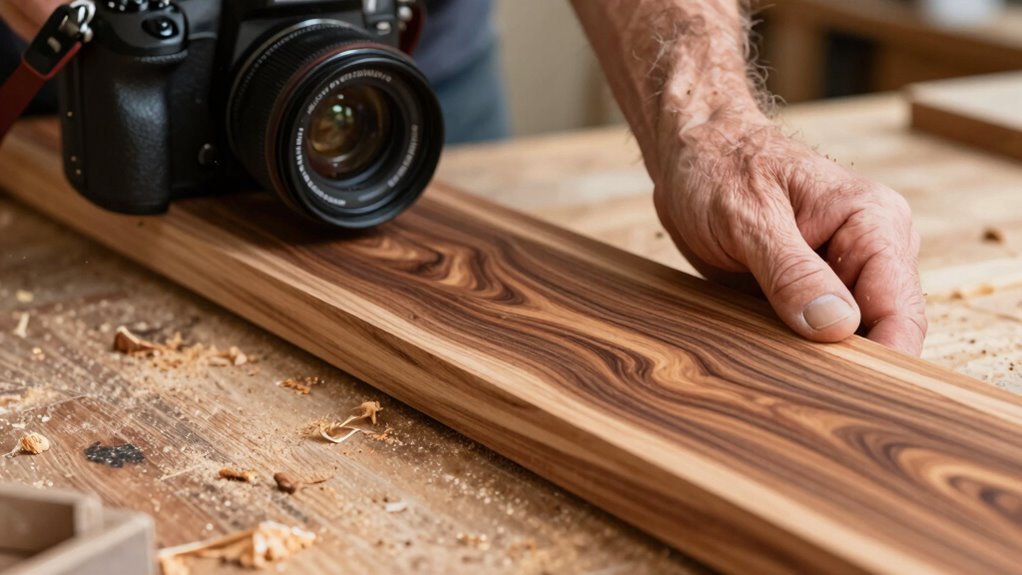
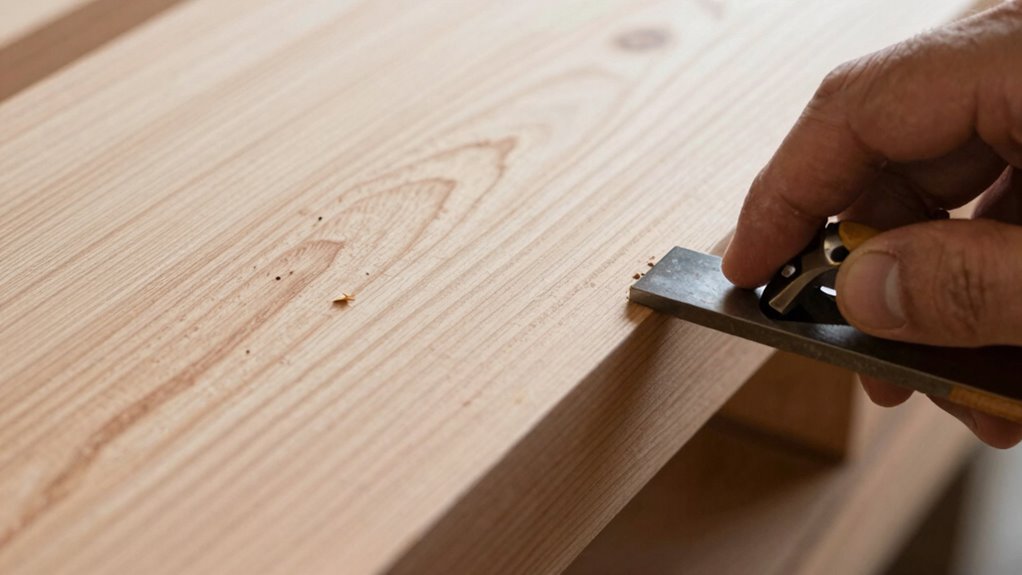
Positioning Your Wood to See the Grain Flow Clearly

To see the grain flow clearly, you need to position the wood properly before planning. Align the wood so that you can observe the grain pattern from different angles. Rotating the piece helps reveal the natural flow of the grain and highlights areas prone to tearout. Pay close attention to the wood texture, as tighter or more irregular textures can influence how the grain runs. Positioning your wood with the grain direction in mind allows you to plan your cuts more effectively. When the grain is aligned properly, it becomes easier to anticipate tearout and adjust your approach accordingly. Proper placement ensures you can read the grain flow accurately, giving you better control during planing and reducing the risk of damaging your wood. Additionally, understanding the grain orientation helps you make more informed decisions during your woodworking projects.

DECONOOR Brass 10X Handheld Magnifier, Wood Handle, Antique, Ideal for Reading, Inspection, Coin & Stamp Collecting, Vintage Gift Decor, 10 inches, 4 inches Diameter, 10X Capacity
COMPACT AND ELEGANT DESIGN: This antique magnifying glass is made of solid brass. Its clean lens allows the…
As an affiliate, we earn on qualifying purchases.
As an affiliate, we earn on qualifying purchases.
Adjust Your Planer Settings Based on Grain Direction
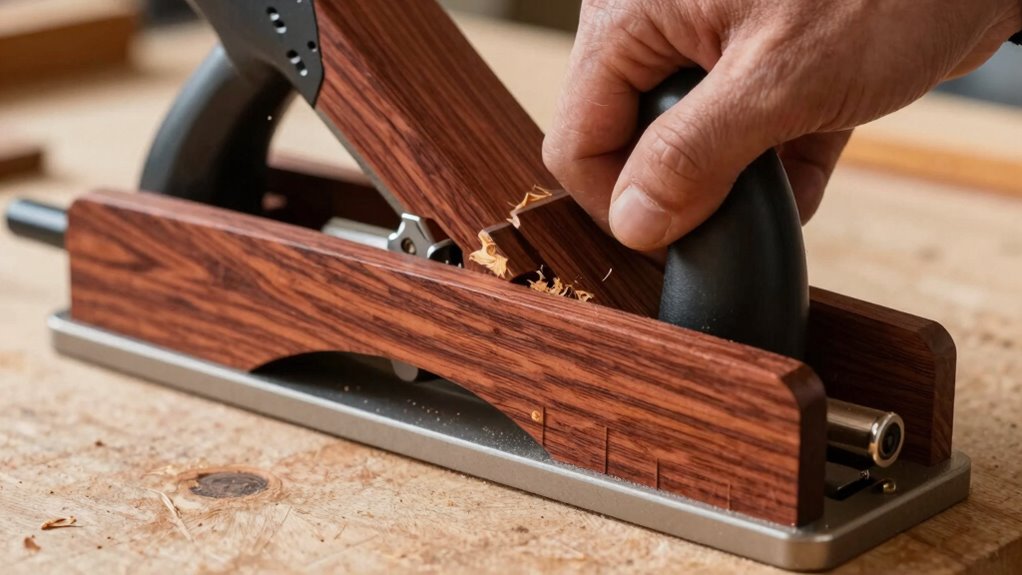
Adjusting your planer settings according to the grain direction can make a significant difference in preventing tearout. When you consider the grain orientation and wood texture, you can optimize your planer for smoother results. Here are three tips:
- Set the feed rate slower when planing against the grain to reduce tearout.
- Use a finer cutting depth for woods with a harsh texture or irregular grain.
- Adjust the cutter head speed to match the grain pattern, making cuts cleaner and minimizing tearout.
Techniques for Planing With the Grain for a Smooth Finish
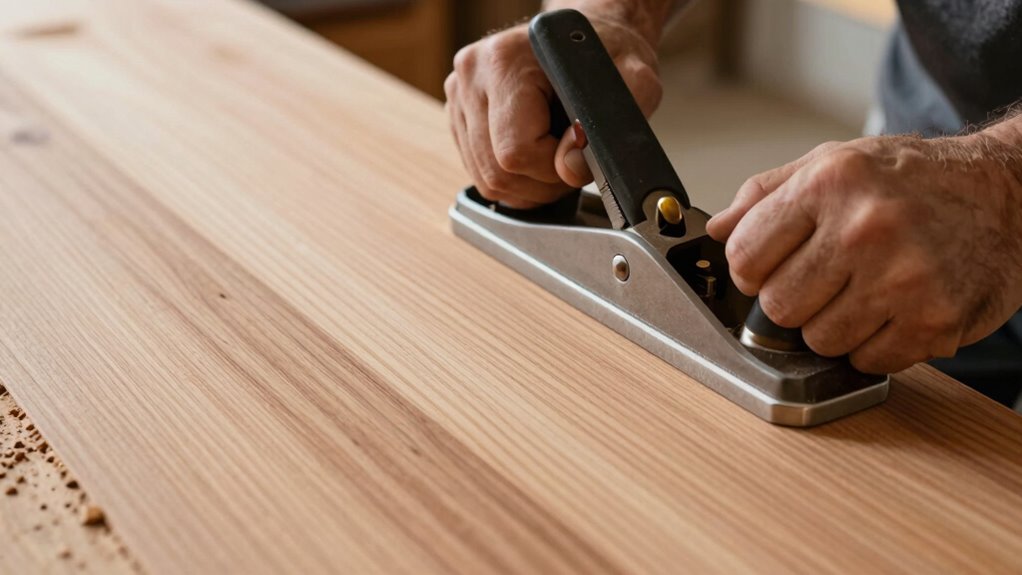
Planning with the grain is essential for achieving a smooth, professional finish on your project. To do this effectively, pay close attention to the wood’s grain texture, which varies among different wood species. Before planing, inspect the surface to identify the grain direction, noting any variations or irregularities. Always start with light passes, moving the planer steadily along the grain, not against it, to minimize tearout. Keep the planer blades sharp and set to a proper height for your wood type. If you encounter tough spots or cross grain, adjust your technique by reducing pressure or making shallower cuts. Taking these steps ensures you follow the grain correctly, resulting in a cleaner, smoother surface free of tearout. Additionally, understanding the grain reading technique helps anticipate potential issues before they occur.
Tools and Tricks to Read Grain More Accurately
To read grain more accurately, use sight line techniques to spot the pattern clearly. Proper grain alignment helps you plan your cuts and reduce tearout. Practicing consistent reading sharpens your eye, making it easier to anticipate how the wood will behave. Incorporating visualization methods can further improve your ability to interpret grain direction and enhance cutting precision. Developing a keen grain reading eye through regular practice allows for more confident and precise woodworking decisions. Additionally, understanding the grain orientation in different types of wood can help you adapt your approach for cleaner cuts and better results. Paying attention to filtration and dust collection systems can also keep your workspace cleaner, providing better visibility for grain reading. Regularly inspecting your work environment ensures optimal conditions for accurate grain assessment.
Sight Line Techniques
A simple yet effective way to read grain more accurately is by using sight line techniques that highlight the natural patterns in the wood. To do this, focus on the grain orientation and how the woodworking patterns flow across the surface. Here are three key tips:
- Hold the board at different angles to see how the grain lines shift, revealing the true direction.
- Use raking light—shine a light across the surface—to cast shadows that emphasize grain contours.
- Look along the length of the board, observing how the grain patterns align or change, helping you identify the natural flow.
These methods help you anticipate tearout and align your cuts with the grain, ensuring smoother results every time.
Proper Grain Alignment
Mastering proper grain alignment starts with choosing the right tools and techniques to read the wood’s natural patterns accurately. Pay close attention to the grain orientation by examining the wood’s texture from different angles. Use a good raking light or a side light to highlight the grain’s flow and direction. Running your fingers along the surface helps you sense the grain’s natural bend, revealing its true path. Look for variations in color, figure, or figure patterns that indicate the grain’s flow. Avoid forcing your cut against the grain; instead, follow its natural course to reduce tearout. When you understand the wood’s texture and grain orientation, you’ll make smarter decisions that lead to cleaner, smoother cuts in your projects. Proper document management can help you keep track of your woodworking notes and references for future projects. Additionally, developing a keen eye for grain reading can significantly improve your craftsmanship and reduce mistakes during cutting. Recognizing the grain flow in different types of wood is essential for achieving professional results.
Consistent Reading Practice
Practicing consistent grain reading sharpens your ability to anticipate how the wood will behave during cutting. By studying grain patterns and understanding moisture content, you develop a sharper eye for potential tearout. To improve, try these steps:
- Examine the grain pattern closely before planing, noting any irregularities.
- Check moisture content to determine if the wood is stable or needs acclimation.
- Make test cuts on scrap pieces, adjusting your technique based on how the grain responds.
- Incorporate proper tool maintenance to ensure your planer functions smoothly, reducing the likelihood of tearout caused by dull blades or misalignment.
This routine helps you recognize subtle cues in grain direction and moisture levels, reducing surprises during actual work. Over time, your ability to read grain patterns precisely increases, leading to smoother cuts and minimized tearout. Consistent practice is your best tool for mastering grain reading.
Common Grain Reading Mistakes and How to Avoid Them

Have you ever misread grain markings and ended up with an uneven cut? One common mistake is ignoring the grain texture, which can mislead you about the wood’s true grain direction. Different wood species have unique grain patterns that can be tricky to interpret, especially if you’re unfamiliar with them. Rushing through grain reading or failing to contemplate how the grain runs across the surface increases tearout risk. Always take your time to examine the grain carefully, feeling its texture and looking at the pattern from multiple angles. Proper grain orientation is essential for a smooth cut and avoiding tearout, so understanding the specific characteristics of your wood species and paying close attention to the grain’s flow before planing can make all the difference. Additionally, recognizing how grain direction influences cutting resistance helps you adjust your technique for cleaner results.
Troubleshooting Persistent Tearout When Grain Reading Isn’t Enough
If tearout keeps happening despite your grain reading, it’s time to check a few key factors. You might need to sharpen your blades, adjust the grain orientation, or change your feed rate. Making these tweaks can help you achieve a cleaner, smoother cut every time.
Adjust Blade Sharpness
When tearout persists despite reading the grain properly, sharpening your planer blades often makes the biggest difference. Dull blades struggle with the wood’s grain pattern and uneven texture, causing tearout. To improve results:
- Inspect the blades for nicks or dull edges and sharpen or replace them if needed.
- Keep blades aligned precisely to ensure even cutting across varied wood textures.
- Regularly maintain and hone blades to maintain sharpness, especially after cutting dense or figured wood.
Sharp blades cut cleanly through the grain pattern, reducing tearout and producing a smoother surface. Remember, no matter how well you read the grain, dull blades undermine your efforts. Proper blade sharpness is essential for clean, professional results.
Refine Grain Orientation
Sometimes, even when you carefully read the grain, tearout still occurs during planing. One way to prevent this is by refining the grain orientation. Pay close attention to the grain pattern and how the wood texture runs across your piece. If tearout persists, try planing with the grain rather than against it, adjusting your workpiece’s position if needed. Changing the direction can help the planer follow the natural flow of the wood, reducing stress on the fibers. Sometimes, slightly skewing your plane can better align with the grain, especially on complex patterns. By understanding and working with the wood’s natural texture, you minimize tearout and achieve a cleaner finish without relying solely on other techniques.
Use Proper Feed Rate
Even after adjusting your grain orientation, tearout can still occur during planing, especially on difficult or unpredictable wood. One key factor is your feed rate. Moving the wood too quickly can cause the planer to catch on uneven or coarse wood texture, leading to tearout. To prevent this, consider these tips:
- Slow down your feed rate to give the blades more control and reduce tearout.
- Maintain consistent pressure to avoid sudden jolts that disturb the wood’s grain.
- Adjust your feed based on wood texture—for rough or uneven grain, use a slower, steadier feed to keep the blades engaged smoothly.
Frequently Asked Questions
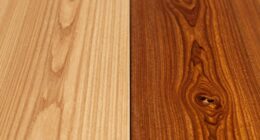
Can Tearout Occur on Different Types of Wood Equally?
Tearout can happen on different types of wood, but not equally. Softwoods with open grain patterns are more prone, especially if the grain runs against the planer’s feed direction. Hardwoods with tight, closed grain patterns tend to resist tearout better. You should always consider the wood’s grain patterns and hardness before planing, using techniques like grain reading to minimize tearout and achieve a smooth finish.
How Does Humidity Affect Grain Visibility and Tearout Risk?
Humidity affects grain visibility like a fog lifting, making the grain more pronounced. When moisture content rises, it causes grain expansion, which can increase tearout risk during planing. Low humidity makes the grain less visible, helping reduce tearout. To prevent issues, always check moisture content and consider how humidity levels influence grain structure. Adjust your planing technique accordingly for smooth cuts and minimal tearout.
Are There Specific Planers Better Suited for Certain Wood Grains?
You should choose a planer suited for specific wood grains by considering grain orientation and blade quality. For woods with prominent grain patterns, a planer with high-quality blades guarantees cleaner cuts and reduces tearout. If your wood has a wavy or irregular grain, opt for a machine that handles variable grain directions well. Properly aligned blades and understanding grain orientation help you achieve smooth, tearout-free results every time.
What Are Quick Ways to Test Grain Direction Before Planing?
You can quickly test grain direction by inspecting the surface and feeling for grain orientation. Run your finger or a straight edge along the wood; if it catches or feels rough, you’re against the grain. Even if surface inspection seems clear, always check visually for grain patterns. This simple step helps you plan your cuts better, reducing tearout and ensuring a smoother finish. Trust your senses to guide your planing, not just the surface appearance.
How Does Sanding Help After Tearout Has Occurred?
Sanding helps smooth out tearout by evening out the surface, especially when you use appropriate sanding techniques. Focus on following the grain patterns with the sandpaper, starting with coarse grit and progressing to finer grits. This approach minimizes visible tearout marks, revealing a cleaner finish. Keep the surface flat and light to avoid further damage, ensuring your project looks polished and professional after the tearout occurs.
Conclusion
Think of reading grain like tuning an instrument—when you align your eye and tool, harmony follows. By understanding the grain’s flow, you’re guiding the wood’s voice, preventing tearout and achieving a smooth melody. Each cut becomes a note played with intention, a dance between your tool and nature’s pattern. Master this rhythm, and your projects will sing with clarity and grace, turning rough timber into polished harmony.