To sand veneer safely, you should always follow the pressure rule: apply light, steady pressure and let the sander do the work. Maintain consistent grip and move the sander smoothly along the grain to prevent gouging or blow-through. Stay aware of your material’s density and avoid pressing too hard, especially on thin or soft veneer. Proper technique minimizes damage and ensures a professional finish—keep going to discover how mastering pressure can make all the difference.
Key Takeaways
- Apply light, steady pressure to avoid penetrating the veneer surface during sanding.
- Keep the sander moving constantly to distribute pressure evenly across the veneer.
- Follow the grain direction to prevent deep scratches and uneven wear.
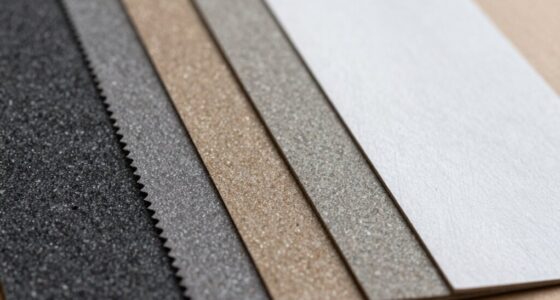
- Use progressively finer grits, starting with medium and finishing with fine, for smooth results.
- Regularly check your pressure and technique, adjusting as needed to prevent blow-through and damage.

HYCHIKA 5-Inch Random Orbital Sander, 13000RPM Electric Palm Sander with 6 Variable Speeds, Powerful Motor, 12PCS Sandpapers and Efficient Dust Collection Bag, for Woodworking, Finishing and Polishing
【Powerful 6-Speed Control 】13000RPM high-performance 2.5A motor with 6 variable speeds (6000-13000 RPM) delivers up to 30% higher…
As an affiliate, we earn on qualifying purchases.
As an affiliate, we earn on qualifying purchases.
Why Proper Pressure Matters When Sanding Veneer

Applying the right amount of pressure when sanding veneer is essential to achieving a smooth, even finish. Proper pressure control guarantees you don’t sand too aggressively, which can damage the delicate veneer surface. Your sanding technique should involve gentle, consistent pressure to avoid creating uneven spots or gouges. Too much pressure causes the abrasive to dig in and may lead to blow-through or uneven sanding. Conversely, too little pressure won’t effectively remove the rough surface or imperfections. Focus on maintaining a steady, moderate force throughout the process. This balance allows the abrasive to work efficiently without risking damage. Mastering pressure control is key to a professional-looking result and a safer sanding experience. Effective pressure management helps prevent damage and ensures a high-quality finish.

Aiyard 5-Inch 8-Hole Hook and Loop Sanding Discs, 600/800/1000/1200/1500/2000 Fine Grits Sandpaper for Random Orbit Sander, 60-Pack
Grits – 10pcs of each grit: 600/800/1000/1200/1500/2000, 6 grades sandpaper assortment fine grits to meet the needs of…
As an affiliate, we earn on qualifying purchases.
As an affiliate, we earn on qualifying purchases.
What Causes Blow-Through During Veneer Sanding

Blow-through occurs when the veneer is sanded too aggressively or with excessive pressure, causing the abrasive to penetrate through the thin surface layer and damage the underlying substrate. This often happens if you neglect the grain direction or use low-quality adhesive underneath. Sanding against the grain or applying uneven pressure can weaken the veneer’s surface, making it more vulnerable. Also, poor adhesive quality can result in weaker bonding, increasing the risk of blow-through during sanding. To understand better, consider this table:
| Cause | Effect | Prevention |
|---|---|---|
| Ignoring grain | Deep scratches, blow-through | Follow grain direction |
| Excessive pressure | Penetrates veneer, substrate damage | Use light, consistent pressure |
| Low adhesive quality | Weak bond, easier damage | Use high-quality adhesive |
Additionally, understanding the pressure rule for sanding can help you control the force applied and prevent damage to the veneer.

SKIL 6 Amp 3"x18" Belt Sander with Pressure Control – 7510-01
Pressure control technology warns user when excessive pressure is applied
As an affiliate, we earn on qualifying purchases.
As an affiliate, we earn on qualifying purchases.
The Pressure Rule: Your Best Defense Against Blow-Through

To prevent blow-through during veneer sanding, mastering the pressure you apply is essential. Proper pressure control ensures you don’t force the abrasive into the veneer, which can cause damage. Using correct sanding techniques helps distribute pressure evenly across the surface, reducing the risk of sanding through the veneer. Light, consistent pressure allows the abrasive to cut effectively without digging in too deeply. Remember, pressing too hard increases the likelihood of blow-through, especially on thin veneer. Focus on maintaining a steady, gentle touch, and avoid applying excessive force. Developing good pressure control is your best defense against damaging the veneer, resulting in a smooth, even finish without risking costly blow-through. Additionally, understanding the appropriate pressure technique can further safeguard your work from unintended damage.

REALINN Wood Furniture Repair Kit- Set of 28 – Touch Up Markers, Fillers with Wood Putty – Repair Scratch, Cracks, Hole, Discoloration for Wooden Door, Floor, Table, Cabinet
KIT INCLUDES our most powerful wood repair compounds, so you can repair all levels of damage to wood…
As an affiliate, we earn on qualifying purchases.
As an affiliate, we earn on qualifying purchases.
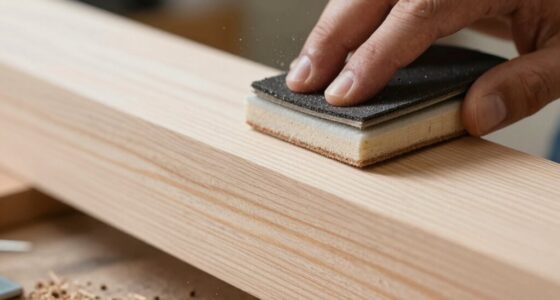
How to Apply the Pressure Rule While Sanding

When applying the pressure rule, you need to keep your grip even and consistent to avoid gouging the veneer. Use light touches and let the sandpaper do the work, rather than pressing too hard. Keep an eye on your progress to guarantee you’re not removing material too quickly or unevenly. Additionally, maintaining proper air quality in your workspace can help you breathe easier and stay focused during detailed sanding tasks.
Maintain Even Pressure
Maintaining even pressure while sanding veneer guarantees a smooth, professional finish and prevents uneven surfaces or damage. To do this, focus on pressure monitoring throughout your sanding process. Keep a steady hand and avoid pressing too hard, which can lead to gouges or blow-through. Instead, use consistent, gentle pressure, adjusting your grip as needed to maintain control. Incorporate proper sanding techniques, such as moving the sander in smooth, overlapping strokes and letting the tool do the work. Regularly check your pressure, especially when shifting between different areas or sanding angles. Staying attentive to your pressure helps prevent uneven sanding and ensures the veneer remains intact, giving you a flawless, even surface with minimal risk of damage. Remember to apply consistent force throughout the process to avoid sudden pressure changes that could compromise the veneer’s integrity.
Use Light Touches
Applying light touches while sanding veneer means using gentle, controlled pressure rather than pressing down hard. This approach enhances pressure control and prevents accidental blow-through. Your touch technique should focus on maintaining consistent, minimal contact with the surface, allowing the sandpaper to do its work without gouging or damaging the veneer. Keep your grip loose and let the weight of the sander do most of the work, avoiding the temptation to push harder. By practicing this light touch, you reduce the risk of removing too much material or creating uneven spots. Remember, finesse and control are key. With patience and a steady hand, you’ll achieve a smooth, professional finish without compromising the veneer’s integrity. Proper technique ensures you maintain even pressure and avoid damaging the delicate surface.
Monitor Sanding Progress
How can you tell if you’re applying the right amount of pressure while sanding veneer? Watch the grain direction closely—if you notice unevenness or scratches, you’re likely pressing too hard or too softly. Proper pressure keeps the sanding grit working efficiently without gouging or blowing through the veneer. As you sand, monitor your progress by checking the surface frequently; it should feel smooth and even. Use lighter pressure when moving across the grain, especially with finer grit sandpaper, to prevent thinning or damage. Remember, consistent, gentle pressure helps you avoid over-sanding in one spot. Adjust your pressure depending on the sanding grit—coarser grits require slightly more force, but always stay within a controlled, light touch to keep your veneer safe. Being aware of the pressure rule ensures you maintain control and prevent blow-through during the sanding process.
Tools and Techniques for Consistent Pressure

Using the right tools and techniques is essential for applying consistent pressure when sanding veneer. Start by wearing sanding gloves to improve grip and control, preventing slips that can cause uneven pressure. Always wear a dust mask to protect yourself from fine veneer dust, which can impair your breathing and focus. Use a steady, even motion when guiding the sander, applying gentle, uniform pressure—avoid pressing down hard, as this risks blow-through. Keep the sander moving continuously to distribute pressure evenly across the surface. Maintain a consistent angle and speed, and periodically check your pressure by feel. These tools and techniques help you achieve a smooth finish while safeguarding the veneer from damage. Proper handling ensures a safe, effective sanding process. Incorporating connected equipment and smart tech can also enhance your control and precision during sanding tasks.
Common Mistakes That Lead to Blow-Through (And How to Avoid Them)

Applying too much pressure can quickly cause blow-through and ruin your veneer. Skipping essential sanding stages or not adjusting for different material densities increases the risk too. To avoid mistakes, stay mindful of pressure, follow proper sanding steps, and consider the veneer’s specific characteristics. Additionally, understanding the pressure rule helps maintain control and prevents damage during sanding.
Excessive Pressure Risks
Excessive pressure during sanding is a common mistake that can quickly lead to blow-through, damaging your veneer. When you press too hard, you disrupt the pressure distribution across the veneer surface, concentrating force on a small area instead of spreading it evenly. This uneven pressure increases the risk of sanding through the veneer’s thin layer, especially if the veneer thickness is minimal. Applying too much force also causes the abrasive to dig in, removing material too rapidly and compromising the surface. To avoid this, maintain light, consistent pressure and let the sander do the work. Proper pressure ensures even sanding and helps protect your veneer from blow-through, preserving its integrity and appearance. Additionally, understanding the pressure rule can significantly reduce the risk of damage and ensure a smooth, professional finish.
Skipping Sanding Stages
Skipping essential sanding stages can lead to uneven surfaces and increase the risk of blow-through, especially on thin veneer. When you skip steps, you might miss smoothing out imperfections or properly following the grain direction, which can cause uneven sanding. Using the correct sanding grit at each stage is vital because starting with too coarse a grit can leave scratches that are hard to remove later, while skipping finer grits can leave a rough finish. Always progress gradually through the grit stages, ensuring you follow the grain direction to avoid gouging or uneven sanding. Rushing through these stages compromises surface quality and heightens blow-through risk. Properly staged sanding with attention to grit progression and grain direction helps you achieve a smooth, durable finish without damaging the veneer.
Neglecting Material Density
Neglecting to contemplate the material density of your veneer can lead to rapid sanding through the surface, causing blow-through. Denser veneers or those with high veneer hardness require a gentler touch and adjusted sanding pressure. If you overlook these differences, you risk sanding too aggressively, breaking through the veneer layer. Lighter, softer veneers can be sanded more firmly, but harder varieties demand a lighter touch to prevent damage. Always assess the veneer’s material density before starting. Use finer grits and reduce pressure on denser or harder veneers. This approach helps maintain control and prevents blow-through. Recognizing veneer hardness and adjusting your sanding technique accordingly keeps your project safe and ensures a smooth, professional finish.
Troubleshooting Blow-Through Problems When They Occur

When blow-through occurs during veneer sanding, it means the sander is penetrating too deeply and damaging the surface. To troubleshoot, first check your sander’s pressure and adjust accordingly, guaranteeing you’re not applying excessive force. Improve vibration damping by using softer pads or mounts, which reduces sudden impacts that cause blow-through. Controlling dust with proper dust collection helps maintain visibility and prevents buildup that could influence pressure. Here are some tips:
Adjust pressure, use vibration damping, and control dust to prevent veneer blow-through during sanding.
- Reduce sanding pressure gradually to find the ideal level
- Use vibration damping materials to stabilize the sander
- Maintain consistent pressure with a steady hand
- Keep your workspace clean to avoid dust interference
- Adjust your technique based on veneer density and condition
Addressing these factors helps prevent blow-through and guarantees a smooth, professional finish.
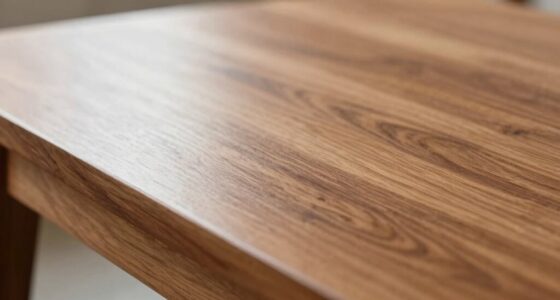
Final Tips for Achieving a Smooth, Professional Veneer Finish

Achieving a smooth, professional veneer finish requires attention to detail and proper technique throughout the sanding process. First, consider veneer thickness; thinner veneers are more prone to sanding through, so use light pressure and adjust your sanding grip accordingly. Keep your grip firm but gentle to maintain control without risking damage. Use progressively finer grits to refine the surface, starting with a medium grit and finishing with a fine grit for a polished look. Always sand with the grain to prevent scratches and unevenness. Regularly check your work to avoid over-sanding. Proper pressure and a consistent sanding grip help prevent gouging or blow-through, ensuring a flawless, professional veneer finish.
Frequently Asked Questions
Can Different Veneer Types Require Different Pressure Techniques?
Yes, different veneer types do require varying pressure techniques. You should modify your veneering techniques based on the veneer grain direction and the specific material. For softer veneers, apply gentler pressure to avoid blow-through, while harder veneers might need more pressure for a secure bond. Always consider the veneer grain direction to ensure smooth finishing and prevent damage, tailoring your approach to each veneer’s unique characteristics.
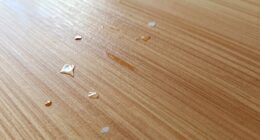
How Does Humidity Affect Veneer Sanding Pressure?
Think of veneer as a sponge that absorbs moisture; higher humidity makes it swell, while dry air causes it to shrink. When humidity fluctuates, your moisture content varies, so you need to adjust your sanding pressure accordingly. Climate control helps maintain consistent moisture content, ensuring you don’t apply too much pressure and risk blow-through. Keep the environment stable, and you’ll sand veneer smoothly without damage.
Is There a Recommended Pressure Level for Beginners?
For beginners, it’s best to start with a light pressure calibration when sanding veneer. Use a gentle, consistent sanding technique, applying just enough pressure to remove the surface smoothly without risking blow-through. Keep your strokes even and avoid pressing too hard, as this can damage the veneer. As you gain experience, you can adjust your pressure to optimize results while maintaining safety.
Can Using Power Tools Help Control Pressure Better?
Yes, using power tools can help you control pressure better. Look for a tool with a pressure gauge, so you can monitor the force you’re applying. An ergonomic grip also helps you maintain steady control, reducing the risk of applying too much pressure. This combination allows you to sand more precisely, preventing blow-through and ensuring a smooth finish. Always stay attentive to the pressure you’re applying, especially when working with delicate veneer.
How Often Should I Check My Sanding Pressure During a Project?
You should check your sanding pressure frequently—roughly every few minutes—to keep it steady, like tuning a fine instrument. As you sand veneer, especially thinner layers, the pressure you apply influences the thickness and prevents blow-through. Regularly inspecting your sanding pressure helps you maintain control and avoid damage. Keep a close eye to ensure even pressure, so your veneer stays intact and smooth throughout your project.
Conclusion
By mastering the pressure rule, you’ll glide your sander like a gentle breeze across delicate veneer, avoiding the harsh gusts that cause blow-through. Imagine your tool as an extension of your hand, softly pressing to reveal a flawless, glassy surface. With consistent, mindful pressure, you’ll craft a stunning finish that’s smooth and professional—like a mirror reflecting your skill. Keep practicing, stay attentive, and let your fingertips guide you to veneer perfection.