
Zero-clearance inserts are a small upgrade that can make a big difference in your woodworking. They fit tightly into your saw’s insert slot, supporting the material right at the cut line and sealing around the blade. This reduces tear-out, produces cleaner cuts, and improves safety. Additionally, they help with dust collection and decrease waste. Want to know how to choose, install, and maintain these inserts? There’s more to discover that can transform your projects.
Key Takeaways
- Zero-clearance inserts support material tightly against the blade, significantly reducing fiber tear-out during cuts.
- They create a sealed environment around the blade, minimizing gaps that cause chip-out and splintering.
- Properly fitted inserts improve cutting accuracy and surface finish, reducing the need for rework.
- They help prevent debris buildup, enhancing dust collection and workspace cleanliness.
- Installing zero-clearance inserts is an easy upgrade that delivers professional-quality results with minimal effort.

3 Pcs Zero Clearance Inserts Fit with Delta 36-725, 36-725T2, 36-5152, 36-5000, 36-5000T2 Table Saws with Riving Knife Slot
Precision Fit Design Notes Our zero-clearance blade is craft from natural bamboo, so there may be slight dimensional…
As an affiliate, we earn on qualifying purchases.
As an affiliate, we earn on qualifying purchases.
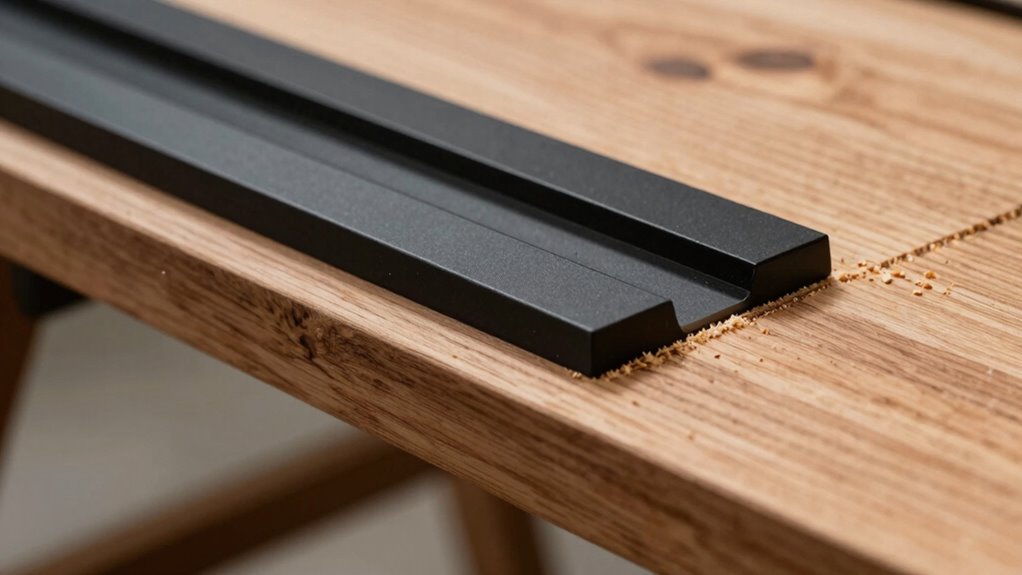
What Are Zero‑Clearance Inserts and How Do They Work?
Have you ever struggled with splinters or tear-outs when cutting plywood or thin materials? Zero‑clearance inserts are a simple upgrade that can make a big difference. They fit into your saw’s insert slot and feature a closely fitting opening that matches the blade’s width. This tight fit minimizes tear-out by supporting the material right at the cut line. Using zero‑clearance inserts also helps you follow safety precautions, reducing kickback risks caused by splintered edges. Plus, they improve dust collection by creating a tighter seal around the blade, keeping your workspace cleaner and safer. Installing these inserts is straightforward, and they’re compatible with most saws. With better support and less tear-out, your cuts become cleaner, safer, and more precise. Incorporating high-quality European cloud innovation can further enhance your workshop’s safety and efficiency through advanced technology integration.

AGILLE Zero Clearance Inserts For DeWalt 7491, 7491RS, 7490 (Type 1), 744, 745, 746, 7480, with Riving Knife Slot, Precise Cuts with No Tear-Out, Include Off-set Screws, Easy Height Adjustment, 4-Pack
【Innovative Upgrades】This 4-pack zero clearance inserts precisely fits for DeWalt 7491, 7491RS, 7490 (Type 1), 744, 745, 746,…
As an affiliate, we earn on qualifying purchases.
As an affiliate, we earn on qualifying purchases.
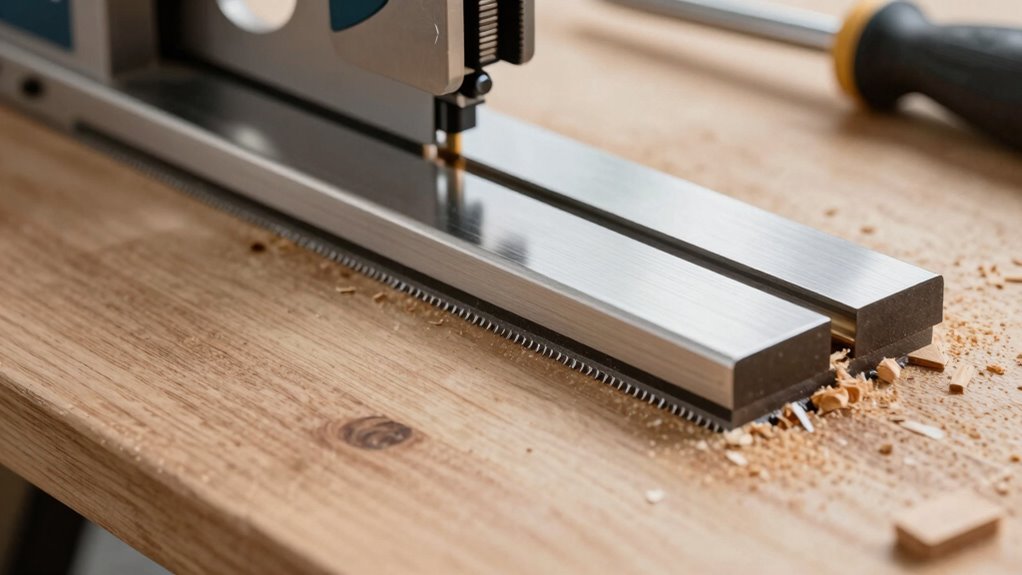
Why Do Tear‑Outs Happen, and How Do Inserts Prevent Them?

Tear-outs occur when the saw blade pulls fibers or grains out of the material’s surface, especially along the cut line. Poor blade maintenance can exacerbate this issue, as dull or misaligned blades increase tear-out risk. Proper blade care guarantees cleaner cuts and minimizes fiber pullout. Additionally, dust collection plays a vital role; dust and debris can cause the blade to bind or vibrate, worsening tear-out. Zero‑clearance inserts help by supporting the material tightly against the blade, reducing gaps that allow fibers to tear out. They also improve dust collection by sealing around the blade, preventing debris buildup that can lead to rougher cuts. Together, maintaining your blade and using inserts considerably cut down on tear-outs, giving you cleaner, more precise results.
Peachtree Woodworking Older Sears Craftsman Table Saw Zero Clearance Insert (Before 1988) PW954 Approx Dims 14-3/8 in x 3-3/4 in x 3/16 in
The insert is blank so you can custom fit the blade slot by passing your blade through it.
As an affiliate, we earn on qualifying purchases.
As an affiliate, we earn on qualifying purchases.
How to Choose the Best Zero‑Clearance Insert for Your Saw

Choosing the right zero‑clearance insert starts with ensuring it’s compatible with your saw model. You’ll also want to think about the material and blade type to match your cutting needs. Finally, look for an insert that’s easy to install so you can replace it quickly when needed. Additionally, considering sleep hygiene can help you stay focused and safe during your woodworking projects, especially when working late into the night.
Compatibility With Saw Model
Selecting a zero-clearance insert that fits your saw model is vital for safe and effective operation. To guarantee proper saw compatibility, always check your saw’s make and model before purchasing. Insert sizing varies between saws, so verifying measurements like width, length, and mounting hole placement prevents fitting issues. Some inserts are universal, but many are designed specifically for certain brands or models, making compatibility checks essential. Always consult your saw’s manual or manufacturer guidelines to find the right insert. Using an insert that matches your saw model guarantees a secure fit, reducing the risk of accidents and improving cut quality. Taking the time to confirm compatibility with your saw’s specifications ensures you get the best performance from your zero‑clearance insert. Additionally, understanding the compatibility factors can help you select the most suitable insert for your specific saw, enhancing safety and efficiency during your projects.
Material and Blade Type
The material of your zero‑clearance insert plays a crucial role in its durability and performance, especially when working with different blade types. Choosing the right insert depends on matching the blade material to ensure ideal insert durability and a clean cut. For example, carbide blades require inserts made from high-density composites or metals that resist wear, while steel blades work well with softer materials. Additionally, matching the right materials can help prevent premature wear and improve the quality of your cuts.
Ease of Installation
Installing a zero‑clearance insert can seem intimidating at first, but with the right approach, it becomes straightforward. Start by removing the factory insert and aligning the new zero‑clearance insert carefully, ensuring proper blade alignment. Proper alignment is essential for smooth cuts and safety. Many inserts come with adjustable features or alignment guides, making this step easier. Once in place, check that the insert sits flush with the table surface to prevent any gaps. Dust collection is also a key factor; look for inserts with built-in ports or compatible attachments to keep your workspace clean. The installation process typically involves simple screws or clamps, so you won’t need special tools. Incorporating connected equipment can also help monitor and improve your saw’s performance. With a little patience, you’ll enjoy a better cut quality and easier cleanup in no time.

Rolkely Zero Clearance Inserts Compatible with DeWalt DWE7485 with Riving Knife Slot, Precise Cuts with No Tear-out and Helps Improve Dust Flow, Includes Off-set Screws, Easy Height Adjustment, 4-pack
【Perfectly Adapted】This zero clearance inserts fits for Dewalt DWE7485 table saw very well and the thickness is more…
As an affiliate, we earn on qualifying purchases.
As an affiliate, we earn on qualifying purchases.
Step-by-Step Guide to Installing Zero‑Clearance Inserts
To guarantee a smooth installation of your zero-clearance inserts, start by gathering all the necessary tools and materials. Ensure you follow safety precautions, such as wearing safety glasses and gloves, to prevent injuries. Regular tool maintenance, like cleaning and sharpening blades, will make the process easier. Use the table below to organize your toolkit:
| Tool/Material | Purpose |
|---|---|
| Screwdriver | Securing inserts to table |
| Measuring tape | Precise fit |
| Drill | Making pilot holes |
| Zero-clearance inserts | The upgrade component |
Check your tools before beginning to avoid interruptions. Carefully follow each step, ensuring proper alignment. Proper safety precautions and maintaining your tools will help you install the inserts efficiently and safely. Proper installation techniques are essential to prevent chip-out and ensure a clean, professional finish.
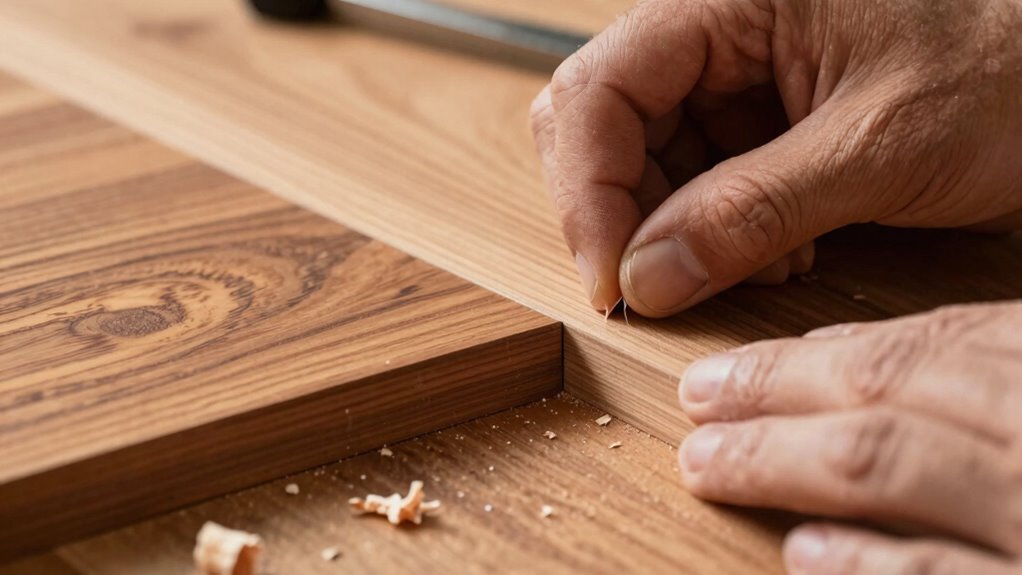
Tips for Maintaining and Troubleshooting Your Zero‑Clearance Inserts

Regular maintenance of your zero-clearance inserts guarantees they perform safely and effectively. Regularly inspect for wear, cracks, or chips that could cause instability or chip-out during cuts. Keep the inserts clean by removing dust and debris, which helps maintain a tight fit and ideal dust collection. Proper dust collection not only improves visibility but also reduces airborne particles, supporting safe operation. Always wear safety gear, such as goggles and a dust mask, when inspecting or cleaning the inserts to protect yourself from flying debris and dust. If you notice any damage or if the inserts don’t fit snugly, replace them immediately. Troubleshoot by checking alignment and ensuring the inserts are properly seated. Consistent care ensures smooth operation and prolongs the life of your zero-clearance inserts. Additionally, consulting navigation and mapping guides can help optimize your setup and ensure precise cuts.
Are Zero‑Clearance Inserts Worth It? Pros, Cons, and Cost Benefits

Zero-clearance inserts can improve your cutting accuracy and reduce material waste, saving you money in the long run. They also help you achieve cleaner cuts and less tear-out, which enhances your project quality. Considering these benefits, you’ll want to weigh them against the costs to decide if they’re worth it for your workshop. Additionally, incorporating precise calibration of your equipment can further optimize your results and ensure consistent quality.
Enhanced Cutting Precision
Enhanced cutting precision is one of the main advantages you’ll notice when using zero‑clearance inserts. They help guarantee better blade alignment, reducing the chances of uneven cuts and tear-out. With the insert fitting snugly around the blade, you get cleaner, more accurate results. This tight fit minimizes gaps that can cause wobbling or blade deflection, improving overall accuracy. Plus, zero‑clearance inserts make dust collection more effective by sealing the cut area, preventing chips and dust from escaping easily. This keeps your workspace cleaner and improves visibility. As a result, you experience smoother cuts and less rework. Whether you’re working on fine woodworking or detailed projects, these inserts deliver enhanced precision that makes your cuts more consistent and professional-looking. Digital asset management strategies can further optimize your workshop organization and safety.
Material Waste Reduction
Using zero‑clearance inserts can markedly reduce material waste by preventing blade pinching and tear-out during cuts. This means fewer ruined pieces and less scrap to dispose of or recycle. By minimizing tear-out, you’re also supporting better material recycling since cleaner cuts produce higher-quality scraps suitable for reuse. Here are three ways they help with waste management:
- Reduce scrap material, saving you money and resources.
- Limit tear-out, resulting in cleaner, more recyclable remnants.
- Cut down on the need to discard damaged or unusable pieces.
Cost-Effectiveness Over Time
Although zero‑clearance inserts may have higher upfront costs, they often prove to be a smart investment over time by reducing waste and improving cut quality. Proper blade alignment is easier to maintain with these inserts, preventing miscuts that lead to rework and material loss. Additionally, they enhance dust collection by sealing gaps around the blade, keeping your workspace cleaner and safer. Over time, these benefits save you money by decreasing the need for blade replacements and minimizing scrap. Better cut quality also reduces the chance of chip-out, which can damage your project and waste material. Using woodworking safety features like zero‑clearance inserts can significantly improve your overall setup. While the initial expense might seem higher, the long-term savings and improved efficiency make zero‑clearance inserts a cost-effective upgrade for your woodworking setup.
Frequently Asked Questions
Can Zero‑Clearance Inserts Be Used With All Types of Saws?
Zero-clearance inserts aren’t compatible with all saw types because saw compatibility varies. You need to confirm if the insert materials are suited for your specific saw model, whether it’s a table saw, miter saw, or another kind. Many inserts are designed for standard saws, but some may require adapters. Always verify your saw’s specifications and the insert’s compatibility to ensure a proper fit and effective chip-out reduction.
How Often Should Zero‑Clearance Inserts Be Replaced?
You should replace zero-clearance inserts whenever you notice blade misalignment or increased chip-out, which can compromise cut quality. Regular insert maintenance, including cleaning and checking for wear, helps guarantee ideal performance. Keep an eye on the fit around the blade, and change the insert if it becomes loose or damaged. Doing this maintains proper blade alignment and reduces chip-out, ensuring safer, cleaner cuts every time you use your saw.
Are Zero‑Clearance Inserts Compatible With Router Tables?
Zero-clearance inserts are compatible with router tables, offering a safer, more secure setup. You should consider safety considerations and material compatibility when installing them, ensuring they fit snugly and suit your specific router table. Properly matched inserts enhance precision, prevent chip-out, and promote safer routing. Always double-check compatibility before installation, and follow manufacturer instructions to optimize your woodworking workflow and minimize risks.
Do Zero‑Clearance Inserts Affect Cutting Accuracy?
Zero-clearance inserts can improve cutting accuracy by enhancing blade stability and reducing tear-out, especially with delicate materials. They help keep the blade aligned and minimize movement during cuts, leading to cleaner results. Additionally, choose inserts compatible with your specific router table and materials to guarantee ideal performance. Properly fitted inserts make a noticeable difference, giving you more control and precision with every project.
Can I Make Custom Zero‑Clearance Inserts at Home?
Imagine yourself in your workshop, crafting custom zero-clearance inserts with ease. Yes, you can make DIY modifications at home using various material options like hardwood, MDF, or plywood. Carefully measure your saw’s blade kerf and cut the inserts to fit snugly. Sand edges smooth, and slot them into place. This simple project enhances safety, reduces chip-out, and gives you a tailored upgrade to improve your cutting accuracy.
Conclusion
Just like the trusty Excalibur guarding King Arthur, a good zero‑clearance insert shields your workpiece from chips and tear‑out. It’s a small upgrade that packs a punch, transforming your saw’s performance and safety. By choosing, installing, and maintaining the right insert, you’ll carve with confidence, turning your workshop into your own legendary domain of precision. Embrace this simple upgrade, and watch your woodworking skills soar like Icarus reaching new heights.