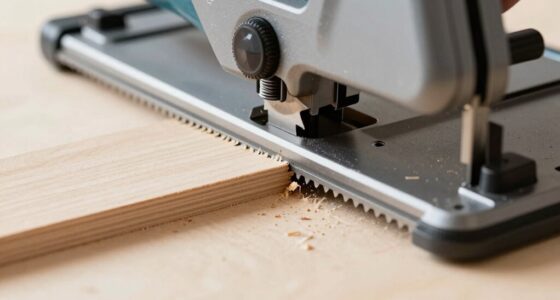
To prevent splintering during a plunge cut with a track saw, make sure your blade is perfectly aligned and slightly below the base plate before starting. Avoid rushing and maintain steady pressure, following the track closely. Misalignments or incorrect blade height can cause fiber tear-out and rough edges. For smoother cuts, support the material properly and utilize fine-tooth blades. Keep these tips in mind, and you’ll improve your technique—more insights await to help you perfect your plunge cuts.
Key Takeaways
- Ensure the blade is properly aligned and set just slightly below the base plate before plunging.
- Avoid forcing the saw; use smooth, controlled motion during the plunge to prevent uneven contact.
- Double-check that the track is secured and straight to maintain consistent blade entry.
- Use blades with fine teeth and sharpness suited for the material to reduce splintering.
- Support the material and consider zero-clearance inserts to minimize fiber tear-out during the cut.

Milwaukee 48 Teeth Fine Finish Track Saw Blade, 165 mm Blade
Designed to perform in the toughest applications
As an affiliate, we earn on qualifying purchases.
As an affiliate, we earn on qualifying purchases.
Master the Correct Technique for Splinter-Free Plunge Cuts
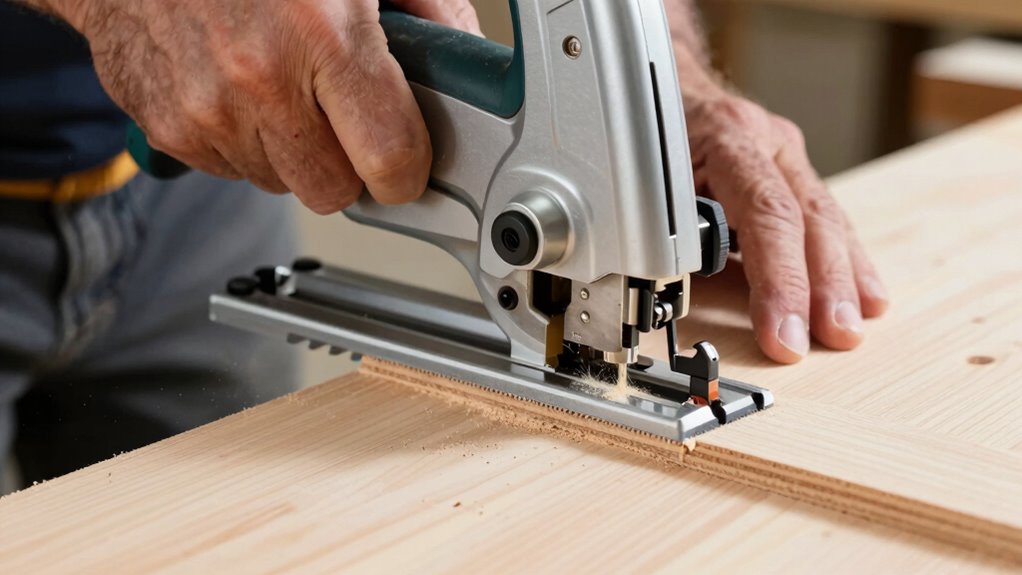
To achieve clean, splinter-free plunge cuts with a track saw, you need to master the correct technique from the start. First, guarantee your blade alignment is precise; misaligned blades cause uneven cuts and splintering. Before making the cut, double-check that the blade extends just slightly below the base plate. Maintain a consistent saw speed—going too fast can cause splinters, while going too slow might burn the wood. Smooth, steady motion is key; don’t force the saw, let the blade do the work. Keep your hands steady and follow the track closely to prevent wobbling. Proper blade alignment combined with controlled saw speed ensures a clean cut, reducing splintering and achieving professional results every time. Additionally, understanding blade depth adjustment can assist in optimizing your cut quality. Being aware of material properties can also help you select the appropriate blade and settings for different wood types, and practicing proper technique can significantly improve your results. Paying attention to ambient light conditions can also help you see your cut line more clearly, further enhancing precision. Incorporating dust collection techniques can also keep your workspace cleaner and improve visibility during cuts.

194419-4 118" Splinter Guard Replacement Strip for Makita Track Saw for Makita Track Saw Guard Rail 118 inches Accessories, Black Upgrade Stickiness
Compatibility: 194419-4 Guide Rail Strip Used with Makita SP6000J/J1 is used for guide rails (part number 194367-7), but…
As an affiliate, we earn on qualifying purchases.
As an affiliate, we earn on qualifying purchases.
Follow These Steps for a Clean, Precise Cut
Achieving a clean, precise cut with your track saw requires following a series of deliberate steps. First, ensure the blade is properly aligned; misalignment can cause splintering or uneven cuts. Check that the track is securely clamped and straight, providing a stable guide for the saw. Before cutting, activate dust extraction; this keeps the cut line clear of debris, improving visibility and reducing dust buildup. Make sure the dust port is properly connected to your vacuum or dust collection system. As you cut, keep the saw steady and apply consistent pressure, following the track smoothly. Regularly verify blade alignment and dust extraction effectiveness to maintain accuracy. Using the right filtration system can also help protect your equipment from dust and debris, ensuring consistent performance. Additionally, selecting the appropriate blade type for your material can significantly reduce splintering and improve cut quality. These steps help you achieve a clean, professional finish every time.

WEN DC1300 1,300 CFM 14-Amp 5-Micron Woodworking Dust Collector with 50-Gallon Collection Bag and Mobile Base , Black
Circulate up to 1,300 cubic feet of air per minute
As an affiliate, we earn on qualifying purchases.
As an affiliate, we earn on qualifying purchases.
Avoid Common Mistakes That Cause Splintering
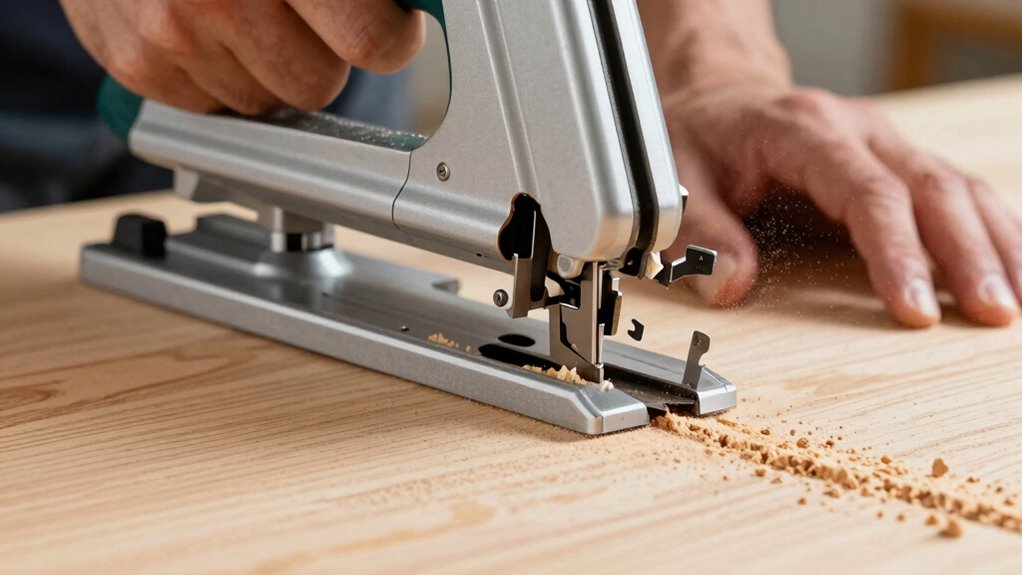
Even with the right steps in place, mistakes during cutting can lead to splintering and a rough finish. One common error is misaligning the saw blade, which causes uneven contact with the material and increases splintering risk. Always double-check your blade alignment before making a cut, ensuring it’s parallel to the track and properly centered. Another frequent mistake is setting the saw blade height too high; a blade height that extends more than a quarter-inch below the material’s surface can cause splintering on the underside. Adjust the blade height so it just clears the material, providing cleaner cuts. Maintaining proper blade alignment and correct saw blade height helps prevent splintering, resulting in smoother, more precise cuts and a professional finish. Paying attention to material support during cutting can also significantly reduce splintering and improve overall cut quality. Proper saw blade selection designed for the material can further minimize splintering and enhance cut quality. Additionally, ensuring that your cutting environment is stable and free of vibrations can contribute to cleaner cuts and reduce the risk of splintering. Using a cutting technique that emphasizes slow, steady motion can also help achieve cleaner, splinter-free results.

POWERTEC 2 PK Tracksaw Track Guide Rail Clamp, 8-3/4 Inch Quick Release Clamps for Circular Saw Guide Rail System, Woodworking, 71423V
INCLUDES: (2) Track Saw Track Clamps
As an affiliate, we earn on qualifying purchases.
As an affiliate, we earn on qualifying purchases.
Pro Tips to Minimize Splintering and Improve Your Cut Quality

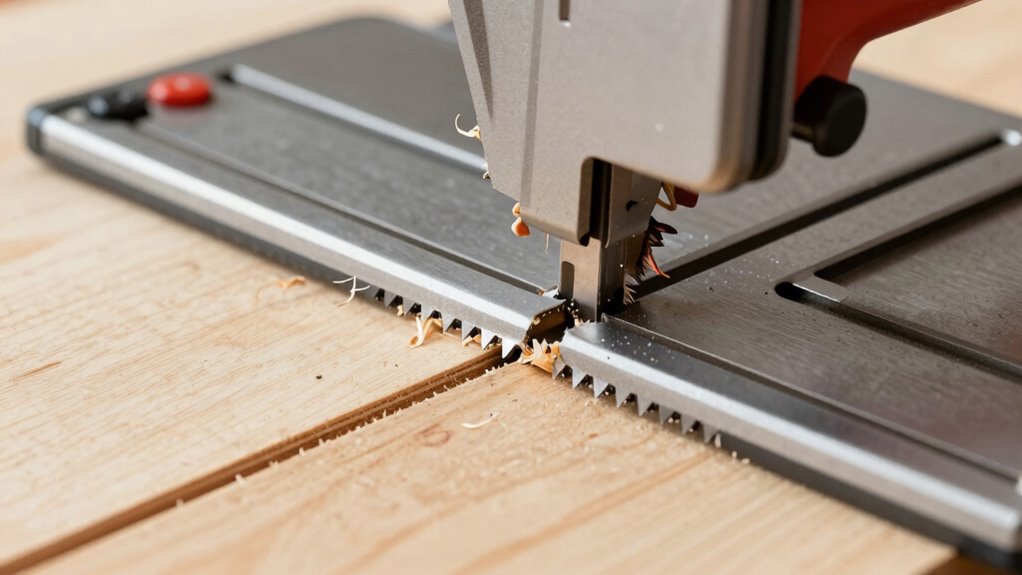
Using a zero-clearance insert or a sacrificial fence can markedly reduce splintering during cuts, as they support the material closely along the cut line. To further enhance cut quality, focus on these tips:
- Ensure blade alignment is perfect; misaligned blades cause uneven pressure, increasing splintering.
- Use dust collection effectively; clear dust obscures the cut line and affects blade performance, leading to rough edges.
- Choose the right blade for your material; sharper blades with fine teeth produce cleaner cuts and minimize splintering.
Troubleshoot Persistent Splintering and Fine-Tune Your Approach

If splintering persists despite your initial adjustments, it’s time to identify underlying issues and refine your technique. Check your blade alignment to ensure the blade is perfectly perpendicular and straight relative to the track. Misalignment can cause uneven cuts and increase splintering. Also, evaluate your material selection; some woods are more prone to splintering, especially if they’re dense or have a rough surface. Using the correct blade for your material can make a significant difference. Additionally, consider using a zero-clearance insert or applying painter’s tape along the cut line to support fibers and reduce splinters. Ensuring your saw’s filtration system is functioning properly can help prevent dust and debris from affecting cut quality. Proper blade maintenance and regular inspection can also help maintain optimal cutting performance. For added protection and to achieve cleaner cuts, you might also explore cutting techniques that minimize fiber tear-out. Fine-tuning your approach with these adjustments helps minimize splintering and results in cleaner cuts every time.
Frequently Asked Questions
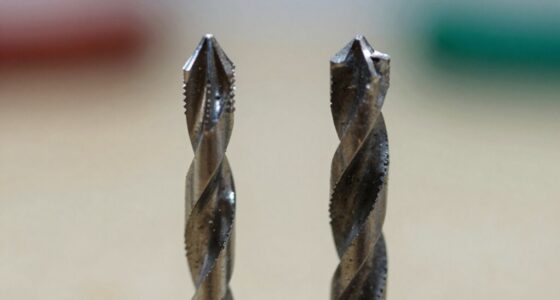
What Types of Blades Are Best for Reducing Splintering?
You should choose blades with a fine tooth count and a thin kerf for reducing splintering. Look for blades with specialized coatings, like anti-friction or carbide tips, to improve smoothness. Opt for a blade with an appropriate diameter for your saw, typically 6-1/2 inches or 8-1/4 inches, to ensure clean cuts. These features help minimize splintering and provide a cleaner finish on your cut edges.
How Does Wood Grain Direction Influence Plunge Cut Quality?
When making plunge cuts, you’ll get a cleaner finish by aligning your cut with the wood’s grain direction. For example, if you cut against the grain, splintering and rough edges are more likely. Always follow the grain alignment for smoother cuts, especially with delicate or veneered wood. Paying attention to cut direction helps prevent splintering and guarantees a professional-looking result.
Are There Specific Safety Precautions for Plunge Cutting?
When plunge cutting, you should wear safety gear like eye protection, ear protection, and a dust mask to stay safe. Make certain your work area is clear and stable before starting. Familiarize yourself with emergency procedures, like how to quickly turn off the saw if needed. Always double-check the blade is secure, and keep your hands away from the blade path. These precautions help prevent accidents and keep you safe during plunge cuts.
Can Blade Speed Settings Affect Splintering During Cuts?
Imagine you’re wielding your trusty saw like a Jedi with a laser sword—blade speed settings do matter for splintering. Keep your blade well-maintained and sharp, as dull blades cause more splintering, and use dust extraction to keep the cut clean. Adjust the speed to match the material, and you’ll minimize splintering, ensuring a smooth cut. Proper blade maintenance and dust control are your best allies against splintering mishaps.
How Can I Achieve Consistent Plunge Cuts on Thick Materials?
To achieve consistent plunge cuts on thick materials, start by securely clamping your workpiece to prevent movement. Use precise marking techniques to outline your cut, ensuring accuracy. When making the plunge, go slow and steady, applying even pressure. Keep the saw’s blade at the correct speed, and maintain a straight, controlled motion. Proper clamp positioning and clear markings help you stay on track, resulting in cleaner, consistent cuts every time.
Conclusion
Remember, practice makes perfect when mastering plunge cuts. By following the right technique and avoiding common mistakes, you’ll achieve clean, splinter-free results every time. Use sharp blades, control your speed, and don’t rush the process. As the saying goes, “A stitch in time saves nine,” so take your time to get it right. With patience and attention, you’ll turn every cut into a professional finish. Keep practicing—you’re on the path to woodworking mastery!