To keep walls straight when hand-cutting mortises, develop a steady chopping rhythm that combines controlled strikes with consistent timing. Focus on chopping with the grain, keeping your tools sharp, and maintaining proper stance and grip. Practice using scrap wood to refine your technique until your strikes become smooth and even. When you master this rhythm, your mortises will be cleaner and your wall joints will stay true. Keep going, and you’ll learn the key to precision and strength.
Key Takeaways
- Maintain a consistent chopping rhythm to ensure even walls and prevent deviations during mortising.
- Use steady, controlled strikes aligned with marked lines for accurate and straight mortise walls.
- Keep chisels sharp and properly sharpened to facilitate clean, precise cuts with less force.
- Practice proper stance and grip to develop muscle memory and improve wall straightness over time.
- Regularly use scrap wood for practice, refining technique and reinforcing the rhythmic chopping motion.

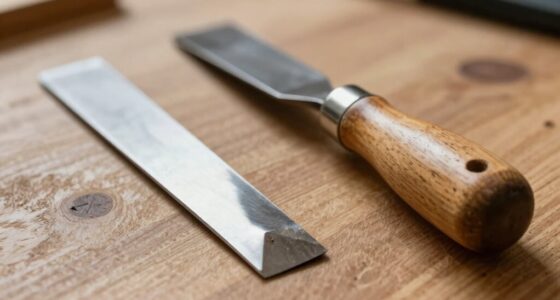
Narex 863600Chisel / Mortise Chisel Set – 4/6 / 10/12 mm – for Mortises
Robust tool used for chopping out joints as well as cutting mortises
As an affiliate, we earn on qualifying purchases.
As an affiliate, we earn on qualifying purchases.
What Are Hand-Cut Mortises?

Hand-cut mortises are precisely carved rectangular openings in wood that are created using manual tools. Historically, craftsmen relied on chisels and mallets to cut these mortises, a skill passed down through generations. This technique allowed for strong, secure joints crucial in traditional woodworking and timber framing. Although modern alternatives, like power mortisers and CNC machines, offer faster and more consistent results, hand-cut mortising remains valued for its craftsmanship and control. Using manual tools, you can achieve a deeper understanding of wood’s grain and better fit joints, which is essential for high-quality woodworking projects. Mastering traditional woodworking techniques can also enhance your appreciation for craftsmanship and attention to detail. The historical context emphasizes the skill and patience involved, but today’s tools provide efficient options for those willing to learn or prefer traditional techniques.

GREBSTK Beech Wood Mallet – Woodworking Hammer & Ice Crusher for Cocktails, Perfect for Chisels, DIY, Bar Tool, Polished Solid Hardwood, 12 Inch
Crafted from solid beech wood, this woodworking mallet offers superior hardness and durability. Its expertly balanced design, measuring…
As an affiliate, we earn on qualifying purchases.
As an affiliate, we earn on qualifying purchases.
Why Mastering Hand Mortising Is Still Worth It
Mastering hand mortising gives you unmatched precision and control, ensuring your joints fit perfectly. It also helps you preserve valuable traditional skills that can’t be replaced by power tools. Plus, hand techniques are cost-effective, making high-quality craftsmanship accessible without breaking the bank. Developing woodworking fundamentals through hand mortising builds a strong foundation for more complex projects.
Precision and Control
Have you ever wondered why skilled craftsmen still prefer hand mortising despite the availability of power tools? It all comes down to precision and control. With hand tools, you develop a keen sense of timing consistency, allowing you to make accurate cuts that fit perfectly. Your grip strength plays a vital role, giving you the finesse needed to control each chop and prevent slips. Unlike power tools, which can be less forgiving, mastering hand mortising requires focus and steady technique, ensuring every mortise is uniform and precise. This control translates into stronger joints and better wall alignment. By honing these skills, you gain an intuitive feel for the material, giving you unmatched accuracy that machines often can’t replicate. Developing manual dexterity is essential for achieving the best results in hand mortising.
Preserving Traditional Skills
Despite the rise of power tools, preserving traditional hand mortising skills remains significant because these techniques foster a deeper understanding of craftsmanship. Mastering hand mortising connects you to centuries of traditional craftsmanship, emphasizing patience, precision, and attention to detail. This skill allows you to appreciate the nuances of woodworking that power tools can’t replicate, giving you better control and finesse. Preserving these techniques also promotes tool preservation, ensuring that classic tools remain functional and well-maintained for future generations. By honing these skills, you deepen your respect for the craft and maintain a crucial link to woodworking history. Keeping traditional mortising alive enriches your craftsmanship and sustains a timeless aspect of woodworking culture. Proper tool maintenance is essential to ensure these traditional techniques continue to thrive and serve future artisans.
Cost-Effective Technique
While preserving traditional skills enriches craftsmanship, mastering hand mortising also offers practical financial advantages. You can implement cost-saving methods by avoiding expensive power tools and outsourcing labor. Hand-cut mortises require minimal equipment, making them accessible for DIY woodworking projects and reducing overall expenses. Learning this skill allows you to create high-quality joints without relying on costly machinery, saving money in the long run. Plus, hand mortising is highly adaptable for small-scale projects or repairs, where precision and control matter most. By investing time in developing this technique, you cut material costs and eliminate the need for specialized equipment. Additionally, understanding projector technology can help you optimize your workspace for better viewing experiences, making this skill even more valuable. Overall, mastering hand mortising is a smart way to keep projects affordable while maintaining craftsmanship standards.

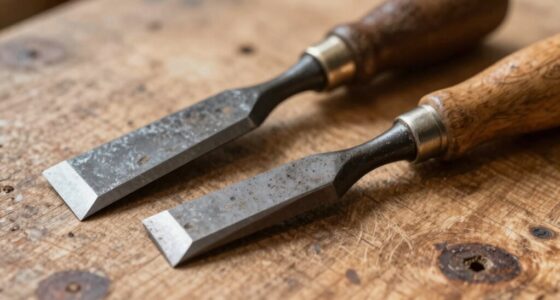
4 Piece Wood Chisel Sets Woodworking Tools Set, Wood Chisels for Woodworking with Steel Hammer End, Wood Tools Chisel Set Woodworking with Ergonomic Plastic Handle, 6mm, 12mm, 18mm, 24mm
Versatile Wood Chisel Set: This chisel set woodworking kit includes 4 pieces wood chisels in different sizes, including…
As an affiliate, we earn on qualifying purchases.
As an affiliate, we earn on qualifying purchases.
Essential Tools and Setup for Accurate Mortising
To achieve accurate mortises, selecting the right tools and setting up your workspace properly are vital. Start with quality chisels, mallets, and a reliable marking gauge to guarantee precision. A sharp chisel makes clean cuts, reducing splitting and errors. Use a square and measuring tools to mark your mortise layout accurately. Choosing the right wood is essential; opt for stable, tight-grained hardwoods that resist splitting. Set up a sturdy workbench with good lighting to keep your work secure and visible. Safety gear like goggles, gloves, and a dust mask protect you from chips and dust, especially when chopping. Proper setup and the right tools make the chopping process safer and more precise, setting a solid foundation for straight, even mortises. Understanding wood stability can help you select materials that hold up well during the mortising process.

Mortising Machine, Tenon Tools Mortising Attachment for Drill Press and Woodworking Mortise, Bench Drill Locator Set for Mortiser Circles/Square Hole Chisel Drilling Machine Mortise Machine.
Mortising Attachment for Drill Press Set include:locator,press block,side positioning rod,fixed seat and other accessories,also comes with 4 kinds…
As an affiliate, we earn on qualifying purchases.
As an affiliate, we earn on qualifying purchases.
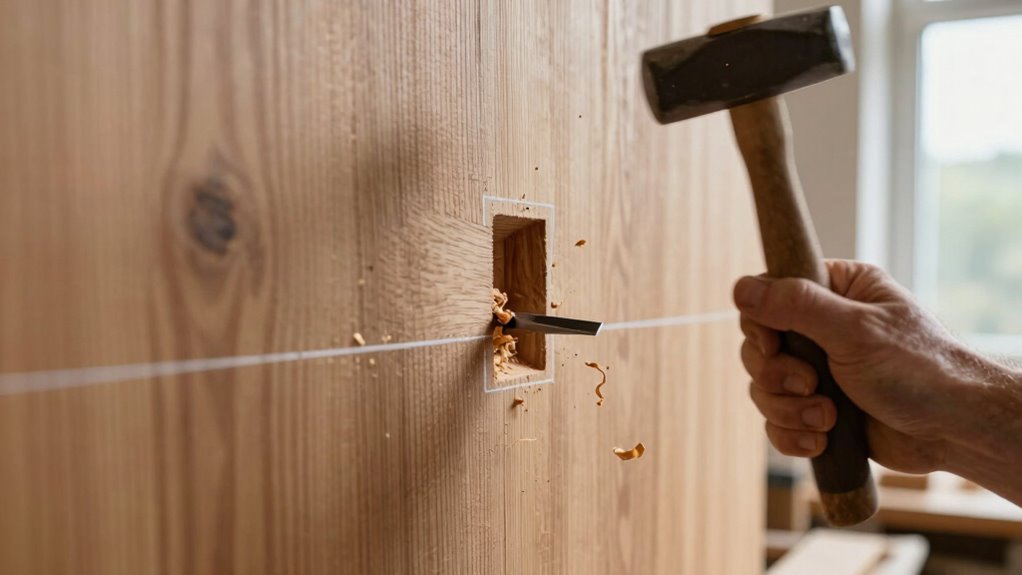
How to Develop a Steady Chopping Rhythm

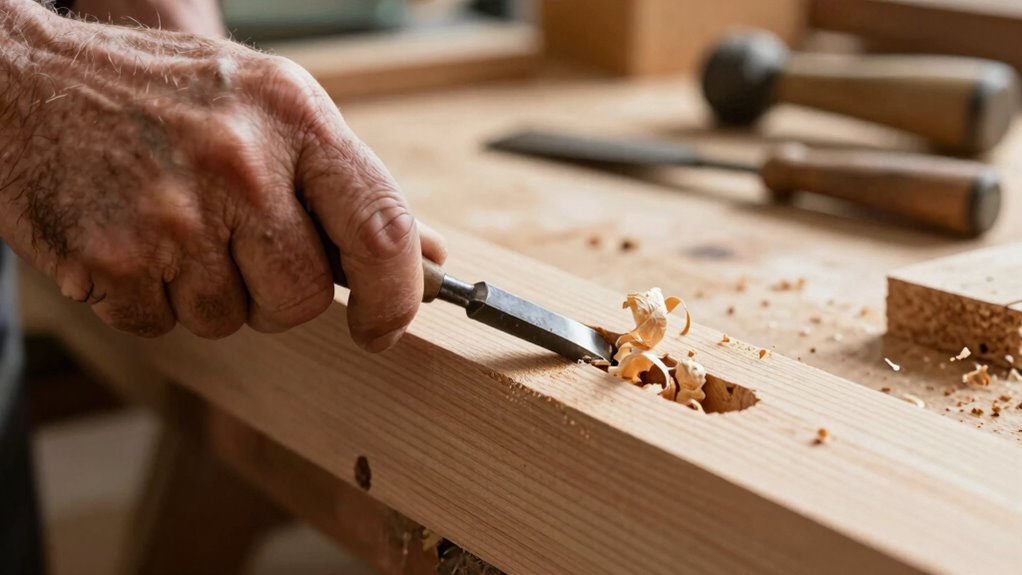
Developing a steady chopping rhythm is essential for making clean, precise mortises and maintaining safety. A consistent rhythm helps you control the force and depth of each chop, reducing fatigue and mistakes. Focus on establishing a pattern where each strike follows smoothly from the last, building muscle memory with every swing. Start with light, controlled hits to find your rhythm, then gradually increase power as you become more confident. Keep your body relaxed, using your whole arm and torso rather than just your wrist. As your muscle memory develops, your chopping becomes automatic, enabling you to work efficiently and accurately. Practicing this consistent rhythm not only improves the quality of your mortises but also keeps the process safe and sustainable over long sessions.
Step-by-Step: Hand-Cutting Mortises for Strong Wall Joints
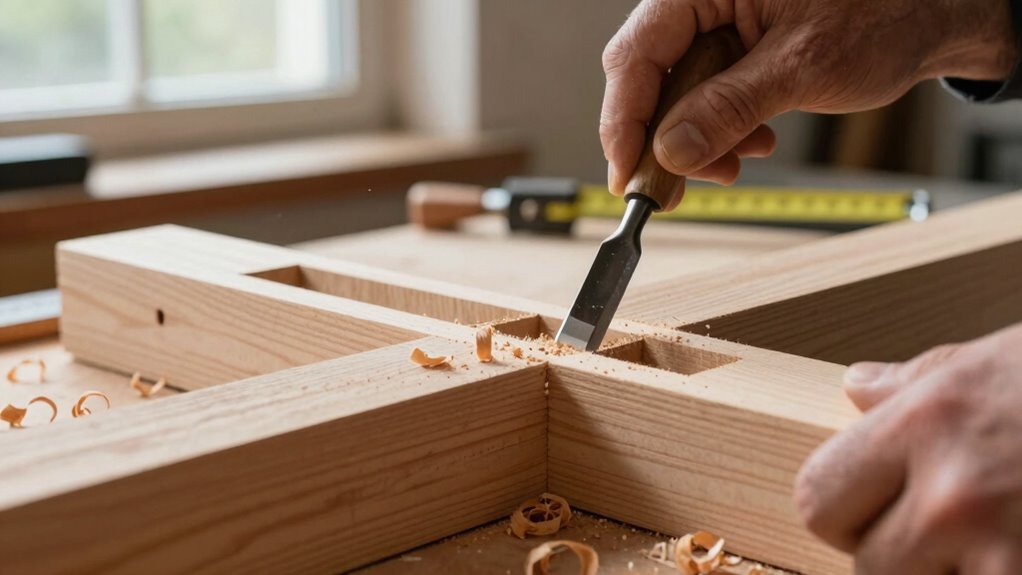
Hand-cutting mortises for strong wall joints requires careful planning and precise execution. Start by choosing the correct mortise pattern for your project, ensuring the dimensions match the corresponding tenons. Mark the mortise layout clearly on your wood, double-checking measurements for accuracy. Use sharp chisels and a mallet, working steadily to maintain control and consistency. Always prioritize woodworking safety—wear eye protection and keep tools sharp to prevent slips. Begin by removing waste from the mortise with a chisel, then refine the walls for a snug fit. Take your time, chopping along the marked lines, and regularly test the fit with your tenon. This disciplined approach guarantees strong, durable joints that keep your walls straight and true. Additionally, paying attention to woodworking tools and materials can greatly improve your precision and safety during the process.
Common Mistakes to Avoid When Mortising

One common mistake is using improper chisel technique, which can lead to uneven or damaged mortises. You also need to pay close attention to measurement accuracy; rushing or guessing can result in poor fits. Incorporating sound vibrations into your process can help improve your focus and precision when chiseling. Avoiding these errors helps make sure your wall joints are strong and precise.
Improper Chisel Technique
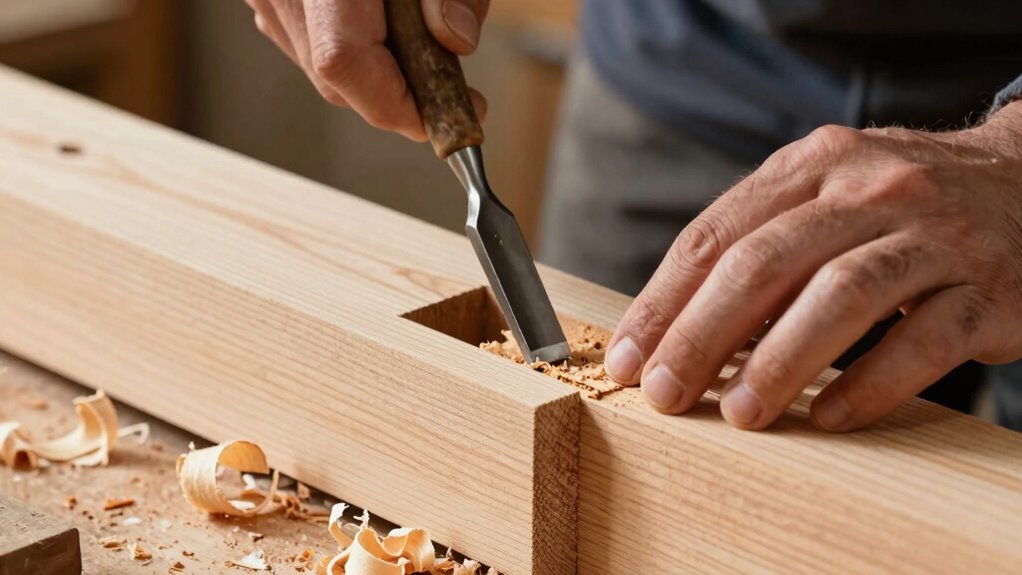
If you’re not careful with your chisel technique, you risk creating uneven or splintered mortises that compromise the fit and strength of your joints. Proper chisel sharpening is essential—dull tools cause slips and rough cuts, so keep your chisels sharp for cleaner, more controlled cuts. Pay attention to the wood grain orientation; cutting with the grain produces smoother mortises and reduces splintering, while cutting against the grain can tear the wood apart. Avoid forcing the chisel, which can lead to uneven edges and damage to the wood. Instead, use controlled, steady strikes, maintaining a consistent chopping rhythm. Developing proper technique guarantees your mortises are precise, clean, and strong, setting a solid foundation for your project’s integrity. Additionally, understanding the importance of free floating in woodworking can help you achieve better results by allowing your tools and joints to move naturally, reducing stress and potential damage.
Ignoring Measurement Accuracy
Ignoring measurement accuracy is a common mistake that can lead to ill-fitting mortises and weak joints. When you rush or neglect measuring precision, your mortises may be too wide, too narrow, or uneven, compromising the wall’s stability. Always double-check your measurements before marking out, and don’t rely solely on your eye—use precise tools like calipers or marking gauges for accuracy. Additionally, ensure your tools are properly calibrated; dull or misaligned chisels and saws will throw off your measurements. Taking the time to verify measurements and maintain tool calibration guarantees a better fit and stronger joints. Precision in measuring and tool setup isn’t just about neatness—it’s the foundation for strong, durable mortises that keep walls straight.
Tips for Keeping Walls Straight When Using Hand Mortises
Maintaining straight walls during hand mortising can be challenging, but using proper techniques makes a significant difference. Pay close attention to the wood grain; following its natural direction reduces splitting and guarantees better joint stability. Use a marking gauge and a square to plan your mortise lines accurately, preventing deviations. Keep your chisel and mallet aligned with your marks, chopping steadily to follow the wall’s intended path.
| Wood Grain | Joint Stability | Chopping Rhythm |
|---|---|---|
| Follow grain | Strengthens joints | Steady, consistent strikes |
| Avoid cross grain | Prevents cracks | Maintain rhythm without rushing |
| Grain direction guides | Ensures precise mortises | Controlled chop for accuracy |
| Respect grain flow | Secures wall alignment | Focus on consistency |
Practice Tips: Improving Your Technique and Wall Alignment

Are you looking to sharpen your mortising skills and achieve perfectly aligned walls? First, pay attention to the wood grain; cutting with the grain reduces splitting and helps maintain a straight line. Practice consistent chopping rhythm to build muscle memory and control, which directly impacts wall alignment. Regular tool sharpening is essential — a dull chisel makes uneven cuts and increases effort. Keep your chisel sharp and properly honed to improve accuracy and reduce fatigue. Focus on your stance and grip, ensuring steady, controlled strikes. As your technique improves, your mortises become cleaner and walls straighter. Incorporate deliberate practice, starting with scrap wood to refine your approach. Over time, these habits will lead to more precise cuts and walls that stay true.
Frequently Asked Questions
How Do Different Wood Types Affect Mortising Techniques?
Different wood types impact your mortising techniques because of their wood density and grain orientation. Denser woods require more force and sharper tools, while softer woods are easier to cut but may tear if you’re not careful. Grain orientation influences your chisel’s direction; cutting against the grain can cause chips, so aligning your cuts with the grain guarantees cleaner mortises. Adjust your approach based on these factors for precise, straight walls.
What Safety Precautions Should I Follow During Hand Mortising?
Did you know that proper safety precautions can reduce workplace injuries by up to 50%? During hand mortising, always wear eye protection to shield against wood chips and debris. Use proper tool handling techniques, keeping your hands steady and tools sharp. Work in a well-lit area, and take your time to avoid slips or accidents. Safety isn’t just important—it’s essential for a successful, injury-free project.
Can Hand-Cut Mortises Be Used for Load-Bearing Structures?
Yes, you can use hand-cut mortises for load-bearing structures if you focus on mortise strength and proper technique. Make certain your mortises are precisely cut, deep enough, and fit tightly to maximize load-bearing capacity. Using quality tools and sharp chisels helps achieve clean, strong joints. Remember, well-crafted mortises distribute weight evenly, making them reliable for structural support. Always double-check your work to ensure safety and stability in load-bearing applications.
How Do Environmental Conditions Impact Mortising Accuracy?
Environmental conditions can markedly impact your mortising accuracy. Studies show that moisture fluctuations cause wood to expand or contract by up to 3%, making precise cuts challenging. Temperature variations can also lead to inaccuracies, especially if the wood is not acclimated. To maintain precision, you should work in a stable environment, allowing your wood to adapt to room conditions, ensuring your mortises stay straight and true.
What Are Alternative Methods to Hand-Cut Mortising for Beginners?
You can use power tools like a drill press with a mortising attachment or a dedicated mortising machine for beginners. Mortising jigs are also great because they guide your cuts precisely, reducing the learning curve. These tools help you achieve accurate mortises without the physical effort and skill required for hand-cutting, making the process faster and more consistent, especially if you’re just starting out.
Conclusion
Mastering hand-cut mortises might take practice, but it’s worth it. When you develop a steady chopping rhythm, your walls stay straight and strong—just like when a seasoned woodworker built a custom bookshelf that didn’t warp over time. Keep honing your technique, stay patient, and focus on your rhythm. Before long, you’ll be creating precise, durable joints that stand the test of time, proving that traditional skills still have a essential place in woodworking.