
Spot work repairs can definitely save you time and money by targeting specific damage. For small drywall holes, use lightweight spackle; for hardwood scratches, colored wood filler works wonders. Tiles with cracks benefit from color-matched epoxy. Just remember to prepare the surface well to guarantee strong adhesion and a great finish. These techniques let you tackle minor issues without the hassle of a full strip-down. Stick around for more tips on effective repairs!

Get business pricing on tools and workshop supplies
- Business-only prices and quantity discounts
- Tax-exempt purchasing
- Multiple users, one account, clear invoices
Key Takeaways
- Spot repairs are effective for minor surface damage, such as small holes or scratches, preventing the need for extensive renovations.
- Proper surface preparation ensures better adhesion and enhances the durability of spot repairs.
- Use color-matched materials for a seamless finish that blends with existing surfaces.
- Assess the severity of damage to determine if spot work is suitable rather than a full strip-down.
- Regular maintenance can minimize the need for extensive repairs, allowing for targeted spot fixes.

When you notice a small issue in your home, tackling spot work repair can save you time and money. Instead of going for a full strip-down, you can often fix minor problems with some effective patching techniques. Whether it’s a ding in the wall, a small crack in the ceiling, or a chip in the flooring, knowing how to address these issues can keep your home looking sharp without the hassle of extensive renovations.
First, identify the specific problem area. Is it a paint scuff that needs touching up, or a hole in the drywall? Understanding what you’re dealing with will help you choose the right spot repair techniques. For instance, if it’s a small hole in the wall, you can use a lightweight spackle to fill it in. After applying the spackle, let it dry, and then sand it down until it’s flush with the surrounding wall. A quick coat of matching paint will make the repair nearly invisible.
Identify the issue first—whether it’s a paint scuff or drywall hole—to select the best repair technique for a seamless finish.
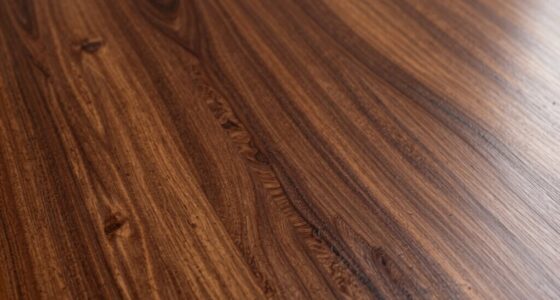
For scratches in hardwood floors, you can use a colored wood filler that matches your flooring. Simply apply the filler, let it dry, and buff it out until it blends seamlessly with the rest of the floor. This straightforward approach can save you from needing to refinish the entire surface, which is often more time-consuming and costly. Proper surface preparation is essential for achieving a seamless repair adhesion quality. Ensuring the repair area is properly prepped enhances the surface adhesion and durability of the fix.
If you’re dealing with tile cracks, using a color-matched epoxy can work wonders. Clean the crack thoroughly before applying the epoxy, and guarantee you follow the product instructions for the best results. With a little patience, you’ll have your tiles looking good as new without the need for a complete replacement. Preparing the area properly ensures a more durable and aesthetically pleasing repair surface preparation.
When it comes to spot repair techniques, preparation is key. Always clean the area you plan to work on, as dirt and debris can interfere with adhesion and the overall finish. Additionally, use high-quality materials designed for the specific type of repair you’re undertaking. This will not only enhance the longevity of the repair but also improve its appearance. Proper surface preparation is essential for effective DIY repairs that last.
As an affiliate, we earn on qualifying purchases.
Frequently Asked Questions
What Tools Are Essential for Spot Work Repairs?
For spot work repairs, you’ll need a few essential tools. Start with a quality sander for smoothing surfaces and a selection of brushes for applying finishes. A putty knife helps with filling in any gaps, while a detail sprayer can guarantee an even coat. Don’t forget safety gear! Your tool selection directly influences the success of your repair techniques, so choose wisely to achieve the best results.
How Long Does Spot Work Typically Take?
Ah, the elusive “quick fix”—a myth as ancient as time itself! Spot work typically takes a few hours, depending on the job’s nature. While you might dream of instant gratification, reality check: repair timeframes vary. Efficiency comparisons show that spot work can save you time versus full repairs, but don’t expect miracles. So, buckle up for a few hours of focused effort, and you’ll soon revel in your handiwork.
Can I Perform Spot Work on Any Finish Type?
You can’t perform spot work on every finish type. It’s essential to assess finish compatibility first. Some finishes, like lacquer or polyurethane, respond well to spot repair techniques, while others, such as certain stains or oil-based finishes, might not blend seamlessly. Always test a small area before diving in. If the finish doesn’t cooperate, you might need a different approach to guarantee a consistent and appealing result.
What Are the Risks of Spot Repair Versus Full Strip-Down?
Spot repair can save time and money, but it carries risks you need to assess. If the finish doesn’t blend well, you might end up with noticeable patches. A thorough cost analysis shows that while spot work is cheaper initially, it could lead to more extensive repairs later if done incorrectly. Always weigh the immediate savings against potential long-term issues to guarantee your repair choice is the best for your project.
How Do I Prep the Area Before Starting Spot Work?
Before starting spot work, you’ll want to guarantee proper surface cleaning and conduct a thorough damage assessment. First, clean the area to remove any dirt, grease, or debris. Next, assess the damage to determine how deep it goes and what materials you’ll need. Prepare your tools and materials based on this evaluation. By taking these steps, you’ll create a solid foundation for effective spot repair and achieve a better result.
As an affiliate, we earn on qualifying purchases.
Conclusion
In the domain of repairs, spot work is like a skilled artist adding a vibrant brushstroke to a faded canvas. You don’t always need to strip it bare to breathe new life into it. Sometimes, it’s those small, carefully placed touches that restore beauty and functionality. Just as a single flower can brighten a garden, your focused efforts can rejuvenate what seems lost, reminding us that hope often blooms in the most unexpected places.
As an affiliate, we earn on qualifying purchases.
As an affiliate, we earn on qualifying purchases.
Columbus Day / Indigenous Peoples' Day Picks
long weekend sales
As an affiliate, we earn on qualifying purchases.