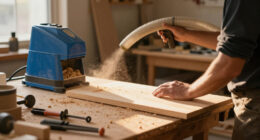

A capable woodworking shop is not defined by its size or the number of machines it contains. It is defined by how well the space supports accurate work, safe habits, and the kinds of projects you actually want to build. A garage corner can become an efficient furniture shop, while a large outbuilding can remain frustrating if its tools, storage, lighting, and dust controls were added without a plan.

Get business pricing on tools and workshop supplies
- Business-only prices and quantity discounts
- Tax-exempt purchasing
- Multiple users, one account, clear invoices
This hub is an orientation guide to the essential decisions behind DIY woodworking: organizing a workspace, choosing tools, controlling dust and heat, developing dependable techniques, and expanding without buying equipment you do not need. Use it to understand how the pieces fit together, then follow the linked guides when you are ready to compare a specific tool category.
Start With the Work You Want to Do
Before choosing machines, identify your likely projects. Someone building bookshelves, cabinets, and tables needs reliable sheet-goods cutting, routing, assembly, and finishing capacity. A woodworker interested in chairs or traditional furniture may place more emphasis on joinery, shaping, and hand tools. Outdoor construction introduces framing, fastening, and jobsite portability. Turning, carving, and instrument making create entirely different priorities.
Project scale matters as much as project type. Long boards need infeed and outfeed clearance. Full sheets of plywood require support during breakdown. Large assemblies need a flat surface and enough room to move around them. If space is limited, portable tools and rolling workstations may be more useful than stationary machines with large footprints.
Choose a few representative projects and map the operations they require: measuring, cutting, milling, joining, shaping, sanding, assembling, and finishing. This reveals which tools will be used repeatedly and which specialized operations can initially be handled with a jig, hand tool, rented machine, or outside service.
woodworking shop organization tools
As an affiliate, we earn on qualifying purchases.
As an affiliate, we earn on qualifying purchases.
Plan the Shop as a Workflow
A practical shop follows the movement of material. Lumber and sheet goods enter through a storage area, move to rough cutting and milling, continue through joinery and shaping, and eventually reach assembly, sanding, and finishing. These areas do not need rigid boundaries, but arranging them in a sensible sequence reduces unnecessary lifting and rearranging.
Give Mobile Tools a Home Position
Mobility is valuable only when every cart and machine has a designated parking place. A mobile router table or workbench can create temporary capacity, but equipment left in circulation becomes an obstacle. Mark home positions, protect clear walking paths, and keep emergency exits, electrical panels, and ventilation openings accessible.
Use Vertical Space Carefully
Walls can hold clamps, jigs, hand tools, and shallow cabinets without consuming floor area. Store frequently used items between knee and shoulder height, and reserve high shelves for light or infrequently used supplies. Heavy tools and unstable stacks should remain low. Lumber racks must be securely mounted and loaded within their intended capacity.
Protect the Assembly Area
A flat assembly surface is one of the most useful assets in a shop. It should not automatically become permanent storage. If the same bench handles cutting, glue-ups, sanding, and finishing, create nearby places for tools and project parts so the surface can be cleared quickly between operations.
dust collection system for woodworking shop
As an affiliate, we earn on qualifying purchases.
As an affiliate, we earn on qualifying purchases.
Build Around Safety and Visibility
Good safety begins before a blade moves. Clear floors, adequate lighting, stable work support, and easy-to-reach controls prevent many avoidable problems. Learn the instructions for every machine, inspect guards and accessories, and disconnect power before changing blades, bits, or making adjustments that place hands near a cutting edge.
Lighting should reveal layout lines, surface defects, and the relationship between a workpiece and a cutter. General overhead lighting is the foundation, supplemented by task lighting at benches and machines. Position fixtures to reduce shadows without creating glare at eye level.
Personal protective equipment should match the operation. Eye protection is a baseline around cutting, drilling, routing, and fastening. Hearing protection is important around sustained machine noise. Respiratory protection may be appropriate for dusty work or finishing processes, but it does not replace collection, filtration, ventilation, or following the safety information for the material being used.
Fire prevention deserves equal attention. Keep ignition sources away from flammable vapors, store finishing materials appropriately, and manage oily rags according to the product instructions and local requirements. Maintain suitable fire extinguishing equipment and ensure that everyone using the shop knows where it is.
portable workbench for woodworking
As an affiliate, we earn on qualifying purchases.
As an affiliate, we earn on qualifying purchases.
Control Dust, Heat, and Air Quality
Woodworking produces chips, fine airborne dust, heat, and sometimes vapors. These are related problems, but no single device necessarily solves all of them. Source collection captures debris near a tool. Air filtration addresses some suspended particles. General ventilation exchanges indoor air and can help manage heat. Finishing may require additional precautions based on the product instructions and applicable safety rules.
Small shops have special ventilation challenges because machines, walls, storage, and doorways compete for limited air paths. Fan size alone does not determine a useful setup; placement, intake openings, obstructions, noise, climate, and the destination of exhausted air also matter. The guide to shop ventilation fan systems for small shops provides a focused starting point for compact workspaces.
Larger or frequently used shops may need equipment suited to longer operating periods and more demanding airflow layouts. Woodworkers planning such a space can explore the separate guide to shop ventilation systems for professional woodworking.
Do not discharge dust or vapors into an attached living area. Consider where replacement air comes from, especially around fuel-burning appliances. Local building, fire, and environmental rules may affect ventilation design, ducting, electrical work, and finishing areas, so consult qualified professionals when those systems extend beyond a straightforward portable setup.
woodworking clamps and jig storage
As an affiliate, we earn on qualifying purchases.
As an affiliate, we earn on qualifying purchases.
Create a Reliable Cutting System
Accurate projects begin with controlled cuts and well-supported material. The best cutting system is not necessarily one machine; it is a combination of layout tools, work supports, blades appropriate to the material, and a repeatable method for referencing edges and faces.
Track saws are especially useful for breaking down sheet goods and making guided straight cuts without maneuvering a large panel across a stationary saw. When comparing models, consider cutting depth, bevel operation, dust collection connection, plunge action, corded or cordless power, and compatibility with the rest of the system. The overview of plunge track saws can help narrow the category.
The rail deserves separate attention because accuracy and usability depend heavily on it. Length, connector design, anti-slip features, splinter strips, clamps, and accessory compatibility influence how efficiently the saw works. Consult the guide to track saw guide rail systems when building or extending a guided-cutting setup.
Whatever saw you use, support both the workpiece and offcut. A guided cut can still become unsafe or inaccurate if material shifts, pinches the blade, or drops at the end of the cut. Check for hidden fasteners in reclaimed wood and wait for moving parts to stop before setting a tool down.
Develop Joinery in Layers
Joinery choices should follow the project’s loads, appearance, material, and available tools. Screws and simple reinforced joints can be entirely appropriate for shop furniture. Dados, rabbets, dowels, loose tenons, mortise-and-tenon joints, and other methods become useful as projects demand different combinations of strength, alignment, and visual refinement.
A hollow chisel mortiser is a specialized option for creating square-sided mortises. It may appeal to woodworkers who make repeated mortise-and-tenon joints and want a dedicated process. Capacity, workholding, adjustment, chisel availability, and the physical space around the machine are important considerations. For a category overview, see the guide to hollow chisel mortisers.
Specialized equipment should follow proven need. First learn how the joint works, how grain direction affects it, and how accurately its mating parts must fit. A dedicated machine can improve repetition, but it cannot compensate for poor layout, unsupported stock, or inconsistent reference surfaces.
Make Routing More Predictable
A router can cut profiles, grooves, dados, rabbets, patterns, and joinery. Handheld routing is flexible, while a router table provides support for operations in which moving the work past a fixed cutter is more controlled. Safe routing depends on correct feed direction, suitable bit speed, secure workholding, shallow passes when needed, and keeping hands away from the bit.
A router lift allows above-table height adjustment on compatible setups and can make repeated changes more convenient. Fit is crucial: the lift, router motor, insert opening, fence, and table must work together. Compare dimensions and compatibility before buying rather than assuming that components are interchangeable. The guide to router lifts for router tables explains the available choices.
Add Fastening Tools When the Projects Justify Them
Nailers can speed construction, but the nailer type and fastener must match the work. Framing nailers are intended for structural-style construction tasks rather than delicate furniture assembly. Cordless models remove the compressor hose from the immediate workflow, although size, weight, power system, fastener compatibility, and intended duty remain important.
If decks, sheds, partitions, or similar construction projects are part of your plans, the guide to cordless framing nailers offers a focused comparison. Always verify fastener requirements for the project and tool, keep hands away from the firing path, and understand the nailer’s trigger mode before use.
Understand Vacuum Workholding and Veneering
Vacuum systems can support veneering, clamping, pressing, and specialized workholding, but the complete setup matters more than the pump alone. The required vacuum level, flow, duty cycle, bag or fixture volume, fittings, hoses, gauges, and leak control all influence performance.
A professional or repeated-use workflow may also place different demands on durability, serviceability, and operating time than an occasional project. The guide to vacuum pumps for woodworking is a useful entry point, but check every component against the process and materials you intend to use.
Buy Tools as a System
Before purchasing, ask what operation the tool improves, how often that operation occurs, where the tool will live, and what else it requires. A machine may introduce blades, bits, rails, batteries, hoses, adapters, mobile bases, electrical needs, or maintenance tasks. Those supporting requirements affect both cost and shop space.
Compatibility is often more valuable than accumulating isolated features. Shared batteries, dust ports, guide rails, accessories, or storage formats can simplify a shop, provided the tools still suit the work. Also consider whether parts and consumables are reasonably obtainable. A tool that cannot be fitted with the correct blade, bit, chisel, or fastener will not remain useful.
Finally, leave room for experience to change the plan. Build projects, notice recurring friction, and improve the shop in response. The most effective woodworking space grows deliberately: one safer workflow, better-supported cut, clearer storage location, and well-chosen tool at a time.
Fall yard work Picks
leaf blowers
As an affiliate, we earn on qualifying purchases.