To stop wasting lumber, focus on understanding each part of a cut list, including dimensions, quantities, and symbols. Verify measurements against your project plans and check grain orientation to avoid mistakes. Organize and double-check all details before cutting, and plan your layout carefully to maximize material use. Mastering this process can markedly reduce waste. If you keep going, you’ll discover how to interpret key details that make your woodworking more efficient.
Key Takeaways
- Understand the components of a cut list, including part descriptions, dimensions, quantities, and symbols.
- Verify measurements and quantities against project plans before cutting to prevent errors.
- Use proper measurement techniques, accounting for saw kerf and material imperfections to minimize waste.
- Plan cuts strategically to maximize material yield and reduce offcuts.
- Cross-check details and practice reading different list formats to improve accuracy and efficiency.
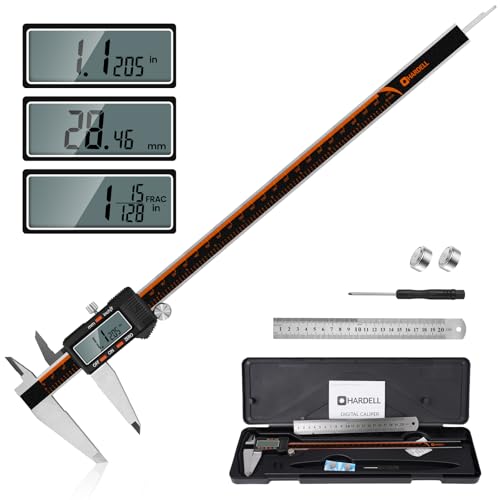
HARDELL Digital Caliper 12 Inch, Stainless Steel Caliper Measuring Tool with Large LCD Screen, Auto-Off Feature, Inch/Millimeter, Electronic Vernier Caliper for DIY, Jewelry, Parts, 3D Printing
【Stainless steel material】Digital calipers are made of high quality stainless steel, waterproof and rustproof, and the sturdy frame…
As an affiliate, we earn on qualifying purchases.
As an affiliate, we earn on qualifying purchases.
What Is a Cut List and Why Is It Important?

Have you ever wondered how woodworkers make certain they have all the pieces they need before starting a project? That’s where a cut list comes in. It’s a detailed plan that outlines each piece of wood required, including dimensions and quantities. Using proper measuring techniques, you can accurately identify the materials needed, preventing waste and saving money. Material identification is key; knowing the type of wood and its grain ensures you select the right pieces for your project. A well-prepared cut list acts as a roadmap, helping you organize your work efficiently and avoid costly mistakes. Additionally, understanding wood selection can enhance the durability and aesthetic of your finished piece. Incorporating measuring precision and digital tools can significantly improve the accuracy of your cut list and overall project quality. Developing a systematic approach to reading measurements can also boost your confidence and efficiency in the workshop.

Woodworker's Project Planner: Woodworking Journal to Record Project Details – Cut List, Materials, Assembly, Notes & Sketches | Workshop Project Organizer for Personal Reference
As an affiliate, we earn on qualifying purchases.
As an affiliate, we earn on qualifying purchases.
What Are the Parts of a Cut List?
What are the essential parts that make up a cut list? First, you’ll find the part descriptions, which specify each piece’s purpose and location. Next, the dimensions are listed, detailing length, width, and thickness; these are critical for accurate cuts. Grain orientation is also noted, guiding you on how to position the wood for strength and appearance, especially important during edge jointing. Quantities tell you how many pieces of each size to cut. Material type indicates what kind of wood to use. Additionally, understanding safety considerations ensures proper handling and reduces the risk of accidents during cutting and assembly. It’s also helpful to include cutting instructions that specify the order and method for making each cut, which can streamline your workflow. Knowing how to interpret cut lists can help you avoid mistakes and save material. Including measurement units clarifies whether dimensions are in inches or millimeters, preventing confusion. Clear dimension tolerances can also be specified to account for slight variations and ensure precise assembly. Finally, any special notes or instructions, like cut angles or finishing details, help guarantee your project turns out right. Understanding these parts helps you plan effectively, avoid waste, and guarantee your cuts match your project’s design.

HONGDUI JF06 Kerfmaker Table Saw Tool – 4”/100mm Movable Measuring Block, Mortise and Tenon Slot Adjuster for Woodworking
【PRECISE KERFMAKER MEASUREMENT】This HONGDUI kerf maker tool adjusts saw slots (≤50mm) and blades (≤13mm) for exact kerf cuts—ensures…
As an affiliate, we earn on qualifying purchases.
As an affiliate, we earn on qualifying purchases.
How Do You Read Dimensions and Quantities?
Understanding how to read dimensions and quantities is essential for accurate cuts and a successful project. Clear measurement details ensure you know the exact length, width, and thickness of each piece, preventing mistakes. Look for numbers paired with units like inches or millimeters—these define the size you need. When reading quantities, pay attention to the number of pieces required; this guarantees measurement clarity and helps avoid under- or over-ordering materials. Accurate quantities also prevent waste and save money. Always verify that the listed dimensions match your project plans, and double-check the quantities before cutting. Recognizing the importance of measurement units is crucial for precise craftsmanship and overall project success. Precise reading of these details keeps your project on track, making your work more efficient and reducing errors caused by misinterpretation. Additionally, understanding cut list terminology can help you quickly interpret complex specifications and streamline your workflow. Being familiar with piercing types and materials can also assist in planning your project with the right components for specific applications. Paying attention to measurement details can further enhance your accuracy and confidence during the building process.

O'SKOOL Wheel Marking Gauge for Woodworking, Precision Scribing Tool with Dual Metric/Imperial Scale, Solid Metal Body, Bearing-Mounted Rolling Cutter, Extra Blade Included, MAM018
Precision Cutting with Less Effort: A rolling cutter equipped with a bearing ensures smooth gliding and clean scoring,…
As an affiliate, we earn on qualifying purchases.
As an affiliate, we earn on qualifying purchases.
How to Cross-Check Your Cut List Before Cutting?

Before you start cutting, it’s crucial to cross-check your cut list to make sure everything aligns with your project plans. Begin by verifying all dimensions and quantities match your measurements, confirming the wood grain direction is correct for each piece. Check that the pieces are labeled properly and correspond to your project layout. Double-check your measurements against your project drawings to avoid mistakes. Always wear your safety gear—gloves, eye protection, and ear protection—before handling tools or lumber. Pay close attention to the grain direction, as cutting against the grain can weaken the structure or cause splintering. Additionally, understanding the cut list and how it reflects your project’s requirements can help prevent costly errors. Familiarizing yourself with modern kitchen technology can also inspire innovative storage solutions or efficient workflows during your project. Being aware of woodworking safety protocols is essential for a safe and successful project. Incorporating accurate measurements from your cut list ensures precision and reduces material waste. Recognizing the importance of precise planning can significantly enhance your efficiency and outcome. Taking these steps helps prevent waste, saves time, and ensures your project turns out as intended. Cross-checking thoroughly makes your cutting process smoother and safer.
Deciphering Symbols and Abbreviations in Cut Lists
Deciphering symbols and abbreviations in cut lists is essential for interpreting your project instructions correctly. To do this effectively, you need to understand symbol decoding, which involves recognizing common icons and shorthand used in plans. Abbreviation meanings vary but often include terms like “L” for length, “W” for width, and “T” for thickness. Some symbols indicate cuts, such as a zigzag line for a miter cut or a circle for drilled holes. Learning these symbols and abbreviations helps you quickly interpret measurements and cutting instructions, reducing mistakes and waste. Keep a legend or key nearby as you work, and practice reading different cut lists to become more confident. Developing your visual literacy in reading technical drawings enhances your ability to interpret plans accurately. Mastering this part of the process saves time and guarantees your project turns out just right.
How to Use Your Cut List to Minimize Waste?
To effectively minimize waste using your cut list, start by carefully planning your cuts before you begin. Focus on material maximization by arranging cuts to maximize yield and reduce offcuts. This proactive approach helps you avoid unnecessary waste and saves money. Use your cut list to identify the best way to organize pieces on your lumber, considering grain direction and board widths. Employ the following table to visualize efficient layouts:
| Piece Size | Number of Cuts | Optimal Placement | Remaining Material | Waste Reduction Tips |
|---|---|---|---|---|
| 2×4 | 4 | Top left corner | Small scraps | Combine scraps for small parts |
| 2×6 | 2 | Bottom right | Offcut pieces | Use offcuts for supports |
| 1×3 | 6 | Centered layout | Minimal waste | Plan cuts to avoid waste |
| 4×4 | 1 | Corner placement | Large leftover | Save for future projects |
| 2×2 | 8 | Edges | Tiny scraps | Use for patching or small projects |
Additionally, considering proper cut list management can further enhance your efficiency and reduce material waste. Implementing precise measurements during your planning phase ensures your cuts are accurate and waste is minimized. Planning your cuts with precision and keeping an organized inventory of your materials are key components of effective waste reduction strategies.
Troubleshooting When Your Cut List Doesn’t Match Your Material?

When your cut list doesn’t match your material, it’s often due to miscalculations or unexpected variations in your lumber. To troubleshoot, double-check your measurement accuracy—small errors can cause big mismatches. Guarantee your measurements are precise and account for any saw blade kerf loss. Material optimization plays a key role; sometimes, adjusting your cut list or reconfiguring pieces can better fit your available lumber, reducing waste. Verify that your initial measurements match the actual dimensions of your stock, especially if it’s been stored or handled. Also, consider lumber imperfections or warping that might affect cuts. By focusing on measurement accuracy and optimizing your material use, you can resolve mismatches efficiently and make the most of every board.
Final Tips to Master Reading Cut Lists and Save Lumber

Mastering how to read cut lists can considerably reduce material waste and improve your woodworking efficiency. To do this effectively, focus on maintaining labeling clarity—double-check that all measurements and notes are clear and consistent. Always review the cut list before starting, verifying each dimension against your plans. Keep your cut list organized, highlighting critical cuts to avoid confusion. Remember, precise interpretation of the list helps ensure you use your lumber efficiently, minimizing waste and saving money. Practice reading different formats and ask questions if anything’s unclear. By paying attention to detail and staying organized, you’ll cut down on errors and material loss. These final tips will make you more confident, helping you master cut lists and maximize material efficiency every time you work.
Frequently Asked Questions
How Can I Customize a Standard Cut List for Unique Projects?
You can customize a standard cut list by adjusting it for your project specifications and using custom measurements. First, review your project plans carefully, then modify the dimensions to match your specific needs. Update the quantities and labels accordingly. This way, you guarantee the cut list aligns perfectly with your design, helping you save material and avoid errors, making your project more efficient and tailored to your unique requirements.
What Tools or Software Can Help Generate Accurate Cut Lists?
Imagine a sleek digital template guiding your cuts with precision, streamlining your workflow effortlessly. You can rely on automation tools like CutList Plus, SketchUp, or Woodworking Software that generate accurate cut lists quickly. These tools let you input measurements and automatically create optimized layouts, saving you time and reducing waste. Embrace technology to turn complex calculations into simple steps, making your woodworking projects more efficient and enjoyable.
How Do I Handle Irregular or Non-Standard Lumber Sizes?
When handling irregular or non-standard lumber sizes, you should first measure accurately and note grain orientation to make certain proper cuts. Adjust your cut list to account for these differences, focusing on joint compatibility to maintain structural integrity. Always cross-check measurements before cutting, and consider using flexible tools or software that can accommodate custom sizes. This approach helps minimize waste and ensures your project stays precise and strong.
What Safety Precautions Should I Follow When Using Cut Lists?
When using cut lists, always prioritize safety by wearing personal protective gear like goggles, ear protection, and gloves. Follow safe tool handling practices by keeping blades sharp, using clamps, and maintaining a clean workspace. Never rush cuts or ignore safety guards. Double-check measurements before cutting, and stay alert to avoid accidents. These precautions help you work efficiently while minimizing risks and ensuring a safe woodworking environment.
How Do I Estimate Time Required Based on a Cut List?
To estimate time required based on a cut list, you should first review each cut’s complexity and length. Consider your experience and the tools you’ll use, as these impact speed. Break down the project into individual tasks, then allocate time for each. This approach helps with accurate time estimation and project planning, ensuring you stay on schedule and avoid surprises during your woodworking project.
Conclusion
Mastering your cut list is like tuning a finely crafted instrument—you’ll strike the right notes every time, avoiding waste and hitting your project’s perfect harmony. When you read your list with confidence, it’s as if you’re steering a well-lit path through a dense forest of lumber, cutting away the excess and revealing the beauty within. With these skills, you’ll build smarter, waste less, and turn raw wood into a masterpiece with every cut.