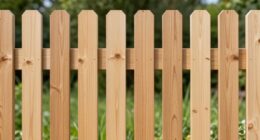
If your tenon fits on one side but leaves gaps on the other, it’s likely due to wood movement, measurement inaccuracies, or poor surface preparation. Wood expands and contracts differently, creating misalignment. Inaccurate measurements can lead to a snug fit on one side while leaving a gap on the other. Plus, rough surfaces hinder proper contact. Paying attention to these factors during assembly can help you achieve a better fit—discover more techniques to enhance your joinery skills.
Key Takeaways
- Wood movement due to moisture changes can cause uneven fitting, resulting in gaps on one side of the tenon.
- Inaccurate measurements or misalignment during cutting may lead to a snug fit on one side but gaps elsewhere.
- Different wood species expand and contract at varying rates, affecting joint integrity and causing uneven gaps.
- Surface roughness can impede proper contact, leading to a tight fit on one side and gaps on the opposite side.
- Regular tool calibration and maintenance are crucial to achieve consistent cuts and prevent fitting discrepancies.

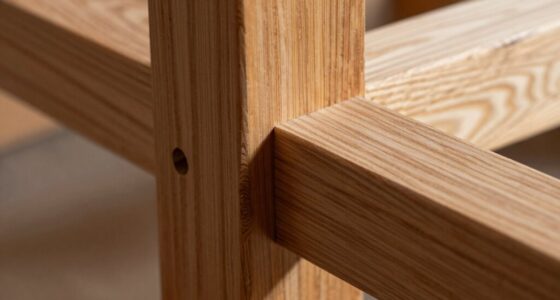
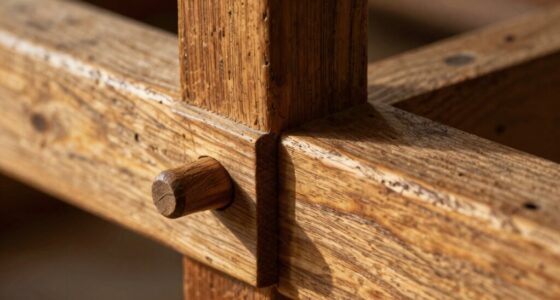
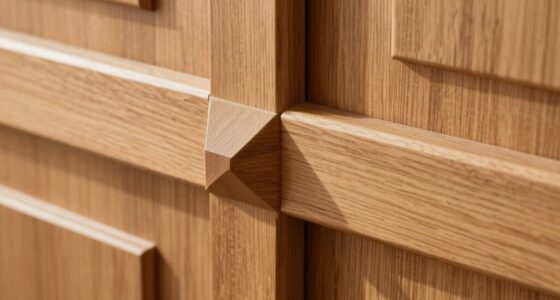
When you’re fitting a tenon into a mortise, it’s frustrating to discover it fits perfectly on one side but leaves gaps on the other. This scenario often springs from a variety of factors, and understanding them can help you achieve better tenon alignment and overall joint stability. One primary reason for this issue might be wood movement. As wood absorbs moisture or dries out, it can expand or contract, affecting the dimensions of your tenon or mortise.
Measuring techniques play an essential role in achieving a snug fit. If your measurements aren’t spot-on, you’re likely to encounter gaps. Make sure you’re using accurate tools, and don’t forget to account for any potential wood movement. Different wood species behave differently; some may expand more than others, leading to uneven fits. Familiarizing yourself with the characteristics of your selected wood can guide your approach in adjusting the tenon accordingly.
Fitting adjustments are sometimes necessary to achieve that perfect fit. After making initial cuts, it’s wise to perform a dry fit before final assembly. This allows you to spot any discrepancies early and make the necessary tweaks. If you notice gaps on one side, you might need to adjust the tenon’s shoulders or its length. A little sanding or planing can go a long way in resolving these discrepancies. Additionally, understanding your wood behavior can help you anticipate and compensate for movement during fitting. Using proper measurement techniques is also crucial to prevent misalignment from the start. Applying correct fitting techniques can further improve your results and ensure a tighter joint.
Tool calibration is another significant aspect. If your tools aren’t set correctly, they might create uneven cuts. Regularly check the alignment of your saws and chisels. Even the smallest deviation can lead to misalignment in your tenon and mortise. Maintaining your tools guarantees you achieve the clean cuts needed for a solid joint. Moreover, performing regular tool maintenance can prevent inaccuracies caused by dull blades or misaligned equipment.
Surface preparation is important, too. A rough surface can hinder proper contact between the tenon and mortise, leading to gaps. Before assembling, make sure both surfaces are smooth and free from debris. Proper tool maintenance and surface prep can significantly improve fit and joint strength, ensuring a more durable connection. Paying attention to these details can help prevent unnecessary gaps and improve the overall quality of your woodworking projects.

Kreg MortiseMate Loose Tenon Jig – Drill Jig for Woodworking – For Loose Tenon Joinery – Fits Workpieces 1/2" to 1 1/2" Thick
Premium Drill Jig: Effortlessly cut mortises with just a drill; the MortiseMate Loose Tenon Jig has an auto-indexing…
As an affiliate, we earn on qualifying purchases.
As an affiliate, we earn on qualifying purchases.
Frequently Asked Questions
What Wood Types Are Best for Tenon Joints?
For tenon joints, hardwoods like oak and maple are your best bet. They offer durability and stability, making your joints strong and reliable. On the other hand, while softwoods, such as pine, are easier to work with, they come with drawbacks like less strength and potential for warping. If you want lasting results, stick with hardwoods for those tight, gap-free connections you’re aiming for in your projects.
How Can Humidity Affect Wood Joints?
Humidity can notably affect wood joints by causing wood expansion or contraction. When the air is humid, wood absorbs moisture, leading to expansion that can compromise joint integrity. Conversely, dry conditions cause wood to shrink, potentially creating gaps. It’s essential to maintain a stable environment for your projects, ensuring the joints remain tight and functional. Regularly checking for changes in humidity can help you prevent issues before they arise.
What Tools Are Necessary for Precise Tenon Cuts?
Imagine crafting a key that opens the beauty of your project. For precise tenon cuts, you’ll need a trusty table saw for clean edges and chisel accuracy to refine those corners. Don’t forget to make miter gauge adjustments for perfect angles, ensuring your joints fit snugly. Finally, layout marking acts as your map, guiding each cut with purpose. Equip yourself with these tools, and watch your creations come to life effortlessly.
How Do I Determine the Right Tenon Size?
To determine the right tenon size, measure the mortise’s depth and width. For tenon length, it should be slightly shorter than the mortise to allow for fitting. Aim for a tenon thickness that matches about one-third the width of the adjoining piece for strength. Adjust based on your specific project needs, ensuring a snug fit without forcing it, which could lead to gaps or misalignment. Always double-check your measurements for accuracy.
Can I Fix Gaps After the Joint Is Glued?
Yes, you can fix gaps after the joint is glued, but it requires some care. Start by checking your joint alignment; if it’s misaligned, you might need to reassemble it. For gap filling, use a suitable wood filler or epoxy that matches your material. Apply it carefully, ensuring it fills the gap without excess. Once it’s dry, sand the area smooth for a seamless finish. Just remember, prevention is key for future projects!

Acrux7 3Pcs 8 Inch Long Spring Caliper Set, Carbon Steel Outside Divider Caliper Compass, Calipers Measuring Tool for Wood Turning Lathe Projects
SIZE OF CALIPER SET: Our wood turning calipers made from high quality carbon steel; Package included 8 inch…
As an affiliate, we earn on qualifying purchases.
As an affiliate, we earn on qualifying purchases.
Conclusion
In the dance of woodworking, a tenon that fits snugly on one side but leaves gaps on the other is like a song with an offbeat note. It’s a reminder that precision is key; even the slightest misalignment can create discord. By adjusting your techniques and paying attention to detail, you can bring harmony back to your joints. Embrace the journey, and soon those gaps will vanish, leaving you with a masterpiece that sings in perfect unison.

CRAFTSMAN Planer, 15 Amp, For Benchtops, Two Knife Solid Steel Cutter Head (CMEW320)
Hard and soft wood material removal: 15 Amp motor provides power for both hard and soft wood material…
As an affiliate, we earn on qualifying purchases.
As an affiliate, we earn on qualifying purchases.
Aluminium Woodwork Measuring and Scribing Tool Set – 9 Piece Precision Kit for Carpentry and DIY Projects with Storage Box(10 Pieces.)
COMPLETE WOODWORKING SET: This 9-piece kit includes angle ruler, dovetail gauge, scriber, and essential marking tools, perfect for…
As an affiliate, we earn on qualifying purchases.
As an affiliate, we earn on qualifying purchases.