
To achieve custom-looking mortise-and-tenon joints, focus on perfecting the shoulder. This flat surface defines the fit, so make precise cuts with a sharp chisel or a fine saw. Mark your shoulder line clearly and take your time to guarantee accuracy. After cutting, test the fit and gradually remove material for a snug joint. A well-defined shoulder enhances both appearance and strength, making your craftsmanship stand out. There’s more to mastering this technique, so keep exploring for tips!
Key Takeaways
- Define precise shoulder lines for a clean, custom fit that enhances the joint’s appearance and overall craftsmanship.
- Use sharp tools and take your time to ensure clean cuts, avoiding rushed workmanship that can lead to misalignment.
- Test fit the joint frequently, making gradual adjustments to achieve a snug fit that emphasizes the quality of your work.
- Pay attention to wood grain and finishes, as they can accentuate well-defined shoulders and project aesthetics.
- Practice and refine your techniques consistently to develop a keen eye for accuracy and elevate the professionalism of your joints.
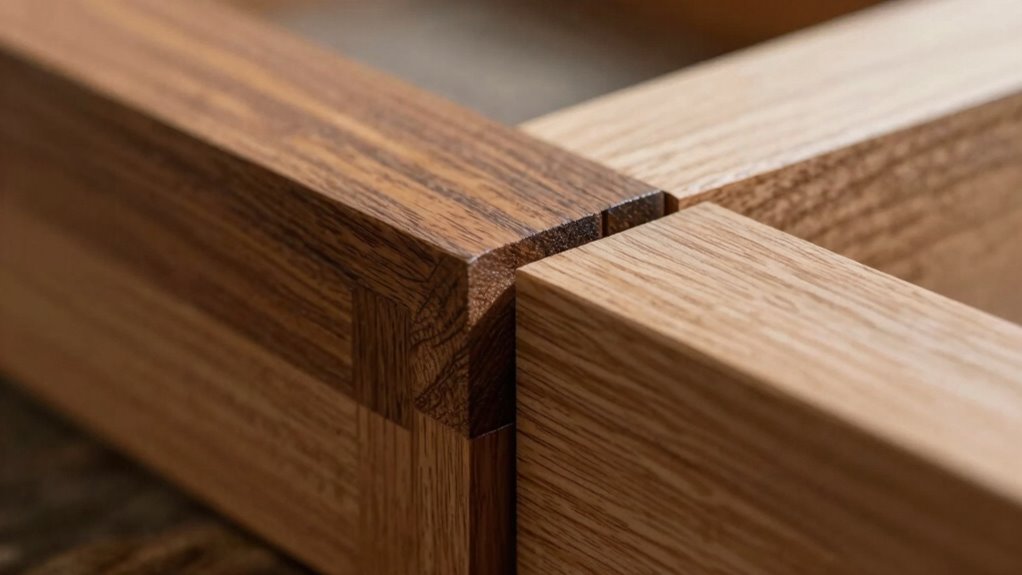
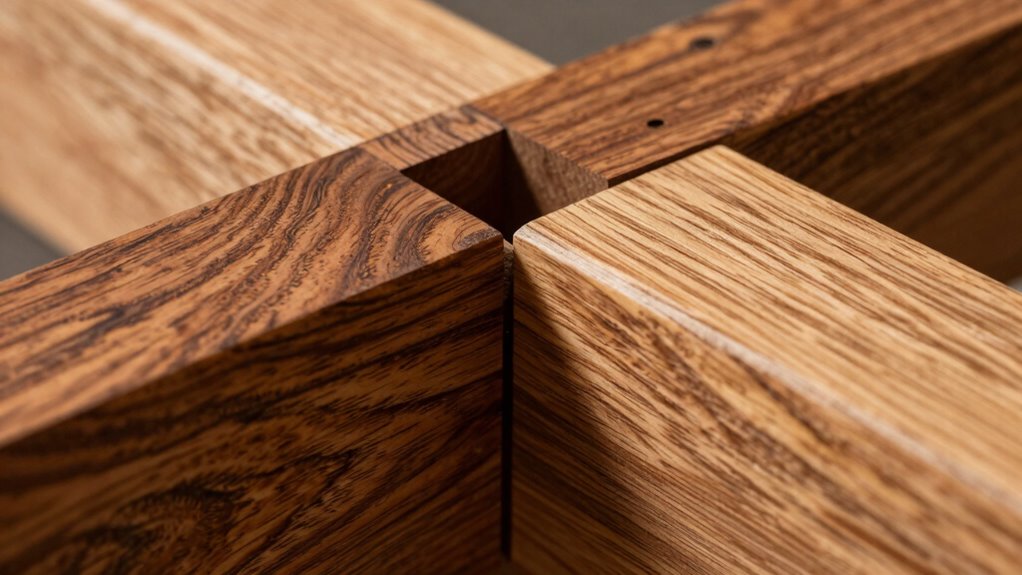
The mortise-and-tenon joint is a classic woodworking technique, but mastering the shoulder can make all the difference in your projects. When you’re aiming for joint precision, the shoulder plays an essential role in how your pieces fit together and how they look. A well-defined shoulder can elevate the appearance of your work, giving it that custom, professional touch that sets it apart from the rest.
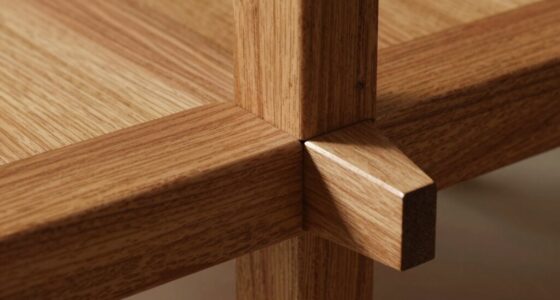
To get started, make certain you understand the anatomy of the mortise-and-tenon joint. The tenon fits snugly into the mortise, but the shoulder is what truly matters. It’s the flat surface that sits against the adjacent piece of wood, providing a clean shift between the two elements. If your shoulder is off, even slightly, it can throw off the entire joint, leading to gaps and misalignments that detract from your craftsmanship.
Understanding the shoulder’s role in the mortise-and-tenon joint is crucial for achieving precision and a flawless fit.
When you’re preparing to cut your shoulder, use a sharp chisel or a precise hand saw. Both woodworking techniques have their advantages, but whichever method you choose, confirm you’re making clean, accurate cuts. Don’t rush; taking your time will pay off. It’s also beneficial to mark your shoulder line clearly beforehand. This simple step can help you maintain focus and accuracy during the cutting process. Additionally, understanding the anatomy of the joint can help you better visualize how the shoulder interacts with the rest of the piece. Developing a clear understanding of the joint mechanics can further improve your precision and craftsmanship. Practicing proper measurement techniques is equally important to ensure consistency and accuracy.
Once you’ve made your cuts, test the fit. It’s always better to remove material gradually than to take too much off at once. You can fine-tune the shoulder by lightly sanding or paring it down until the joint fits perfectly. A snug fit not only enhances joint precision but also improves the overall strength of the joint. Practice and patience are essential for developing this skill, as consistent effort leads to better craftsmanship and more precise joints.
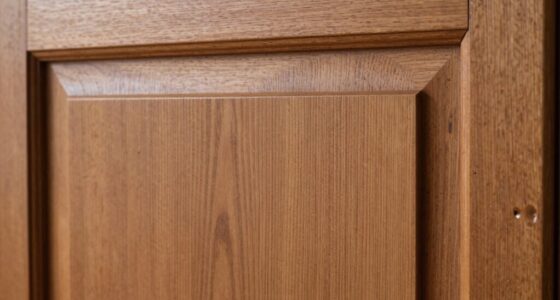
After you’ve achieved the desired fit, you might consider how the shoulder interacts with the rest of your project. Think about the wood grain and any finishes you plan to apply. A well-defined shoulder can highlight these features, drawing attention to the craftsmanship and making your piece stand out.
Finally, don’t forget to practice. Like any skill, mastering the mortise-and-tenon shoulder takes time and patience. Experiment with different types of wood and joint sizes. Developing a keen eye for joint accuracy and careful craftsmanship will help you consistently produce high-quality work. As you hone your skills, you’ll find that these small details can dramatically improve the quality of your work. Before long, you’ll be creating joints that not only function well but also look custom-made, showcasing your dedication to the craft.
Amazon Basics 8-Piece Wood Chisel Set for Woodworking, with Honing Guide, Sharpening Stone and Storage Case, 1/4" – 1-1/2"
8-piece wood carving chisel set includes 6x chisels 1/4 inch (6mm), 1/2 inch (13mm), 3/4 inch (19mm), 1…
As an affiliate, we earn on qualifying purchases.
As an affiliate, we earn on qualifying purchases.
Frequently Asked Questions
What Tools Are Best for Creating Mortise-And-Tenon Joints?
Creating mortise-and-tenon joints is like crafting a perfect puzzle piece; the fit should be seamless. For the best results, you’ll want a mix of hand tools and power tools. A chisel and mallet can help you fine-tune the mortise, while a drill with a forstner bit is great for precision. Combining these tools allows you to achieve that tight, professional look, ensuring your joints are both sturdy and visually appealing.
How Can I Ensure Precise Measurements for My Joints?
To guarantee precise measurements for your joints, focus on accurate joint alignment and effective measuring techniques. Use a reliable square and calipers to check dimensions, and always double-check your measurements before cutting. Mark reference points clearly on your workpiece, and consider using a marking gauge for consistency. Finally, dry-fit your joints to confirm everything aligns perfectly before final assembly. This way, you’ll achieve professional-looking results.
What Wood Types Are Best for Mortise-And-Tenon Joints?
When choosing wood for mortise-and-tenon joints, consider hardwood options like oak, maple, and cherry for their strength and durability. They resist wear and hold up well over time. On the other hand, softwood choices like pine or fir can be easier to work with and more affordable, but they might not offer the same longevity. Ultimately, pick the wood type that suits your project’s needs and desired finish.
Can I Use This Technique for Furniture Repair?
Yes, you can definitely use mortise-and-tenon applications for furniture repair. This technique is a fantastic choice in furniture restoration techniques, as it creates strong, durable joints that can withstand wear over time. When you properly cut and fit these joints, you’ll enhance the overall stability and aesthetics of your furniture. Plus, it allows you to preserve the original character while ensuring the piece remains functional and beautiful for years to come.
How Do I Finish Joints After Assembly?
Did you know that well-finished joints can increase your furniture’s perceived value by up to 30%? To enhance joint aesthetics after assembly, start by sanding the joints smooth, using progressively finer grits. Then, apply a wood finish that matches your piece, ensuring it seeps into the joints for a seamless look. Finally, polish the area for a sleek finish. This attention to joint finishing not only improves appearance but also protects the wood.

Frocopo Hand Saw Woodworking Tools, 6-Inch Pull Saw, Flexible Double-Edge Blade 17/11 TPI, Japanese Flush Cut for DIY Craft, Non-Slip Wood Handle, Sharp & Lightweight for Woodworking and Garden Trim
Craftsman's Essential Hand Saw: Frocopo hand saw offers precision and durability, making it the ideal choice for craftsmen….
As an affiliate, we earn on qualifying purchases.
As an affiliate, we earn on qualifying purchases.
Conclusion
By mastering the mortise-and-tenon shoulder trick, you not only enhance your woodworking skills but also elevate your projects. You’ll create joints that look custom, joints that fit seamlessly, and joints that stand the test of time. Embrace this technique, and you’ll find your confidence growing, your craftsmanship improving, and your pieces becoming more impressive. So, get out there, practice the trick, and watch your creations transform from ordinary to extraordinary with just a little attention to detail.

Clarke Brothers Wheel Marking Gauge – Woodworking Marking Scriber Kit With 2 Replacement Cutters – Wood Marking Tools With Graduated Inch & MM Scale – Solid Metal Bar Wood Scribe Tool For Carpenter
✅ PATENT PENDING – ROLL STOP FENCE WITH FLAT SPOT – woodworking tasks with a high-end wheel marking…
As an affiliate, we earn on qualifying purchases.
As an affiliate, we earn on qualifying purchases.

DFM Tool Works Rectangle Card Scraper – Precision Cabinet Multi-use Scraper for Woodworking, Wood Fine Finishers, Glue Scraper, Quality Handcrafted Card Shaping Tool – Made in USA, 2 Quantity – Blue
JUST THE RIGHT FIT FOR EVERY CRAFTSMAN: These 2 Piece DFM Tool Works Card Scraper, at 0.032" thickness,…
As an affiliate, we earn on qualifying purchases.
As an affiliate, we earn on qualifying purchases.