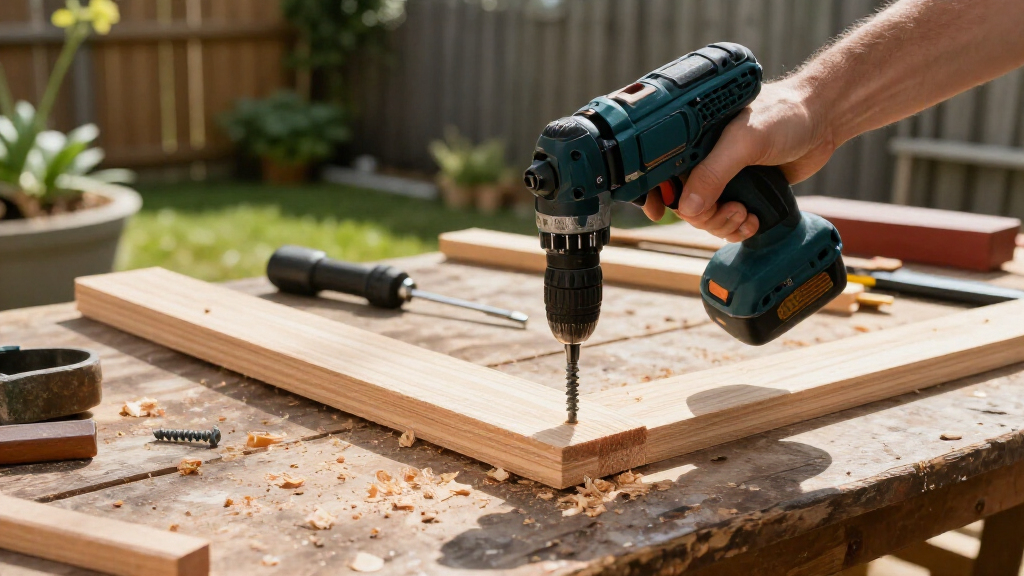

Use this guide to set up a cordless power drill, fit the right bit, and drill a hole or drive a screw with control. It is for beginners working on common household materials such as wood, drywall, or metal. Allow 15-30 minutes for preparation and a small practice task. Masonry, electrical work, and projects involving hidden pipes or cables need suitable equipment and additional precautions.

Get business pricing on tools and workshop supplies
- Business-only prices and quantity discounts
- Tax-exempt purchasing
- Multiple users, one account, clear invoices

DEWALT 20V MAX Cordless Drill and Impact Driver (DCK240C2)
- ✔ Platform: 20V MAX lithium-ion
- ✔ Included tools: Drill/driver and impact driver
- ✔ Batteries: Two included

BLACK+DECKER 20V MAX POWERCONNECT Cordless Drill Driver Kit (BDC120VA100)
- ✔ Platform: 20V MAX POWERCONNECT lithium-ion
- ✔ Tool type: Cordless drill/driver
- ✔ Clutch: 24 positions

DEKOPRO Cordless Drill 20V Set
- ✔ Voltage: 20V
- ✔ Battery: 1.5 Ah lithium-ion
- ✔ Speed ranges: 0–350 and 0–1,350 rpm
Difficulty: Beginner | Time: 15-30 minutes
What You’ll Need
Tools & Materials:
- Cordless drill with charged battery
- Drill or driver bit suited to the material and fastener
- Safety glasses
- Tape measure and pencil
- Clamps or a stable work surface
- Screw or other intended fastener, if driving
Knowledge:
- Basic ability to identify the workpiece material
- Ability to read the drill and bit manufacturer instructions
Check the drill manual for its controls, chuck limits, and operating guidance. Use a bit made for the material: wood bits for wood, metal bits for metal, and masonry bits with a hammer setting only when the drill supports it. Do not use a standard drill for masonry unless the manufacturer specifies that it can.
DEWALT 20V MAX Cordless Drill and Impact Driver (DCK240C2)
For buyers who want one cordless purchase to cover drilling and frequent screw driving, the DEWALT DCK240C2 is the strongest all-round pick in this group. Its drill/driver handles ordinary holes and fastening, while the separate impact driver is designed for driving screws with more force and less reliance on the drill’s clutch. That division of labor gives it a clear advantage over the single-tool DEKOPRO and BLACK+DECKER kits, especially for assembling structures or tackling a string of fasteners.The kit includes two 20V batteries, a charger, and a carrying bag, so a spare battery can reduce interruptions when one is charging. Compact tool designs and LED lights with a delay are useful in cramped or dim work areas. The main tradeoff is that this is a combo kit: it occupies more storage space and asks buyers to manage two tools. Its published figures also vary by description, so we would focus on the stated tool roles and included components rather than treating every torque figure as directly comparable. Choose it for versatility; skip it if you only need an occasional household drill.
Pros:
- Includes both a drill/driver and a separate impact driver.
- Two batteries, charger, and storage bag are included.
- Compact designs and delayed LED work lights support work in tight or dim spaces.
- Impact driver adds a dedicated option for repeated screw driving.
Cons:
- Two tools take more space and add setup complexity.
- The combo offers more capability than occasional, light household jobs require.
- Product descriptions give differing torque figures, complicating direct spec comparisons.
Best for: DIYers and homeowners who expect to drill holes and drive many screws, and want two specialized tools plus a spare battery.
Not ideal for: Someone seeking the lightest, simplest single drill for occasional picture hanging or basic furniture assembly.
Bottom line: We recommend the DEWALT as the most versatile cordless choice here when drilling and substantial screw driving both matter.
“We recommend the DEWALT as the most versatile cordless choice here when drilling and substantial screw driving both matter.”
BLACK+DECKER 20V MAX POWERCONNECT Cordless Drill Driver Kit (BDC120VA100)
The BLACK+DECKER 20V MAX kit is the approachable pick for a home toolbox that needs a drill plus a ready assortment of bits and sockets. Its 100-piece set spans drilling and driving accessories, and the 24-position clutch gives us more adjustment points for easing into screw fastening. That control can help reduce stripped screw heads or overdriving when we are working with different materials. Compared with the DEKOPRO, this package emphasizes accessory breadth and a larger clutch-position count; compared with DEWALT, it keeps the setup to one drill rather than adding an impact driver.The tradeoff is capability: the listed drill speed is 650 rpm and the description frames it for quick repairs and DIY tasks, not demanding production work. The supplied specifications also contain inconsistent torque and speed entries, so we would avoid using those numbers to claim a decisive power edge. Its POWERCONNECT battery can be shared with compatible tools in that system, which is useful if we already own them. Choose this kit for variety and controlled household use; look to DEWALT if repeated heavy fastening is part of the plan.
Pros:
- 100-piece kit includes a wide range of drill and driving accessories.
- 24-position clutch offers many settings for controlling screw depth.
- Battery works with compatible POWERCONNECT tools.
- Soft-grip handle and storage case support basic home use and organization.
Cons:
- Single drill lacks the DEWALT kit’s separate impact driver.
- Listed 650 rpm speed suggests a more modest drilling pace.
- Some supplied torque and speed figures conflict, making performance harder to assess.
Best for: New DIYers who want one drill, a wide range of included accessories, and adjustable control for routine home repairs.
Not ideal for: Users who need faster drilling, a dedicated impact driver, or a clear choice for frequent heavy-duty fastening.
Bottom line: We would choose BLACK+DECKER for accessory variety and approachable clutch control, provided heavy fastening is not the priority.
“We would choose BLACK+DECKER for accessory variety and approachable clutch control, provided heavy fastening is not the priority.”
DEKOPRO Cordless Drill 20V Set
When a second tool is unnecessary, the DEKOPRO 20V cordless drill offers a direct, drill-focused alternative. Its two speed ranges—0–350 and 0–1,350 rpm—and 18+1 torque settings give us a choice between slower, more controlled fastening and quicker drilling. At a stated 2.5 pounds, it is the lightest option by the supplied figures, making it appealing for short jobs around the home or work above shoulder height. Unlike BLACK+DECKER’s large accessory bundle, DEKOPRO keeps the package centered on the drill and basic bits.The included 1.5 Ah battery, charger, and screwdriver bits cover common starter tasks, but the supplied information does not establish a broad compatible tool system or a second battery. It is also a single drill with no impact driver, so frequent driving into dense material is a reason to consider the DEWALT combo instead. The listed 40 N·m torque figure is useful context, but we would not compare it directly with the other listings’ differently stated figures. Choose DEKOPRO for a lighter, uncomplicated kit; skip it if the job list calls for two tools or extended work between charges.
Pros:
- Stated weight of 2.5 pounds supports easier handling for short tasks.
- Two speed ranges provide a slower setting for controlled fastening.
- 18+1 torque settings allow adjustment for different screw tasks.
- Battery, charger, and a selection of drill and screwdriver bits are included.
Cons:
- Only one 1.5 Ah battery is listed.
- No separate impact driver for repeated or demanding screw driving.
- The supplied wood drilling capacity figure is unusually small and may not be useful as a practical guide.
Best for: Homeowners who want a lighter single drill for occasional repairs, furniture assembly, and basic DIY tasks.
Not ideal for: Buyers planning frequent heavy screw driving, extended jobs, or wanting a separate impact driver and spare battery.
Bottom line: We see DEKOPRO as the compact, uncomplicated pick for light household drilling when a second tool is unnecessary.
“We see DEKOPRO as the compact, uncomplicated pick for light household drilling when a second tool is unnecessary.”
As an Amazon Associate we earn from qualifying purchases.
Before You Start
Put on safety glasses and secure the workpiece so it cannot shift or spin. Check both sides of the drilling area when possible. Avoid locations where electrical wiring, plumbing, or other hidden services may run; use an appropriate detector or get qualified help if you cannot confirm the area is clear. Tie back long hair and keep loose clothing, jewelry, and hands away from the rotating bit. Remove the battery before changing a bit or adjusting the drill.
Step-by-Step Instructions
Step 1: Choose the right bit
Match the bit to the job and material. Use a drill bit for making a hole and a driver bit that fits the screw head for driving a screw. For a screw, choose a bit that sits firmly in the recess without wobbling. Check the bit and fastener packaging for the right size; a pilot hole should be narrower than the screw’s solid core, while leaving room for its threads.
Tip: A loose-fitting driver bit can slip and damage the screw head or work surface.
Check: The bit matches the material and task, and a driver bit fits the screw head securely.
Step 2: Mark and secure the work
Measure the intended location and mark it with a pencil. For repeatable holes, mark each center and check spacing before drilling. Clamp the workpiece to a bench or place it on a stable surface with support beneath it. Keep the area behind the drilling point clear so the bit will not strike the bench, floor, or another object as it exits.
Tip: Do not hold a small piece in your hand while drilling; the bit can catch and make it spin.
Check: The mark is in the right place, the workpiece does not move when gently pressed, and the exit path is clear.
Step 3: Fit the bit in the chuck
Remove the battery before fitting or changing the bit. Open the chuck jaws, insert the bit straight and far enough for a secure grip, then tighten the chuck according to the drill manual. On a keyless chuck, hold the chuck sleeve and tighten it by hand; do not grip the chuck while the motor is running. Reinstall the battery only after the bit is secure.
Tip: Keep the bit centered in the chuck. A crooked bit can wobble, enlarge the hole, or come loose.
Check: The bit sits straight and cannot be pulled out by hand with light pressure.
Step 4: Set the drill controls
Select forward rotation for drilling and most screw driving. Choose a lower gear for driving screws or working with larger bits, and a higher gear for smaller holes when the material allows. Set the clutch to a low number for screw driving, then raise it gradually if the drill stops before the screw is seated. Turn off hammer action for wood, drywall, and metal. Use hammer action only for masonry when the drill and bit are designed for it.
Tip: The clutch helps limit screw-driving force, but it does not replace a firm grip or careful control.
Check: The direction, gear, clutch, and hammer settings suit the material and task.
Step 5: Position yourself and the drill
Hold the drill by its handle with your finger off the trigger. Stand so you can keep your balance and see the mark. Place the bit tip on the mark and hold the drill straight to the surface for a straight hole or screw. If the drill has a side handle, fit and use it for large bits or demanding work as directed by the manual.
Tip: Keep both hands clear of the bit and do not brace the workpiece with a hand near the drilling point.
Check: The tip rests on the mark, the drill is aligned, and your stance feels stable.
Step 6: Drill the hole or drive the screw
Squeeze the trigger gently to start at low speed, then increase speed only as needed while keeping the drill aligned. For a hole, apply steady pressure without forcing the bit. Ease off periodically to clear chips, especially in deeper holes, and withdraw the bit while it is still turning slowly. For a screw, keep the driver bit seated firmly in the head and use controlled trigger pressure. Stop when the screw is seated; do not force it below the surface unless the project calls for that.
Tip: If the bit binds, release the trigger and wait for it to stop before removing the drill or changing direction.
Check: The hole is at the marked location, or the screw is seated without a stripped head, split material, or visible damage.
Step 7: Stop and inspect the result
Release the trigger and let the drill stop completely before setting it down. Remove the battery before touching the bit, clearing a jam, or making an adjustment. Brush away dust and chips rather than using your fingers near a sharp bit. Check the hole or fastener for position, depth, and damage, then remove clamps only when the workpiece is stable.
Tip: Bits may remain hot after drilling, especially in metal. Let them cool before handling.
Check: The drill is off, the work is undamaged, and the hole or fastener meets the project’s intended position and depth.
Common Mistakes to Avoid
- Using a bit that is unsuitable for the material or screw head. — Check the bit label and select one designed for the material; match driver-bit shape and size to the fastener.
- Starting at high speed or pushing hard to make the drill work faster. — Start slowly, keep the drill aligned, and let the correct bit cut at its own pace.
- Drilling an unsecured piece or holding it by hand. — Clamp the workpiece to a stable surface and keep the drilling path clear.
- Leaving the battery in while changing the bit or clearing a jam. — Remove the battery before adjustments, and wait for all rotation to stop.
Troubleshooting
Problem: The bit slips in the chuck or wobbles while spinning.
Solution: Release the trigger, remove the battery, and reseat the bit straight. Tighten the chuck as the manual directs. Replace a bent or damaged bit.
Problem: The screw will not go in or the driver bit keeps slipping.
Solution: Check that the drill is in forward, use the matching driver bit, and press straight into the screw head. Try a pilot hole where the material or screw size calls for one. Lower the clutch if the screw is being driven too deeply.
Problem: The drill stops, binds, or overheats.
Solution: Release the trigger and let the bit stop. Check for a jam, a dull or incorrect bit, excessive pressure, or a low battery. Clear the jam only with the battery removed, and let a hot drill or bit cool before continuing.
Problem: The hole is off-center or angled.
Solution: Stop and reposition before the hole becomes deep. Mark the center clearly, start at low speed, hold the drill perpendicular to the surface, and secure the workpiece against movement.
What Success Looks Like
The drill and bit remain secure, the workpiece stays in place, and the hole or screw is at the intended location and depth. The material has no unintended cracks or significant damage, and the screw head remains intact. The drill is switched off before you set it down or handle the bit.
Next Steps
Remove the battery before storing the drill or changing accessories. Brush dust from the drill and bit, check bits for wear or damage, and store them dry in a case. Recharge the battery according to its manual. For the next task, repeat the material and hidden-service checks, then choose a bit and setting suited to the new workpiece.
Frequently Asked Questions
Should I drill a pilot hole before driving a screw?
Use a pilot hole when the screw or material guidance calls for one, particularly near the edge of wood or when driving a larger screw into dense material. Choose a hole size that guides the screw without removing so much material that its threads cannot grip.
Which drill setting should I use for screws?
Start with forward rotation, low gear, and a low clutch setting. Test on a scrap piece if available, then raise the clutch a little at a time until the screw seats at the desired depth.
Can I use a cordless drill on concrete or brick?
Only if the drill manual allows masonry drilling and the drill has the needed hammer function. Fit a masonry bit and follow the manufacturer’s instructions. A regular drill may struggle or overheat on masonry.
How do I keep a hole straight?
Mark the center clearly, clamp the workpiece, and hold the drill perpendicular to the surface. Start slowly and pause to check alignment before the hole gets deep.