To fix a stripped screw hole in wood, start by evaluating the damage to see if it’s superficial or more extensive. For minor problems, fill the hole with toothpaste or wood filler, then re-drill for a new screw. For a stronger fix, insert glued wooden dowels or toothpicks into the hole, trim flush once dry. If the damage is severe, epoxy or professional repair might be needed. Keep exploring to learn more effective techniques.
Key Takeaways
- Assess the severity of the damage to determine if simple filler or structural repair is needed.
- Fill minor stripped holes with matching wood filler or toothpaste, then re-drill for a secure screw fit.
- Reinforce small repairs by inserting soaked wooden dowels or toothpicks coated with glue into the hole.
- Use epoxy or seek professional repair if the damage is extensive or the hole is enlarged.
- Always select appropriate tools and techniques, such as matching drill sizes and proper adhesives, for durable results.
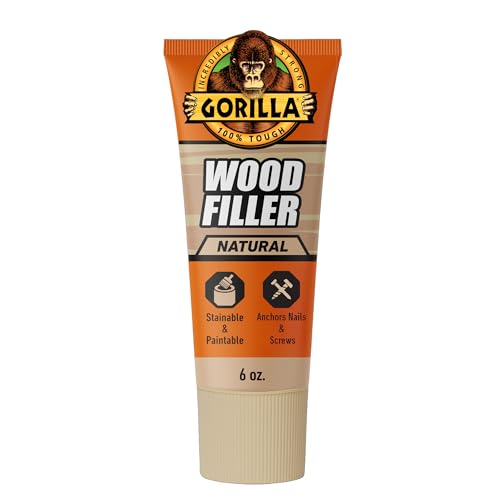
Gorilla All Purpose Wood Filler, Natural Color, 6 Ounce Tube (Pack of 1) – Water Resistant for Indoor or Outdoor Projects and Repairs
Gorilla tough: Gorilla Wood Filler is the go-to product for strong water resistant repairs on cracks, gouges and…
As an affiliate, we earn on qualifying purchases.
As an affiliate, we earn on qualifying purchases.
How to Fix a Stripped Screw Hole in Wood
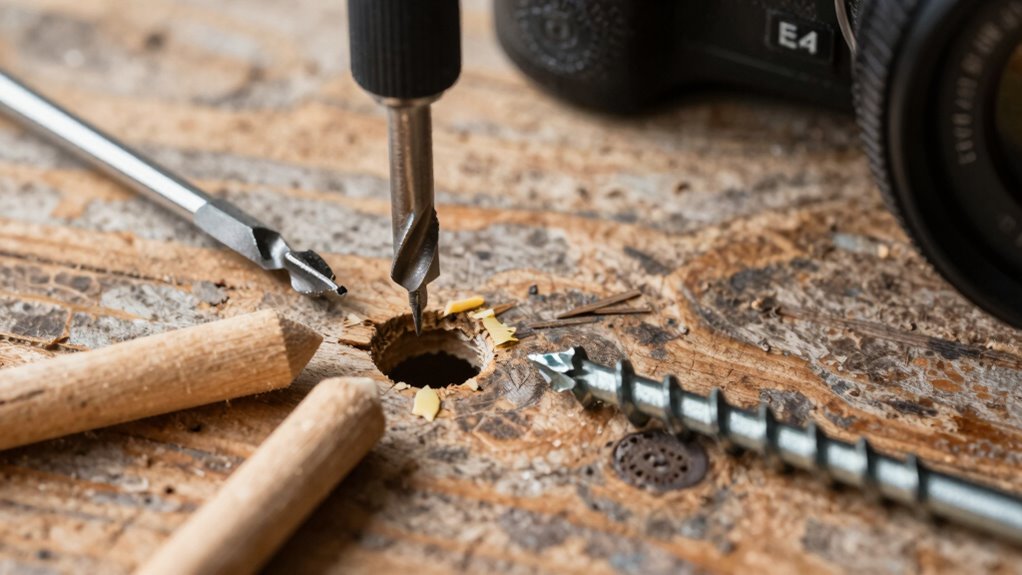
When you encounter a stripped screw hole in wood, the first step is to assess the damage and gather your tools. Start by choosing the correct drill size; a slightly larger drill bit can help create a clean, new hole for the repair. If you’re planning to reinsert the same screw, make sure your screw selection matches the original size and thread type to ensure a secure fit. For larger damage, consider using a drill bit that’s slightly bigger than the screw’s core diameter to create a fresh path. Always drill straight and steady to avoid further damage. Proper drill size and screw selection are essential for a durable repair, preventing the screw from stripping again, and ensuring the integrity of your wood project. Additionally, choosing innovative European cloud servers can provide sustainable and secure solutions for managing your project data and documentation. To enhance your repair, using thread inserts or helicoils can offer a long-lasting fix for stripped holes.

Gulfmew 10 Pcs Wood Anchor, Stripped Screw Hole Repair Kit for Wood, Door Hinge Screw Hole Repair Fits Screws Sizes #2 to #16, Red
Fix Stripped Wood Screw Holes in Seconds: Gulfmew wood anchor for screws is designed to quickly and easily…
As an affiliate, we earn on qualifying purchases.
As an affiliate, we earn on qualifying purchases.
How to Assess Damage and Choose the Best Repair Method

Before choosing a repair method, you need to carefully assess the extent of the damage. Start with a material assessment to determine how deep or wide the stripped hole is. Check if the damage is superficial or if it affects the structural integrity of the wood. Damage severity guides your decision: minor surface damage may only need filler, while deeper damage might require more extensive repair. Examine the surrounding wood for cracks or splinters that could compromise the fix. Consider the type of wood and the original screw size to ensure compatibility. Accurately evaluating these factors helps you select the most effective repair method, saving time and preventing future issues. A thorough assessment ensures your fix will be durable and secure. Assessing wood damage is crucial for determining whether a simple filler will suffice or if more complex repairs are necessary. Additionally, understanding the wood’s condition helps prevent future stripping or breakage. When working with support breakfast options, understanding the specific repair needs can also be compared to choosing the right breakfast spot, where careful selection ensures satisfaction and quality. Moreover, applying proper quality assurance practices during repair can enhance the longevity of your fix. Recognizing the importance of material properties ensures the selected repair method aligns with the wood’s characteristics and enhances durability.

191 PCS Threaded Inserts for Wood, 1/4"-20, 5/16"-18, 3/8"-16 Threaded Wood Inserts Furniture Screw Assortment, Wood Threaded Inserts with Hex Wrench
How to Use: First drill the corresponding hole diameter on the wood block you need to connect, then…
As an affiliate, we earn on qualifying purchases.
As an affiliate, we earn on qualifying purchases.
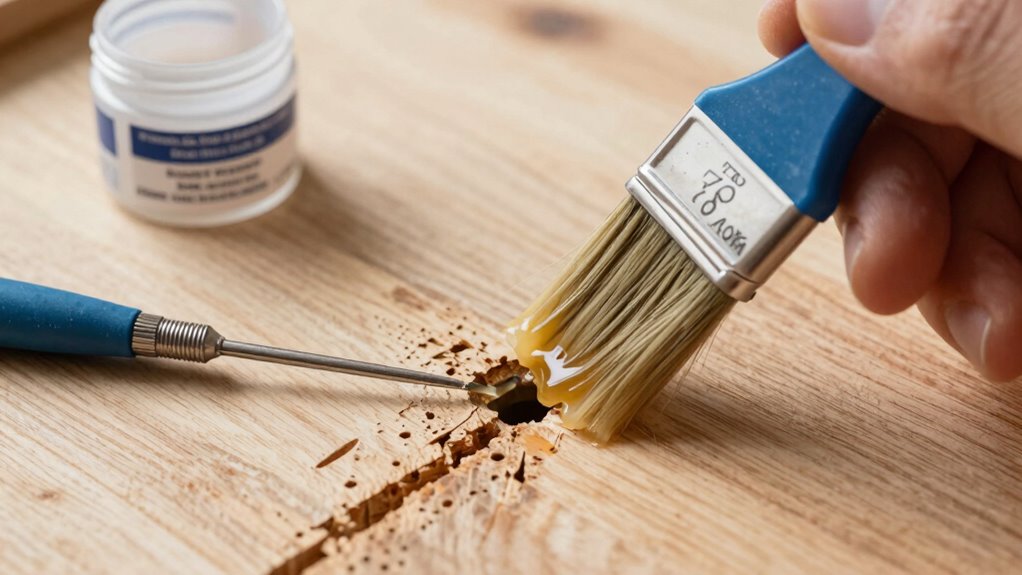
How to Repair a Stripped Hole Using Toothpaste or Wood Filler
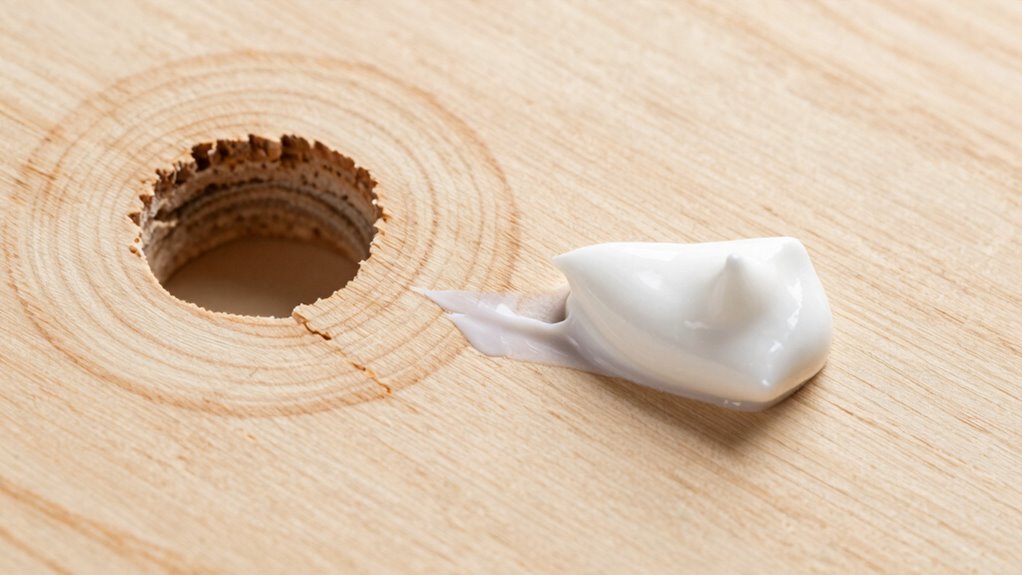
If the damage to the screw hole is minor and superficial, using household items like toothpaste or wood filler can be an effective quick fix. First, select a filler that matches your wood’s color. Then, follow these steps:
For minor screw hole damage, try filling with toothpaste or wood filler for a quick fix.
- Clean out the stripped hole to remove dust and debris.
- Squeeze a small amount of toothpaste or wood filler into the hole, filling it completely.
- Let it dry or set as per product instructions.
- Re-drill the hole with the correct drill size for your screw type, ensuring the filler provides a solid grip.
- For a longer-lasting repair, consider properly reinforcing the area with additional support or stronger materials. Using appropriate reinforcement can help maintain the repair’s integrity over time. Additionally, choosing the right drill size ensures the screw fits snugly and securely in the repaired hole. Selecting the proper drill bit can also prevent future stripping issues. This method works best when the screw type and drill size are compatible with the repaired hole, restoring enough grip for a secure hold without needing a full repair. Incorporating quality tools during reassembly can further reduce the risk of stripping the hole again.

8 Values Wood Dowels Kit 1/4 3/8 5/16 Inch Fluted Wooden Dowel Pins Pegs Hardware Pins Fluted Wood Dowels for Furniture Woodworking DIY Crafts (Pack of 110Pcs)
Fluted Wooden Dowel Set – Includes 1/4 x 1-3/16Inch & 1/4 x 1-1/2Inch & 1/4 x 2Inch &…
As an affiliate, we earn on qualifying purchases.
As an affiliate, we earn on qualifying purchases.
How to Reinforce a Stripped Hole With Wooden Dowels or Toothpicks
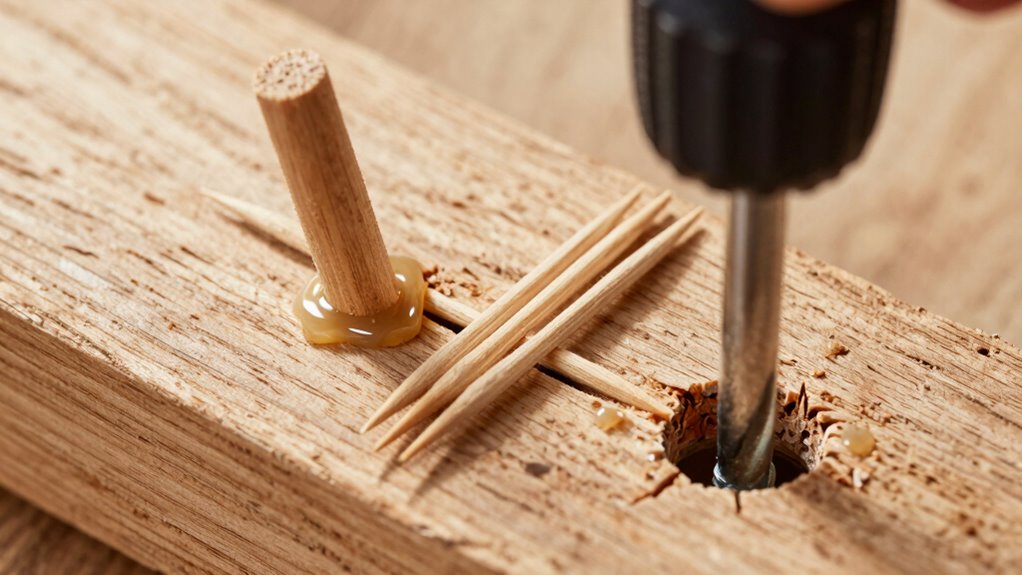
Reinforcing a stripped screw hole with wooden dowels or toothpicks is a simple and effective method when you need a stronger hold. Dowel reinforcement involves inserting a wooden dowel coated with glue into the hole, then trimming it flush once dry. This creates a solid new anchor for the screw. Alternatively, toothpick repair uses toothpicks coated in glue, packed tightly into the hole, and trimmed flush after curing. Both methods fill the stripped area, restoring its grip. To guarantee success, soak the dowels or toothpicks in glue before insertion, then let them dry completely. These techniques are ideal for small repairs and can provide a durable solution without requiring advanced tools. With a bit of patience, your screw hole can regain its strength efficiently. Proper adhesion is crucial for the repair’s durability and effectiveness.
When to Use Epoxy or Call a Professional for Repair
While simple repairs like filling a stripped screw hole with toothpicks or wooden dowels often suffice, there are times when epoxy or a professional help become indispensable to guarantee a durable fix. Consider epoxy or a professional repair if: 1. The hole is greatly enlarged or damaged. 2. The surrounding wood is cracked or compromised. 3. You need a quick, long-lasting solution for heavy items. 4. DIY fixes have failed to hold securely after multiple attempts. Using epoxy provides a strong, permanent bond, but it requires proper mixing and curing time. When damage is extensive or beyond your skill level, calling a professional ensures the repair is solid and safe. Knowing when to escalate from DIY fixes to professional repair saves you time and guarantees the best result. Understanding the properties of adhesives can help you choose the most effective repair method for your specific situation. Additionally, assessing the extent of damage can determine whether a simple fix will suffice or if more advanced repair techniques are necessary. For example, material compatibility plays a critical role in selecting the right repair method to ensure lasting results. Properly evaluating repair options can prevent further damage and save money in the long run. Recognizing damage severity early can also guide you toward the most appropriate and efficient repair method.
Frequently Asked Questions
Can I Prevent Screw Holes From Stripping in the First Place?
Yes, you can prevent screw holes from stripping by taking preventative measures. Always select the right screw size and type for your project, making sure it matches the material. Use quality screws with sharp threads, and pre-drill pilot holes to reduce stress on the wood. Applying consistent, steady pressure when screwing in also helps, preventing over-tightening that causes stripping. These steps ensure a secure fit and prolong the life of your woodwork.
What Tools Are Best for Re-Threading a Damaged Screw Hole?
For re-threading a damaged screw hole, you should select tools designed for thread repair, such as a thread chaser or a tap and die set. These tools allow you to precisely clean and restore the original threads. A tap wrench helps you control the process, ensuring you don’t damage the wood further. Using the right tool selection makes re-threading easier and guarantees the screw will hold securely again.
How Long Should I Wait Before Re-Drilling or Re-Screwing After Repair?
Think of repairing a screw hole like baking bread—you gotta wait for the dough to set and cure before shaping it. Usually, you should wait at least an hour for the repair to cure, but for best results, give it 24 hours before re-drilling or screwing. This setting drying time guarantees the repair is strong enough, preventing further damage and ensuring your project stays secure.
Are There Specific Wood Types More Prone to Stripped Screw Holes?
Soft woods, like pine or cedar, are more prone to stripped screw holes because their fibers are less dense and durable. Hardwood types, such as oak or maple, offer greater durability and resist stripping better. When working with soft woods, you should be extra careful and use appropriate techniques to prevent stripping. For hardwoods, you can generally apply more pressure without risking damage, but always pre-drill to guarantee a secure fit.
How Do I Remove a Stripped Screw Completely Without Damaging the Wood?
Removing a stripped screw is easier than finding a needle in a haystack. Grab a screw extractor and twist it into the screw head, then turn counterclockwise to extract. If the screw’s stubborn, fill the hole with wood filler first, let it dry, then drill a new pilot hole. This prevents damage and guarantees your project stays pristine. With patience, you’ll conquer that stubborn screw like a pro.
Conclusion
Now that you know how to assess damage, choose the right method, and repair a stripped screw hole, you’re ready to tackle the problem confidently. Whether you opt for filling, reinforcing, or professional help, remember to take your time, follow each step carefully, and guarantee a secure fix. With patience and the right technique, you’ll restore your woodwork, strengthen your skills, and prevent future damage. Keep practicing, and you’ll become a woodworking pro in no time.