
To avoid tear-out when flush-cutting dowels on finished surfaces, use sharp, fine-tooth blades or specialized dowel cutters and cut perpendicular to the grain. Support the dowels firmly and apply masking tape along the cut line to hold fibers in place. Make slow, controlled cuts and guarantee proper alignment to prevent splintering. For a smooth finish, carefully sand with the grain. If you want to master these techniques, keep exploring the details.
Key Takeaways
- Support dowels with stable fixtures to prevent movement and minimize marring during cutting.
- Use sharp, fine-tooth blades designed for crosscutting to reduce tear-out on finished surfaces.
- Cut perpendicular to the grain and at a slow, controlled pace for cleaner, tear-free cuts.
- Apply masking tape along the cut line to hold fibers in place and prevent splintering.
- Gently sand the area with fine-grit paper, working with the grain to smooth and blend the finish.

FOXBC 12 Inch Miter Saw Blade 80 Tooth Fine Finish Wood Crosscutting Saw Blade with 1 Inch Arbor
12-Inch Miter Saw Blades with 80 Teeth ATB, Kerf 0.118", Hook Angle 7°, Fine Finish blades produce extremely…
As an affiliate, we earn on qualifying purchases.
As an affiliate, we earn on qualifying purchases.
Why Getting Flush Cuts Right Matters for a Perfect Finish
Getting flush cuts right is essential because even small imperfections can stand out in the final finish. When you cut dowels, pay close attention to the grain direction, as cutting against the grain can cause splintering and tear-out. Properly aligning your cuts with the grain ensures a cleaner, smoother surface. Using the right finishing techniques, like sanding lightly after cutting, helps hide minor irregularities. Achieving a flush cut not only improves the aesthetics but also makes subsequent assembly and finishing easier. If the cut isn’t perfect, you risk gaps or uneven surfaces that compromise the project’s stability and appearance. Mastering these details guarantees your dowel joints look seamless and professional, giving your project a polished, high-quality finish. Additionally, understanding grain direction can significantly reduce tear-out and improve the overall quality of your cuts.

Double Cutting Dowel Maker Jig Kit Carbide Inserts Stable wooden Dowel Cutter tool Dowel Plate (Imperial 9 different diameters)
Innovative Double Cutting Design: Our dowel maker jig incorporates a distinctive Double Cutting technique, featuring both preliminary and…
As an affiliate, we earn on qualifying purchases.
As an affiliate, we earn on qualifying purchases.
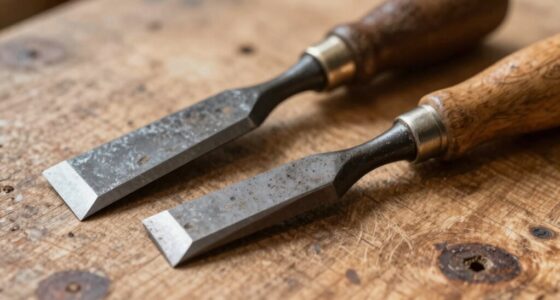
The Best Tools for Tear-Free, Precise Dowel Cutting
To achieve tear-free, precise dowel cuts, choosing the right tools is essential. The best tools allow you to control dowel selection and cutting speed, minimizing tear-out and surface damage. A fine-tooth saw or a specialized dowel cutter provides clean, accurate cuts. Using a sharp blade and adjusting cutting speed helps prevent splintering. Consider this table:
| Tool | Dowel Selection | Cutting Speed |
|---|---|---|
| Fine-tooth saw | Thin, well-seasoned dowels | Slow for control |
| Dowel cutter | Consistent diameter | Moderate for precision |
| Rotary tool | Small, delicate dowels | Variable, steady |
Choosing tools that are energy-efficient can further improve your results by reducing fatigue and ensuring consistent cuts. Always cut at a controlled, steady pace to ensure tear-free results.

4 Rolls Premium Painters Tape, Blue Tape, Masking Tape, Paint Tape for Multi-Purpose, Painting, Painter's, DIY Crafts Arts (88yd =0.94IN*22yd*4) Decoration Labeling No Residue, Easy Removal
Professional Mask Tape – Multi-Surface adhesive tape made of high quality blue crepe paper not easy to lift…
As an affiliate, we earn on qualifying purchases.
As an affiliate, we earn on qualifying purchases.
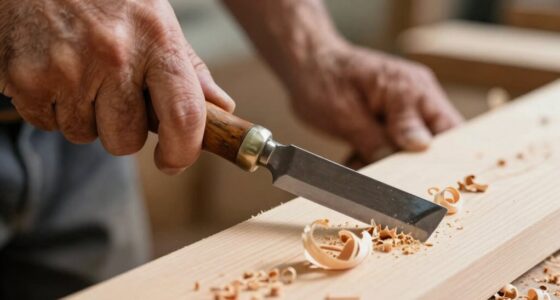
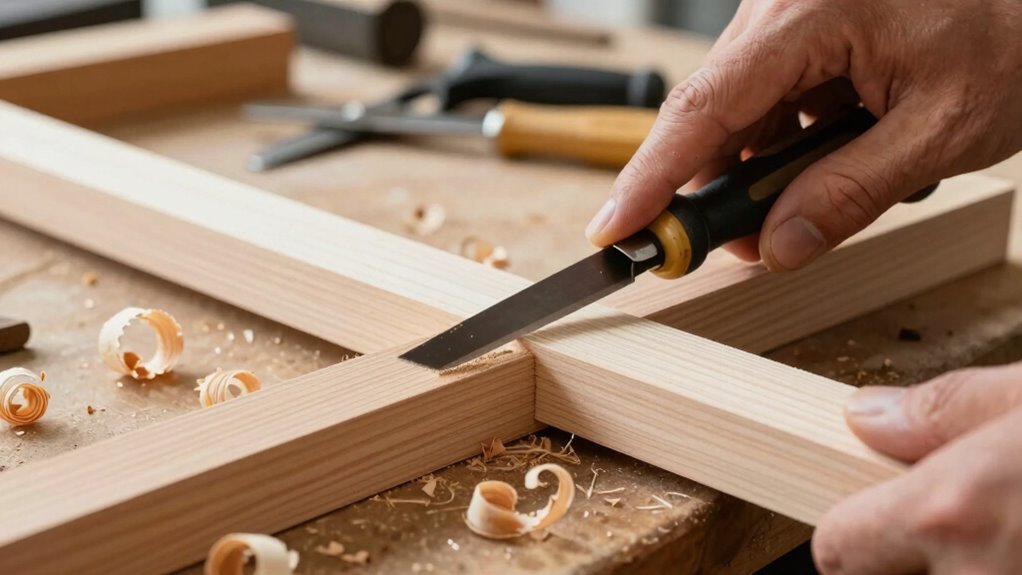
Techniques to Prevent Tear-Out When Cutting Dowels
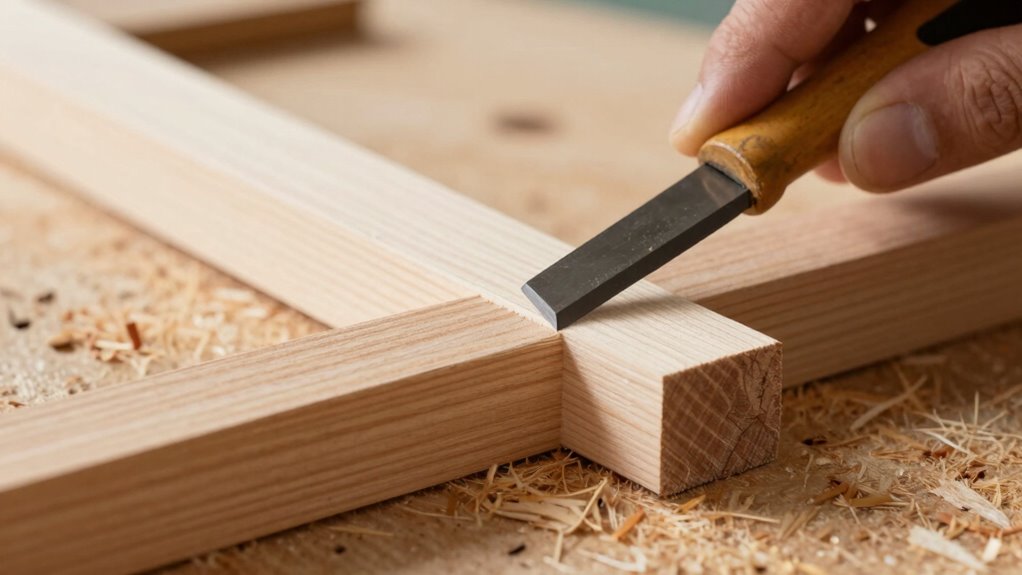
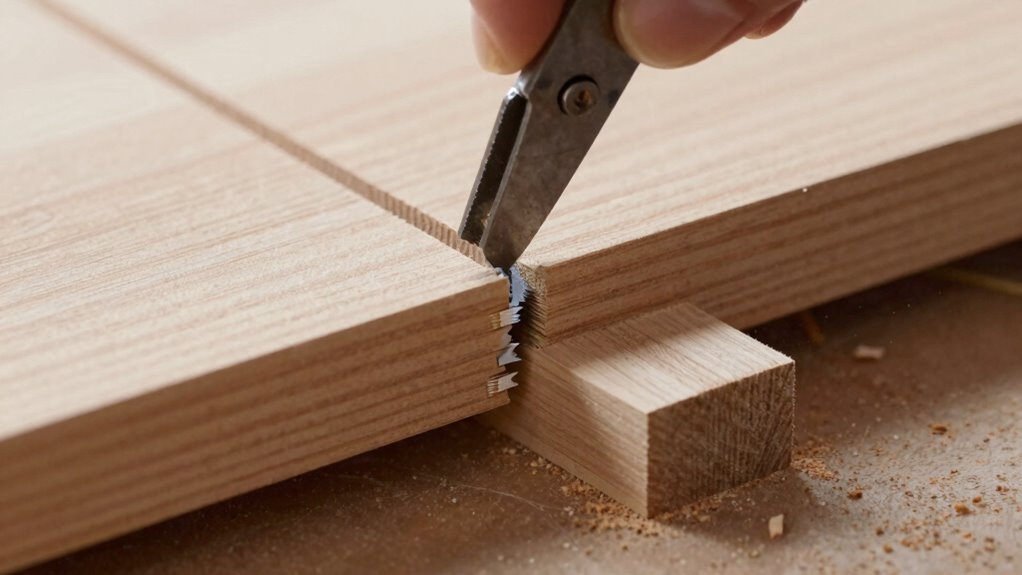
Preventing tear-out when cutting dowels requires careful technique and preparation. First, pay attention to the grain direction; always cut perpendicular to the grain to minimize splintering. When selecting a saw, opt for fine-tooth blades, such as a carbide-tipped saw blade or a blade designed specifically for crosscutting, as they produce cleaner cuts. Using the right saw blade type reduces tear-out by providing a smoother cut surface. Additionally, support the dowel firmly and make slow, controlled cuts to avoid forcing the blade through the wood. Applying masking tape along the cut line can also help hold the fibers in place. Proper saw blade selection and technique are essential to achieving a clean cut. By combining proper grain awareness with the appropriate saw blade types, you markedly decrease the risk of tear-out and achieve cleaner, more finished results.
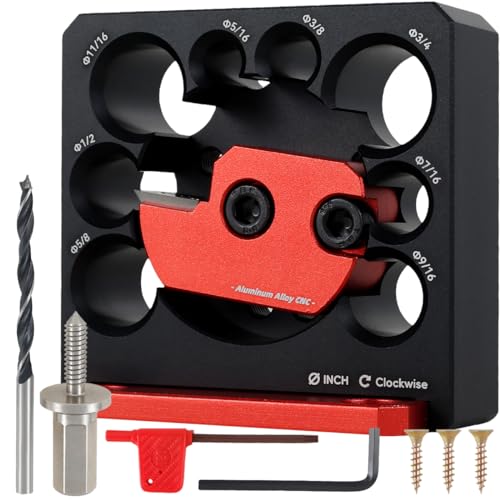
Dowel Maker Jig Kit, Imperial 5/16-3/4 inch Carbide Inserts Dowel Maker, 8 Holes Adjustable Dowel Cutter Plate, Aluminum Alloy Electric Drill Milling Dowel Round Rod Auxiliary Tool (8 Pcs)
[Aluminum Alloy Quality Materials] This dowel maker jig kit is made of premium CNC aluminum alloy material, and…
As an affiliate, we earn on qualifying purchases.
As an affiliate, we earn on qualifying purchases.
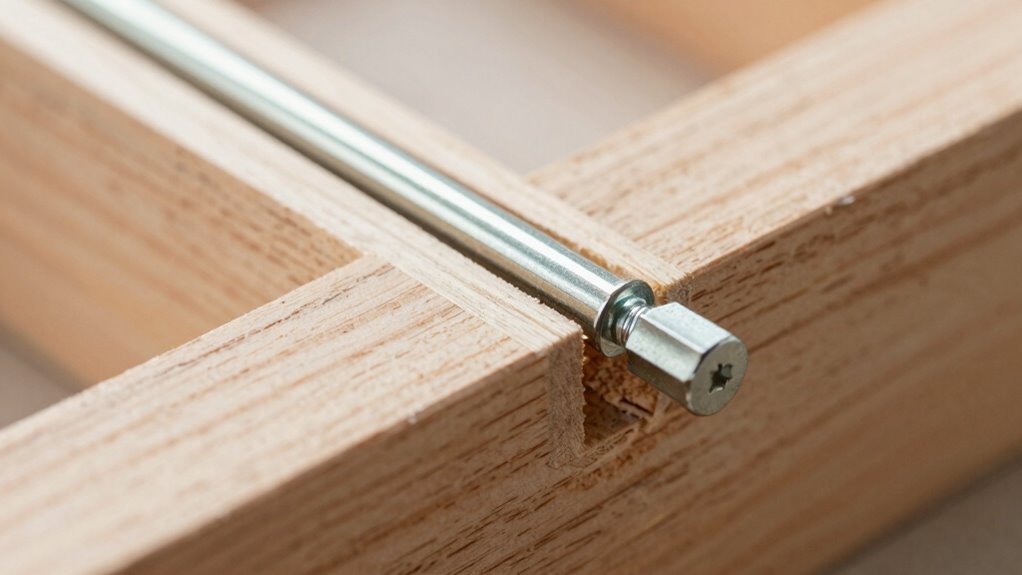
How to Use Supports and Dowel Pins to Protect Your Finish
Using supports and dowel pins effectively protects your finish by preventing direct contact with tools and surfaces that could cause damage. Proper support placement ensures the dowel remains stable, reducing the risk of marring or tear-out. When aligning dowels, carefully position supports to keep the dowel flush with the surface, avoiding unnecessary pressure on finished areas. This method preserves your work’s pristine appearance and minimizes sanding or touch-ups. Additionally, understanding power tool safety and proper techniques can further prevent accidental damage during your project. To evoke emotion and emphasize importance, consider this table:
| Support Placement | Dowel Alignment | Outcome |
|---|---|---|
| Precise | Perfect | Flawless finish |
| Careful | Accurate | Reduced tear-out |
| Strategic | Aligned | Professional, smooth look |
Mastering these techniques keeps your project looking pristine, giving you confidence in every cut.
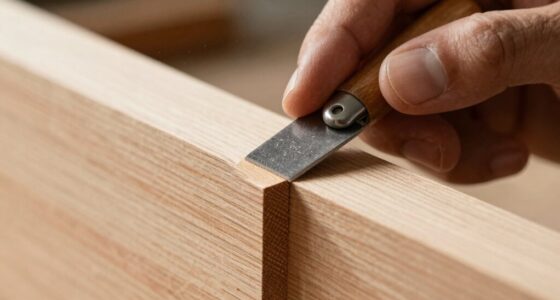
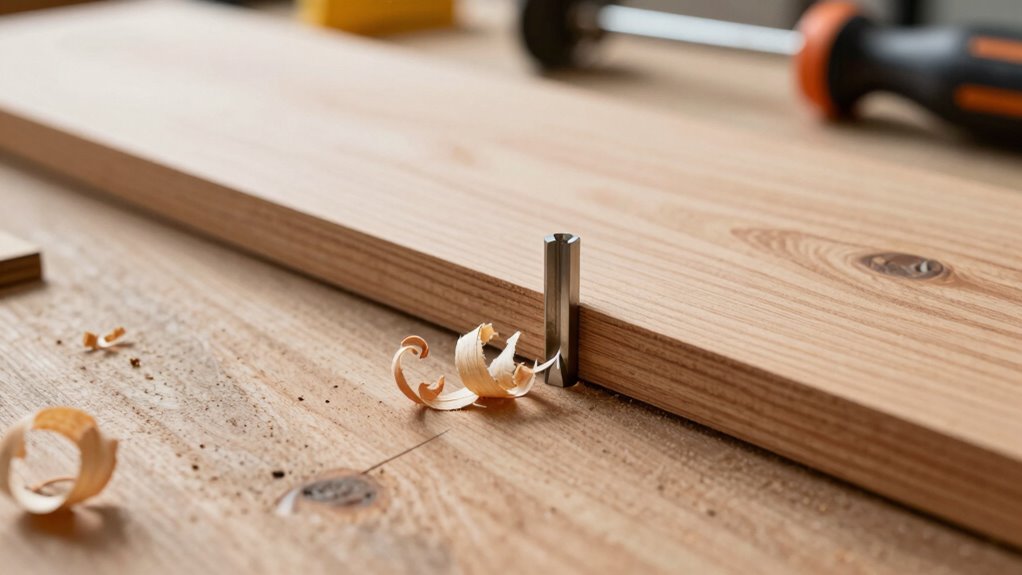
How to Easily Achieve Seamless, Flush Cuts on Finished Wood
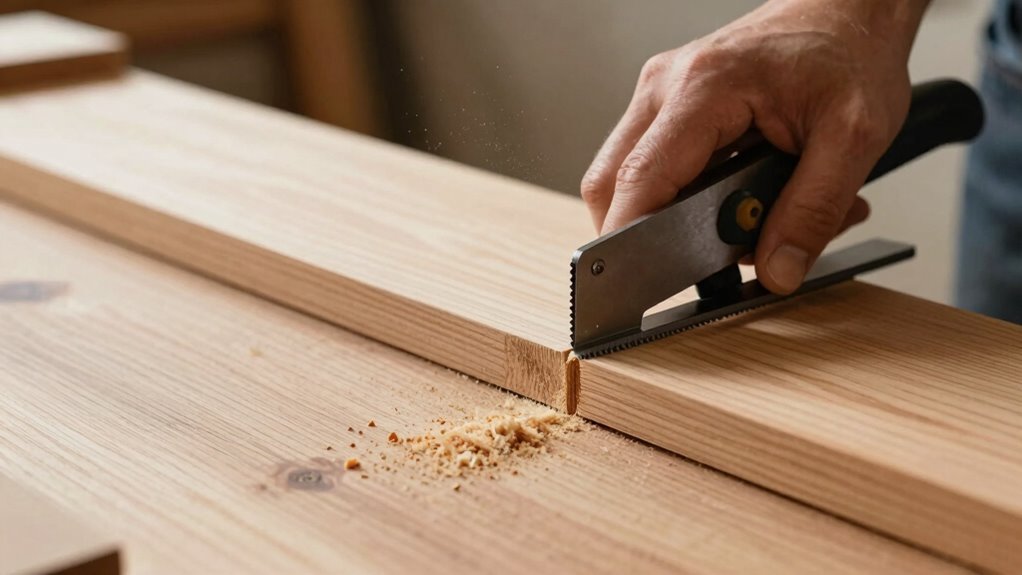
Achieving a seamless, flush cut on finished wood might seem challenging, but with the right techniques, it becomes straightforward. Start by ensuring proper dowel alignment before cutting; misaligned dowels can cause uneven surfaces. Use a sharp saw or flush-cutting tool designed for clean finishes, making steady, controlled cuts just above the surface. Once cut, gently sand the area with fine-grit sandpaper, working with the grain to smooth out any rough edges or minor imperfections. Take care not to oversand, which could damage the surrounding finish. If needed, apply a small amount of finish or touch-up stain after sanding to blend the repaired area seamlessly. Proper dowel alignment combined with careful surface sanding guarantees a professional-looking, flush finish on your wood project. Additionally, understanding the contrast ratio of your finishing materials can help ensure the final surface reflects light evenly, enhancing the overall appearance.
Frequently Asked Questions
Can I Use a Regular Saw for Flush-Cutting Dowels?
You can use a regular saw for flush-cutting dowels, but it’s not ideal. A fine-tooth saw or a flush-cut saw designed for woodworking tools helps prevent tear-out on finished surfaces. Make sure your dowel sizing matches the tool, and take slow, controlled cuts. Using the right saw minimizes damage, ensuring clean, professional-looking results, especially when working with delicate or finished surfaces.
What Are the Signs of Tear-Out During Dowel Cutting?
You’ll notice tear-out during dowel cutting as rough edges and visible grain tear on the surface, especially near the cut line. These signs indicate the wood’s grain has split or torn, often caused by improper cutting technique or dull blades. To prevent this, use a sharp blade, cut slowly, and support the material properly. Keep an eye out for these signs to ensure a smooth, clean finish.
How Do I Choose the Right Support for Delicate Surfaces?
Ever wonder how to keep delicate surfaces pristine? You should select support materials that provide gentle, even backing, like soft clamps or scrap wood, to distribute pressure evenly. Using proper surface protection—like masking tape or a soft cloth—also helps prevent tear-out. The right support minimizes vibration and movement during cutting, safeguarding your finished surfaces and ensuring a clean, professional result every time.
Is There a Specific Type of Blade That Minimizes Tear-Out?
Yes, a fine-toothed blade with blade compatibility for delicate surfaces minimizes tear-out. Look for blades with more teeth per inch, like a finishing or detail blade, which provide cleaner cuts. Use gentle cutting techniques, applying steady, even pressure, and avoid forcing the blade through the material. This combination helps you achieve a smooth finish and prevents damage to finished surfaces.
How Do I Repair Tear-Out Damage After Cutting?
Did you know that over 60% of wood repairs involve sanding? To fix tear-out damage, start by applying wood filler to the affected area, ensuring it fills all gaps. Once dry, sand gently with fine-grit sandpaper using smooth, even strokes to blend the repair seamlessly. This approach restores your surface’s smoothness and minimizes visible repair marks, leaving your project looking professional and polished.
Conclusion
By paying attention to your tools and techniques, you can turn rough cuts into flawless finishes. Think of each cut as a brushstroke in your masterpiece—precision makes all the difference. With patience and the right approach, tear-out becomes a thing of the past, leaving your project smooth and professional. Remember, every perfect finish starts with a careful cut—so take your time and let your craftsmanship shine through.