Glue-line rips happen when a board splits along the glued joint during sawing, often unexpectedly exploding into dangerous shards. This occurs because the glue line can be a weak point, especially if the grain runs parallel or the joint isn’t properly prepared. Rapid cuts, dull blades, or uneven support increase the risk. To stay safe, it’s essential to recognize signs and use proper techniques. Keep exploring to learn how to prevent these dangerous surprises.
Key Takeaways
- Internal stresses, uneven grain, or poor surface prep can weaken the glue line, causing boards to explode during ripping.
- Cutting too quickly or with a dull blade increases stress along the glue joint, leading to sudden failures.
- Moisture content and environmental changes cause differential expansion at the glue line, weakening the bond.
- Visible glue lines or uneven adhesives indicate weak spots prone to explosive splitting during cutting.
- Lack of proper support and unsupported cutting can amplify internal stresses, resulting in board explosions on the saw.

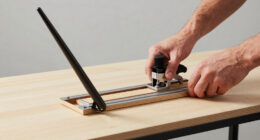
VEVOR Circular Saw Blade Sharpener, 140W 3800RPM Electric Saw Blade Sharpening Machine with 4" Ceramic & Diamond Grinding Wheels – Fits 3.5" to 15.7" Diameter Circular Saw Blades
Efficient, Powerful Sharpening: Powered by a 140W strong motor running at 3800 RPM high speed, this VEVOR circular…
As an affiliate, we earn on qualifying purchases.
As an affiliate, we earn on qualifying purchases.
What Are Glue‑Line Rips and Why Do They Explode?
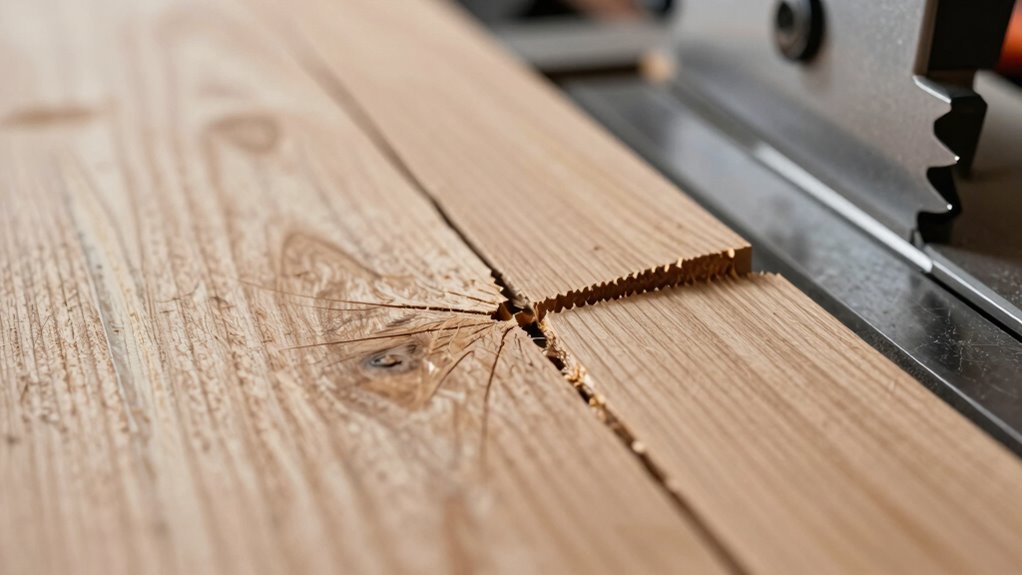
Have you ever wondered why some glue-line rips suddenly explode apart during woodworking? These are known as glue-line rips, where the board splits along the glue joint, often unexpectedly. The wood grain plays a vital role; if it runs parallel to the cut, the board is more prone to splitting, especially if the glue joint isn’t strong enough. Cutting speed also matters—cutting too quickly can cause stress along the glue line, making it more likely to explode. When you rush through a cut or don’t match the wood grain properly, you weaken the board’s structure at the joint. This creates a perfect storm for a sudden failure, especially if the grain directions and cutting speed aren’t carefully managed.

POWERTEC Push Block and Push Stick Set Fits Table Saws, Router Tables, Band Saws & Jointers, Dual Ergonomic Handles w/Max Grip, Wood Pusher Reduces Kickback & Increases Safety. 5PK (71009V)
INCLUDES: (1) Long Hold Down Push Block (1) Safe V Stick and (1) Straight Push Stick (2) Short…
As an affiliate, we earn on qualifying purchases.
As an affiliate, we earn on qualifying purchases.
How Can You Recognize Signs of Potential Board Explosions?

Look closely at the boards for visible glue lines, which can indicate weak spots prone to explosion. Also, check for uneven surfaces that suggest internal stresses building up. Recognizing these signs early helps prevent potential board explosions before they happen.
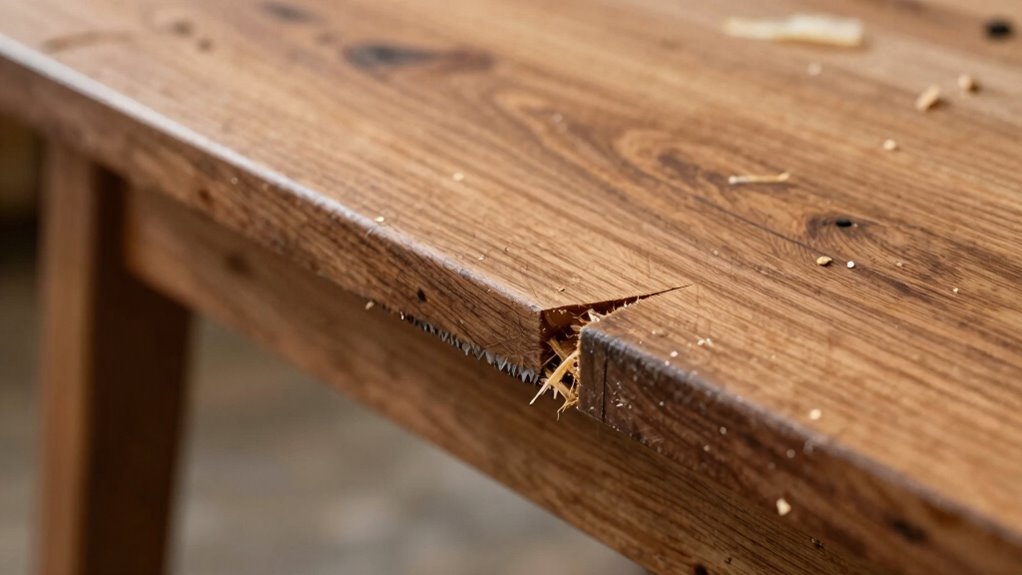
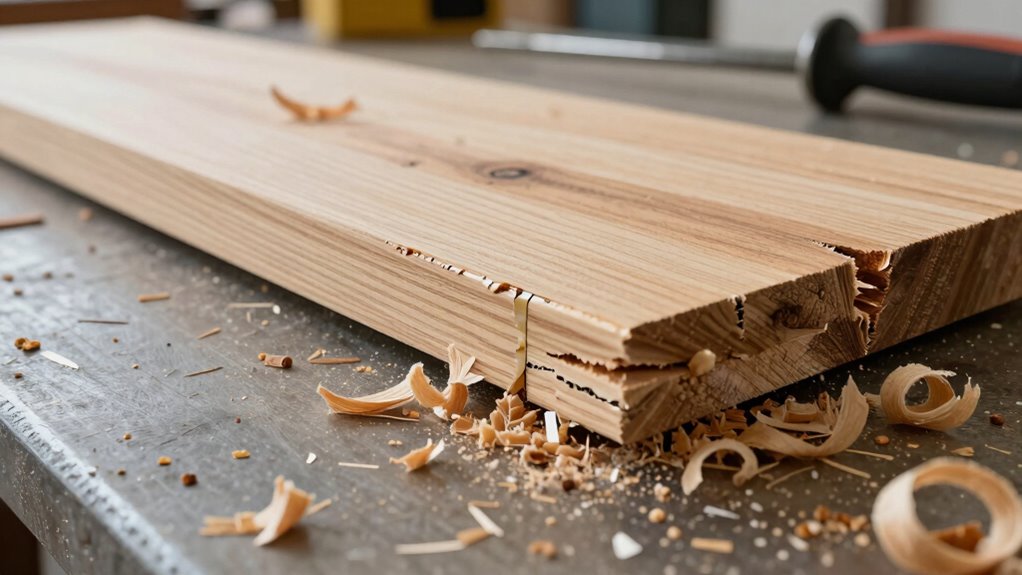
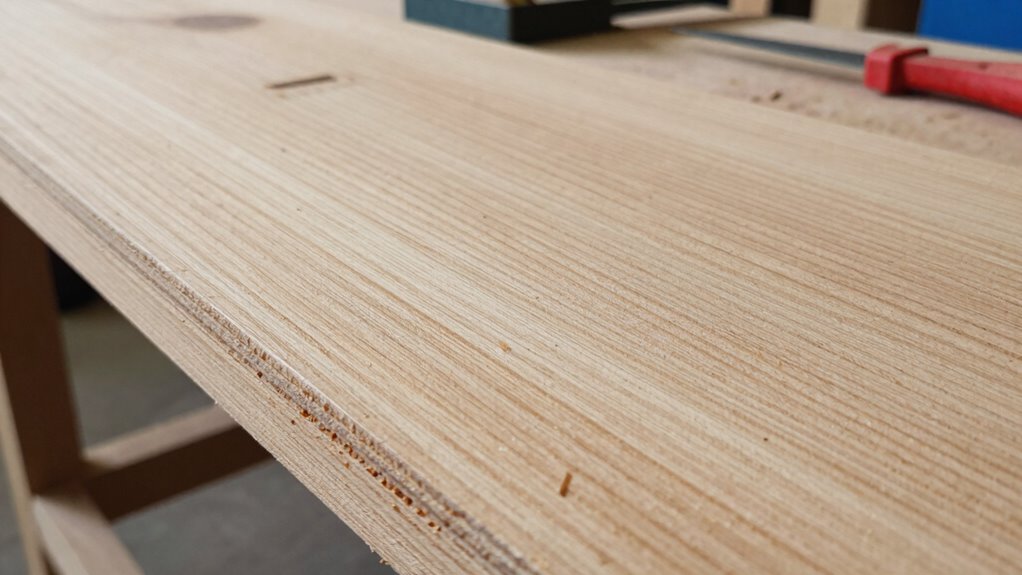
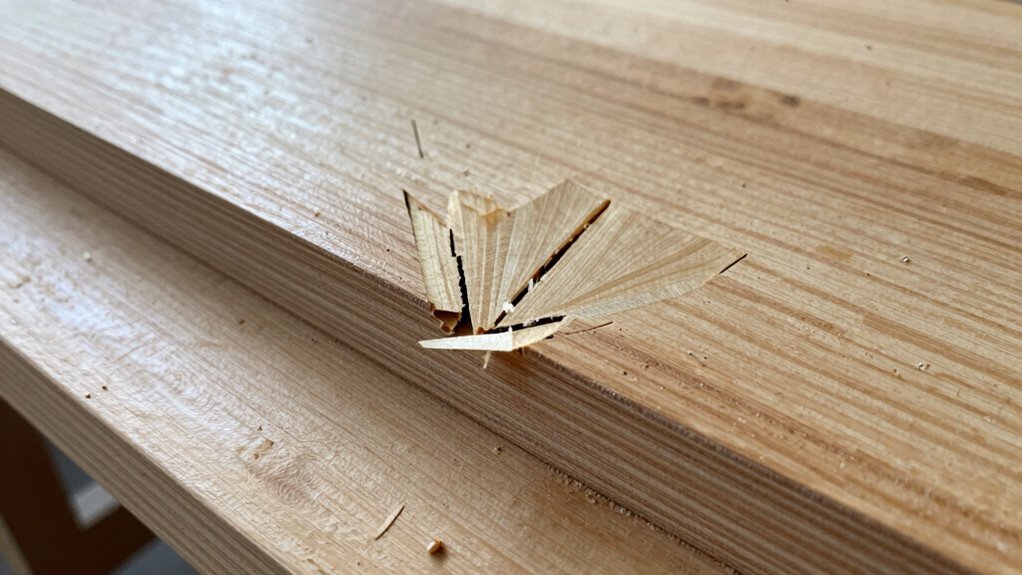
Visible Glue Lines
Visible glue lines can serve as a warning sign of potential board explosions, signaling underlying issues in the manufacturing process. If you notice a prominent glue joint running through a board, it may indicate uneven adhesive application or poor alignment during glue-up. These visible lines can weaken the board’s integrity, especially if combined with warping or internal stresses. When a glue joint is overly obvious, it suggests the wood fibers aren’t bonding uniformly, increasing the risk of internal tension release during cutting. Warped boards with uneven glue lines are particularly vulnerable, as stress concentrates along these weak spots. Recognizing these signs helps you anticipate possible explosions or blowouts on the table saw, prompting you to select more stable, properly prepared stock. Additionally, understanding the contrast ratio and its effect on image quality can be analogous to assessing the integrity of the wood; a higher contrast ratio often indicates better differentiation between textures and can reflect overall material quality.
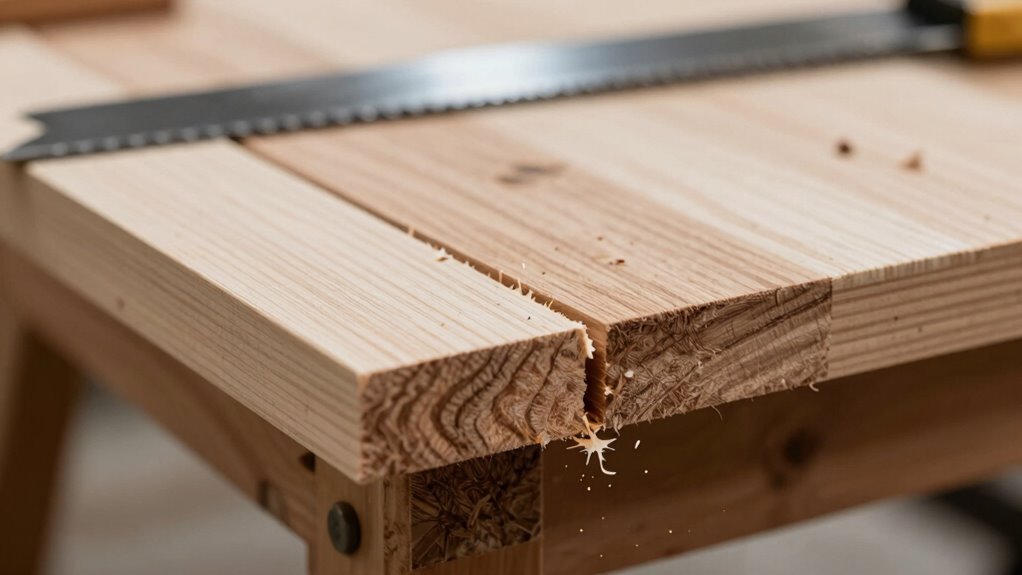
Uneven Board Surface
An uneven board surface often signals potential danger when using power tools, as it indicates underlying structural issues that can lead to explosions. Check the grain direction—if it runs irregularly or has knots, the board may warp or split under pressure. Variations in moisture content can cause the surface to be uneven, with some areas swelling or shrinking more than others. These inconsistencies weaken the board’s integrity, increasing the risk of explosive rips. Before cutting, inspect the surface closely for irregularities, warping, or areas that feel soft or spongy. An uneven surface isn’t just a cosmetic issue; it’s a warning sign that the board’s internal structure isn’t uniform, making it more prone to sudden splitting during machining. Recognizing these signs helps prevent potential accidents. Additionally, natural imperfections like knots and grain irregularities can contribute to unpredictable behavior when cutting.

HORUSDY 8-Pack Bar Clamps for Woodworking, 12" and 6" Bar Clamps, Wood Working Clamp Sets, Quick Clamps F Clamp with 150 LBS Load Limit (8-Pack Wood Clamps)
1. The complete set includes 4pcs 6" bar clamps,2pcs 12" bar clamps and 2pcs 6" spring clamps, which…
As an affiliate, we earn on qualifying purchases.
As an affiliate, we earn on qualifying purchases.
Why Do Glued Joints Create Weak Points in Boards?
Glued joints can create weak points in your boards because the glue bonds may not be as strong as the wood itself. When wood expands or contracts differently across the joint, stress builds up and can cause failure. Additionally, stress concentration points often develop at the edges of the glue line, increasing the risk of rips. Incorporating energy-efficient gluing techniques can help improve joint strength and durability.
Weak Glue Bonds
Have you ever wondered why joints in glued boards sometimes break more easily than the surrounding wood? The answer often lies in weak glue bonds, which result from adhesive failure. When the adhesive doesn’t bond properly, the joint loses its strength, creating a weak spot in the board. Poor surface preparation, moisture contamination, or using the wrong type of glue can all compromise joint integrity. Even if the glue appears cured, it might not have fully bonded at a microscopic level. This weak bond becomes a stress concentration point, especially during cutting or machining. Over time or under pressure, these weak glue bonds can give way, causing the joint to fail and leading to glue-line rips. Ensuring proper glue application and surface prep is key to maintaining joint strength. Additionally, machine learning can help identify optimal gluing techniques by analyzing joint failure patterns.
Differential Wood Expansion
Because wood expands and contracts with changes in humidity and temperature, glued joints can become weak points in your boards. Wood movement varies across different species and even within the same board, causing stress at the glue lines. When one part of a board expands more than another, the joint experiences tension, weakening its material stability. This differential expansion creates micro-movements that can lead to cracks or splits along the glue line. If the glue bond isn’t flexible enough to accommodate these shifts, the joint becomes a vulnerable point. Understanding how wood responds to environmental changes helps you select appropriate adhesives and prepare your stock properly. Managing moisture levels and controlling climate can markedly reduce differential wood expansion and improve the overall durability of your glued-up projects.
Stress Concentration Points
When two pieces of wood are joined with glue, the joint becomes a focal point for stress concentration. This is especially true if the grain direction isn’t aligned properly, causing uneven load distribution. Variations in moisture content can also weaken the joint, creating internal stresses that concentrate at the glue line. These weak points are vulnerable during cuts, as stress naturally accumulates at the joint, making it prone to ripping or splitting. If the moisture content differs markedly between the pieces, it can lead to differential expansion or contraction, further increasing stress concentrations. Understanding how grain direction and moisture content influence stress points helps you anticipate where failures might occur, allowing you to take steps to strengthen glued joints and minimize the risk of explosive rips. Additionally, proper curing of the glue ensures the joint attains maximum strength, reducing the likelihood of failure during machining.
Gorilla Wood Glue; 8 Ounce Bottle; Natural Wood Color; (Pack of 1)
Complete Projects Fast: Requires only 20-30 minutes of clamp time; fully cured in 24 hours. Quickly creates an…
As an affiliate, we earn on qualifying purchases.
As an affiliate, we earn on qualifying purchases.
How Can You Safely Cut Glue Lines to Avoid Explosions?
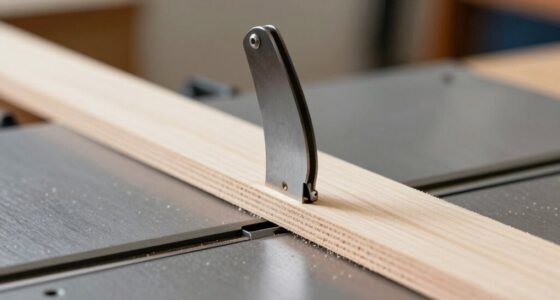
Cutting glue lines safely requires careful technique to prevent potential explosions. First, check the wood’s moisture level; overly dry or wet wood can increase the risk. Ensure the glue line is fully cured and the wood is stable. Next, select the right blade—preferably a sharp, thin-kerf blade designed for clean cuts. A high-quality carbide-tipped blade reduces stress on the material and minimizes tear-out. Adjust your saw’s blade height so it just clears the surface of the board, reducing the chance of binding. Feed the board steadily and avoid forcing the cut. These steps help control wood moisture content and optimize blade selection, reducing the chance of explosive failures during glue-line cuts. Additionally, understanding safe woodworking practices can further help prevent accidents and ensure smooth operation.
What Techniques Help Minimize the Risk of Board Breakouts?
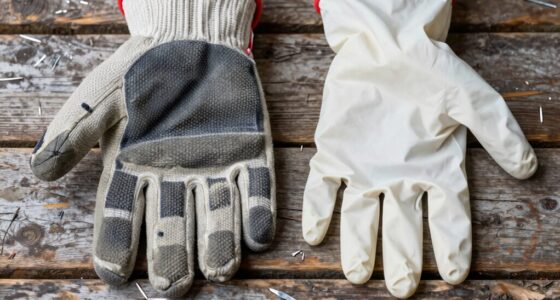
To minimize the risk of board breakouts, it’s essential to support the wood properly before and during the cut. Pay attention to grain direction; always cut with the grain when possible to prevent tear-out. Keep your blade sharp, as a dull blade increases resistance and can cause the wood to chip or splinter. Proper support prevents the wood from bending or vibrating, which can lead to breakouts. Use push sticks and featherboards for added control. Here’s a quick overview:
| Technique | Benefit |
|---|---|
| Cutting with the grain | Reduces tear-out and splintering |
| Maintaining blade sharpness | Ensures clean cuts and less stress on the wood |
Additionally, understanding how wood grain orientation affects cut quality can help you choose the best approach for each project. Applying these techniques will help you achieve safer, cleaner cuts and reduce breakout risks.
What Common Mistakes Lead to Glue‑Line Rips and How Can You Avoid Them?
One of the most common mistakes that lead to glue-line rips is failing to properly support the wood during the cut. Without adequate support, the board can flex or pinch the blade, causing joint instability and increasing the risk of ripping apart along the glue line. Additionally, using a dull blade compromises cut quality, leading to rough edges and increased tearing. Always guarantee your blade is sharp and suitable for the material. Properly supporting the board with push sticks or sacrificial fences helps maintain joint stability throughout the cut. Avoid rushing or applying excessive force, as these can also cause instability. Ensuring your saw setup meets safety standards and includes proper safety practices helps prevent accidents and damage. By maintaining a sharp blade and steady support, you reduce the chances of glue-line rips and achieve cleaner, safer cuts.
How Do You Inspect and Prepare Boards for Safe Cutting?
Before you start cutting, it’s essential to thoroughly inspect and prepare your boards to guarantee safety and quality. First, check the grain orientation; boards with uneven grain can cause ripples or dangerous kickbacks. Look for any warping, knots, or splits that could compromise stability. Next, assess the moisture content—wood with high or uneven moisture can warp or pinch the blade, leading to dangerous rips. Use a moisture meter to verify the wood is properly dried, ideally around 6-8% for indoor projects. Always joint and plane your boards to create a flat, straight surface and smooth edges. Proper inspection and preparation help you identify potential issues before cutting, reducing the risk of glue-line rips and ensuring safer, cleaner cuts. Additionally, understanding wood movement and how it affects your cuts can prevent unexpected board shifts during machining.
Frequently Asked Questions
Can Different Types of Glue Affect the Likelihood of Board Explosions?
Different types of glue can affect the likelihood of board explosions by influencing adhesive curing and glue joint strength. If you use a glue that doesn’t cure properly or creates a weak bond, it can cause stress during ripping. Stronger, well-cured glue joints help distribute force evenly, reducing the risk of explosion. Always choose the right adhesive for your project and guarantee proper curing to keep your cuts safe.
Does Wood Species Influence the Risk of Glue-Line Rips?
Yes, wood species can influence the risk of glue-line rips because denser woods with higher wood density tend to require stronger glue bonds. If the glue strength isn’t sufficient for the wood’s density, the bond may fail during ripping, causing explosive splits. Understanding your wood’s density helps you choose appropriate glue and cutting techniques, reducing the chance of dangerous rips and ensuring safer, cleaner cuts on your table saw.
How Does Moisture Content Impact the Safety of Cutting Glued Boards?
Imagine your glued boards as a tightly wound spring; if the moisture balance isn’t right, cutting can cause it to snap unexpectedly. Too much moisture causes uneven drying, risking explosive rips. Use proper drying techniques to stabilize moisture content, ensuring safe cutting. When moisture levels are balanced, the wood behaves predictably, reducing hazards. Always check moisture content before ripping, keeping your workshop safe and your cuts clean.
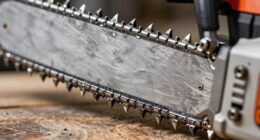
Are Specific Blade Types Better Suited for Cutting Glued Boards?
You should choose blades specifically designed for cutting glued boards, ensuring blade compatibility with your saw. Carbide-tipped blades are ideal because they stay sharp longer, reducing the risk of kickback or explosions. Regular blade sharpening is essential; a dull blade can cause uneven cuts and increased safety hazards. Using the right blade type and maintaining it properly helps you cut glued boards safely and efficiently.
What Role Does Grain Direction Play in Preventing Board Explosions?
Coincidentally, understanding grain direction helps prevent board explosions. You should align the grain orientation parallel to the cut to maintain fiber alignment, which reduces stress and minimizes tear-out or kickback. When you cut against the grain, fibers can split unexpectedly, causing dangerous board explosions. By paying close attention to grain direction, you guarantee smoother cuts and safer operation, protecting both your workpiece and yourself on the table saw.
Conclusion
If you ignore the warning signs of glue‑line rips, you risk turning your workshop into a fireworks display of flying boards and dangerous shrapnel. With just a little care and attention, you can prevent catastrophic explosions that could shatter your confidence and your tools. Master these techniques, recognize the subtle signals, and treat glued boards like ticking time bombs—because in woodworking, a small mistake can explode into chaos in the blink of an eye.