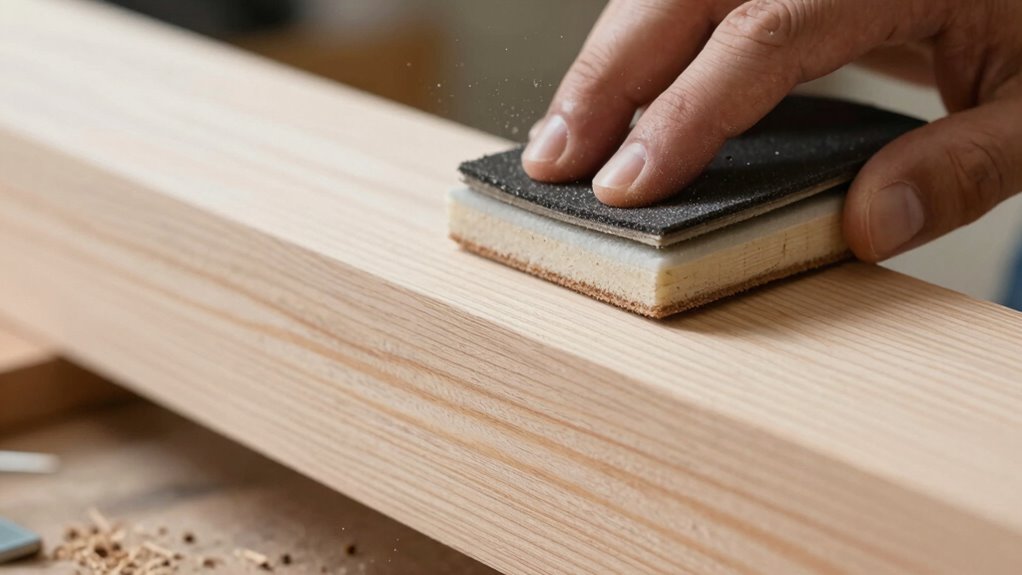

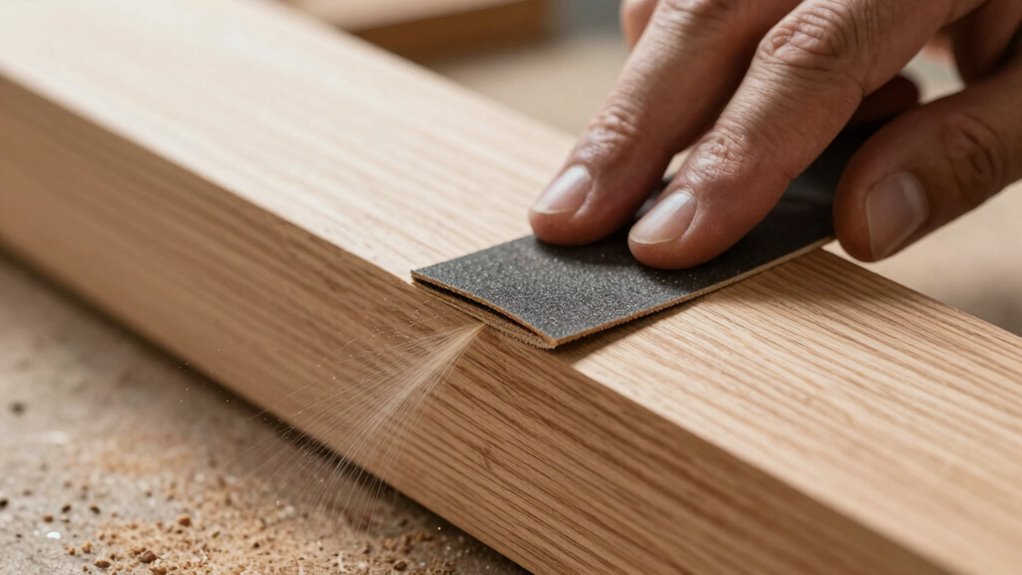
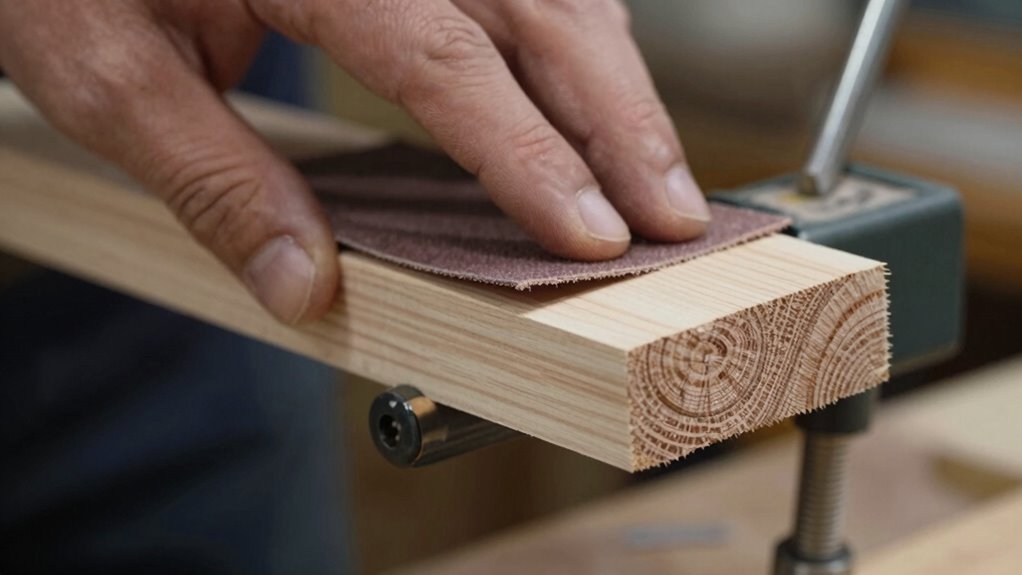
To sand end grain without making it look fuzzy, always sand with the grain using light, gentle pressure. Start with a coarse grit to remove roughness, then gradually move to finer grits, stopping frequently to inspect the surface. Use hand sanding or a sanding block for better control, and avoid excessive pressure that lifts fibers. Finishing with a very fine grit and proper sealing helps achieve a smooth, professional look—continue to learn techniques that make a big difference.
Key Takeaways
- Use fine-grit sandpaper (220+), and sand lightly with the grain to prevent fiber tear-out.
- Always sand with the grain, applying gentle, even pressure to avoid fuzziness.
- Keep the surface clean and free of dust or debris before sanding to ensure smooth results.
- Consider wet-sanding or dampening the surface slightly to reduce fuzz and fiber lifting.
- Inspect regularly and switch to higher grit sandpaper if fuzz or roughness appears.

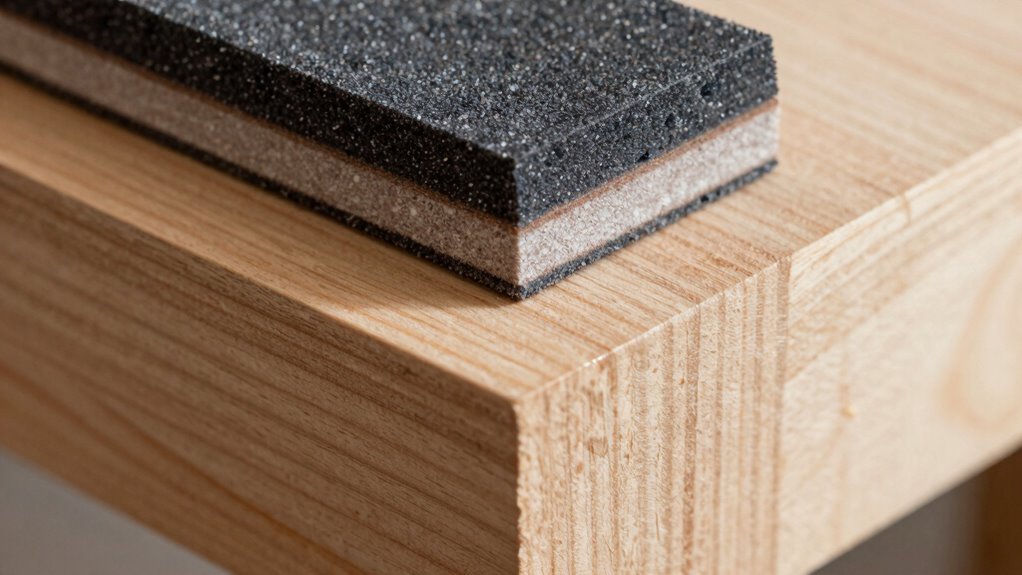
4 Pack Hand Sanding Sponge Set -120 220 320 400 Grit- Coarse Medium Fine Grit Sanding Block, Sander Sponges for Wood-Working Drywall Metal, Washable and Reusable Sponge for Rust Removal Polishing
Assorted Grit Sanding Blocks – This set includes 4 sponge sanding blocks (4 x 2.6 x 0.7 inches)…
As an affiliate, we earn on qualifying purchases.
As an affiliate, we earn on qualifying purchases.
Why Does End Grain Look Fuzzy When Sanded?
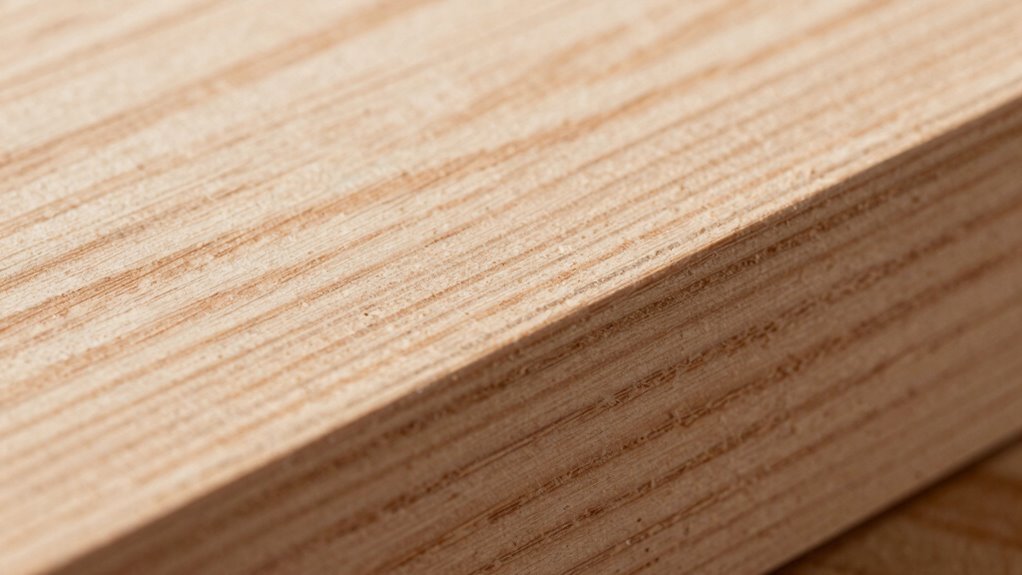
When you sand end grain, it often looks fuzzy because the wood fibers are cut perpendicular to their natural grain. This creates a rougher surface with increased grain roughness, making the fibers stand up instead of lying flat. Sanding tools, especially coarse or aggressive ones, can exacerbate this issue by tearing or splintering the fibers rather than smoothing them. As a result, the end grain appears fuzzy and uneven. To avoid this, it’s important to understand how the grain reacts during sanding and select the right tools. Using finer grit sandpaper and gentle strokes helps minimize fiber tear-out, reducing fuzziness. Recognizing that end grain behaves differently from face grain is key to achieving a smooth, professional finish. Additionally, understanding grain behavior can help you choose better techniques to prevent fuzziness during sanding.

Romeda 8-Pack Sandpaper Block, Four Grits Per Pack 60/80/120/220, Washable and Reusable Handmade Sanding Sponge, Drywall Sandpaper Blocks for Wooden Drywall Sheetrock and Metal Glazing
【ASSORTED GRIT SANDING BLOCKS】 Each set contains 8 sponge sanding blocks, each measuring 3.9 x 2.76 x 0.6…
As an affiliate, we earn on qualifying purchases.
As an affiliate, we earn on qualifying purchases.
How to Prepare Your Wood and Sandpaper for Smooth End Grain
Before you start sanding, make sure you’ve chosen the right sandpaper grit for your project. Keep your surface clean and dry to prevent uneven results. Also, match your sandpaper type to your wood to get the smoothest, most professional finish. Selecting the appropriate abrasive material can significantly influence the quality of your end grain surface. Additionally, understanding European cloud innovation can help you choose sustainable materials and techniques for eco-friendly woodworking projects. Being aware of style trends can also guide you in achieving a modern and polished look for your finished piece.
Choose Proper Sandpaper Grit
Choosing the right sandpaper grit is essential for achieving a smooth, professional finish on end grain. Start with a coarse grit, like 80 or 100, to remove roughness and shape the surface, following the grain direction to prevent fuzzy edges. Then, move to a medium grit, such as 150, to refine the surface and eliminate scratches from the coarse paper. Finish with a fine grit, like 220 or higher, to achieve the desired surface smoothness. Always sand along the grain to avoid fuzzy or uneven spots. Using proper grit progression ensures you don’t damage the wood or create a fuzzy appearance, resulting in a clean, polished finish on the end grain. Proper grit selection is key to professional-looking results. Additionally, understanding the grain direction and maintaining consistent pressure helps prevent fuzzy edges and ensures a smooth, even surface. Paying attention to sandpaper quality can also make a significant difference in achieving optimal results. To further enhance your finish, consider testing on scrap wood, which allows you to select the best grit sequence without risking your project. Incorporating proper technique during sanding can help you achieve a uniform and blemish-free surface. It’s also beneficial to understand how different wood types respond to various grit levels for the best outcome.
Clean and Dry Surface
Start by inspecting your wood surface for dust, debris, or residues that could interfere with sanding. A clean, dry surface guarantees the grain pattern remains clear and prevents particles from causing fuzzy spots. If you notice any dust or moisture, wipe the area with a tack cloth or a damp cloth and let it dry thoroughly. Moisture or debris can lead to uneven sanding and affect the finish. When preparing, also check your sandpaper; a clean surface helps you apply consistent sanding pressure, reducing the risk of gouging or creating fuzzy areas. Properly cleaning and drying the surface allows you to focus on even, gentle pressure, which is essential for smooth, professional-looking results on end grain. Additionally, understanding the Gold IRA markets can help you plan for future investments once your woodworking project is complete. Recognizing the importance of wood grain types can also guide you in selecting the appropriate sanding techniques for different wood surfaces. Being aware of sanding pressure techniques ensures you avoid damaging the delicate end grain during the process. Moreover, employing the correct surface preparation methods can further improve your results and prevent fuzzy patches. Paying attention to market trends and insights can also help you choose the best time to start new projects for optimal results.
Match Sandpaper to Wood Type
Matching your sandpaper to the type of wood guarantees a smooth, even finish on end grain. To do this effectively, you need to identify the wood correctly through wood identification techniques. Different woods have varying grain patterns and hardness levels, which influence how they respond to sanding. Grain matching involves selecting the right grit to complement the wood’s characteristics—finer grits for softer woods and coarser for tougher species. Using the wrong sandpaper can cause fuzzy ends or uneven surfaces. By understanding your wood’s specific type, you can choose the appropriate grit and avoid damaging the grain. Proper wood identification helps ascertain you use the right sandpaper, resulting in a clean, professional finish on your project. Recognizing the wood’s density and grain pattern is essential for selecting the correct sandpaper grit, and considering the best finishing techniques can further enhance your results to achieve a polished look. Additionally, understanding the sticking wall decor techniques can help protect your finished piece from damage during handling or display. Knowing how to properly select the right sandpaper based on wood type can also prevent common issues like fuzzy grain and uneven surfaces, leading to a superior finish. Being aware of the benefits of airless paint sprayers can also provide insights into finishing techniques that complement your sanding process for an ultra-smooth surface.

TOVPADE 54PCS Premium Micro Sander, Detail & Mini Sander Block – Precision Small Hand Sanding Tool, 80–800 Grit Sandpaper Kit, 3-in-1 Set for Wood, Crafts, Furniture, Tight Spaces & DIY Projects
All-in-One Sanding Kit for Every Detail: Includes a compact sanding block and 54 sandpapers in 9 grit types…
As an affiliate, we earn on qualifying purchases.
As an affiliate, we earn on qualifying purchases.
Best Techniques for Sanding End Grain Without Fuzz

Sanding end grain can easily lead to fuzz and roughness if you’re not careful, but applying the right techniques will help you achieve a smooth finish. Focus on understanding grain orientation and adjusting your sanding pressure accordingly. Always sand with the grain, applying light, consistent pressure to prevent fuzz. Use a finer grit as you progress to refine the surface without damaging it. Keep your sandpaper flat and avoid pressing too hard, which can raise fuzz or cause uneven sanding. The table below highlights key techniques:
| Technique | Purpose | Tips |
|---|---|---|
| Sand with grain orientation | Reduce fuzz | Follow natural grain direction |
| Light sanding pressure | Prevent roughness | Use gentle, even pressure |
| Gradually increase grit | Achieve smooth finish | Move to finer grits gradually |
| Keep sandpaper flat | Ensure even sanding | Avoid digging into wood |
| Use a sanding block | Maintain control | Apply consistent pressure |
Additionally, understanding how grain orientation impacts the sanding process can greatly improve your results. Being aware of the grain direction helps you avoid creating fuzzy patches and ensures a more professional finish. Recognizing the importance of grain structure can also guide your sanding strategy for different types of wood. Developing an awareness of the grain pattern allows for more precise control during finishing.

24PCS 3 x 4 Inch Sanding Sponge Set, 120-3000 Grit Soft Foam Hand Sander Block, Hook & Loop Wet Dry Sanding Sponges for Metal Wooden Furniture Drywall Sheetrock and Model Polishing
ASSORTED GRIT SANDING BLOCKS: Each set includes 12 different grit sizes (20 mesh, 180 mesh, 240 mesh, 320…
As an affiliate, we earn on qualifying purchases.
As an affiliate, we earn on qualifying purchases.
Choosing the Right Grit and Tools for End Grain Sanding
Choosing the right grit and tools makes a big difference when sanding end grain. You’ll want to select the ideal grit for smooth results and prevent fuzz, while using tools designed for detailed work. Keep these tips in mind to guarantee your sanding process is efficient and effective. Additionally, selecting high-quality air purifiers can improve your workshop environment by reducing dust and airborne particles during sanding.
Optimal Grit Selection
Have you ever wondered why selecting the right grit makes a difference when working on end grain? The correct grit smooths the surface without fuzziness, respecting the grain pattern. Start with a coarse grit like 80 to remove roughness quickly, then move to medium grits such as 120 to refine. Finish with fine grits like 220 or higher for a smooth finish. Be mindful of sanding pressure; too much pressure can gouge the end grain, while too little won’t remove scratches effectively. Choosing the right grit sequence ensures a crisp, even surface. Here’s a quick guide:
| Grit | Purpose |
|---|---|
| 80 | Remove roughness |
| 120 | Smooth intermediate surface |
| 220+ | Achieve fine finish |
| 320+ | Final polishing |
| 400+ | Ultra-smooth surface |
This approach respects grain pattern and prevents fuzziness.
Proper Tool Types
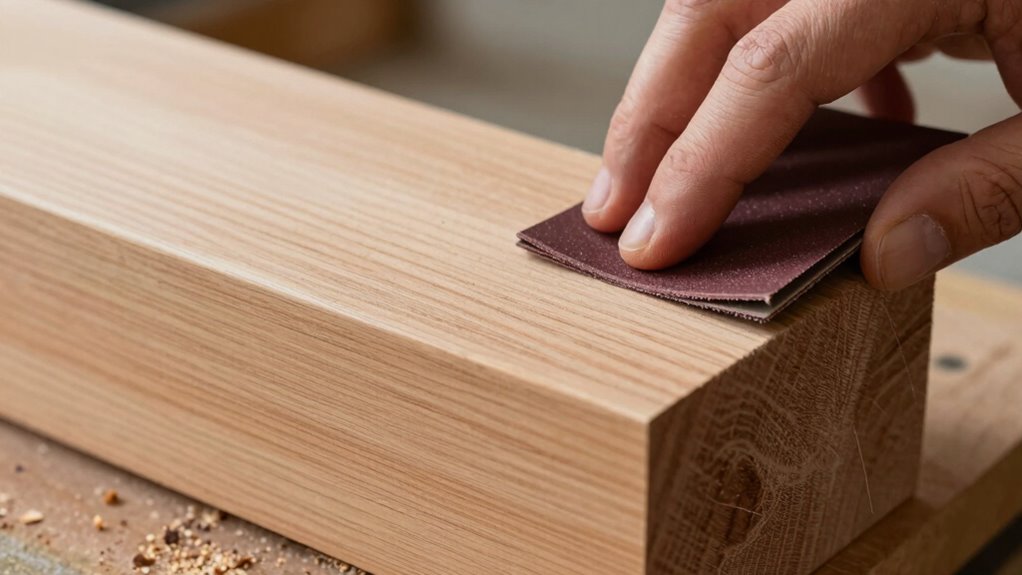
Selecting the right tools for end grain sanding is essential to achieve a smooth, professional finish. Power tools like orbital sanders or detail sanders can speed up the process and provide consistent results when used with the appropriate grit. For finer control, especially on delicate or detailed work, hand sanding with sandpaper or sanding blocks offers precision. Use coarse grits initially to remove roughness, then switch to finer grits for smoothing out the surface. Power tools are effective for larger areas but can cause fuzzy edges if not handled carefully, so balance their use with careful hand sanding. Ultimately, choosing the right combination of power tools and hand sanding guarantees you get a clean, smooth end grain without fuzziness.
Sanding Technique Tips
To achieve a smooth end grain finish, it’s essential to use the right grit and tools tailored to each stage of sanding. Start with a medium grit to remove roughness, then switch to finer grits for a polished surface. Pay close attention to grain direction; sanding with the grain reduces fuzziness and scratches. Apply light, consistent sanding pressure—pressing too hard causes fuzzy edges and uneven results. Use the appropriate tools, such as sanding blocks or pads, to maintain control. Here’s a quick guide:
| Grit Level | Recommended Tool | Key Focus |
|---|---|---|
| Coarse | 80-120 grit sandpaper | Remove roughness |
| Medium | 150-220 grit sandpaper | Smooth surface |
| Fine | 320+ grit sandpaper | Final polish |
| Tool Type | Block, pad, or sponge | Control and pressure |
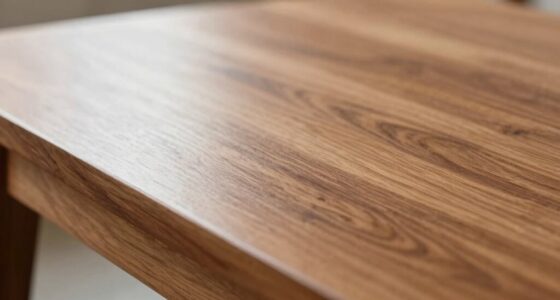
Finishing Tips for a Clean, Professional End Grain Surface
Achieving a smooth, professional finish on end grain surfaces requires careful preparation and attention to detail. To enhance your surface finish, focus on these key tips:
- Use fine-grit sandpaper gradually to refine the wood grain without causing fuzziness.
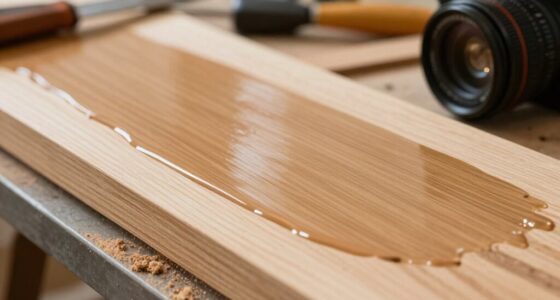
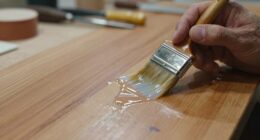
- Apply a quality sealant or oil designed for end grain to prevent absorption issues and highlight the wood’s natural beauty.
- Sand lightly after each coat to smooth out any imperfections, ensuring the surface remains even and clean.
Troubleshooting Common Fuzziness Problems and How to Fix Them
Fuzziness is a common issue that can ruin the smooth, professional look you’re aiming for on end grain surfaces. It often occurs when the grain pattern isn’t properly managed or sanding pressure is too high, causing fibers to lift and create a fuzzy texture. To troubleshoot, examine the grain pattern carefully; if you see uneven surfaces, switch to a finer grit to smooth out the fuzz. Adjust your sanding pressure—light pressure helps prevent fibers from lifting. If fuzziness persists, switch to a higher grit sandpaper or use a sanding block for more control. Always sand with the grain pattern in mind, using gentle, even strokes. Proper technique ensures a clean, smooth finish without damaging the end grain or creating fuzzy patches.
Frequently Asked Questions
Can I Use Power Tools for Sanding End Grain?
Yes, you can use power tools for sanding end grain, but you need to prioritize power tool safety. Use a random orbital sander for better control and to prevent fuzzy edges. Adjust sanding speed techniques to avoid removing too much material or creating rough spots. Always wear safety gear, keep the tool steady, and don’t press too hard. Proper technique guarantees a smooth finish without damaging the wood.
How Does Wood Type Affect Sanding Techniques?
Sure, because all wood is basically the same, right? Nope! Wood type dramatically influences your sanding game. Grain characteristics and wood density dictate how you approach it. Soft woods like pine are gentle—sand with a light touch. Hard woods like oak demand patience and coarser grit first, then finer. Ignoring these details turns your project into a fuzzy mess, so adapt your technique to each wood’s unique personality!
What Safety Precautions Should I Take When Sanding?
You should always wear personal protective equipment like goggles and a dust mask to shield your eyes and lungs. Make sure to utilize proper dust collection systems or a vacuum to keep your workspace clean and minimize airborne dust. Keep your hands steady and avoid applying too much pressure, which can cause splinters or fuzzy edges. Taking these precautions ensures your safety and results in a smooth, professional finish.
How Often Should I Replace My Sandpaper During a Project?
Think of your sandpaper as a trusty brush in a painting. You’ll want to substitute it when the grit dulls, usually after a few minutes of use or when dust removal becomes less effective. Keep an eye on the sanding grit; once it’s clogged or worn, switch it out to avoid fuzzy, uneven surfaces. Regularly changing your sandpaper ensures smooth results and prevents unnecessary sanding frustration.
Is There a Finishing Technique That Minimizes Fuzziness?
Yes, you can minimize fuzziness with a finishing technique called grain refinement. After initial sanding, switch to a finer grit sandpaper and gently sand along the end grain to improve finish smoothing. This process reduces roughness and fuzziness, creating a cleaner, more professional look. Always use light pressure and work with the wood’s grain to achieve the best results, ensuring a smooth, polished end grain surface.
Conclusion
To achieve a smooth, fuzz-free end grain, prepare your wood properly, select the right grit, and use gentle, consistent techniques. Sand evenly, check your progress often, and finish with a fine grit to refine the surface. By being patient, staying attentive, and applying these tips diligently, you’ll enjoy a clean, professional look every time. Remember, patience, preparation, and persistence are your best tools for perfect end grain results.