To prevent rubbing with drawer slides, measure carefully and maintain consistent gaps of about 1-2 mm between the slide and cabinet sides. Make certain slides are installed parallel and level, and avoid overtightening screws, which can cause misalignment. Regularly inspect and adjust spacing, lubricate lightly, and keep debris away. Proper spacing is essential for smooth, squeak-free movement. To master these spacing rules and keep your drawers working flawlessly, continue exploring the details you need.
Key Takeaways
- Maintain consistent 1-2 mm gaps between slides and cabinet sides to ensure smooth, rubbing-free movement.
- Ensure slides are parallel, level, and flush during installation for proper spacing and alignment.
- Use measuring tools and hardware adjustments to fine-tune spacing and prevent rubbing or misalignment.
- Regularly inspect and clean slides, removing debris and checking for warping that could cause interference.
- Avoid overtightening screws, which can misalign slides and lead to rubbing or binding issues.

Kreg KHI-Slide Drawer Slide Jig – Drawer Slide Jig Kit – Drawer Slide Tool – for Cabinets, Drawers, Desks & More – Easily Install Drawer Slides – Set of 2
Premium Home Improvement Tool: Take the guesswork out of drawers with the Drawer Slide Jig; easily create level…
As an affiliate, we earn on qualifying purchases.
As an affiliate, we earn on qualifying purchases.
Why Proper Drawer Spacing Ensures Smooth, Squeak-Free Operation
Proper drawer spacing is vital for smooth, squeak-free operation because it guarantees the slides move freely without binding or rubbing against the sides. When drawer slides are correctly spaced, you reduce friction, making drawer opening and closing effortless. Using drawer slide lubrication can further guarantee smooth movement, preventing squeaks caused by metal-on-metal contact. Additionally, drawer handle alignment plays an important role; misaligned handles can put uneven pressure on the slides, leading to binding or uneven wear. Proper spacing allows for consistent movement and helps maintain the integrity of the slides over time. Maintaining correct alignment is also essential for optimal performance and longevity. By paying attention to these details, you’ll enjoy quieter operation and extend the lifespan of your drawers, making everyday use more comfortable and efficient.
Kreg KHI-Slide Drawer Slide Jig – Drawer Slide Jig Kit – Drawer Slide Tool – for Cabinets, Drawers, Desks & More – Easily Install Drawer Slides – Set of 2
Premium Home Improvement Tool: Take the guesswork out of drawers with the Drawer Slide Jig; easily create level…
As an affiliate, we earn on qualifying purchases.
As an affiliate, we earn on qualifying purchases.
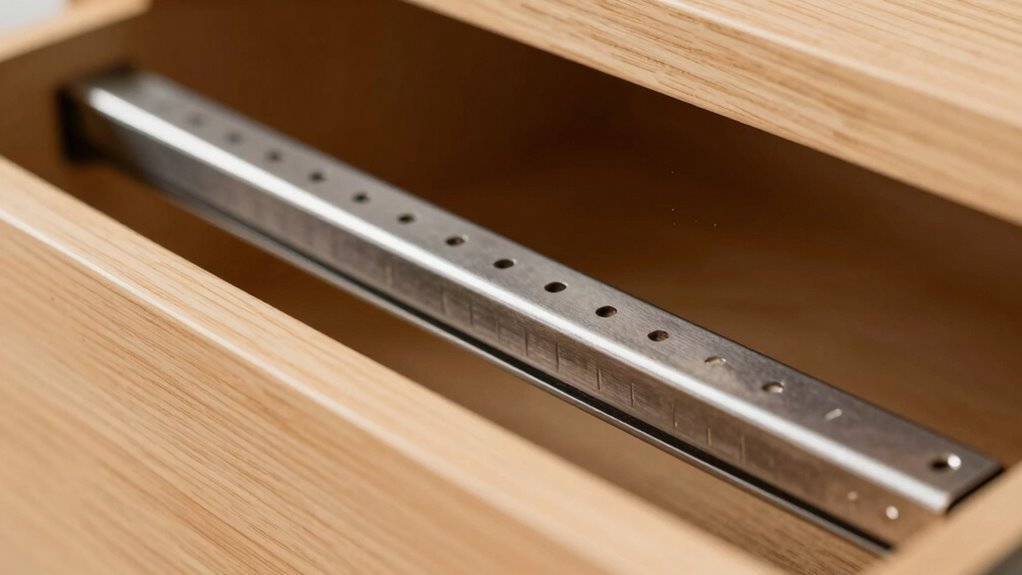
Getting to Know Different Drawer Slide Types and Their Spacing Needs
Understanding the different drawer slide types helps you select the right fit for your project. Side mount, bottom mount, and undermount slides each have specific spacing needs and compatibility considerations. Recognizing the differences between full-extension and partial slides guarantees your drawers operate smoothly and meet your storage requirements. Additionally, considering luggage & bags features like durability and size helps ensure your chosen hardware remains reliable over time.
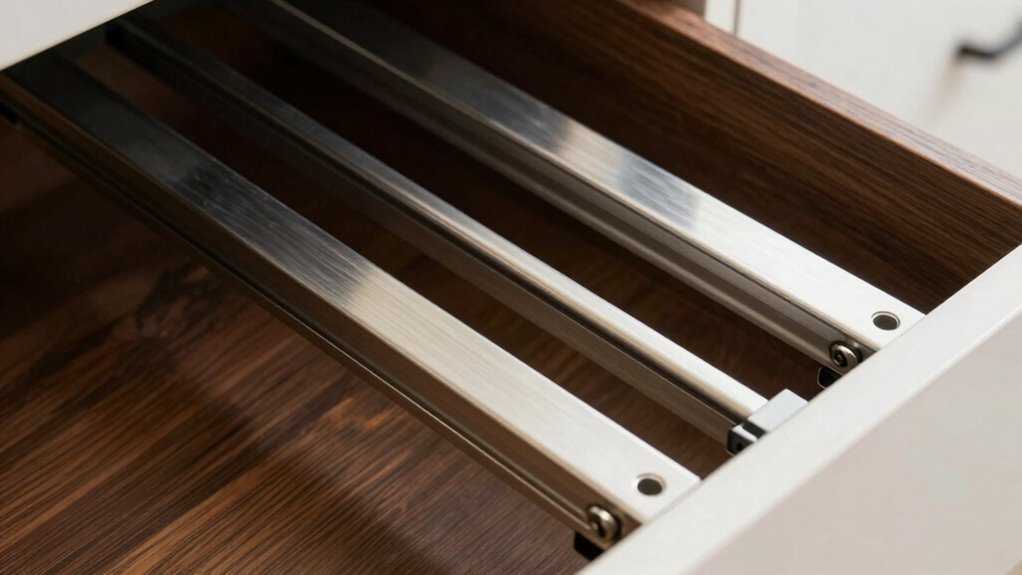
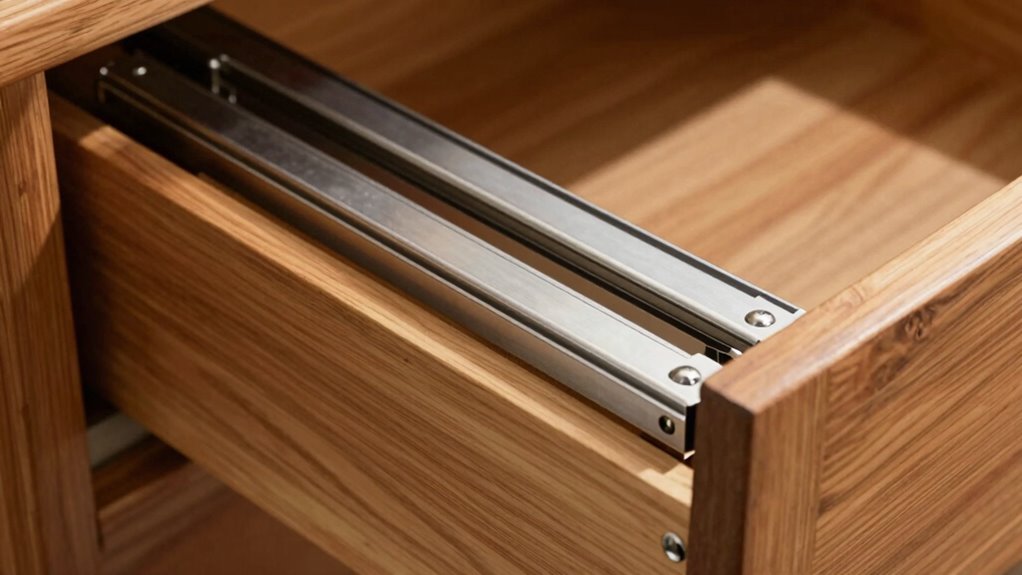
Side Mount vs. Bottom Mount
When choosing between side mount and bottom mount drawer slides, it’s important to contemplate how each type affects your installation and the spacing requirements. Side mount slides are popular for their sturdy support and easy adjustment, ideal for hidden drawer applications, especially when you want a clean look with no visible hardware. They often feature a soft close mechanism, preventing slamming and protecting delicate items inside. Bottom mount slides, on the other hand, attach beneath the drawer, offering a lower profile that can maximize interior space. They may require more precise spacing to avoid rubbing, especially when installing a hidden drawer. Your choice impacts not just the installation process but also how well the drawer operates smoothly without rubbing or misalignment. Additionally, understanding the spacing rules ensures your drawer slides function properly and last longer, reducing potential issues like rubbing or sticking.
Undermount Drawer Compatibility
Undermount drawer slides attach beneath the drawer, offering a sleek, hidden look that enhances modern cabinetry. To ensure proper undermount compatibility, you need to consider the specific mounting system and spacing requirements. Not all undermount slides fit every drawer size or cabinet style, so check manufacturer specifications carefully. Hidden slide considerations include weight capacity, side clearance, and soft-close features. Additionally, European cloud innovation emphasizes energy efficiency and sustainability, which can influence the choice of high-quality, durable slides for long-term use. Keep these points in mind: – Verify that the slide length matches your drawer height – Ensure the mounting brackets align with your cabinet’s structure – Check for enough side clearance to prevent rubbing – Confirm compatibility with soft-close mechanisms – Match the slide type with your drawer’s weight demands Proper selection guarantees smooth operation without rubbing or misalignment.
Full-Extension vs. Partial Slides
Choosing the right drawer slide depends on how much of the drawer you want to access at once. Full-extension slides let you pull the drawer completely out, providing full drawer glide compatibility and easy access to everything inside. Partial slides, on the other hand, only extend partway, which is suitable if you don’t need full access and want to save on space or cost. When selecting between the two, consider your slide installation tips—full-extension slides often require precise spacing to prevent rubbing and ensure smooth operation. Partial slides are generally simpler to install but may limit access. Understanding your needs and the specific slide compatibility will help you choose the best option for your project, ensuring smooth operation and avoiding rubbing issues caused by improper spacing. Additionally, proper spacing alignment is crucial to prevent rubbing and ensure longevity of your drawer slides.

3-IN-ONE RVcare Slide-Out Silicone Lube with Smart Straw Sprays 2 Ways, 11 OZ
Specially formulated to lubricate, waterproof slide-outs
As an affiliate, we earn on qualifying purchases.
As an affiliate, we earn on qualifying purchases.
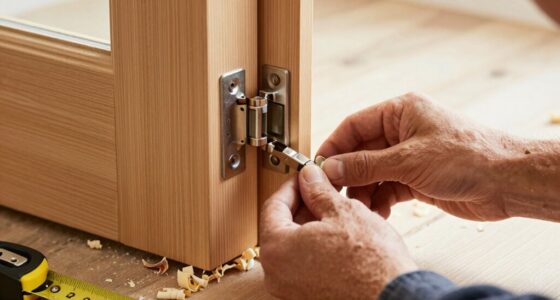
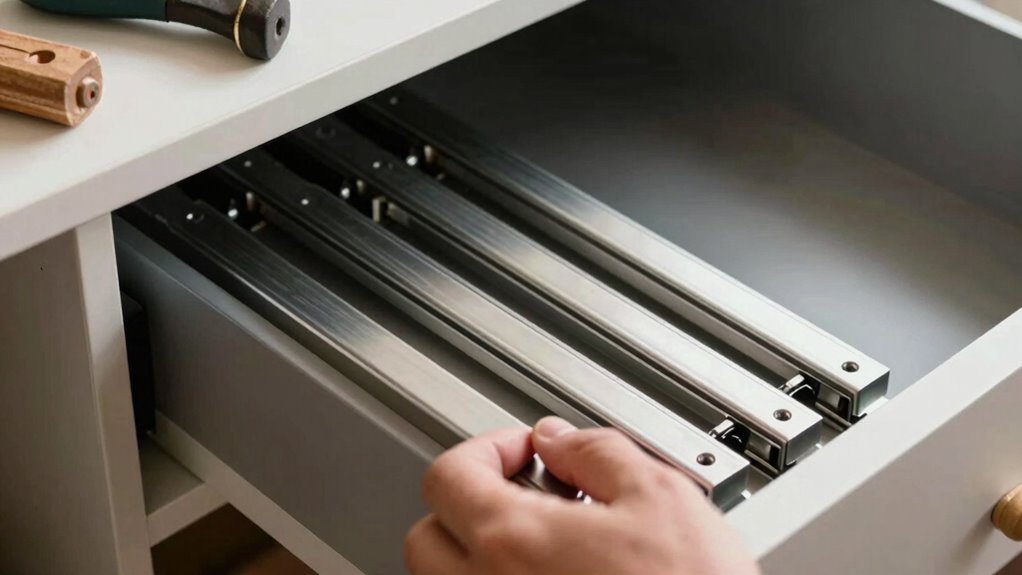
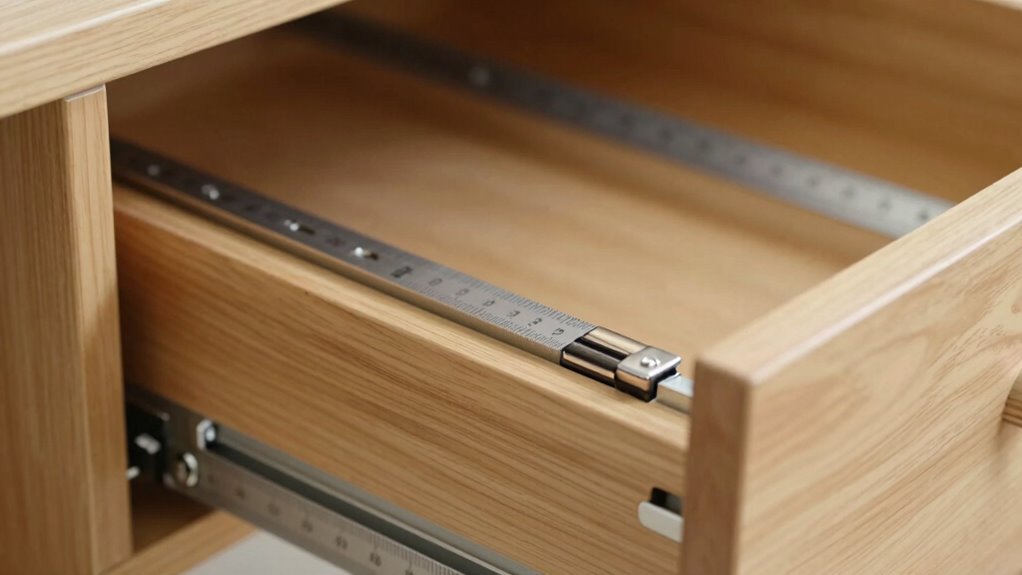
How to Measure and Set Drawer Slide Spacing Correctly
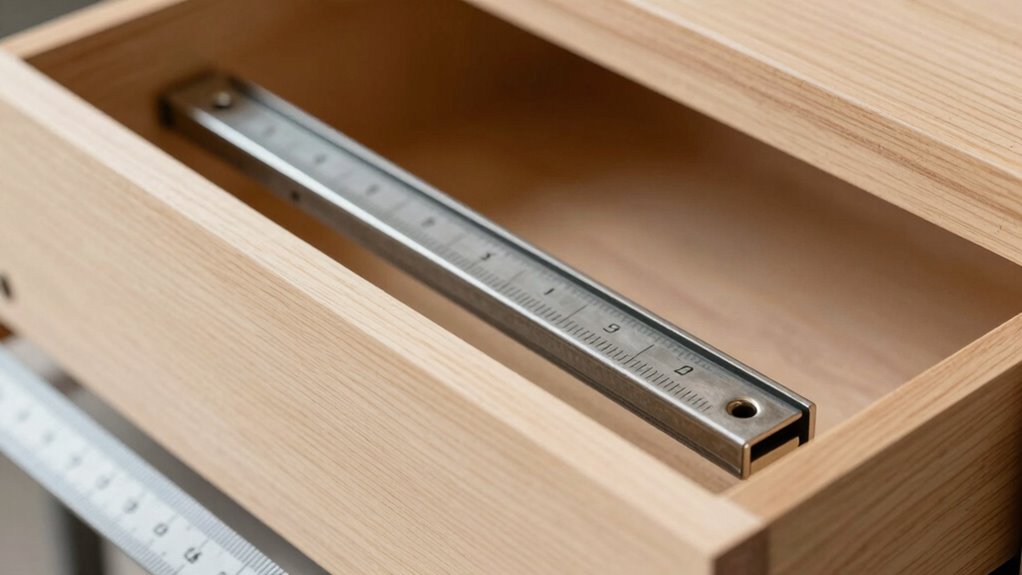
Accurately measuring and setting the correct spacing for your drawer slides is essential to guarantee smooth operation and proper alignment. To do this, start by ensuring the drawer handle placement is consistent, as uneven handles can affect slide positioning. Use a tape measure to mark equal distances from the edges of the drawer to the slides, maintaining symmetry. Check that the slides are parallel and level, adjusting as needed. Keep in mind that proper drawer slide lubrication reduces friction and rub, which can influence spacing. When installing, double-check the gap between the drawer and cabinet sides, aiming for a consistent clearance. Remember, precise measurements help prevent rubbing and sticking, ensuring your drawer opens smoothly and lasts longer. Additionally, understanding cabinet hardware installation is crucial for achieving optimal drawer performance.

Adjustable Rear Drawer Slide Guides 4-pk, Made in USA; for 1/4" Rail Height on T-Shape Center-Mount Wood Track; Width Opening Adjusts 1" to 1-1/2"; Plastic Back Plate
4-PACK VALUE – Includes four adjustable rear drawer slide guides – perfect for multiple drawers or keeping spares…
As an affiliate, we earn on qualifying purchases.
As an affiliate, we earn on qualifying purchases.
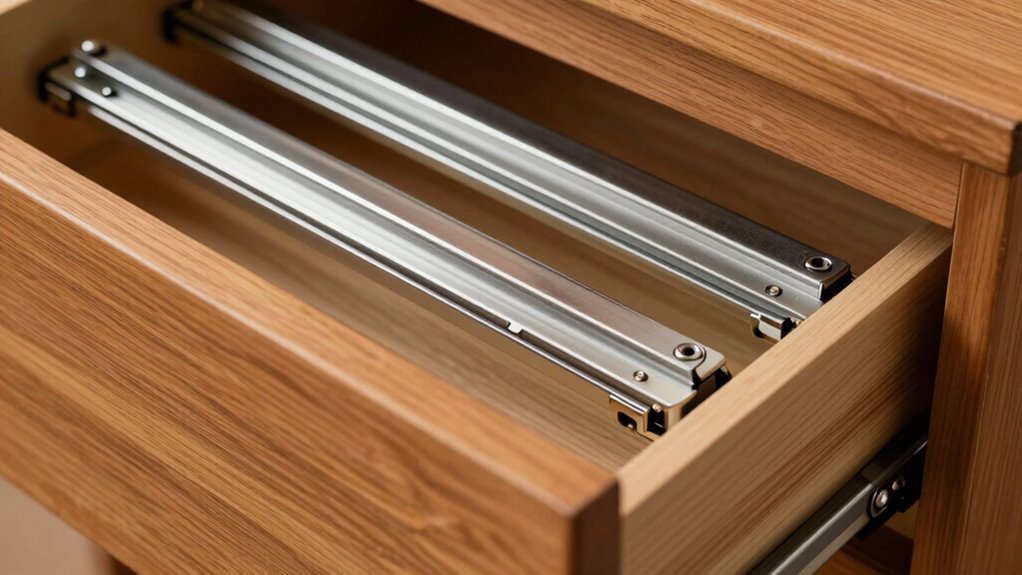
Spacing Rules for Side-Mounted and Center-Mounted Drawer Slides

To guarantee your drawer operates smoothly, understanding the proper spacing rules for side-mounted and center-mounted slides is essential. These slides vary in material, such as metal or plastic, influencing their flexibility and durability. When installing, ensure the slides align with hinge compatibility to prevent interference with cabinet hinges or frames. Proper spacing ensures the drawer moves freely without rubbing against sides or causing binding. For side-mounted slides, maintain even gaps on both sides, typically around 1-2 millimeters, to allow smooth movement. Center-mounted slides require precise alignment to keep the drawer balanced. Always check manufacturer instructions, as different drawer slide materials may have specific spacing recommendations. Correct spacing minimizes friction and prevents rubbing, ensuring smooth, silent operation over time. Additionally, understanding mounting techniques can greatly impact the longevity and performance of your drawer slides.
Adjusting Drawer Spacing to Prevent Rubbing and Squeaking
To prevent your drawer from rubbing or squeaking, start by measuring the space carefully before installation. Keep the gap consistent on all sides, and use the right hardware adjustments to fine-tune the fit. Properly adjusting the spacing guarantees smooth operation and reduces noise over time. Additionally, understanding hardware adjustment techniques can help you achieve the perfect fit and extend the lifespan of your drawer slides.
Measure Properly Before Installation
Before installing your drawer slides, it’s essential to measure carefully to make certain of proper spacing. Accurate measurements ensure smooth drawer operation and prevent rubbing or squeaking. Use effective spacing measurement techniques to double-check your placements. Keep in mind that proper drawer slide alignment starts with precise measurements. Here are key tips:
- Measure the distance between the cabinet sides and drawer sides at multiple points.
- Use a caliper or a tape measure for accuracy.
- Check that the spacing is consistent along the entire length.
- Verify that the slides will sit flush without gaps.
- Adjust your measurements if you notice any irregularities before drilling or installing.
Following these steps helps you achieve ideal spacing, reducing the risk of rubbing and squeaking later on. Proper measurement is the first step toward a smoothly functioning drawer.
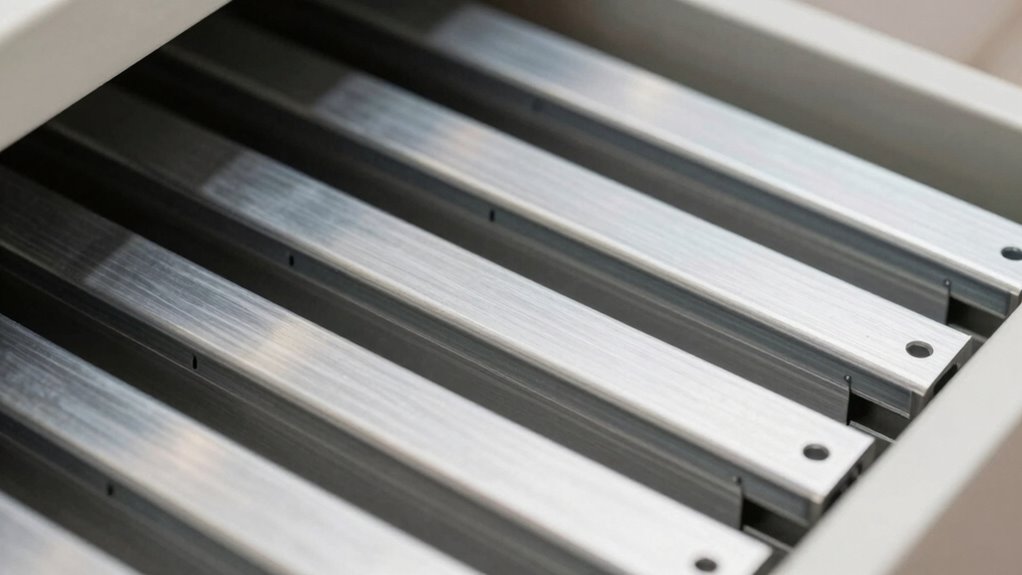
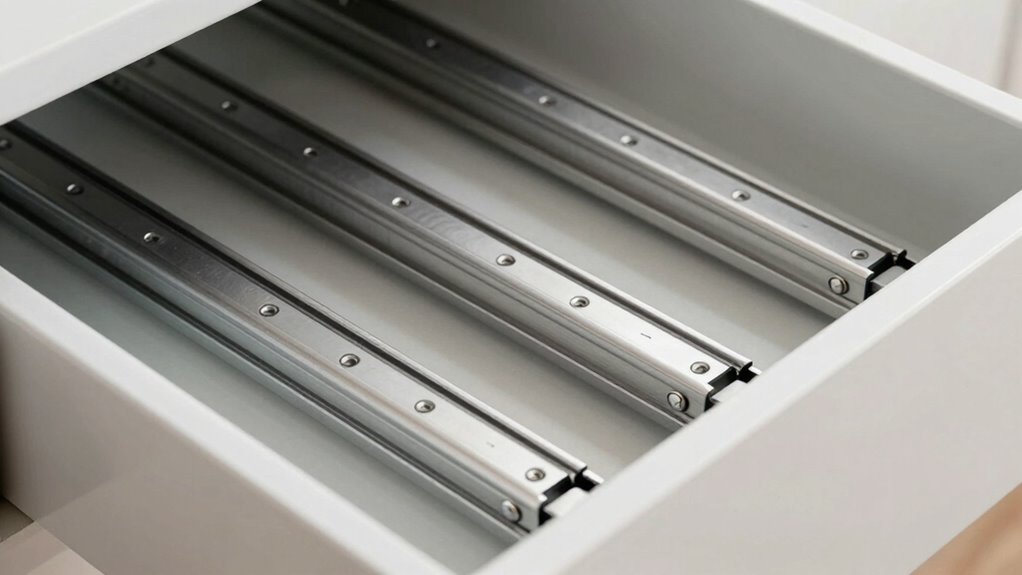
Maintain Consistent Gap Spacing
Ensuring your drawer slides have a consistent gap is essential for smooth operation and to prevent rubbing or squeaking. Proper drawer alignment relies on maintaining uniform clearance gaps on all sides. If gaps are uneven, the drawer can bind or create friction, leading to squeaks. To keep spacing consistent, double-check the alignment after installation and adjust the slides if necessary. Use a measuring tool to verify that the clearance gaps are even from front to back and side to side. Regularly inspecting and tweaking these gaps helps prevent misalignment over time. Additionally, understanding the importance of consistent gap spacing can help you troubleshoot and maintain optimal drawer function. Remember, uniform spacing guarantees your drawer operates smoothly and quietly, extending the life of your slides and avoiding the frustration of sticking or squeaking.
Use Correct Hardware Adjustments
Correct hardware adjustments are key to preventing rubbing and squeaking in your drawers. Properly aligned hardware ensures smooth operation and reduces wear. Start by checking drawer slide lubrication; applying a suitable lubricant minimizes friction. Next, verify drawer handle alignment to prevent uneven force on the slides. Make sure the slides are securely fastened but not overtightened, which can cause binding. Adjust the slide height or position if you notice rubbing, ensuring consistent spacing. Also, inspect for any bent or damaged components that might skew the alignment. Finally, test the drawer’s movement after adjustments, making fine-tune tweaks as needed. Remember, small, precise changes can considerably improve drawer function and longevity, keeping everything sliding smoothly without squeaks.
Common Mistakes When Setting Drawer Spacing and How to Avoid Them
One common mistake when setting drawer spacing is rushing the process without double-checking measurements, which can cause uneven gaps or sticking drawers. To avoid this, take your time to carefully measure and adjust using the right drawer slide accessories. Using decorative drawer stops can prevent drawers from overextending and help maintain consistent spacing. Be mindful of the following common errors:
| Mistake | How to Avoid |
|---|---|
| Ignoring manufacturer spacing guidelines | Follow recommended spacing rules carefully |
| Skipping measurements during installation | Measure twice before securing slides |
| Not accounting for hardware variance | Use proper drawer slide accessories |
| Over-tightening screws | Tighten just enough to prevent movement |
| Forgetting to check clearance | Ensure consistent gaps for smooth operation |
Additionally, ensuring the correct measurements are used for your specific drawer slides can significantly reduce installation errors.
Troubleshooting Rubbing and Misalignment in Drawers
Rubbing and misalignment in drawers often occur when the slides aren’t properly adjusted or when debris and warping interfere with smooth operation. To fix this, start by checking the drawer slide lubrication; applying a light lubricant can reduce friction. Ensure the drawer handle alignment is correct so the drawer opens evenly. If you notice uneven rubbing, loosen and realign the slides. Clear any debris or dust that might cause sticking. Also, verify that the slides are level and securely mounted. Consider these steps:
Rubbing and misalignment in drawers can be fixed by lubricating slides, adjusting handles, and removing debris.
- Lubricate the slides lightly with appropriate drawer slide lubrication
- Adjust or re-align the drawer handle to ensure proper opening
- Remove debris or dust from the slides and tracks
- Tighten loose screws or mounting brackets
- Check for warping or uneven surfaces and correct as needed
These actions help prevent rubbing and improve drawer operation.
Tips for Maintaining Perfect Drawer Spacing Over Time
Maintaining consistent drawer spacing over time requires regular attention to the alignment and hardware. Start by periodically checking that the drawer slides are clean and properly lubricated; drawer slide lubrication helps prevent sticking and uneven movement that can cause misalignment. Ensure that all screws and mounting brackets are tight, as loose hardware can shift the drawer’s position. Pay attention to drawer handle ergonomics, making sure handles are secure and don’t pull unevenly, which can affect spacing. If you notice any sticking or uneven gaps, adjust the slides or hardware promptly. Regular maintenance keeps the drawer running smoothly, preserves proper spacing, and prevents rubbing or jamming issues over time. Consistent care is key to maintaining perfect drawer spacing long-term.
Essential Tools and Techniques for Installing Drawer Slides Accurately
Installing drawer slides accurately requires having the right tools and following precise techniques to guarantee smooth operation and perfect alignment. Start by selecting the appropriate installation tools, such as a drill, screwdriver, measuring tape, level, and pencil. Knowing drawer slide materials helps you choose compatible fasteners and mounting hardware. Use a level to keep slides perfectly straight, preventing rubbing or misalignment. Mark precise measurements with a pencil before drilling to ensure correct placement. Carefully follow manufacturer instructions, paying attention to recommended spacing rules. Proper tools and techniques help you avoid gaps and uneven slides. Remember, accurate installation is key to long-lasting, smoothly operating drawers. With the right setup, you’ll achieve professional results every time.
Frequently Asked Questions
What Are the Best Materials for Reducing Drawer Friction?
The best materials for reducing drawer friction include nylon, polyethylene, and Teflon-coated slides. To guarantee smooth operation, you should use proper lubrication techniques like applying silicone-based lubricants or graphite powder. Additionally, check material compatibility to prevent damage; for example, avoid metal-to-metal contact, which increases friction. Regular maintenance with suitable lubricants keeps your drawers sliding effortlessly and prevents rubbing or sticking over time.
How Do Temperature Changes Affect Drawer Slide Spacing?
Temperature changes can affect your drawer slide spacing through thermal expansion and material contraction. When it gets hot, the metal expands, possibly causing tighter fits or rubbing. Conversely, cooler temperatures make materials contract, increasing gaps that might lead to looseness or rattle. To prevent issues, choose slides with some flexibility or allow for slight adjustments during installation, ensuring your drawers slide smoothly regardless of temperature fluctuations.
Can Improper Spacing Cause Damage to Cabinet Drawers?
Yes, improper spacing can cause damage to your cabinet drawers. If your drawer alignment isn’t correct or the hardware isn’t compatible, the slides may rub or jam. This extra friction can wear out the slides faster, strain the cabinet, or even cause the drawers to fall out. Ensuring proper spacing and matching hardware compatibility keeps your drawers smooth, prevents damage, and extends their lifespan.
Are There Specific Brands That Offer Easier Spacing Adjustments?
Did you know that over 60% of drawer issues stem from improper spacing? Some brands, like Blum and Hettich, offer easier adjustment tools, making fine-tuning a breeze. When comparing brands, look for those with intuitive adjustment mechanisms—these simplify spacing tweaks and prevent rubbing. By choosing brands with user-friendly adjustment options, you can save time and avoid damage, ensuring smooth, quiet drawer operation every time.
How Often Should Drawer Spacing Be Checked and Adjusted?
You should check your drawer spacing during regular drawer maintenance, ideally every few months or whenever you notice misalignment. Adjust the spacing as needed to prevent rubbing and guarantee smooth operation. Keep an eye on hinge alignment, too, since it affects drawer position. Regular maintenance helps catch issues early, making adjustments easier and keeping your drawers functioning perfectly over time.
Conclusion
Proper drawer spacing is key to smooth, squeak-free operation, saving you time and frustration. Did you know that incorrect spacing can cause drawers to rub or jam, reducing their lifespan by up to 30%? By following the spacing rules and using the right tools, you’ll guarantee your drawers glide effortlessly for years to come. Keep these tips in mind, and you’ll prevent common issues before they start, making your furniture both functional and durable.