
To strip finish safely and minimize damage, start from the top and work downward along the grain of the wood. This order helps prevent gouging or scratching the surface and guarantees you remove layers evenly. Applying chemical stripper carefully and working in small sections also helps protect the wood. Using the right tools and techniques for softening and scraping provides a smoother process. Continue exploring effective methods to keep your furniture looking its best without harm.
Key Takeaways
- Start stripping from the top surface or along the wood grain to prevent uneven removal and surface damage.
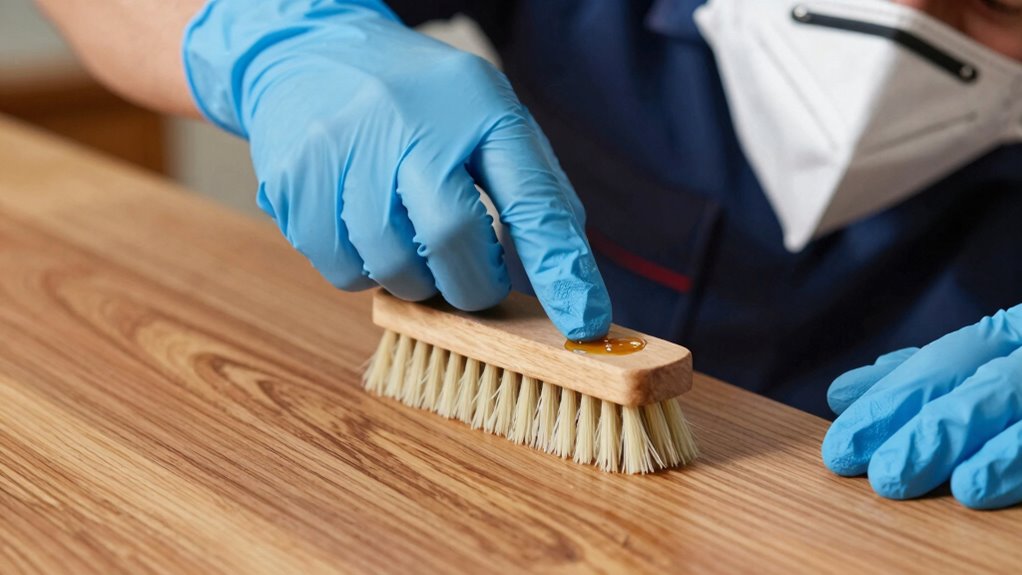
- Apply chemical stripper evenly and let it soften the finish before scraping to avoid gouging.
- Work in small sections to ensure complete removal and prevent chemicals from drying out prematurely.
- Use the appropriate tools and protective gear to minimize the risk of scratching or damaging the wood.
- After stripping, thoroughly clean and lightly sand the surface before applying any finish to maintain wood integrity.
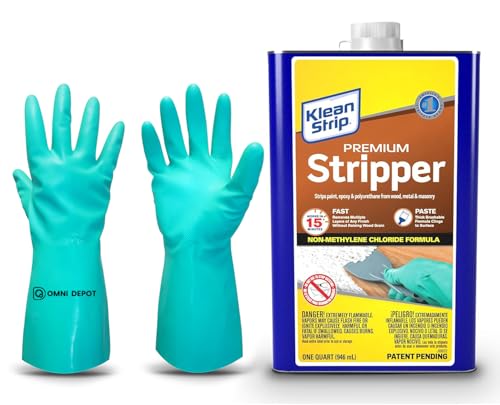
Paint & Varnish Remover Klean Strip Premium Stripper– Fast-Acting Stripper for Epoxy, Polyurethane, Wood, Metal & Masonry – Includes Protective Omni Depot Gloves – 1 QT
🧪 Fast & Powerful Paint Removal – Quickly strips epoxy, polyurethane, varnish, and multiple layers of paint from…
As an affiliate, we earn on qualifying purchases.
As an affiliate, we earn on qualifying purchases.
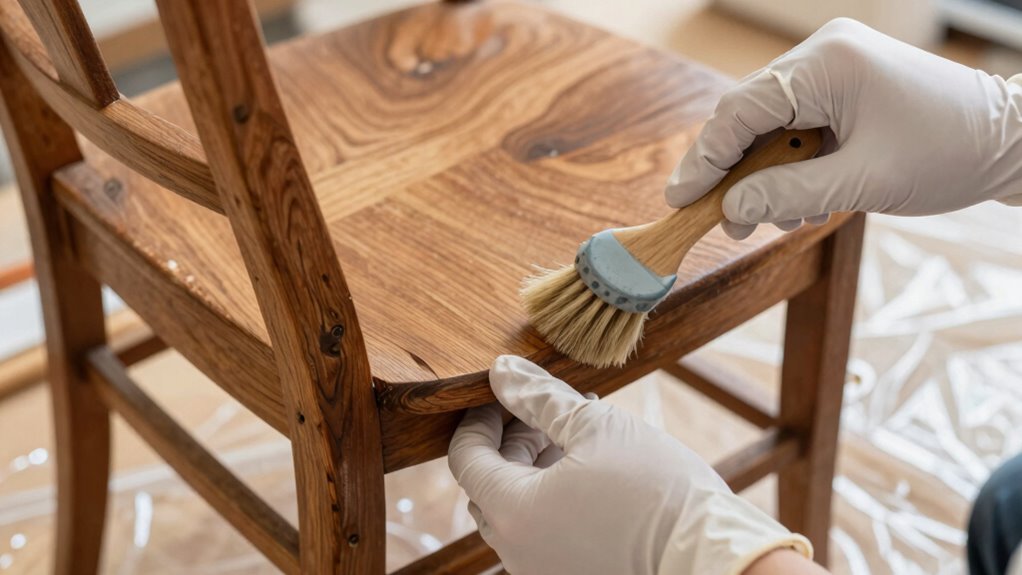
Why Proper Finish Stripping Order Protects Your Wood Surface
When stripping a finish from wood, following the correct order is essential to prevent damage. Proper finish stripping ensures you remove old layers without harming the underlying surface. If you start haphazardly, you risk gouging or scratching the wood, which compromises surface protection. By working in a logical sequence—usually from top to bottom or in the direction of the grain—you minimize the chance of uneven removal or accidental damage. Using the right tools and techniques also helps protect the surface during the process. Remember, the goal is to strip away old finish gently, preserving the integrity of the wood underneath. Incorporating proper technique can further reduce the risk of damage during stripping. A careful, methodical approach guarantees a smooth surface ready for refinishing, ultimately safeguarding your furniture or project from unnecessary harm.

Fledomx Plastic Putty Knife Set – 2" 4" 6" Spackle Knives & Paint Scrapers
3 Sizes for All Projects: The plastic putty knives Set Includes 2", 4", and 6" scrapers for precise…
As an affiliate, we earn on qualifying purchases.
As an affiliate, we earn on qualifying purchases.
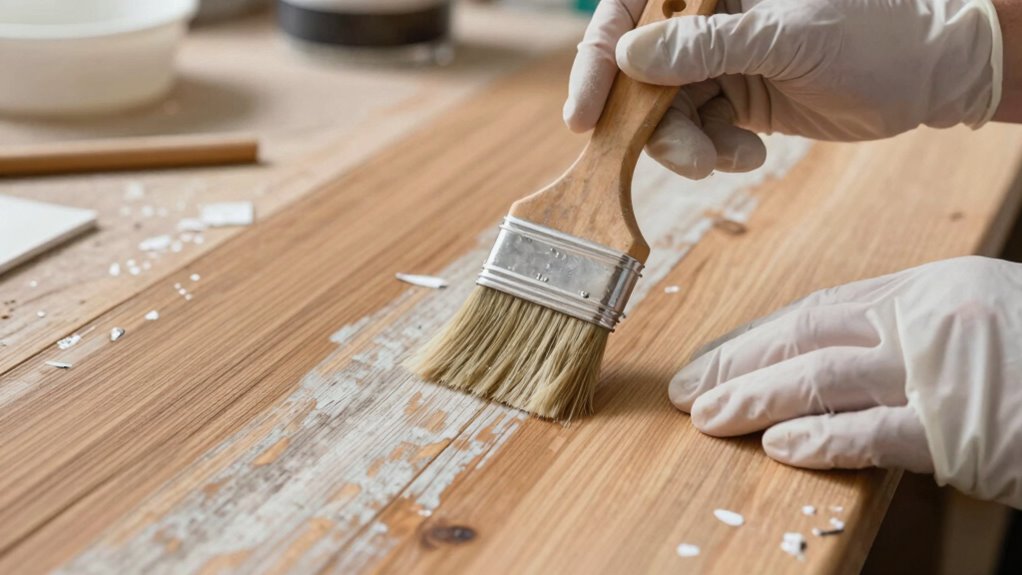
How to Safely Strip Furniture Finish : A Step-by-Step Guide
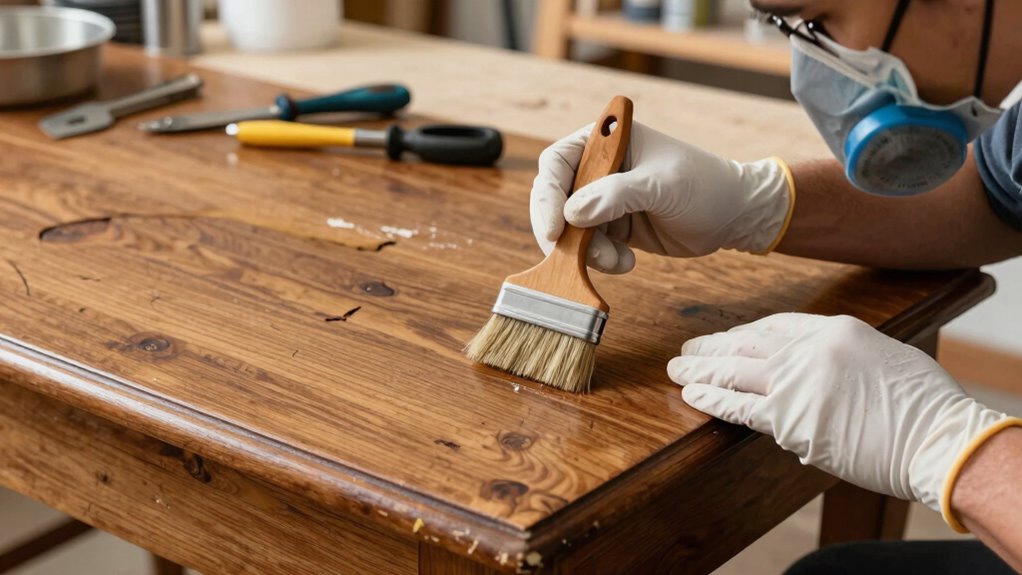
To safely strip the finish from your furniture, start by gathering the right tools and materials, such as a chemical stripper, plastic or metal scrapers, gloves, and protective eyewear. Begin with chemical techniques by applying the stripper evenly with a brush, following the manufacturer’s instructions. Allow it to sit until the finish softens, then use stripping tools—plastic scrapers are gentle, while metal ones work for stubborn areas—to lift the finish carefully. Work in small sections to prevent the chemicals from drying out too quickly. Always wear gloves and goggles to protect your skin and eyes from fumes and splashes. Take your time to ensure the finish is completely loosened before proceeding to the next step. Proper technique minimizes damage and makes the process safer. Additionally, understanding the energy-efficient nature of modern tools can help you choose equipment that reduces environmental impact during your project.

3M 91252-824 Chemical Splash/Impact Goggle, 1 -Pack
Durable, one piece lens helps protect eyes from certain liquids, dirt and particles
As an affiliate, we earn on qualifying purchases.
As an affiliate, we earn on qualifying purchases.
Preparing Your Workspace and Tools for Effective Finish Removal
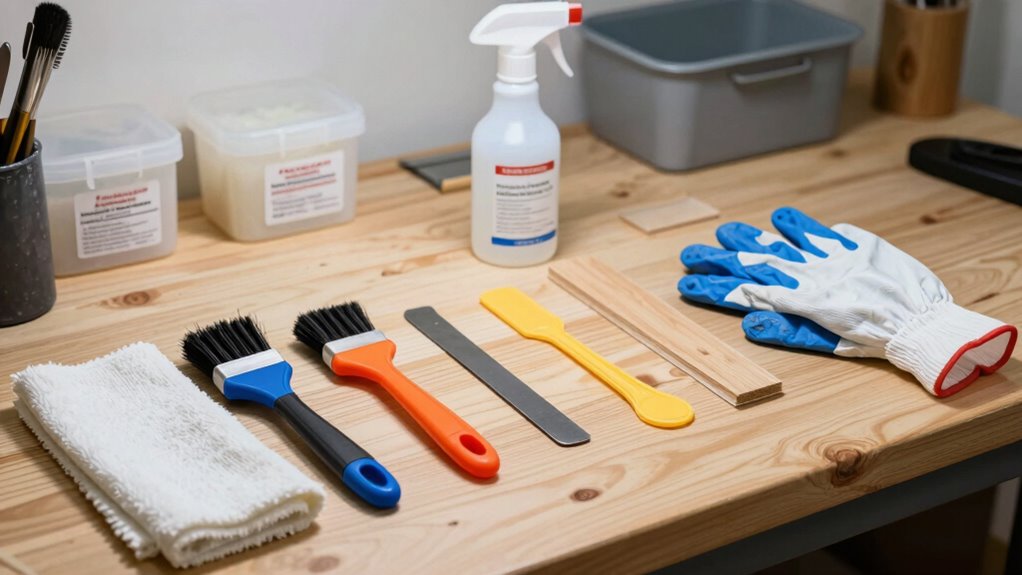
Preparing your workspace and tools before you begin is essential for a smooth and safe finish removal process. A well-organized setup minimizes accidents and ensures efficiency. Start by clearing the area of clutter to create a safe workspace layout. Gather all necessary tools, such as scrapers, brushes, and chemical strippers, beforehand. Don’t forget to wear appropriate protective gear—gloves, safety goggles, and a mask—to protect against fumes and splashes. To optimize your workspace:
- Designate a well-ventilated area for fumes and chemical use
- Arrange tools within easy reach to avoid unnecessary movement
- Cover nearby surfaces to prevent damage from spills or drips
- Choose the right finishing materials to ensure proper removal and avoid damaging underlying surfaces
These steps help you work safely and efficiently, reducing the risk of damage and injury.

16 PCS Contoured Profile Sanding Block Set – Hook and Loop Foam Material Hand Sander Block- Interchangeable Assorted Convex & Concave Shapes for Sander Wood Woodworking Furniture, Auto Paint
1.Versatile sanding set: Featuring 16 pieces of assorted shape sanding blocks, this set is perfect for all your…
As an affiliate, we earn on qualifying purchases.
As an affiliate, we earn on qualifying purchases.
Troubleshooting Common Finish Stripping Challenges (Stains, Damage, Stuck Finish)
Encountering stains, damage, or a finish that refuses to budge can be frustrating during stripping. These issues often result from complex chemical reactions between the old finish and your removal method. Stains may resist removal because they’ve deeply penetrated the wood or reacted with previous finishes, making chemical reactions more stubborn. Damage can occur if the finish has bonded strongly or if incompatible stripping agents are used, complicating finish removal. When a finish refuses to lift, it’s often due to incomplete penetration of the stripping solution or the finish’s chemical composition. To troubleshoot, verify you’re using the correct chemical stripper for your finish type, apply it evenly, and allow enough dwell time. Sometimes, multiple applications are necessary to achieve complete removal and prevent damage to your wood. Additionally, detecting passive voice can help clarify your instructions and improve overall communication.
Cleaning and Caring for Your Wood After Stripping
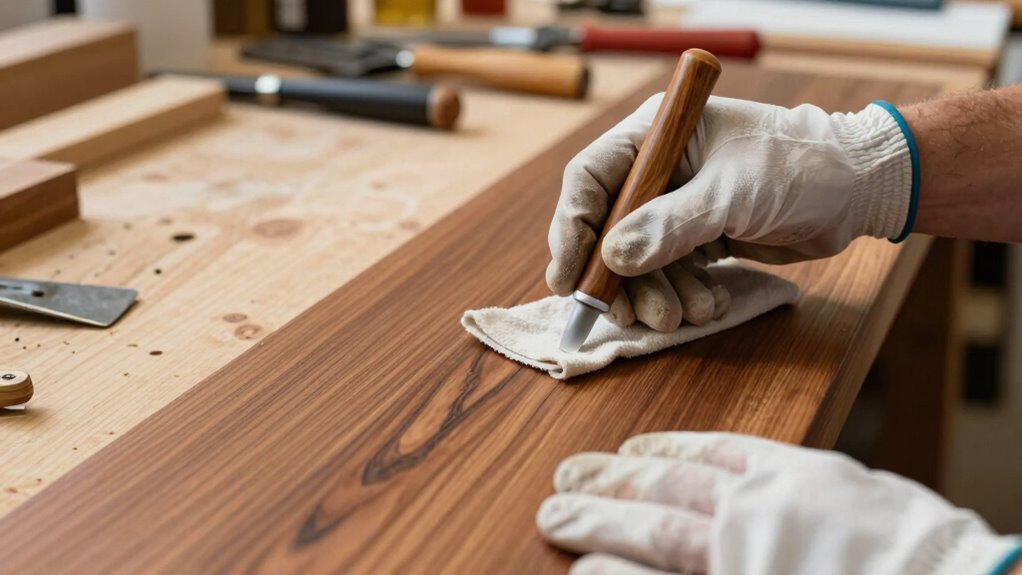
Once you’ve successfully stripped the finish, it’s vital to clean and care for your wood to guarantee its longevity and beauty. Proper cleaning reveals the natural wood grain and prepares the surface for future finishes. Use a gentle cleaner to remove residue and avoid damaging the wood. After cleaning, assess the wood’s condition and decide if you should sand lightly to restore smoothness or preserve the existing texture. Remember, your goal is to maintain or enhance the finish sheen while protecting the wood. Consulting services can assist in selecting the appropriate products and techniques for your specific project. – Gently wipe the surface with a soft cloth to preserve the wood grain. – Apply a wood conditioner or oil to nourish the wood. – Use a fine finishing polish to restore or enhance the finish sheen. Following these steps ensures your wood remains stunning and well-protected after stripping.
Frequently Asked Questions
What Safety Gear Is Essential During Finish Stripping?
You should always wear protective gloves and a respirator mask during finish stripping. Gloves protect your skin from harsh chemicals, preventing irritation or burns, while a respirator mask keeps you safe from inhaling toxic fumes and dust. These safety gear pieces are essential to minimize health risks and guarantee your safety throughout the process. Remember, proper protection helps you work efficiently and safely without exposing yourself to unnecessary hazards.
How Long Does the Stripping Process Typically Take?
Think of paint removal as a delicate dance that can take anywhere from a few hours to several days, depending on the layers and surface. You’ll want to pace yourself, allowing the chemicals to work without rushing through. Chemical safety is vital, so follow all instructions closely. The process’s length varies, but patience ensures you strip safely and effectively, minimizing damage and avoiding hazards along the way.
Can I Strip Finish on Delicate or Antique Furniture?
You can strip finish on delicate surfaces or antique furniture, but you must proceed carefully for antique preservation. Use gentle stripping methods and products specifically designed for delicate surfaces, and test a small hidden area first. Avoid harsh chemicals that could damage the wood or veneer. Take your time, and if unsure, consult a professional to guarantee you protect the antique’s integrity during the stripping process.
Are Eco-Friendly Stripping Products Effective?
Eco-friendly stripping products are like gentle giants—they can be surprisingly effective while respecting the environment. You’ll find chemical alternatives that remove finishes efficiently, reducing environmental impact. Though they may take a little more time or effort, they’re safer for your health and the planet. By choosing these options, you’re making a smart move toward sustainable restoration, proving that kindness to nature and quality craftsmanship can go hand in hand.
How Do I Prevent Future Finish Damage During Stripping?
To prevent future finish damage during stripping, you should use gentle paint removal techniques and consider chemical alternatives that are less harsh. Always test a small, hidden area first to gauge reactions. Apply stripping agents carefully, following manufacturer instructions, and avoid excessive scraping. Using eco-friendly products can also reduce risk. Proper ventilation and patience help minimize damage, ensuring your surface stays protected throughout the process.
Conclusion
By following the proper stripping order and handling your wood with care, you’ll preserve its natural beauty for years to come. Patience and attention to detail act like gentle whispers, guiding your project smoothly. Remember, a well-tended surface holds stories and warmth, waiting to be appreciated anew. With each careful step, you’re not just removing finish—you’re nurturing your wood’s silent elegance and timeless charm.